

Introduction
Sticky paint behind doors is when the film stays soft and tacky after it dries. That softness can come from plasticizers in the paint and a finish that cures slowly in tight spaces. Heat, humidity, and being pressed between door frames can make the film stay sticky longer.
To prevent or fix it, read the paint label and follow the manufacturer’s directions for drying and curing. Make sure the surface is clean and fully dry before re-closing doors, and avoid heavy use while the film cures. If sticking shows up, consider a touch-up or extra cure time and check local rules or instructions for the right approach.
Key takeaways
- Identify sticky films by touch and check for tackiness that resists drying.
- Inspect under-door areas for clear film with plasticizers leaching from paint.
- Test environmental factors: humidity, dust, and temperature fluctuations during coating.
- Review primer compatibility and ensure finish coats match substrate and door type.
- Apply thin, uniform coats and allow proper dry times between applications.
- Safety: ventilate well and wear mask when sanding or removing sticky film.
Table of Contents
- Introduction
- Key takeaways
- Quick Overview: What “Sticky” Paint Means and Why It Matters
- Chemistry Behind Sticky Paint: Soft Films and Plasticizers
- Environmental and Application Causes
- Material and Product Factors to Check
- Diagnosing the Cause: a Step-by-Step Checklist
- Short-Term Fixes and DIY Remedies
- Permanent Solutions and Repair Procedures
- Prevention and Best Practices for Door Painting Jobs
- Conclusion
- FAQ
Quick Overview: What “Sticky” Paint Means and Why It Matters
Sticky paint refers to a film that feels tacky to the touch and doesn’t dry to a hard surface. Blocking is when doors or panels stick together after painting, often leaving marks or residue. Tackiness can also release odors or trap dust, which affects indoor air quality and door operation.
Understanding these symptoms helps you catch problems early and plan fixes that don’t damage hinges, weatherstripping, or surrounding trim. This quick snapshot sets the stage for practical, jobsite steps you can take before revisiting a full repaint.
Definition of sticky paint and blocking
When we talk about ‘sticky’ paint, it’s not just about the paint being tacky to touch. It’s a film that doesn’t fully cure or dry, leaving a residue behind.
Blocking, on the other hand, is when two surfaces stick together because they haven’t dried properly. This can happen with doors and their frames, leading to all sorts of issues.
Temporary tack is different – it’s just the paint not being fully dry yet, but it should come off easily once it has cured completely. Blocking and sticky paint are more serious problems.
Real-world impact on doors and finishes
Sticky paint behind doors can make them hard to open and close. It’s like having a big, invisible sticker holding your door in place.
Dirt loves sticky surfaces too. So, that ‘sticky’ paint will pick up dust and grime faster than normal paint, making your doors look dirty quicker.
Long-term, sticky paint can ruin the finish on your doors and hardware. It can cause hinges to stick or break, and it can make your door edges and jambs look rough and worn out.
Chemistry Behind Sticky Paint: Soft Films and Plasticizers
In plain terms, a paint film forms as solvents evaporate and binders cohere. If the surface remains soft, it can stay tacky long after the surface feels dry. Plasticizers and flexible binders push the film toward a soft state that can resist hardening in normal indoor conditions.
Nontechnical language aside, these components can keep the film pliable, especially in corners or on surfaces that see frequent movement. The result is a surface that feels sticky and attracts dust or fingerprints more readily.
What makes a film ‘soft’ (coalescence and Tg)
A paint’s film hardness depends on two key factors: coalescence and glass transition temperature (Tg).
Coalescence is when the paint’s solid particles fuse together to form a continuous, smooth film. If this process isn’t complete, you’re left with a soft, tacky surface.
Tg, on the other hand, is like the film’s ‘freezing point’. Below Tg, it’s soft and flexible; above, it’s hard and brittle. Low Tg paints can stay soft at room temperature, causing stickiness.
Soft films behave like a semi-set jelly – they’re not fully solid, so they feel tacky to the touch.
Role and behaviour of plasticizers
Plasticizers are additives that make paint films more flexible. They work by lowering the film’s Tg, making it softer but also more pliable.
However, plasticizers can migrate. This means they move around within the film and can exude to the surface over time, causing tackiness. This is more likely in humid conditions or when pressure is applied, like on a door.
Some paints use external plasticizers that can leach out easily, while others use internal ones that are less prone to migration but may still cause issues if they’re not properly incorporated into the film.
Effect of different binders and resins
Different paints use various binders or resins, each with its own blocking tendencies. Waterborne acrylics, for instance, are generally resistant to tackiness due to their high Tg and quick drying times.
Alkyds, on the other hand, have lower Tg and slower dry times. They can be more prone to blocking, especially in humid conditions or when under pressure. Oil-based paints fall into this category too.
Latex paints often use plasticizers for flexibility. As we’ve seen, these can sometimes cause tackiness if they migrate to the surface. But not all latex paints are created equal – some formulations are better at preventing this than others.
Environmental and Application Causes
Temperature and humidity influence how quickly paint dries and cures. Cold rooms or drafts can slow solvent evaporation and extend tackiness. Poor airflow around doors can trap moisture and solvents near the surface.
Application technique matters too. Overloading the brush or roller, applying too thick a coat, or stopping work with a partially dried film can leave sticky patches. Indoors, these factors often show up around doors where drafts and traffic are common.
Temperature and humidity effects
Cold temperatures and high humidity slow down paint drying and curing. This gives the plasticizers more time to migrate to the surface, making the film tacky.
Ideal temperature for painting: 50-85°F (10-29°C).
Humidity above 70% can also cause issues. Keep your space well-ventilated and within these temp ranges to avoid sticky paint.
Insufficient dry time and poor airflow
Premature contact with doors or other surfaces before the paint is fully cured can cause blocking – when two painted surfaces stick together.
Adequate drying time: 24-48 hours, depending on paint type. Check your specific product’s instructions.
Good airflow helps speed up curing. Keep doors and windows open if possible during painting and drying.
Thick coats, recoating too soon, and overspray
Applying thick coats or recoating too early can trap solvents under the surface, preventing it from curing properly. This results in soft films that stick.
Proper application: Apply thin, even coats. Allow recommended drying time before recoating.
Overspray onto adjacent surfaces can also cause blocking. Be careful when painting near doors to avoid this.
Material and Product Factors to Check
Inspect label warnings, recoat times, and gloss level as clues to whether a product is prone to sticking. Some formulations hide softness behind high gloss or specific finishes. Additives chosen for flexibility can also predict a softer, tackier film.
Look for clues in the manufacturer instructions or data sheets about drying windows and surface prep. If the guidance isn’t clear, verify with the supplier or check local rules before continuing.
Paint type, sheen, and label warnings
The paint’s type and sheen play a significant role in how it behaves when drying. Check the product label for any tack or blocking cautions.
Latex paints, for instance, are water-based and generally have faster drying times than oil-based ones. However, they can still stick if not given enough time to cure properly.
High-gloss sheens tend to dry harder and faster than low-sheen or flat paints. But, they might also show imperfections more easily if they do stick.
Additives and special ingredients to watch for
The presence of certain additives in paint can increase its tackiness. Consulting the technical data sheet can help you understand these materials better.
- Coalescents: These help bind pigments together, but too much can cause sticking. Look for products with balanced coalescent levels to avoid this.
- Extenders: While they improve coverage and reduce cost, extenders can also slow drying times and increase tackiness if used excessively.
- Plasticizers: These make the paint film more flexible. However, too many plasticizers can cause the paint to remain soft and sticky.
- Special ingredients: Some paints contain unique additives for specific purposes (e.g., mildew resistance). Check if these could contribute to increased tackiness.
Substrate condition and previous coatings
The underlying surface’s condition and any existing coatings can significantly impact the topcoat’s drying and tackiness.
Contaminated surfaces may prevent proper adhesion, leading to increased tackiness. Ensure the substrate is clean before painting.
Incompatible primers or sealers can also cause issues. If you’re unsure about previous coatings, consider testing a small area first or consulting with a paint professional.
Moreover, existing finishes might affect the new paint’s drying time and tackiness. For instance, applying latex paint over an oil-based primer could lead to sticking problems due to incompatible materials.
Diagnosing the Cause: a Step-by-Step Checklist
Start by noting when and where stickiness occurs—near doors, on high-traffic edges, or in shaded corners. Then consider environmental factors like temperature, humidity, and airflow in that area. Compare different coats or areas to isolate the variable.
Next, review the product data and application method used. If possible, test a small spot with the same product to confirm behavior. Keep the findings organized for a quick repair plan if needed.
Step-by-Step Process
Before you start troubleshooting, follow this step-by-step process to ensure a thorough and systematic approach.
- Preparation: Gather necessary tools like a flashlight, magnifying glass, and gloves. Ensure the area is well-lit and safe for inspection.
- Safety check: Check for any hazards like loose hardware or sharp edges that could cause injury during inspection.
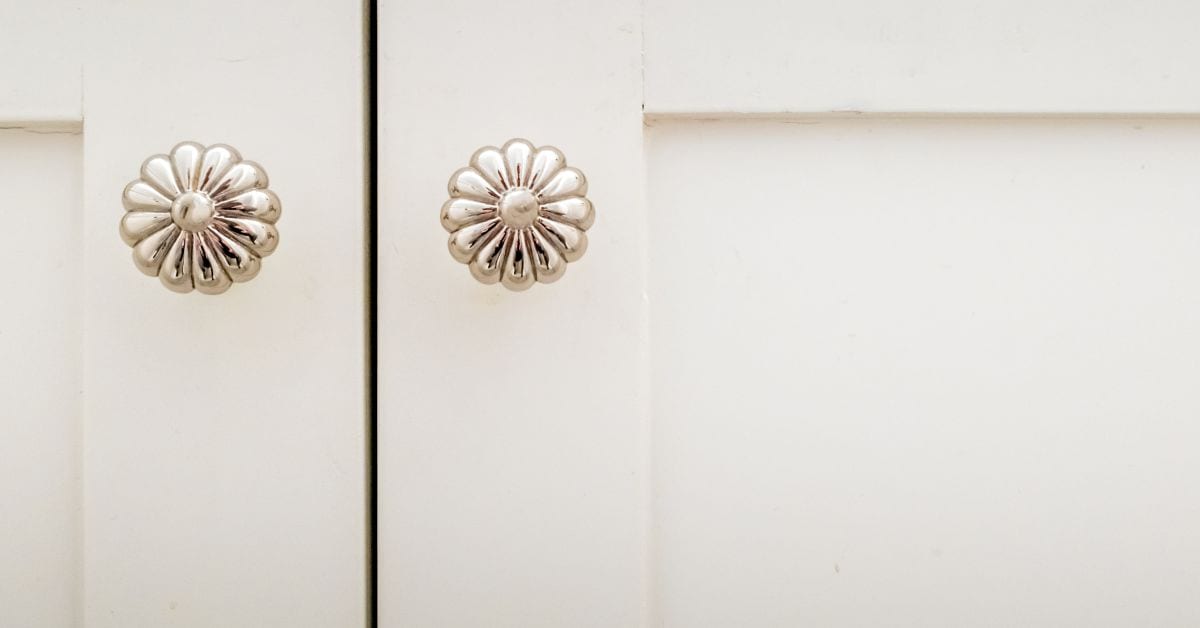
- Inspect the door: Examine both sides of the door, focusing on hinge edges and areas where paint is sticky.
- Check application history: Review when the paint was applied, what type was used, and any issues noted during or after application.
- Examine weather patterns: Note any unusual temperature changes, humidity spikes, or other environmental factors around the time of painting and since then.
- Check door usage: Consider if the door has been used frequently or left closed for extended periods.
- Inspect previous coatings: Check the condition of any existing paint or primer on the door and surrounding areas.
- Document findings: Keep notes on your observations to help track progress and identify trends.
Quick rule: Following this process helps ensure you’ve covered all bases, making it easier to pinpoint the cause of sticky paint.
Visual checkpoints and timing history
Inspecting visible signs and tracking symptom onset can help narrow down the cause of your sticky paint problem.
- Hinge edges: Check for excessive buildup, uneven coverage, or signs of overspray. Sticky paint here may indicate application issues.
- Door faces: Look for areas with visible residue, discoloration, or soft spots. These could point to product-related problems or environmental factors.
- Symptom onset: Note when you first noticed the stickiness – immediately after painting, a few days later, or weeks/months post-application?
- Weather correlation: Compare symptom onset with any significant weather changes around that time.
- Door usage: Consider if stickiness is worse on one side of the door or in specific areas where it’s used more frequently.
- Previous coatings: Check for signs of incompatibility between new and old paint, such as peeling or alligatoring.
Quick rule: Carefully observing these visual cues and tracking symptom history can help you determine if the issue is environmental, product-related, or application-based.
Simple in-place tests to perform
Conduct these quick, non-destructive tests to help distinguish between surface residue and uncured film.
- Tack test: Gently press a piece of clean, white paper onto the sticky area. If it sticks firmly but lifts off without leaving residue, the paint is likely uncured.
- Press/peel check: Press your thumb firmly on the sticky spot for 10-15 seconds, then lift quickly. If the paint peels away cleanly, it’s probably not fully cured.
- Residue test: Use a cotton swab dampened with rubbing alcohol to wipe the sticky area. If residue comes off easily, you may be dealing with surface contamination rather than uncured paint.
Quick rule: These simple tests can help you determine if the stickiness is due to an application issue (uncured film) or a surface contaminant that needs cleaning.
When to consult SDS or lab testing
In some cases, you may need more detailed information about the paint’s composition or specific contaminants. Here are situations when consulting the Safety Data Sheet (SDS) or sending a sample for professional analysis is warranted.
- Unknown paint type: If you’re unsure what type of paint was used, check the SDS or contact the manufacturer to identify it.
- Special additives: When the paint contains special ingredients like biocides, fungicides, or other additives that could affect curing, consult the SDS for more information.
- Persistent stickiness: If simple tests and visual inspections don’t provide clear answers, sending a sample to a lab can help identify contaminants or issues with the paint itself.
- Health concerns: If you suspect exposure to harmful substances, consult the SDS immediately and consider professional testing to ensure your safety.
Quick rule: Don’t hesitate to seek additional information when needed. Consulting the SDS or sending samples for lab testing can provide valuable insights into complex paint problems.
Short-Term Fixes and DIY Remedies
Improve ventilation to speed solvent evaporation and reduce surface tack. Gentle heat from a controlled source can help, but avoid direct flame or overheating the area. Light cleaning with a soft, non-abrasive cloth can remove surface residues that feel sticky.
Use these as temporary steps while you plan a more durable fix. Reserve heating and cleaning as stopgaps when they won’t compromise substrate or coatings.
Improving cure with airflow and controlled heat
Sticky paint behind doors often happens when it dries too slow. We can speed things up safely.
Ventilation: Open windows, use fans. Good airflow helps dry the paint faster.
Dehumidification: If it’s humid, rent a dehumidifier. It’ll suck moisture out of the air, helping your paint cure quicker.
Low, controlled heat: Use space heaters or heating lamps, but keep temps below 90°F (32°C). Too hot can damage the paint.
Cleaning sticky residue safely
Sometimes, plasticizers from the paint exude and stick. Here’s how to clean it gently:
Mild soap and water: Start with a mild dish soap and warm water. Dip a soft cloth, wring it out, then wipe.
If that doesn’t work, try isopropyl alcohol or mineral spirits. They’re gentle solvents. Dampen a cloth, not the surface, then wipe.
Never use harsh chemicals like acetone or paint thinners. They can damage your finish.
Temporary solutions like light buffing or dusting
Sometimes, you need a quick fix until you can repaint. Here are some temporary solutions:
Light buffing: Use a soft cloth and gentle buffing motion. It can help reduce tackiness.
Talc or non-permanent powders: Sprinkle lightly, let it sit, then vacuum off. This can absorb excess moisture or plasticizers.
Remember, these are temporary. They won’t fix the problem long-term. Repaint when you can for a lasting solution.
Permanent Solutions and Repair Procedures
When sticking persists, consider sanding the affected area and reapplying with the correct prep and compatible products. Choose a compatible primer if the surface shows signs of bleed-through or poor adhesion. In some cases, full replacement of the affected door panel is warranted for a durable result.
Prioritize non-invasive options first and follow manufacturer instructions for any new products. If you’re unsure about compatibility, check the product label or data sheet before proceeding.
Safe removal and surface prep methods
Before you start, ensure your workspace is well-ventilated. Use a respirator rated for sanding dust or chemical fumes.
Sanding: Lightly sand the sticky area with 120-grit sandpaper to remove the gloss and help new paint adhere. Be gentle to avoid damaging the substrate.
Deglossing: Use a deglosser or liquid sander to remove the shiny surface without aggressive sanding. Follow manufacturer’s instructions.
Chemical stripping: For severe cases, use a paint stripper. Apply, let it sit as directed, then scrape off the softened paint. Rinse thoroughly with water.
Priming and re-coating strategies
Start by applying a high-quality primer designed for your substrate and paint type. This helps prevent future blocking and ensures better adhesion.
Choose a primer with a tack coat option if your paint is prone to blocking. Apply it lightly, let it dry according to manufacturer’s instructions, then proceed with painting.
Follow the recoat window on your paint can label. Typically, this is 16-24 hours for most paints. Recoating too soon can lead to blocking.
Use a good quality paint and apply it evenly in thin coats. This helps prevent buildup that could cause future blocking.
When to replace parts or hire a professional
If you notice delamination—when paint peels off in large sheets—it’s time for replacement. This indicates the substrate is no longer accepting paint.
Persistent exudation, where sticky residue keeps reappearing despite your efforts, also warrants professional help. This could be a sign of underlying moisture or structural issues.
If you’re unsure about any part of the process, don’t hesitate to hire a professional. They have the tools and knowledge to assess and fix complex problems safely and effectively.
Before hiring, get quotes from at least three reputable contractors. Check their licenses, insurance, and references to ensure you’re making an informed decision.
Prevention and Best Practices for Door Painting Jobs
Plan around environmental conditions and avoid painting in rooms with high moisture or rapid temperature swings. Prepare the door and frame with proper masking, cleaning, and light scuffing to promote adhesion. Keep coats thin and allow adequate cure time between steps as advised by the product data.
Maintain consistent airflow and avoid overcoating in one pass. Build a simple pre-job checklist to track tools, materials, and environmental controls so you don’t miss critical steps that lead to tacky paint later on.
Tools and materials checklist
Use this list before starting your door painting job to ensure you have the right tools and consumables to prevent blocking issues.
- Paint sprayer or roller: For even application, avoid brushes for large areas.
- Safety gear: Goggles, gloves, and a respirator to protect from paint fumes.
- Drop cloths: To catch drips and protect floors. Use canvas or plastic sheets.
- Tape measure: For accurate painting and touch-ups later on.
- Sandpaper (120-grit): To prep surfaces, remove old paint, and smooth out imperfections.
- Primer: To seal the surface, improve adhesion, and prevent tannins from bleeding through.
- Ventilation/dehumidification: Fans or dehumidifiers to control humidity levels and speed up drying.
- Paint stirrer: To mix paint thoroughly before application. Avoid lumps for smooth finish.
- Cleaning supplies: Soap, water, and rags for easy clean-up afterwards.
Quick rule: Having the right tools and materials ensures a smoother job with fewer issues like blocking.
Material specs and standards to check
Checking material specifications helps ensure you’re using the right paint for your door, preventing sticky films and other issues.
- Paint type: Latex or oil-based? Latex dries faster but may not be as durable. Oil-based takes longer to dry but offers better adhesion and durability.
- Sheen level: Gloss, semi-gloss, satin, or flat? Higher sheens are more durable and easier to clean but show imperfections. Lower sheens hide imperfections but aren’t as easy to clean.
- Recommended substrates: Check if the paint is suitable for your door material – wood, metal, etc.
- Recoat time: Follow manufacturer’s guidance on recoating times to avoid sticky films from overlapping wet paint.
- Cautions and warnings: Read labels for any specific cautions or warnings about using the product in your conditions.
- Manufacturer’s instructions: Always follow the manufacturer’s guidelines for best results. They know their product best.
The wrong material can lead to cracking, staining, weak bonds, and sticky films. Always check specs and follow manufacturer guidance.
Maintenance and long-term care to avoid future blocking
Regular maintenance prevents future blocking issues by keeping your door finish in good condition.
- Cleaning schedule: Regularly clean your doors with mild soap and water to remove dirt and grime that can trap moisture and cause blocking.
- Humidity control: Keep humidity levels between 30-50% to prevent excessive moisture from causing sticky films. Use dehumidifiers or humidifiers as needed.
- Periodic inspection: Regularly inspect your doors for signs of wear, tear, or damage that could lead to blocking issues. Touch up any nicks or scratches promptly.
- Avoid extreme temperatures: Extreme heat and cold can cause paint to expand and contract, leading to cracking and peeling. Keep your home’s temperature consistent when possible.
Neglecting maintenance can lead to sticky films, cracking, and other issues that require extensive repair or replacement.
Conclusion
The core takeaway is simple: sticky film behind a painted door means the coating didn’t cure or respond the way it should, and that affects safety, durability, and how good it looks over time. You can fix it without pulling the door apart if you stay deliberate and use the right checks and steps.
First, check the environment and materials in a logical order: confirm the temperature and humidity meet the product’s guidelines, inspect the existing film for softness or tack, read the product data sheets for compatibility, do a small patch test on an inconspicuous area, then choose the remedy that matches the cause—clean and recoat if needed, or sand back to a sound layer and recoat with a compatible system, ensuring full cure before use. Test a small area first, use only compatible products, and always follow the label instructions.
Common mistakes to avoid are rushing any cure or recoat, using the wrong thinner or incompatible finishes, and skipping a proper test patch or ventilation. Safety rules to follow are clear: wear eye and skin protection, work with good ventilation, and never apply finishes outside the recommended conditions or on damaged surfaces. If you see peeling, deep damage, or persistent stickiness after the steps above, don’t push through—call a professional rather than risk bigger repairs.
When it makes sense to get help is when the door has structural damage, the cause isn’t clear after tests, or the project involves high-traffic doors or sensitive materials. With the right checks and careful work, you can restore a smooth, durable finish and keep future door jobs simple and predictable. You can do this—steady, step by step, and with safety first.
FAQ
What should I check first to confirm why the paint behind a door is sticky?
Look for signs if the film remains soft when you press it with a fingertip. Check the product labels or datasheets for any notes on soft films, plasticizers, or blocking issues. If in doubt, follow the manufacturer instructions and local guidelines for rework or ventilation requirements.
What immediate steps can I take to reduce stickiness while the issue is ongoing?
Ventilate the area and avoid closing doors tightly until the film cures or rework is complete. Do not sand or scrub aggressively on a sticky film; this can embed additives and worsen the stain. Use the guidance on the product label for safe cleanup or temporary fixes.
How do environmental conditions influence stickiness behind doors?
High humidity, temperature fluctuations, or rapid drying can affect film formation and cause blocking. Review the environmental notes on the paint can or manufacturer instructions for acceptable conditions during and after application. Local conditions may require adjustments in placement and curing time.
When is it time to repair permanently or bring in help?
If the film remains gummy after typical remedies, plan for a permanent repair and follow approved procedures from the manufacturer. Check labels, data sheets, and local rules for proper sanding, recoating, or surface prep steps. If unsure, consult a professional for a safe assessment and plan.