
Introduction
Measuring stucco thickness without removing it means checking how thick the outer layer is using probes, gauges, and careful patching. You’ll learn to use probe holes and depth gauges to estimate thickness and plan repairs. This article keeps things practical and safe for DIY homeowners.
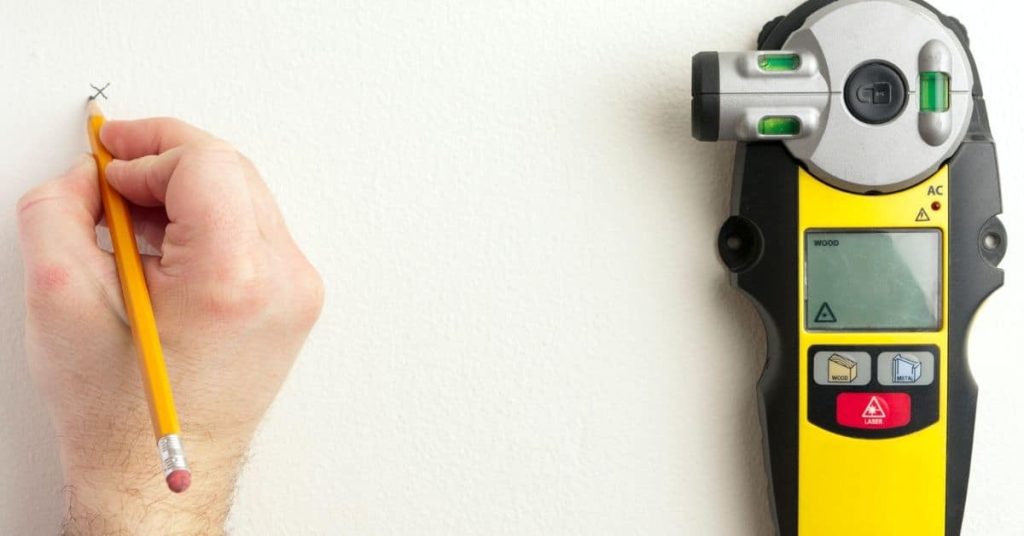
Tools needed for measuring stucco thickness include a probe tool, a depth gauge, and patching supplies. We’ll walk through the process of making probe holes safely and inspecting the underlying structure, so you can patch cleanly afterward. Then we’ll cover how to use the measurements to decide the repair thickness range and ensure a solid finish.
Key takeaways
- Plan probe locations away from corners and utilities, mark with chalk and depth limits.
- Use a masonry drill or correct drill bit, and probe holes cleanly with minimal damage.
- Record hole depth with depth gauge; cross-check multiple holes for accuracy.
- Calculate average thickness from verified measurements; interpret against manufacturer guidance.
- Patch holes cleanly using matching stucco and proper finish following steps.
- Safety: locate utilities, wear PPE, and comply with local codes and rules.
Table of Contents
- Introduction
- Key takeaways
- Quick Overview and Planning Considerations
- Tools and Materials Checklist
- Safety Precautions and Locating Hidden Hazards
- Proper Technique for Making Probe Holes
- Measuring Stucco Thickness Accurately
- Calculating Average Thickness and Interpreting Results
- Cleaning and Patching Probe Holes Cleanly
- Common Mistakes, Troubleshooting, and Cost Implications
- Conclusion
- FAQ
Quick Overview and Planning Considerations
Set a clear goal for why you’re measuring stucco thickness and what it means for repair, retrofit, or inspection. Define acceptable tolerances and what data will trigger a bigger project or professional help. Outline the scope, timeline, and how results may influence contractor decisions or sequencing.
Plan the sampling locations with purpose in mind—exterior walls, interior surfaces, or high-traffic zones—and decide how many probe holes or gauges you’ll use. Document why each location was chosen and how it supports a reliable overall thickness picture. Prepare tools and methods, and note access or permit needs before you start.
Why measure stucco thickness
Measuring stucco thickness is crucial for various reasons. It helps in planning repairs, upgrades, and diagnosing moisture issues.
Repair Planning: Knowing the thickness helps determine how much material you’ll need and the best repair method.
Cladding Upgrades: Before installing new cladding, measure stucco to ensure it’s thick enough to support the new material.
Moisture Diagnosis: Uneven or thin spots could indicate moisture issues that need addressing. Measuring helps pinpoint these areas.
Code Compliance: Some building codes require minimum stucco thickness. Measuring ensures you’re in compliance.
What to gather before you start
Before starting, gather some basic information to guide your measurements.
Building Plans: If available, building plans show original stucco thickness and can help identify any additions or modifications.
Previous Repairs: Knowing where previous repairs were made helps avoid those areas and get a more accurate reading of the original thickness.
Visible Damage Areas: Note any visible damage. You’ll want to measure these areas, but also consider surrounding undamaged areas for a complete picture.
When to hire a professional
While this guide helps you measure stucco thickness, there are times when it’s best to hire a pro.
Extensive Cracking: If there are extensive cracks or signs of significant damage, it’s wise to have a professional inspect the structure.
Suspected Hidden Damage: If you suspect hidden damage due to water intrusion or other issues, a pro can use specialized tools and techniques to find it.
Inaccessible Areas: If the areas you need to measure are high up or otherwise inaccessible without proper safety equipment, hire a professional with the right gear and training.
Tools and Materials Checklist
Clarify which tools work best for non-destructive checks on your wall types, and tailor choices to your DIY comfort level. Think about hardcoat, traditional cement plaster, and EIFS when selecting probes and gauges. Match tools to the wall so you don’t overdo or underdo the probing.
Keep core hand tools handy and include measurement devices like depth gauges, calipers, and non-destructive indicators. Plan patching materials that are compatible with the existing stucco and substrate, and check patch texture and curing requirements to avoid mismatches later.
Probes and depth gauges (choosing the right tools)
Before you start, ensure you have the right probes and depth gauges for your job. Here’s a quick checklist to help you choose.
- Hollow probes: Check reach – should extend beyond stucco thickness. Tip profile? Round or flat?
- Thin awls: Ensure tip is sharp and strong enough for substrate.
- Manual depth gauges: Verify scale accuracy and readability.
- Probe compatibility: Check with substrate (hardcoat, EIFS, traditional).
- Probe material: Steel or aluminum? Consider wall hardness.
- Probe length: Long enough for depth, short enough for control.
- Probe handle: Comfortable grip for easy use.
- Depth gauge accuracy: Calibrate before use. Range suitable?
Quick rule: Choose probes and depth gauges that match your wall type, are comfortable to use, and have accurate readings.
Power tools, drill bits, and inspection accessories
For neat access holes and non-destructive inspections, consider these power tools and accessories.
- Drill type: Cordless or corded? Consider wall size and access.
- Bit type: Twist bits for general use. Masonry bits for hard substrates?
- Bit size: Match probe size for neat holes.
- Stud finder: Optional, but reduces unnecessary holes.
- Borescope: For inspecting deep or hidden areas.
- Drill speed: Low to medium speeds for control and accuracy.
- Drill pressure: Light touch – avoid over-drilling.
- Safety features: Check drill has clutch and lock-on button.
Quick rule: Choose power tools with the right bits, speeds, and safety features for your job.
Patch materials and finishing supplies
For clean patching, consider these materials and tools. Check manufacturer compatibility with existing stucco.
- Stucco patch: Compatible with substrate (lath, gypsum, masonry)?
- Bonding agent: Enhances patch adhesion. Check compatibility.
- Texture tools: Brushes, sponges for matching texture.
- Skim coat: For final smoothing. Match thickness to surrounding area.
- Mesh or fiberglass: Reinforces patch. Compatible with substrate?
- Trowel size: Match existing texture for seamless finish.
- Mixing tools: Drill mixer, paddle for consistent patch mix.
- Safety gear: Gloves, goggles, and dust mask for mixing/patching.
Quick rule: Choose patch materials that match your substrate, provide good adhesion, and allow for easy texturing and finishing.
Safety Precautions and Locating Hidden Hazards
Prioritize identifying and isolating hazards before you drill. Use lockout/tagout basics and verify that power cannot be re-energized during probing and patching. Have a plan to stop work if a hazard is found.
Bring the right PPE and set up a clean, organized workspace with proper fall protection for ladders. Check for buried utilities with maps and detectors, and verify marked indicators before any drilling or patching begins.
Locating wiring, pipes, and reinforcing elements
Before you start probing, it’s crucial to locate and avoid electrical, plumbing, and reinforcing elements. Use a stud/pipe detector to find metal lines or supports behind the stucco.
Look for visual clues like switch boxes, outlets, or plumbing fixtures that might indicate nearby wires or pipes. Consult building plans if available; they can provide detailed layouts of these systems.
Use caution around corners and edges where wires or pipes may be hidden. If you’re unsure about any area, contact a professional to inspect it safely.
Personal protective equipment and safe workspace setup
Safety starts with the right gear and a well-organized workspace. Here’s what you need:
- Eye/face protection: Safety glasses or goggles to shield your eyes from debris.
- Gloves: Work gloves for grip and protection, around $10-$20.
- Respirator (optional): If there’s a lot of dust, use a respirator. Rentals start at about $30/day.
- Non-slip boots: To maintain footing on uneven surfaces, around $40-$80.
- Ladder (correct type/height): Ensure it’s tall enough for the job and secure it properly. Consider rentals if you don’t own one.
- Fall protection: If probing high up, use a harness or other fall arrest systems.
- Clearly organized workspace: Keep tools and materials neat to prevent trips and falls.
Minimizing moisture and structural risks
Probing stucco can create entry points for water and compromise the weather barrier. Be mindful of these areas:
Moisture-sensitive zones: Avoid probing near windows, doors, or other openings where water intrusion could cause issues. If you must probe here, seal the hole afterwards.
Avoid compromising structural integrity: Don’t probe in areas with known structural problems or where you suspect there might be hidden damage. Drill depth should also account for any potential structural members behind the stucco.
If unsure about any area, consult a professional to assess it before proceeding. It’s better to be safe than cause further damage.
Proper Technique for Making Probe Holes
Choose probe locations that avoid major structural elements and utilities, and place multiple zones on different surfaces to capture representative thickness. Balance accessibility with the need for accurate data. Label each point for later reference.
Prepare by gathering the correct bits, dust containment, masking, and a plan to shut off utilities if required. Drill with a clean, sharp bit, start small, and keep the surface perpendicular while limiting depth to protect lath and WRB.
Choosing probe locations and spacing
Selecting the right probe points is crucial for accurate readings. Here’s how:
Representative zones: Pick spots that cover different areas, like corners, field locations, and transitions to ensure you’re measuring typical thickness.
Avoid major elements: Steer clear of structural components and utilities. Use a stud finder or utility scanner if unsure.
Balance accessibility and damage: Choose points that are easy to reach but won’t cause excessive damage. A few small holes are better than one big one.
Drilling clean holes and protecting layers
Proper drilling technique keeps your probe holes neat and protects underlying materials:
Angle and speed: Keep the drill perpendicular to the surface. Use slow, steady pressure to avoid tearing paper wraps or lath.
Bit control: Guide the bit gently. Don’t force it through. If you feel resistance, stop and check your bit or angle.
Depth control: Limit penetration to necessary depth. Pushing too deep can damage lath, mesh, or WRB.
Controlling hole size and entry/exit cleanup
Keeping holes small and clean ensures reliable readings and easier patching:
Hole diameter: Use the smallest practical bit. Larger holes require more material for patching and can weaken the stucco.
Temporary plugs: Consider using temporary plugs to keep holes clean before measuring and patching.
Cleanup: Remove all debris from the hole after drilling. A clean hole ensures accurate readings and easier patching.

Measuring Stucco Thickness Accurately
Use measurements after a probe hole is created, focusing on repeatability and minimal damage to surrounding material. Prioritize methods that let you cross-check readings from multiple spots. Keep notes organized for later analysis.
Describe how to use mechanical depth gauges and how to mark consistent depth references. Consider using borescopes or endoscopes to verify layer boundaries and confirm substrate thickness from different angles.
Using manual depth gauges and marked probes
To measure stucco thickness accurately, you’ll need to insert a probe or gauge into the hole until it reaches the substrate. Here’s how:
First, ensure your probe or gauge is clean and dry to avoid any measurement errors. Insert it slowly and steadily, feeling for the resistance of the substrate.
Be cautious not to push too hard if you encounter soft layers. Compressing them can give false readings. Mark the depth consistently on the probe using a pencil or marker as you reach the substrate.
Using borescopes and non-destructive tools for confirmation
Borescopes allow you to visually inspect the layers behind the stucco, reducing the need for multiple holes.
- Fiber Optic Borescope: Inexpensive, easy to use. Look for one with at least 3m of cable and a 6mm camera diameter. Tip: Check the focus before insertion.
- Infrared Camera: Shows temperature differences, helping locate layers. Pricey but rentable. Setting: Set to ‘reflective’ mode for best results.
- Ultrasonic Thickness Gauge: Uses sound waves to measure thickness non-destructively. Expensive but accurate. Tip: Hold it perpendicular to the surface for best readings.
Recording measurements and immediate verification
Keeping track of your measurements is crucial for accurate patching. Here’s a simple logging method:
Record the location of each probe hole, the measured thickness, and any visual notes about layer boundaries or substrate conditions.
Verify immediately by re-measuring the same hole or checking adjacent points. This helps catch any measurement errors early. If readings are inconsistent, consider using a borescope to visually confirm the depth.
Calculating Average Thickness and Interpreting Results
Establish a straightforward sampling framework that defines how many holes per area and which surfaces to include for a representative dataset. Avoid over-interpretation when data is sparse. Use simple rules to guide next steps based on the spread of readings.
Compute mean thickness as a baseline and consider the median to handle outliers. Report the range or standard deviation to convey variability and note when results suggest layered or repaired zones needing caution.
Sampling strategy and statistical basics
To get a good picture of your stucco’s thickness, you need to take readings from across the surface. Don’t cluster them in one spot.
Here’s how: define areas, like flat walls or corners. Then, pick spots evenly spaced within each area. This gives you a representative dataset for estimating averages.
Averaging is simple. Add up all your readings and divide by the number of readings. It gives you the central tendency – what’s typical across your samples.
Converting point data to area estimates
Once you’ve got your readings, you can estimate the average thickness for larger areas. Here’s how:
First, calculate the mean thickness from your probe holes. Then, multiply this by the total surface area of the wall or section you’re interested in.
But remember, material changes and localized repairs can throw off these estimates. If you suspect that’s the case, take more readings in those areas.
Interpreting variability and ambiguous readings
Inconsistent readings can happen due to multiple coats, patches, or differences in the underlying substrate. Here’s how to make sense of them:
If you keep getting higher or varying readings in one spot, it might indicate a thicker area, a patch, or a change in the base material. Take more readings nearby to confirm.
If readings are all over the place, be cautious. You might need more data, or even a professional assessment to understand what’s going on under your stucco.
Cleaning and Patching Probe Holes Cleanly
Outline prep steps to keep the area clean and protected from dust or moisture during patching. Isolate nearby sections as needed to avoid collateral damage. Have your patch materials ready before you start sealing the holes.
Follow a stepwise patching workflow: clean the hole, apply bonding agent, fill with compatible patch material in layers if needed, and texture to match surrounding stucco. Plan for proper curing and a finish coat to minimize moisture ingress and color mismatch.
Surface prep and product selection
The first step is to clean the probe hole. Use a wire brush or compressed air to remove any loose material, dust, or old patch remnants.
Safety first: Wear gloves and safety glasses during this process.
Next, apply a bonding agent compatible with your stucco. This helps the patch material adhere better. If you’re unsure about color matching, test a small patch in an inconspicuous area before proceeding.
Step-by-step patching and texture matching
This sequence ensures your repaired spot blends visually with the surrounding finish, minimizing appearance mismatch.
- Start by filling the hole with compatible patch material. Apply in layers if needed to avoid overfilling or underfilling.
- Use a silicone trowel or putty knife to consolidate the patch and remove air pockets. Press firmly but gently.
- Let it set for a few minutes, then use a trowel or texture tool to match the surrounding stucco’s finish. Work quickly before the patch dries completely.
- Quick check: Compare your patch with the existing texture. If it doesn’t match, adjust your technique and try again.
- Let the patch cure according to the manufacturer’s instructions. This is crucial for the patch’s long-term strength and durability.
Curing, protection, and inspection after patching
Use this checklist to protect patches while curing and inspect for adhesion or shrinkage before final finish or paint.
- Protect from rain: Cover the patch with a plastic sheet or tarp during rainfall to prevent washout.
- Monitor temperature: Keep an eye on the weather. Extreme heat or cold can affect curing.
- Check for adhesion: Gently tap the patch after it’s set but before final cure. It should sound solid, not hollow.
- Look for shrinkage: Check for cracks or gaps around the edges of the patch. If present, you may need to add more material and retexture.
Quick rule: Inspect your patches regularly during curing. Catching issues early prevents costly rework.
Common Mistakes, Troubleshooting, and Cost Implications
Highlight frequent errors such as large or misaligned holes, sampling only the surface, or misreading layer order. Explain how these mistakes skew results and patch performance. Emphasize fixes like rechecking locations and calibrating equipment.
Discuss practical cost implications of careful work versus rework or hiring a pro. Provide a decision framework for when to proceed DIY-style and when to escalate, based on readings, access, and patching needs.
Typical measurement and patching mistakes
To get accurate readings and avoid costly rework, steer clear of these common pitfalls.
- Sampling bias: Don’t rely on a few spots. Spread out your probes to account for variability.
- Concealed elements: Be cautious when drilling. Avoid hitting wires, pipes, or other hidden items.
- Off-angle probes: Keep your probes vertical. Angled holes skew readings.
- Incompatible patch materials: Match the existing stucco’s composition for adhesion and appearance.
- Over-penetration: Don’t drill too deep. It weakens the stucco and risks hitting substrates.
Remember, a little extra care upfront saves time and money later.
Repair, liability, and replacement cost considerations
Incorrect measurements or poor probing can lead to expensive repairs and potential liabilities. Here’s what you need to know.
Rework: Fixing mistakes costs more than doing it right the first time. Be prepared for extra labor, materials, and time.
Liability: Botched probing can create water intrusion issues or code noncompliance. You could be liable for damages or fines.
Sometimes, full replacement is cheaper than repeated repairs. If you find extensive damage or non-compliance, consider a professional inspection to weigh your options.
When to stop and call a professional
DIY has its limits. Know when to step back and bring in the experts.
Extensive deterioration: If you find widespread damage, it’s time to call a stucco contractor for an assessment.
Structural concerns: Any signs of structural issues, like cracks or bulging, warrant immediate attention from a building inspector or engineer.
Repeated ambiguous readings: If you can’t get consistent results despite careful probing, consider hiring a moisture specialist to diagnose the issue. Safety and accuracy should always be your top priorities.
Conclusion
Knowing how to measure stucco thickness without a full demo is practical for safety, durability, and a clean, lasting look. Do the work methodically, and you protect the wall and your investment from costly mistakes.
Start by planning, verify hazards, gather the right tools, then locate probe points, drill carefully, record depths, compute an average, and plan clean patching before you finish. Keep the patching clean, test a small area first, and double-check your measurements to guide repairs without creating new problems.
Common mistakes to avoid are drilling too deep or too close to edges, ignoring concealed hazards like wiring or plumbing, and skipping cleaning and patching steps. Use proper safety gear, work slowly, and verify each probe area before proceeding. If anything unexpected shows up—hiding behind the stucco, questionable substrate, or uncertain measurements—pause and reassess rather than pushing ahead.
When in doubt or if you encounter stubborn patching challenges, consider a pro for a precise diagnosis or nontrivial repairs. Stay patient, follow the steps, and you’ll finish with a solid result and a surface that looks right and lasts.
FAQ
What tools do I need to measure stucco thickness accurately without heavy demolition?
You’ll want a few simple tools: a depth gauge or caliper, a drill with a sharp masonry bit, a probe or punch, and a utility knife for clean edges. Have a tape measure or ruler handy to record thickness at each hole. Always check tool labels and manufacturer instructions for use on stucco.
How do I safely make probe holes in stucco step by step?
Choose a spot that won’t hit embedded wiring or plumbing. Mark a small, straight drill line, then drill a shallow pilot hole to test the surface. If the hole bites cleanly and you can see the substrate, proceed with a full-depth probe in a controlled, steady drill pass.
How can I use depth gauges or other tools effectively to read thickness?
Insert the gauge into the probe hole and read the depth from the surface to the substrate. Take multiple readings at different locations and record the values. If your gauge isn’t calibrated for stucco, compare results with a reputable reference on the tool’s label or manufacturer instructions.
What’s the right way to calculate the optimal thickness range for repairs?
Look at the readings you collected and compare them to the surrounding board or sheathing thickness. Use the average of reliable measurements and factor in any expected patch material. If you’re unsure, check the patch material’s guidance and local recommendations before deciding on a repair target.
How do I patch holes cleanly after measuring?
Cut and feather the edges around the hole, apply patch material per the manufacturer directions, and smooth to blend with the surrounding stucco. Allow proper curing time and then lightly texture to match. If the patch sits high or low, revisit the depth readings and adjust the patch thickness accordingly.