
Introduction
Dusting concrete early means the surface is wearing away, leaving a chalky film. It often comes from curing mistakes that kept the slab too dry or too wet during early hardening. This basic guide covers how to spot it and what you can do next.
Densifiers and similar surface hardeners can help bind the top layer, but you need to choose the right type and follow label directions. Before applying anything, identify the surface condition and read the product label, then plan timing around whether the slab has cured and is dry enough. If you’re unsure, check with the product instructions or local rules and test on a small area first.
Key takeaways
- Identify early dusting signs: powdery surface, chalky feel, dull sheen on slab.
- Common curing mistakes include cutting corners and rapid drying, causing micro-cracks.
- Densifier options differ by chemistry; plan with slab chemistry and surface prep.
- Apply densifier after curing treatment finishes; follow manufacturer instructions exactly.
- Use proper PPE, ventilation, and avoid improper runoff; dispose slurry per local rules.
- For damage, test lightly with brushing after cure to gauge hardness before sealing.
Table of Contents
- Introduction
- Key takeaways
- What Actually Causes Early Concrete Dusting (Powdering)
- How Improper Curing Directly Leads to Dusting and Common Curing Mistakes
- Diagnose the Severity: Tests and Visual Checkpoints
- Densifier Types Explained: Chemistry, Pros and Cons
- How to Choose the Right Densifier or Sealer for Your Slab
- Step-by-Step Application Methods and Tools Checklist
- Repair and Remediation Options for Dusting Concrete
- Safety, Environmental Impact, and Disposal Best Practices
- Conclusion
- FAQ
What Actually Causes Early Concrete Dusting (Powdering)
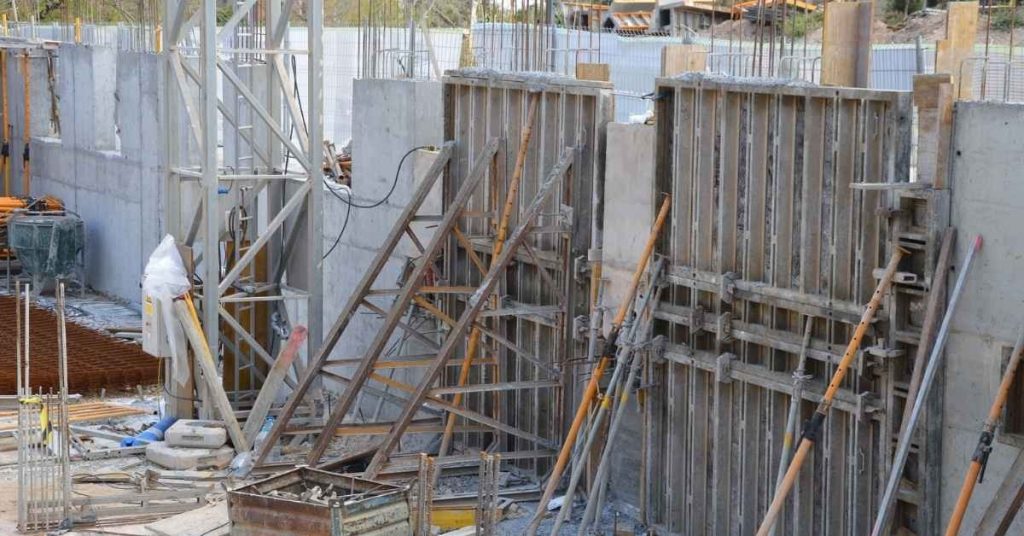
Powdering, or laitance, is a real surface problem, not just a cosmetic issue. It means a weak, cement-rich layer has formed on the surface and can break away with light abrasion, leaving a powdery feel underfoot. This isn’t the same as color or finish flaws; it’s a material- and process-driven separation at the top of the slab. Understanding laitance helps you trace the root cause back to how the slab was poured and finished.
On the micro level, capillary pores, microcracks, and a subsurface hard zone interact so the fines-rich top becomes prone to shedding when you broom, trowel, or walk on it. The result is a soft, dusty crust that hides deeper strength issues. The main culprits are surface-rich cement paste, high water content, premature or aggressive finishing, rapid drying, inadequate curing, residual curing compounds, bleed water mismanagement, and rough or poorly graded surface aggregates. Diagnostic tests and careful observation help pinpoint which factor started the dusting and which tools or steps amplified it.
Curing- and workmanship-related causes
Premature drying is a common culprit behind early concrete dusting. When concrete dries too quickly, the surface layer doesn’t have time to develop proper strength.
Trapped moisture can also cause problems. If water evaporates from the surface but remains trapped beneath, it weakens the top layer and leads to powdering.
Over-finishing or aggressive troweling can also create a weak surface layer. Timing errors during finishing, like applying a final finish too early, can result in a weak, dusty surface.
Mix design and material issues
Material choices play a significant role in preventing or causing early concrete dusting. A well-designed mix can help minimize powdering.
- Low cement content: Insufficient cement leads to weak surface paste that powders easily. Aim for the recommended cement content based on your project’s needs.
- Excessive water: Too much water increases surface porosity and reduces strength. Follow the specified water-to-cement ratio to avoid this.
- Improper admixtures: Some admixtures can cause excessive bleeding or increase surface porosity if not used correctly. Always follow the manufacturer’s guidelines for proper use.
- Poor batching: Inconsistent batching can result in a weak, dusty surface. Ensure consistent material proportions and quality during mixing.
Environmental and timing factors at placement
Temperature affects concrete curing. High temperatures speed up drying, leading to early dusting. Conversely, low temperatures slow down the curing process, which can also result in weak surface paste.
Wind can cause rapid evaporation of surface moisture, leading to a weak top layer. Humidity levels also play a role – high humidity can delay setting time, while low humidity can speed up drying and lead to early dusting.
Delayed protection with blankets or sealers can exacerbate powdering issues. Concrete should be protected as soon as possible after placement to maintain proper moisture levels during curing.
How Improper Curing Directly Leads to Dusting and Common Curing Mistakes
Curing is the single most effective preventative measure against dusting because it lets the cement paste gain strength during the critical early hours. If you lose moisture too quickly, the surface paste hardens unevenly and remains weak, making it prone to dusting under light traffic or brooming. Proper curing creates a coherent, durable skin that resists scuffing and powdering over time.
Common on-site mistakes include exposing fresh concrete to sun, wind, or heat without moisture, skipping or shortening the moist curing phase, relying on quick-drying compounds too early, finishing before bleed water stabilizes, and neglecting coverage with curing blankets or damp burlap. During curing, monitor humidity, temperature, and wind, and check the surface for tackiness or a chalky film. If you see signs of laitance, address moisture management and postpone surface treatments until the slab has fully cured.
Moisture retention and timing mistakes
Letting your concrete dry too fast or unevenly can lead to dusting. Here’s what to avoid:
- Exposing fresh concrete to sun, wind, or heat: This accelerates moisture loss, weakening the surface paste.
- Skipping or incomplete moist curing: A full 3-7 day cure is crucial for strength gain and dust resistance.
- Finishing too soon or aggressively: Closing the surface before bleed-water and capillary rise stabilize can cause a weak, dust-prone top layer.
- Not accounting for environmental factors: High temperatures, low humidity, or strong winds speed up drying and lead to dusting.
To prevent this, keep your concrete consistently moist during the initial curing period, and protect it from harsh weather conditions.
Wrong curing materials and methods
The right materials and methods ensure even moisture retention. Here’s what to look for:
- Non-breathable covers in hot sun: Traps heat, causing uneven curing and potential cracking.
- Quick-drying compounds or sealers too early: Prevents proper hydration, leading to a weak surface layer.
- Inadequate coverage or deteriorated blankets: Allows moisture loss and exposes concrete to elements.
- Using improperly rated materials: Check ratings for your specific climate and conditions.
- Applying curing compounds incorrectly: Follow manufacturer’s guidelines for application rates and timing.
Choose appropriate, high-quality materials and apply them correctly to maintain consistent moisture during the cure.
Typical on-site finishing errors that compound curing problems
Certain finishing techniques can thin the surface paste and promote dusting. Here’s what to avoid:
- Over-troweling: Excessive troweling removes too much cement, weakening the surface.
- Excessive water on the surface: Dilutes the cement paste, leading to a weak top layer.
- Early power-tool use: Grinding or polishing before full cure can remove the weak, dust-prone top layer but doesn’t address underlying issues.
- Finishing in hot, dry conditions: Speeds up drying and weakens the surface paste.
Avoid these mistakes by following proper finishing techniques, accounting for weather conditions, and allowing adequate curing time before any power-tool use or densification.
Diagnose the Severity: Tests and Visual Checkpoints
Dusting severity can be described by feel, dust production, and how hard you must scrub to clean the surface. A simple scale helps you communicate with a pro: mild, moderate, or severe dusting based on surface feel and cleaning effort. This quick gauge keeps you from guessing whether it’s a surface-only issue or something deeper.
Look for visual and tactile clues that separate surface dusting from structural problems. Spalling, cracks, loose patches, or hollow-sounding areas require professional assessment. DIY checks include a shallow abrasion test, a quick water bead, a pull-off test where feasible, and a scratch test after cleaning. Documenting age, curing history, and moisture observations will help a contractor diagnose accurately.
Quick field checks (rub, tape, water)
Before diving into complex tests, use these simple and quick checks to get a preliminary idea of the dusting severity.
- Rub with hand: Gently rub the surface. If it feels gritty or leaves a powdery residue, dusting is present.
- Tape test: Apply and remove tape. If it pulls off aggregate or leaves a white residue, the issue is severe.
- Water absorption (quick-water test): Sprinkle water on the surface. If it’s quickly absorbed, the concrete may be porous due to improper curing.
- Check edges: Inspect where dusting is worst. If edges are crumbling or exposed, structural issues might be present.
- Feel for smoothness: A rough surface indicates severe dusting and potential aggregate loss.
- Look for efflorescence: White deposits near joints may indicate excessive moisture, which can lead to structural problems if ignored.
- Check other areas: If dusting is localized, a cosmetic fix might be sufficient. Widespread issues need professional attention.
- Feel for warmth: Excessively warm concrete may indicate ongoing hydration, which could lead to future problems if not addressed.
Quick rule: If these checks reveal severe dusting or structural issues, consult a pro immediately. For localized light dusting, proceed with DIY remedies.
When to inspect core strength or pull-off adhesion
In some cases, a professional test is needed to determine the extent of damage. Here’s when to consider these tests.
- Widespread aggregate loss: If large areas are exposed, a core test can reveal if the issue is surface-only or structural.
- Delamination: When layers start peeling off, pull-off adhesion tests can help identify weak bonds between layers.
- Cracking patterns: Unusual cracking may indicate compromised strength. A core test can confirm this.
- Uneven surfaces: If some areas are significantly lower than others, it might indicate delamination or other structural issues.
- Recurring dusting: If previous surface treatments didn’t work, a professional test can help diagnose the root cause.
- Moisture readings: If moisture meters show high readings, a core test can confirm if there are voids or delamination beneath the surface.
Quick rule: If you suspect structural issues or recurring dusting after treatments, don’t hesitate to call a pro for these tests. They’ll provide accurate insights into your concrete’s strength and adhesion.
Visual checkpoints for when a cosmetic fix suffices
Before investing in expensive repairs, use these visual cues to determine if a densifying or sealing treatment will work.
- Localized dusting: If dusting is confined to small areas, a surface treatment might be enough.
- Light powdering: Gently rubbing the surface leaves only a light residue. This indicates superficial dusting.
- No exposed aggregate: If you can’t see individual aggregate particles, the issue is likely just on the surface.
- No delamination: No peeling or flaking layers mean the problem is probably not structural.
- No efflorescence near joints: The absence of white deposits indicates moisture levels are under control.
- Even surface: No significant dips or bumps suggest the issue isn’t structural.
Quick rule: If these visual checks reveal only superficial dusting and no signs of structural issues, a densifying or sealing treatment might be all you need. However, always consider environmental factors that could exacerbate the problem in the future.
Densifier Types Explained: Chemistry, Pros and Cons
Densifiers and penetrating hardeners fall into major categories like traditional silicate densifiers, lithium silicate densifiers, and crystalline penetrating hardeners. Each category interacts with calcium hydroxide and pore structure differently to harden the surface and reduce dusting. They aren’t interchangeable, so you’ll choose based on your slab’s condition and use case.
Chemistry outcomes vary: some densify by forming additional calcium silicate hydrates and filling pores, while crystalline types encourage internal crystal growth that blocks capillaries. This affects surface hardness, gloss, and durability under foot traffic or exposure to moisture. When selecting, compare penetration depth, finish impact, humidity tolerance, and compatibility with any existing sealers or coatings, then plan a small field test before full-scale application.
Silicate-based densifiers (lithium, sodium, potassium)
Silicate densifiers are the most common type. They react with calcium hydroxide in concrete to form additional calcium silicate hydrates (C-S-H), hardening the surface.
Lithium, sodium, and potassium silicates each have their strengths:
– Lithium: Deep penetration, good for industrial floors. Can cause haze.
– Sodium: Balanced performance, suitable for most applications. May darken concrete slightly.
– Potassium: Shallow penetration, ideal for decorative surfaces. Less durable but doesn’t affect color or gloss.
Blended densifiers and hybrid formulations
Blends combine silicates with other chemistries to balance performance:
– Silicate + Fluoride: Enhances penetration, improves dust resistance.
– Silicate + Polymer: Increases surface hardness, improves abrasion resistance. Can affect breathability.
– Silicate + Crystalline: Combines pore-filling with capillary blocking for enhanced durability.
Polymer and topical hardeners/sealers
When penetration is limited or film-forming protection is needed, consider:
– Polymer-modified densifiers: Enhance surface hardness, improve abrasion resistance. Can affect breathability.
– Topical sealers: Form a protective film on the surface. Don’t penetrate deep but provide immediate protection against dusting and moisture.
These options are useful for freshly poured concrete or when quick results are needed, but they may not provide long-term durability like penetrating densifiers.
How to Choose the Right Densifier or Sealer for Your Slab
Start with a quick decision framework: match densifier or sealer type to the slab’s age, porosity, and expected use. Fresh pours often need penetrating densifiers that don’t trap residual moisture, while older slabs might benefit from deeper densification or a compatible sealer system. Think about whether you want a natural look or some sheen, and how that choice affects maintenance over time.
Finish texture and environment matter too. A broomed, polished, or decorative surface will react differently to each product, and porosity or moisture status guides you toward breathable or rapid-setting chemistries. Use a practical screening approach to narrow to 2–3 types, and remember to check compatibility with any existing coatings or stains before proceeding with full-scale use.
Step-by-Step Process
Follow this clear sequence to choose and apply the right densifier or sealer for your concrete slab.
- Inspect your slab: Check for cracks, damage, and ensure it’s clean. If unsure, consult a pro.
- Test porosity and moisture: Use a simple test kit (available at hardware stores) to check for excessive porosity and surface moisture.
- Identify finish and traffic: Note the intended use, expected traffic, and desired sheen of your slab.
- Choose products based on decision table below: Match product type to slab age, porosity, finish, and traffic needs.
- Prepare surface: Clean thoroughly, remove dust, and ensure pH is suitable for chosen densifier or sealer. Follow manufacturer’s guidelines for curing/conditioning.
- Apply densifier/sealer: Follow application instructions carefully, ensuring even coverage and proper penetration.
- Inspect and maintain: Check results after drying/curing time, and follow maintenance plan to keep your slab protected.
Match chemistry to substrate and finish
Choosing the right densifier or sealer depends on your slab’s age, porosity, and intended finish.
Older, carbonated slabs may require silicate-based densifiers to penetrate deep and fill pores. Fresh slabs can use hardeners for early strength gain and improved durability.
For polished floors, consider lithium silicate densifiers that enhance gloss and provide long-term protection. Broomed or textured surfaces may benefit from water-based sealers that won’t alter the surface texture.
Consider breathability, gloss, and maintenance needs
Penetrating treatments like silicate densifiers offer breathability, allowing moisture to escape while protecting against dusting. They require less frequent reapplication but may not enhance gloss.
Topical sealers provide a glossy sheen and can be easier to apply, but they form a surface film that may trap moisture and need more frequent touch-ups.
Maintenance needs vary: breathable treatments require less upkeep but may need periodic reapplication. Topical sealers might need more frequent touch-ups but offer immediate gloss enhancement.
Material specs and standards explained
Understanding material specifications helps ensure the right product for your job.
- SDS (Safety Data Sheet): Check for handling, storage, and disposal guidelines. Look for any incompatibilities with existing sealers or densifiers.
- Technical Data Sheet: Review performance data, coverage rates, and recommended application conditions.
- Certifications/EPD (Environmental Product Declaration): Consider sustainability aspects like VOC emissions, recycled content, and certifications.
- Testing: Always test in a small area first to ensure compatibility with your slab and desired results.
Step-by-Step Application Methods and Tools Checklist
Outline a concise workflow: prep the surface, perform a test patch, apply the densifier, allow a curing window, then consider a sealer if the substrate accepts it. Always follow the manufacturer directions and respect temperature and humidity limits for best results. A solid plan reduces the risk of over or under treatment.
Before you start, ensure the area is clean, dry, and free of loose dust. Prepare the right tools and safety gear, then carry out a patch test to verify penetration and even appearance. Choose your application method carefully—spray, brush, or roller—based on product type, and keep an eye on avoiding pooling or excessive misting during the process.
Step-by-Step Process
Use this checklist for a smooth, efficient application of densifiers and sealers.
- Preparation: Check weather forecast, ensure slab is dry enough for penetration (moisture meter), wear PPE.
- Surface Prep: Clean, remove dust, etch or profile if required, check moisture content.
- Test Patch: Apply densifier on a small area, wait 24 hours to check penetration and appearance.
- Application: Follow manufacturer’s instructions for application rate, technique (sprayer/roller/pad), and temperature/humidity restrictions.
- Curing Window: Allow the recommended cure time before re-entry or further work.
- Sealer Application (optional): If using a sealer, follow manufacturer’s instructions for application rate, technique, and recoat window.
- Final Inspection: Check surface for any signs of over- or under-application, ensure hardness and moisture content are within acceptable ranges.
- Cleanup: Clean tools thoroughly with neutral cleaner to prevent product buildup.
Quick rule: Always follow manufacturer’s directions. Temperature and humidity can affect application and cure times.
Surface Preparation and Tools Checklist
Before applying densifiers or sealers, ensure your surface is ready for optimal penetration and performance.
- Cleaning: Remove all dirt, stains, and contaminants using a neutral cleaner and mechanical scrubbing if necessary.
- Dust Removal: Vacuum or sweep the surface to remove any loose particles that could hinder penetration.
- Etching/Profiling (if required): Lightly etch or profile the surface with a mechanical grinder or acid etcher to open pores and enhance absorption.
- Moisture Check: Use a moisture meter to ensure the slab is dry enough for penetration (typically below 4%).
- Dryness Confirmation: Perform a simple water test: sprinkle water on the surface; if it beads up, the surface is too dry and may not absorb the densifier.
- Tools: Have on hand: neutral cleaner, mechanical grinder/scrubber, wet vac, pump sprayer, squeegee, microfiber pads, masking tape, PPE (gloves, goggles, respirator).
Quick rule: A well-prepared surface ensures optimal densifier penetration and sealer bonding.
Typical Application Steps for Penetrating Densifiers
Follow this sequence to apply penetrating densifiers effectively.
- Clean: Ensure the surface is clean and free of contaminants using a neutral cleaner.
- Neutralize Residues: Rinse with clean water to remove any cleaning residue that could hinder penetration.
- Apply Evenly: Use a pump sprayer, roller, or microfiber pad to apply the densifier evenly across the surface. Avoid pooling or misting.
- Allow Reaction/Dwell Time: Let the densifier react with the concrete for the time specified by the manufacturer (usually 15-30 minutes).
- Remove Excess: After the dwell time, remove any excess densifier using a squeegee or wet vac to prevent surface film.
- Test and Follow Label Instructions: Perform a test application on a small area first. Follow label instructions for dwell time, reapplication, and temperature/humidity restrictions.
Quick rule: Always follow manufacturer’s directions for dwell times and reapplication to ensure optimal penetration and performance.
Handling Topical Sealers and Film-Formers
Preparing and applying topical sealers requires different considerations than penetrating densifiers.
- Surface Preparation: Ensure the surface is clean, dry, and free of contaminants. Lightly abrade if necessary to enhance bonding.
- Dry Time Consideration: Allow sufficient drying time between steps (e.g., cleaning, priming, sealing) to prevent trapping moisture or solvents.
- Recoat Window: Follow manufacturer’s instructions for recoat windows. Applying too soon can lead to poor bonding and reduced performance.
- Surface Bonding: Ensure the sealer is compatible with your substrate and finish. Some sealers may not bond well with certain surfaces or finishes.
- Gloss Consideration: Choose a sealer that matches your desired gloss level. Some sealers can alter the appearance of the surface.
Quick rule: Always follow manufacturer’s directions for application, drying times, and recoat windows to ensure optimal performance and longevity.
Repair and Remediation Options for Dusting Concrete
Diagnose with a clear framework: assess dusting depth, porosity, surface roughness, moisture emission, and curing history. This helps decide whether to densify/seal, polish, overlay, or replace. Each path has different implications for durability, appearance, and cost, so match the plan to test results and budget.
Move from least to most invasive: start with densifier/sealer, then consider polishing or overlays, and finally replacement if the condition warrants it. Understand how compatible each option is with existing finishes and how it might affect color, slip resistance, and maintenance. Treat temporary fixes as such and set clear expectations for long-term performance and when a more permanent solution is needed.
When densifying and sealing will likely solve the problem
If your concrete is only dusting on the surface, a combination of densifier and penetrating sealer could be your long-term solution. This approach works best when:
Surface dusting is minimal, not affecting the entire slab’s depth.
The substrate is strong and structurally sound. Densifiers penetrate deep into the concrete, filling microscopic voids that cause dusting. A penetrating sealer then locks in these improvements, preventing future dusting while allowing moisture to escape naturally.
Resurfacing, polishing, or overlay options
When surface damage is more extensive but the concrete’s structure remains intact, consider these resurfacing methods:
Mechanical polishing can restore appearance and enhance durability. It grinds down the dusting layer, exposing fresh, dense material.
Microtoppings or bonded overlays provide a new surface layer that adheres to the existing concrete. These options can improve aesthetics, performance, and slip resistance. They’re ideal when the substrate is sound but the surface is damaged or worn.
When replacement or structural repair is necessary
If your concrete shows signs of severe damage, it’s time to consider repair or replacement. Look for these red flags:
Rebar exposure: Exposed reinforcement indicates significant deterioration that can’t be fixed with surface treatments.
Deep delamination: Large areas peeling away from the base suggest structural issues that require more than a resurfacing solution.
Widespread spalling: Extensive flaking or chipping across the entire slab signals severe damage that may necessitate replacement or major repairs.
Safety, Environmental Impact, and Disposal Best Practices
Protect yourself with the right PPE, maintain adequate ventilation, and follow job-site safety rules when handling densifiers and sealers. A quick readiness checklist helps ensure the space is prepared and compliant with odor, fume, and splash considerations. These steps keep the work safer for you and your neighbors as you proceed.
Understand environmental impact by checking VOC content, looking for low-VOC or greener options, and comparing labels or certifications. Learn how to handle storage, spills, and disposal by consulting product SDS and local regulations. A practical plan for leftover product, contaminated rags, and empty containers will help you dispose responsibly while keeping your site tidy.
Personal protective equipment and site controls
The right gear keeps you safe. Here’s what you need:
- Respirator: Protects from harmful fumes. Choose a P100 filter for densifiers, N95 for sealers.
- Gloves: Chemical-resistant gloves protect hands. Expect to pay $10-$20 per pair.
- Eye Protection: Safety glasses or goggles shield eyes from splashes. Around $5-$15.
- Coveralls: Protect clothing. Rentals available for around $30-$50 a day.
- Ventilation: Use fans to keep the area well-ventilated. Noise levels can reach 70 dB, so consider ear protection too.
Environmental considerations and greener alternatives
Choose products that care for your health and the environment:
Low-VOC options reduce smog-forming emissions. Look for products with < 50 g/L VOC content.
Non-chlorinated solvents are safer for groundwater. Opt for products using alcohols or esters instead of chlorinated solvents.
Responsibly sourced products protect ecosystems. Check certifications like Forest Stewardship Council (FSC) or Green Seal to ensure sustainability.
Product disposal and cleanup guidance
Proper disposal keeps our planet clean:
Unused product: Follow the Safety Data Sheet (SDS) for disposal instructions. Typically, it’s hazardous waste that needs special handling.
Contaminated rinse water: Don’t let it enter storm drains or groundwater. Collect and dispose of with hazardous waste.
Empty containers: Triple-rinse and recycle if possible. Otherwise, dispose of as hazardous waste following local regulations.
Conclusion
Fixing early dusting is about stopping the cycle before it worsens—safety first, then durability and looks. Use the right densifier or sealer and follow sound curing and remediation steps to keep the slab from chalking and powdering again.
Start by inspecting a small area: test a tiny section for cure quality, apply the chosen densifier or sealer as directed, and monitor for a clean, hard surface with no powder. Then scale up methodically, following the in-slab order of preparation, application, and cure time, and keep testing along the way to confirm you’re getting a solid, dust-free result.
Common mistakes to avoid include skipping a proper cure or overdoing a densifier, rushed cleaning that roughs the surface, and ignoring safety data or disposal rules. Always wear the right PPE, work in good ventilation, and perform a small-area test before full use. If you see unfamiliar reactions, lingering haze, or questionable slab behavior, pause and reassess—do not push through.
When in doubt, or if the slab is extensively worn, cracked, or poorly cured, it’s wise to call a pro rather than gamble with irreversible damage. With careful checks, the right product, and disciplined steps, you can stop dusting and restore a surface that lasts. Stay steady, keep safety at the center, and you’ll finish strong.
FAQ
How can I identify early dusting in a new concrete slab?
Look for a powdery, chalky surface that rubs off easily with a finger or a cloth. If you see fine white or gray dust on shoes or tools, that’s a red flag. A quick test is to rub a small area with a damp rag; if powder comes off, you’re in dusting territory.
What common curing mistakes lead to dusting, and how do I spot them?
Short or improper curing time, and drying too fast, cause the surface to cure too hard on top while underlying moisture remains. If the slab dries visibly fast or you didn’t keep it moist or protected during cure, dusting can follow. Check the finish feel and any tiny flaky patches that rub off.
What are the main types of densifiers, and when should I consider using one?
Densifiers create a harder, smoother surface by reacting with the concrete. They’re useful when the surface dusts or wears easily and you want to lock in the top layer. Check the product label for suitability on your slab type and porosity before choosing.
How do I apply a densifier and when should I seal after applying it?
Follow the manufacturer’s instructions for spray or broom-on application and cure time. Apply evenly in a clean, dry area and avoid puddling; multiple light coats are better than one heavy coat. After densifying, plan a sealer only after the slab has fully cured per label instructions, and use a sealer compatible with the densifier you used.