
Introduction
A penetrating sealer for de-icing salt is a treatment that soaks into concrete to form a protective barrier against salt damage.
Common options include silicate, silane, and fluoropolymer blends, each with its own pros and cons. When picking, read the product label and follow manufacturer instructions, and check local rules for your project.
Silicate, silane, and fluoropolymer sealers behave differently under de-icing salts. Consider how you apply them, surface prep, cure times, and the kinds of harsh conditions you expect. Weigh the practical trade-offs and choose based on what you can verify on the label and in local guidance.
Key takeaways
- Compare penetrating sealer types: silicate, silane/siloxane, and fluoropolymer pros and cons.
- Silicate works differently from silicone-based sealers; watch cure interactions with deicers.
- Silane/siloxane provide water repellency with breathable films; check salt resistance.
- Fluoropolymers offer chemical resistance but may affect breathability; evaluate needs.
- Prep and timing are critical; ensure surface clean and dry before sealing.
- Test on inconspicuous area; follow manufacturer instructions and local codes.
- Safety: wear PPE, avoid fumes, and ventilate during application properly.
Table of Contents
- Introduction
- Key takeaways
- Why De-Icing Salt Damages Concrete and How Penetrating Sealers Help
- The Three Penetrating Sealer Types: Silicate, Silane/Siloxane, and Fluoropolymer
- Side-by-Side Performance Comparison and Suitability by Condition
- Application and Installation: Prep, Methods, Timing, and Common Pitfalls
- Cost, Coverage, and Lifecycle (How to Evaluate Cost-Effectiveness)
- Safety, Environmental, and Regulatory Considerations
- Tools, Materials and Specs Checklist for a DIY or Contractor Job
- Conclusion
- FAQ
Why De-Icing Salt Damages Concrete and How Penetrating Sealers Help
Chloride de-icing salts can migrate into concrete through capillary pores and microcracks, reaching the steel reinforcement where they can drive corrosion. Moisture presence and repeated freeze-thaw cycles aggravate scaling, spalling, and microcracking, creating pathways for further ingress. A penetrating sealer aims to alter pore behavior and surface energy to slow these processes.
Porosity, pore connectivity, and moisture saturation control how salt and water move through concrete. Sealer chemistry can densify pores, reduce capillary suction, or create hydrophobic surfaces that limit liquid uptake. The right balance preserves vapor movement to vent trapped moisture while reducing liquid transport of salts and dissolved contaminants.
How de-icing salt attacks concrete
De-icing salts, like sodium chloride, are a common cause of concrete damage. Here’s how they attack your concrete:
Salt Crystallization: When salt water seeps into concrete pores and evaporates, it leaves behind salt crystals that expand and contract with temperature changes, causing microcracks.
Accelerated Freeze-Thaw Damage: In cold climates, moisture in the cracks freezes and thaws repeatedly. This cycle causes further cracking and spalling, leading to a rough, pitted surface.
Chloride Penetration: Chlorides from de-icing salts can reach steel reinforcement, accelerating corrosion. Signs of this include rust stains, delamination, and popouts (small pieces breaking off).
Sealing becomes worthwhile when you spot these signs or live in an area with frequent salt use.
What penetrating sealers protect against (and what they don’t)
Penetrating sealers are designed to protect concrete from specific issues:
Water Penetration: They reduce water absorption, preventing moisture-related damage like freeze-thaw deterioration and efflorescence.
Chloride Ingress Reduction: By limiting salt penetration, they slow down steel corrosion, extending the life of your concrete.
Stain Resistance: Some sealers repel oil-based stains, making them easier to clean off.
However, penetrating sealers don’t provide structural repairs or coating-level abrasion protection. They won’t fill cracks, strengthen weak concrete, or protect against heavy foot traffic or vehicle loads.
The Three Penetrating Sealer Types: Silicate, Silane/Siloxane, and Fluoropolymer
Silicates promote densification by reacting within the substrate and forming solid-looking deposits that reduce porosity. Silane and siloxane formulations mostly act as surface modifiers, imparting hydrophobicity and water beading with varying depth of penetration. Fluoropolymers create durable, low-surface-energy coatings that repel water and many contaminants.
Penetration depth depends on substrate porosity and texture; concrete, masonry, and pavers respond differently based on their openness and moisture content. Some sealers chemically bond with the substrate, while others form a protective layer on the surface with limited penetration. Consider how each type handles indoor versus outdoor exposure and salt compatibility when choosing a candidate.
Silicate (densifiers)
Silicate sealers, also known as densifiers, work by chemically reacting with the calcium hydroxide in concrete to form additional calcium silicate hydrate (CSH), the same compound that gives concrete its strength. This process increases the density and compressive strength of the concrete.
Best used on: Concrete surfaces with some moisture content, not too porous or polished. Ideal for new concrete once it’s cured but still has some lime available to react with.
Limits: While silicate sealers improve water resistance by making concrete denser, they don’t provide the same level of water repellency as silane/siloxane or fluoropolymer sealers. They also won’t prevent de-icing salt damage on their own; use them in combination with other measures.
Silane / Siloxane (penetrating water repellents)
Silanes and siloxanes are low-molecular weight, penetrating water repellents. They work by reacting with the hydroxyl groups on concrete surfaces to form a stable bond, then migrating into the substrate to create a hydrophobic barrier.
Excels on: Dense masonry, pavers, and concrete with moderate porosity. They provide excellent water and chloride ion resistance, protecting against de-icing salt damage.
Limits: On very porous surfaces or polished concrete, silanes/siloxanes may not penetrate deep enough to provide sufficient protection. They’re best suited for outdoor use due to their UV stability but can be used indoors with proper ventilation.
Fluoropolymer (advanced hydrophobic/stain resistance)
Fluoropolymers are low-surface-energy repellents that create a durable, stain-resistant barrier on concrete surfaces. They work by reducing the surface tension of water and other liquids, causing them to bead up and roll off.
Excels over silanes/siloxanes in stain resistance, especially against oil-based stains. Fluoropolymers are ideal for high-traffic areas like driveways, walkways, and indoor floors with heavy foot traffic.
Trade-offs: While they offer superior performance, fluoropolymers come at a higher cost compared to silane/siloxane sealers. They also require careful application and may not be suitable for all concrete types or applications due to their unique chemical composition.
Side-by-Side Performance Comparison and Suitability by Condition
Core performance metrics include resistance to water and chlorides, breathability, UV stability, abrasion resistance, and typical lifespan. These factors translate into practical matchups for climate, traffic, and exposure conditions. Use real-world expectations to judge durability and maintenance needs.
A simple at-a-glance comparison helps align substrate type and service conditions with sealer classes. Consider concrete, pavers, and aged surfaces, along with how porosity and texture influence performance and reapplication intervals. Set expectations for installation caveats and regional limitations.
Durability and longevity under freeze-thaw and salt exposure
Each sealer type handles freeze-thaw cycles differently. Here’s what to expect:
- Silicate: Forms a chemical reaction with concrete, increasing its internal strength and resistance to salt damage.
- Silane/Siloxane: Penetrates deep into the concrete, blocking moisture and salts from entering. Lifespan depends on traffic and exposure.
- Fluoropolymer: Creates a durable, hydrophobic barrier that resists salt buildup but may degrade faster under heavy traffic or extreme temperatures.
The lifespan of each sealer is affected by:
- Traffic: High traffic areas reduce lifespan.
- Exposure: More exposure to salts and freeze-thaw cycles shortens lifespan.
- Maintenance: Regular cleaning extends the life of the sealer.
Breathability, vapor permeability and interior vs exterior use
Moisture vapor transmission is crucial for concrete health. Here’s how each sealer performs:
- Silicate: Allows some moisture vapor transmission but reduces overall breathability due to increased density.
- Silane/Siloxane: Highly breathable, allowing moisture vapor to escape while blocking liquid water and salts. Ideal for interior slabs and old concrete.
- Fluoropolymer: Low permeability, trapping moisture within the concrete. Not suitable for interior use or surfaces with trapped moisture.
Consider these factors when choosing a sealer:
- Interior use: Silane/Siloxane is best to prevent trapped moisture and mold growth.
- Exterior use: Silicate offers good freeze-thaw resistance, while Fluoropolymer provides excellent salt resistance but may trap moisture.
- Old or porous concrete: Silane/Siloxane allows for better breathability and prevents new moisture from entering.
Application and Installation: Prep, Methods, Timing, and Common Pitfalls
Start with a surface assessment and thorough cleaning, followed by moisture checks and substrate repair as needed. Note differences for new versus cured surfaces, and plan for environmental constraints like temperature and wind. Identify substrate-specific considerations before coating.
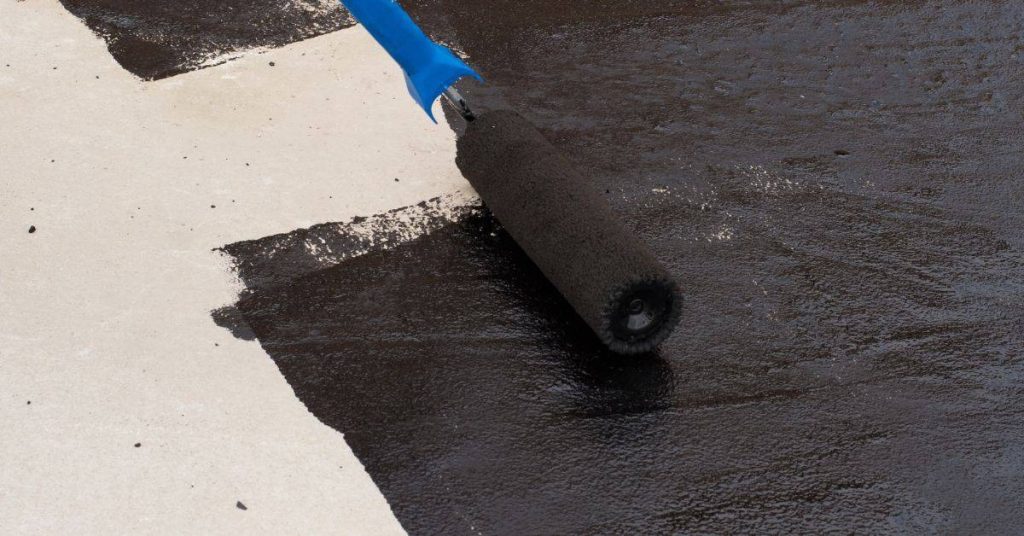
Discuss brush, roller, and low-pressure sprayer methods, including practical pros and cons. Include tool cleanliness, dilution guidance if applicable, and cure details that influence timing before traffic or salt exposure. Prepare for visual checks to confirm uniform penetration.
Surface preparation and testing to ensure penetration
Before you start applying your sealer or coating, you need to prep the surface right. Here’s what you gotta do:
Clean it up: Sweep, vacuum, or blow off any dirt, debris, or loose material. Use a degreaser if there’s oil or grease. Let it dry.
Remove efflorescence: If you see white powdery stuff (efflorescence), brush it off gently. You might need to use a diluted acid solution, but check the label first and rinse well afterwards.
Check pH and moisture: Concrete should be between 6-9 on the pH scale. If it’s too high or low, adjust with an appropriate neutralizer. Moisture content should be below 18%. Use a moisture meter to check.
Now, before you dive in, do some test patches. Apply your sealer or coating to small areas and let it cure. This way, you can see how well it’s absorbing and what the final look will be. If it’s not looking right, adjust your product or method accordingly.
Application methods, equipment and quality checkpoints
Use this checklist before, during, and after applying concrete to ensure a strong, durable finish. Follow these steps for each product type.
- Check equipment: Inspect your tools – trowel, float, edger – for damage or wear. Sharp edges can cause imperfections.
- Use the right mix: Follow manufacturer’s instructions to create a mix that suits your project (e.g., 3000 psi for general use).
- Avoid oversaturation: Too much water weakens concrete. Keep water-to-cement ratio around 0.5 by volume.
- Check slump: Measure concrete’s consistency (6-8 inches is ideal) to ensure proper workability and strength.
- Apply evenly: Spread concrete uniformly using a shovel or pump, avoiding over-pouring that can cause pooling.
- Level correctly: Use a straight edge to level the surface. Check for high or low spots by running a screed board across the surface.
- Float properly: After initial set (15-30 minutes), use a bull float to smooth and compact the surface. Check for any remaining imperfections.
- Edge carefully: Use an edger tool to strike off excess concrete and create a clean edge. Be careful not to remove too much material.
- Finish with trowel: Once the surface is firm (3-6 hours), use a trowel to smooth out any remaining imperfections. Check for a consistent, even finish.
Quick rule: Always follow the manufacturer’s recommended application methods and timing to ensure your concrete sets and cures properly.