
Table of Contents
- Table of Contents
- Introduction
- Introduction to Moisture Testing in Concrete Slabs
- Understanding the Importance of Moisture Testing in Concrete Projects
- Understanding the Tape Test (Plastic Sheet Method)
- Exploring the Relative Humidity (RH) Test
- Comparing the Tape Test and RH Test
- Addressing High Moisture Readings
- Conclusion and Best Practices
- Conclusion
- FAQ
Introduction
Ensuring a concrete slab is free from excess moisture is crucial before applying any coatings, as trapped moisture can lead to adhesion problems and damage over time. This article explores effective methods such as the tape test and relative humidity (RH) testing to accurately assess moisture levels in a slab, helping you achieve a durable and long-lasting finish.
Introduction to Moisture Testing in Concrete Slabs
Understanding the moisture content in concrete slabs is crucial before applying any coatings, as excess moisture can lead to adhesion failures and surface defects. This section highlights the significance of performing moisture tests to ensure the longevity and effectiveness of flooring installations.
Overview of Testing Methods
Testing the moisture in concrete slabs is crucial to ensure long-term durability and avoid future issues like mold or flooring failures. Two primary methods you can use are the tape test and the relative humidity (RH) test. Each has its own steps and tools, so choose based on what fits your project best.
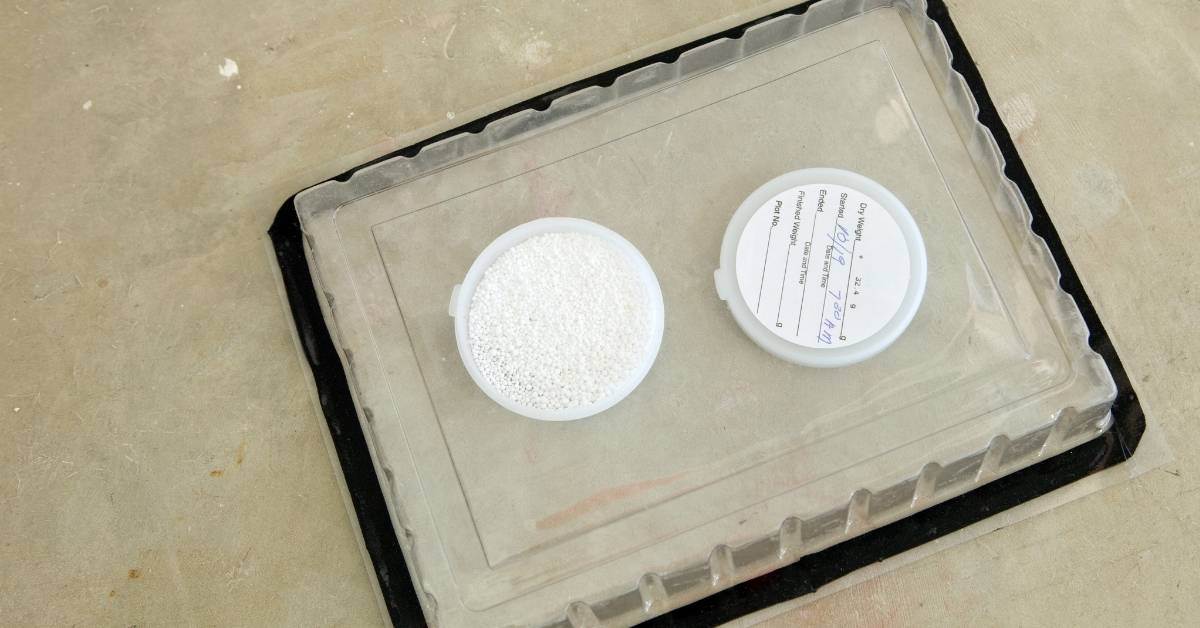
The tape test is a simple, quick way to check for moisture. You just need some plastic sheeting and tape. Secure the plastic to the concrete and leave it for 24 hours. If you find condensation on the underside, moisture is present. It’s a straightforward method but not the most precise.
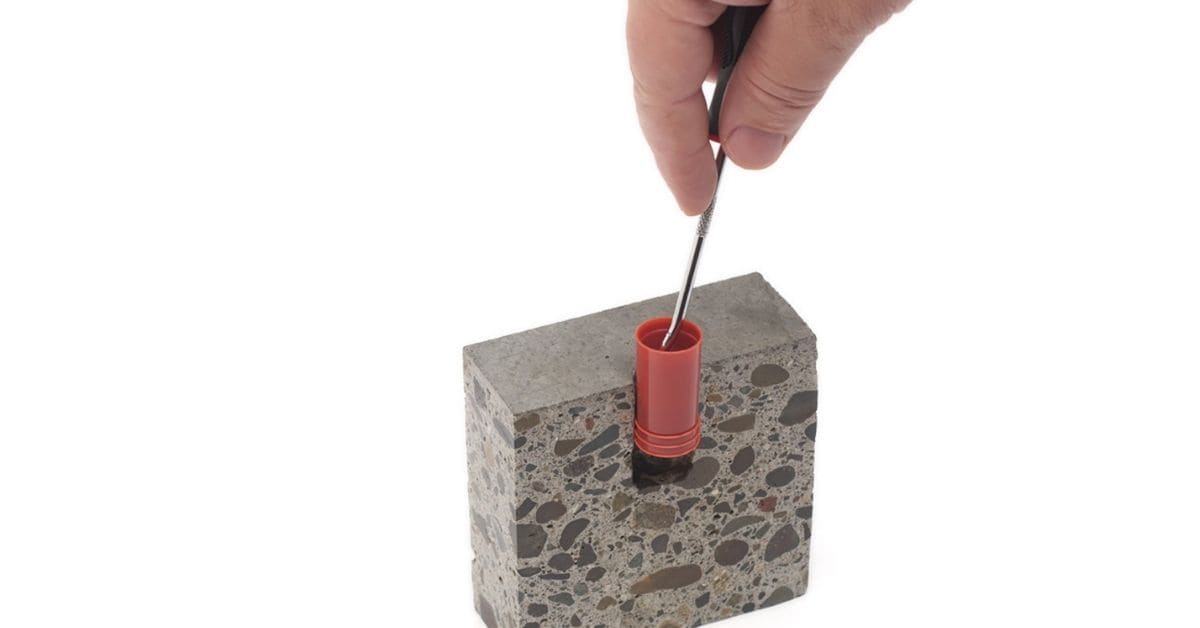
For more accurate results, the RH test is your go-to. This involves drilling small holes in the slab and inserting probes to measure the moisture level inside the concrete. It gives a better picture of what’s happening below the surface. While it requires more effort and equipment, it’s worth it if you’re planning to install sensitive flooring materials.
Understanding the Importance of Moisture Testing in Concrete Projects
Moisture testing is a critical step in any concrete project, especially when applying coatings. Contractors who have experienced the repercussions of neglecting this step understand its significance all too well. Proper moisture assessment can prevent costly repairs and ensure the longevity of your flooring or coatings.
- Conduct moisture tests early in the project to identify potential issues before they escalate.
- Utilize both the tape test and RH test for a comprehensive understanding of moisture levels.
- Document all test results to provide a clear record for future reference and accountability.
- Consult with experienced contractors who have faced moisture-related challenges to gain insights and practical tips.
- Invest in quality testing equipment to ensure accurate and reliable results.
- Implement moisture mitigation strategies immediately if high levels are detected to prevent further complications.
- Regularly monitor moisture levels even after the project completion to maintain the integrity of the coatings.
Learning from Past Mistakes
Contractors who have faced failures due to inadequate moisture testing often stress the importance of thorough preparation. Learning from their experiences can help you avoid similar pitfalls and achieve successful outcomes in your projects.
Understanding the Tape Test (Plastic Sheet Method)
The Tape Test, also known as the Plastic Sheet Method, is a straightforward technique used to identify moisture presence in concrete slabs. This section delves into the specifics of this method, offering insights into its application and effectiveness in moisture detection.
Step-by-Step Guide to the Tape Test
The tape test, also known as the plastic sheet method, helps determine if moisture is present in a concrete slab. Follow these steps to perform the test accurately.
- Gather materials: clear plastic sheet (about 18×18 inches), duct tape, and a clean cloth.
- Clean the concrete surface thoroughly with the cloth to remove any dust or debris.
- Place the plastic sheet flat on the concrete surface.
- Seal all edges of the plastic sheet tightly with duct tape to prevent air from entering.
- Leave the plastic sheet in place for at least 24 hours.
- After 24 hours, remove the plastic sheet and check for condensation on the underside or a darkened concrete surface.
Common mistake: Failing to seal the plastic sheet properly can lead to inaccurate results. Make sure all edges are securely taped down.
Exploring the Relative Humidity (RH) Test
The Relative Humidity (RH) test is a sophisticated technique used to evaluate the moisture levels within concrete slabs, providing crucial insights for construction and flooring projects. This section delves into the methodology and significance of the RH test, highlighting its advantages over traditional moisture assessment methods.
Advantages of the RH Test
The RH test is known for its accuracy in measuring moisture levels within concrete slabs. Unlike surface tests, it provides a clear picture of the moisture condition at various depths, which is crucial for preventing future flooring issues. This depth measurement ensures that you get a reliable assessment of the slab’s readiness for flooring installation.
Another benefit of the RH test is its ability to detect moisture variations across different slab areas. This helps in identifying specific spots that might need additional attention or treatment. By knowing where the moisture is concentrated, you can make informed decisions about drying methods or moisture barriers.
Using the RH test can save time and money in the long run. By accurately assessing the moisture levels before installing flooring, you reduce the risk of costly repairs or replacements due to moisture-related damages. This proactive approach ensures a longer lifespan for your flooring and peace of mind for you as a homeowner.
Comparing the Tape Test and RH Test
Understanding the differences between the tape test and the RH test is crucial for determining which method best suits your needs. This section provides a detailed comparison of these two assessment techniques, highlighting their unique features and applications.
Addressing High Moisture Readings
High moisture levels in concrete slabs can lead to various structural and aesthetic issues if not addressed promptly. This section offers practical solutions to effectively manage and reduce moisture readings, ensuring the longevity and integrity of your concrete surfaces.
Mitigation Strategies
To tackle high moisture readings, start by applying moisture-tolerant coatings on surfaces prone to dampness. These coatings create a protective layer that prevents moisture from seeping through walls and floors. Choose products specifically designed for the type of surface you’re working with, whether it’s concrete, wood, or drywall.
Consider installing vapor barriers in areas like basements or crawl spaces. These barriers are essential for blocking moisture from the ground and can significantly reduce humidity levels indoors. Make sure the barrier is properly sealed at the seams and edges to ensure maximum effectiveness.
Regularly inspect and maintain your home’s drainage systems. Ensure gutters and downspouts are clear and direct water away from the foundation. If necessary, adjust the grading around your home to promote better water runoff. These steps can help prevent excess moisture from becoming a problem in the first place.
Conclusion and Best Practices
In conclusion, ensuring the integrity and longevity of coatings on concrete slabs requires meticulous moisture testing. By adhering to best practices, you can effectively prevent potential issues and achieve optimal results in your projects.
Ensuring Long-Term Success
To keep your concrete coatings in top shape, consistent testing and monitoring are crucial. Start by regularly inspecting the coated surfaces for signs of wear and tear. Look for cracks, chips, or discoloration that might indicate underlying issues. Addressing these early can prevent bigger problems down the road.
Another key practice is to check base compaction and ensure the substrate remains stable. A well-prepared base supports the coating and helps it last longer. If you notice any settling or movement, it might be time to reinforce the base or apply new coatings.
Finally, keep an eye on environmental factors like moisture and temperature changes. These can affect the coating’s durability. Consider applying sealants or protective layers if you live in areas with extreme weather. By staying proactive, you can ensure your concrete coatings serve you well for years to come.
Conclusion
Ensuring that a concrete slab is adequately assessed for moisture is a crucial step before applying any coatings. The methods discussed, including the Tape Test and the Relative Humidity (RH) Test, offer valuable insights into the moisture content of a slab, each with its own advantages and limitations. By understanding these methods, you can make informed decisions that will help prevent potential damage and ensure the longevity of your flooring or coating investment.
While the Tape Test provides a quick and straightforward approach to moisture detection, the RH Test offers a more comprehensive understanding of the slab’s internal moisture levels. Depending on the project requirements and resources available, choosing the right method or a combination of both can lead to more reliable results. It’s essential to interpret the findings accurately and address any high moisture readings promptly to avoid future complications.
Adopting best practices in moisture testing not only protects your investment but also enhances the performance and durability of your coatings. Regular monitoring and maintenance, combined with proper testing techniques, can significantly mitigate the risks associated with moisture-related issues. By prioritizing these steps, you ensure a successful application and long-lasting results for your concrete surfaces.
FAQ
What is the purpose of checking a slab for moisture before coatings?
Checking a slab for moisture is crucial to ensure that coatings adhere properly and do not fail prematurely. Moisture can cause coatings to bubble, peel, or delaminate, leading to costly repairs.
How does the tape test work for checking slab moisture?
The tape test involves sealing a piece of clear plastic to the slab’s surface with tape and observing it for moisture accumulation. If condensation forms under the plastic, it indicates the presence of moisture in the slab.
What is the RH test, and why is it important?
The Relative Humidity (RH) test measures the moisture content within the slab itself, providing a more comprehensive understanding of the slab’s condition. This test is important because it helps in determining if the slab is dry enough for coatings to be applied successfully.
Can moisture levels affect the longevity of floor coatings?
Yes, high moisture levels can significantly affect the longevity and performance of floor coatings. Excessive moisture can lead to adhesion problems, resulting in coatings that fail to protect the surface effectively.
Are there any tools required for conducting these moisture tests?
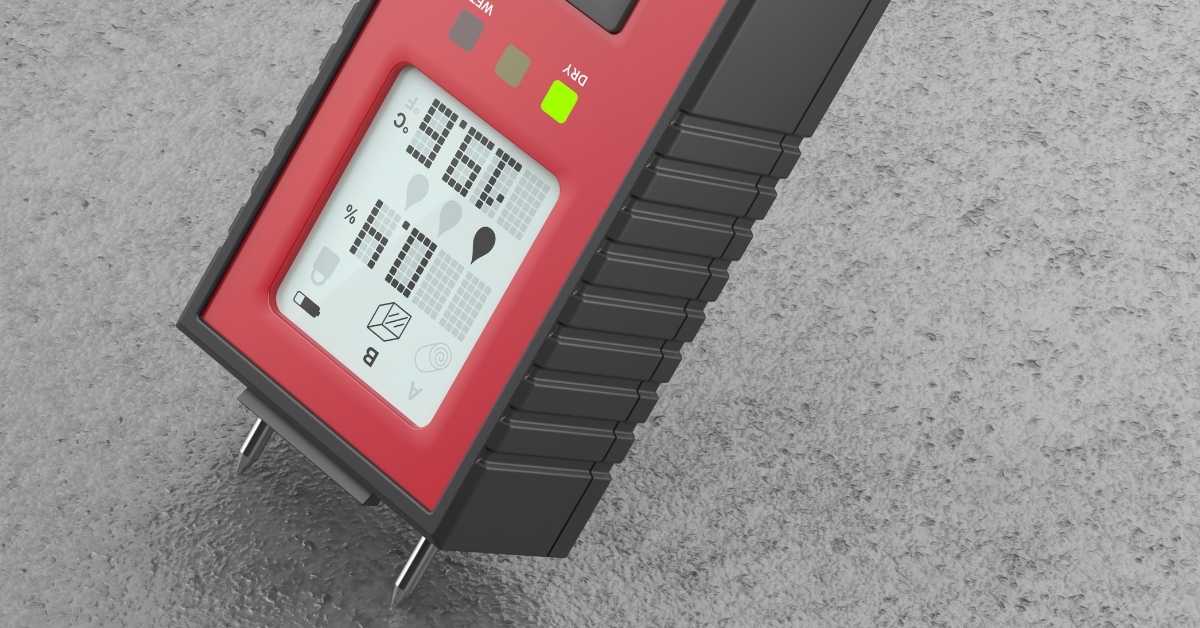
For the tape test, you will need clear plastic and tape. For the RH test, a specialized RH meter is required to accurately measure the moisture content within the slab.