
Introduction
Grinder swirl marks are fine scratches left by abrasive motion, and you avoid them with the right technique. Choose the right grinder and disk for the wood task, keep the surface clean, and maintain steady, even pressure. Work in small, overlapping passes and check your progress often before moving to a finer abrasive.
Use a deliberate tool path that matches the grain and transitions, starting with broad, even strokes. Cross-hatching can help when the surface needs uniform flattening, but only after you’ve leveled the major irregularities. If you’re unsure, check the manufacturer instructions and local rules for safe use and start with the gentlest setting you can safely run.
Key takeaways
- Understand swirl marks form from rapid rotation and uneven pressure on surfaces during grinding.
- Choose grinders and abrasives suitable for surface type and desired finish.
- Maintain tool alignment and steady feed rate to reduce swirl marks.
- Use cross-hatching in a consistent star or grid pattern to even out sheen.
- Safety: wear eye/face shield, dust mask, and ensure power is off before adjustments.
Table of Contents
- Introduction
- Key takeaways
- What Grinder Swirl Marks Are and Why They Form
- Types of Grinders and Abrasives and Their Effects on Surfaces
- Tool Setup and Maintenance to Prevent Imperfections
- When to Use Cross-Hatching and How to Apply It Properly
- Alternatives and Outcomes: Texture Vs Mirror-Smooth Finishes
- Common Mistakes, Diagnosis, and Repair Strategies
- Safety, Cost Trade-Offs, and Sustainability Practices
- Conclusion
- FAQ
What Grinder Swirl Marks Are and Why They Form
Swirl marks show up as circular, crosshatched, or wispy patterns across the concrete finish. They’re easiest to notice under direct light or at sharp viewing angles. Different finishes like broomed, troweled, tined, or stamped surfaces will reveal swirls in distinct ways.
Root causes involve how the tool contacts the surface, the abrasive’s behavior, and how the concrete responds. Consider the geometry of contact, the grit and hardness of the abrasive, and whether the paste, aggregate exposure, or surface moisture makes swirls more visible. Acceptable swirls may blend with the finish, while stubborn patterns can signal a quality problem that needs correction.
Visual indicators to recognize swirl marks
Swirl marks on concrete are visible patterns that can ruin an otherwise smooth finish. They appear as circular, cross-hatch-like, or irregular wisps across the surface.
On broomed finishes, they look like wavy lines disrupting the consistent texture. On troweled surfaces, they show up as tiny circles or ovals. Tined and stamped patterns may have swirls that interrupt the design’s flow.
To identify them, feel the surface with your hands to detect any ridges or valleys. Then, inspect closely using a flashlight at different angles to highlight the marks. Mark down findings for future reference.
Primary root causes (tool, technique, material)
Swirls form due to a combination of tool, technique, and material factors. Understanding these helps prevent them.
- Worn abrasives: Dull grits can’t cut evenly, leaving behind swirls. Solution: Regularly check and replace discs as needed ($15-$30 each).
- Improper contact angle: A wrong angle between the tool and surface causes uneven grinding. Tip: Keep your grinder perpendicular to the slab.
- Inconsistent feed: Varying pressure or speed leaves visible marks. Advice: Maintain steady pressure and pace.
- Substrate properties: Exposed aggregates, dry spots, or soft cement paste can cause swirls. Warning: Prep your surface well before grinding.
- Tool design (roller vs. flat pad): Each has its own swirl tendencies. Consider: Roller pads may leave circular patterns; flat pads, cross-hatch-like marks.
Types of Grinders and Abrasives and Their Effects on Surfaces
Compare the main grinder types and what they typically do to concrete. Each tool class tends to pair with particular finishing goals and swirl risks. Pay attention to how the machine’s motion (rotation, oscillation, or vibration) affects the surface.
Look at abrasive formats, bonds, and grits to estimate heat buildup, clogging, and potential tearing. Concrete hardness, any additives, and coatings will steer how quickly wear patterns form and how smooth the result can be. Use practical pairings that minimize marks, and be ready to switch methods as the job dictates.
Tool types: angle, die, rotary, and manual options
The type of grinder you use significantly impacts the surface finish. Here are your main options:
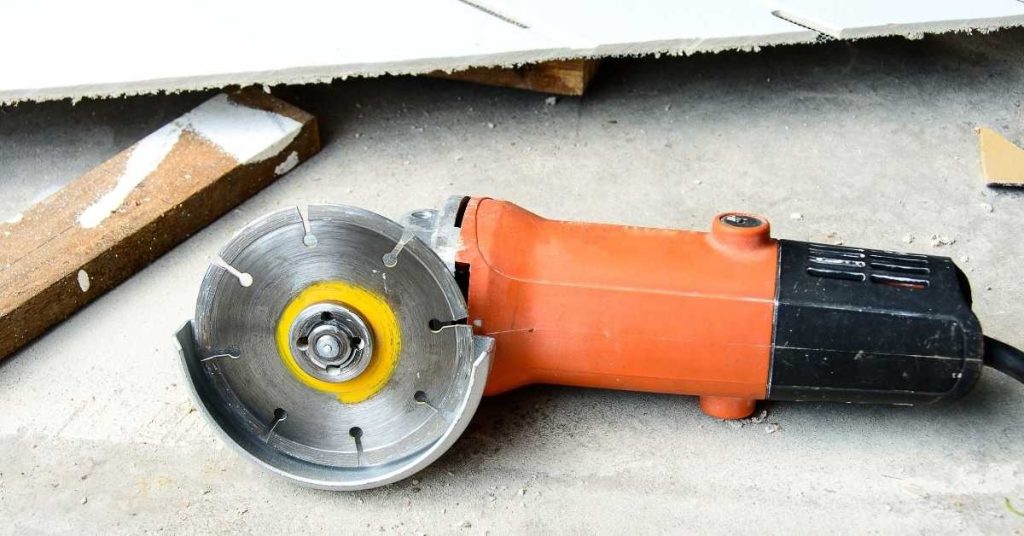
- Angle Grinders: Versatile, affordable. Use for general-purpose grinding, cutting, and light polishing. Adjustable guard for safety. Rentable from 4″ to 9″.
- Die Grinders: Small, precise. Ideal for detailed work, engraving, and small surface areas. High RPM, low torque. Inexpensive.
- Rotary Tools (e.g., Dremel): Multi-purpose, compact. Great for light sanding, carving, and polishing small surfaces. Variable speed, comes with various attachments. Around $30-$50.
- Floor Grinders: Heavy-duty, large surface area. Designed for concrete floor prep, leveling, and polishing. Requires water cooling, heavy and expensive to rent or buy.
- Masonry/Stone Grinders: Specialty tool, aggressive. For tough surfaces like concrete, stone, or thick coatings. High torque, variable speed. Pricey to rent or buy.
Abrasive choices and progression strategy
The abrasive you choose affects swirl risk. Start coarse, progress fine:
Coarse (24-60 grit): Removes material fast but leaves deep scratches. Use for heavy prep work.
Medium (80-150 grit): Smooths out surfaces, reduces swirl risk. Good for leveling and initial polishing.
Fine (220+ grit): Refines the surface, minimizes swirl marks. Use for final polishing.
Choose between discs, pads, diamonds, or wire/brush attachments based on your tool and task. Bond type, grit, and backing affect heat, clogging, and swirl risk. Start with a coarse disc or pad, then progress to finer ones for best results.
Tool Setup and Maintenance to Prevent Imperfections
Start with solid prerequisites that curb vibration and runout. Check motor mounting, belt tension, pulley alignment, and spindle straightness with simple, repeatable tests. Quick checks help catch misalignment before grinding begins.
Keep wear items and consumables in good shape. Inspect blades, wheels, brushes, seals, and dust filters, replacing them when performance drops. Document alignment and calibration steps like work rest height and test cuts to confirm uniform contact and minimal swirl potential.
Wheel/bit mounting, balance, and collet condition
A secure wheel or bit mount is crucial to minimize runout, which causes swirl marks. Here’s how to check:
Wobble: Spin the tool at full speed. If it wobbles, tighten the mounting hardware.
Looseness: Gently pull and push on the wheel or bit while it’s spinning. No play means it’s secure.
Check the collet condition too. A worn one can cause runout. Replace if you see grooves or excessive wear.
Dressing, replacing, and storing abrasives
Regular dressing or renewing of abrasives keeps them sharp and reduces swirl marks. Here’s how:
Dressing: Use a dresser tool to remove clogged grains and restore sharp edges. Do this every few cuts.
Replacing: When the abrasive surface is smooth or worn, replace it. Don’t wait for it to glaze over.
Store abrasives in a cool, dry place away from moisture and extreme temperatures to prolong their life.
When to Use Cross-Hatching and How to Apply It Properly
Cross-hatching is a deliberate patterning method to blend or conceal swirl marks on different finishes. It can help with minor texture differences and sheen variations when applied thoughtfully. Misuse, however, can highlight deeper gouges or uneven density.
Use simple, repeatable patterns like 45-degree X or 90-degree grids, and follow a logical sequence to avoid creating new ridges. Control tool-path, start points, pace, and overlap to balance coverage without overdoing it.
Cross-hatch patterns and spacing principles
Cross-hatching is a crucial step before final finishing. It helps blend the concrete surface, hide imperfections, and create a smooth, even look.
Direction matters. Cross-hatch in two directions – perpendicular to each other. This creates an ‘X’ or ‘+’ pattern. Start with one direction, then switch for the second pass.
Spacing is key. Aim for about 1/8″ to 3/16″ between lines. Too close and you’ll see the lines in your final finish. Too far apart and it won’t blend well. Check your broom’s spacing before starting.
Timing: introduce cross-hatch vs final finishing
Cross-hatching is a technique used to improve the surface texture of concrete. It’s not something you do at the end, but rather during the curing process.
When to start? The best time to introduce cross-hatching is when the concrete has started to set, usually after initial bleeding and before final setting. This is typically around 4-8 hours after pouring, depending on weather conditions and mix design.
Cross-hatching too early can cause defects, while doing it too late might not give you the desired texture. So, check your concrete’s stage of cure before you start cross-hatching.
Alternatives and Outcomes: Texture Vs Mirror-Smooth Finishes
Define goals for texture versus mirror-smooth looks in terms of durability, slip resistance, maintenance, and aesthetics. Texture can hide minor swirl marks, while smooth finishes offer easier cleaning and a high reflectivity. The choice sets the baseline for how you’ll approach finishing passes.
Plan to intentionally create consistent textures that either conceal or embrace swirls. Use stencil patterns, controlled brooming, or deliberate cross-hatching to guide the final appearance. Align tool paths and timing with the chosen texture strategy for predictable results.
Benefits of controlled texture and when it helps
A planned texture can be your best friend in hiding minor marks. It adds visual interest and functional grip, making surfaces more inviting and safer.
Textured finishes are great for high-traffic areas like garages or walkways. They hide scuffs and scratches better than smooth ones. Plus, they provide extra slip resistance, reducing the risk of accidents.
Think about it: A textured floor in your garage won’t show every little scrape from moving furniture or parking your car. It’s a practical choice for busy spaces.
Steps to achieve a mirror-smooth finish
This sequence helps eliminate visible swirl marks, giving you that high-gloss sheen. It’s perfect for spaces where a sleek look is important, like showrooms or indoor patios.
- Start with a well-prepared surface. Clean and prime it to ensure good adhesion.
- Apply your concrete overlay or skim coat. Use a trowel with a straight edge for smooth application.
- Float the surface using a magnesium or aluminum float. This helps even out any minor imperfections.
- Let it dry slightly, then use a steel trowel to burnish the surface. This gives you that glossy sheen.
- Seal with an appropriate sealer. This protects your finish and enhances its reflective qualities.
Common Mistakes, Diagnosis, and Repair Strategies
List common operator errors that cause swirl marks, with quick remediation notes for each. Examples include wrong tool speed, inconsistent feed rate, uneven contact pressure, worn segments, or inadequate lubrication. Note how each error visually appears and how to fix it on the spot.
Forecast a diagnosis workflow by pattern analysis. Map orientation, depth changes, and location to likely causes like misalignment or pad density. Use simple checks to validate hypotheses and guide corrective actions without over-removing geometry.
Diagnosing the mark to find the cause
The first step in fixing swirl marks is understanding what caused them. The direction and spacing of the marks can tell you a lot about the issue at hand.
Circular or elliptical marks, evenly spaced, often point to a wobbling grinder wheel. Check the wheel’s balance and ensure it’s properly mounted.
If marks are irregular in shape and spacing, it might be due to an inconsistent grinding stroke. This could be caused by improper feed rate, inconsistent contact pressure, or even a poorly prepared surface. Inspect your technique and prep work.
Repair approaches without over-removing material
When repairing swirl marks, it’s crucial to choose the right approach to avoid over-removing material and compromising the concrete’s geometry.
- Blending: Use a lower grit diamond pad (e.g., 50 or 100) with a light touch. Work in small, overlapping circles to blend marks into the surrounding surface without removing too much material.
- Targeted Sanding: For deep marks, use a soft sanding block with fine-grit sandpaper (e.g., 220 or 320) to lightly sand away marks. Be careful not to sand through the surface.
- Polishing: After blending or sanding, use a polishing pad with a suitable compound to restore the surface’s gloss and remove any remaining swirls.
- Avoid: Do not use aggressive grits (e.g., 30 or 40) as they can exacerbate marks and remove too much material.
- Patch Only if Necessary: If geometry is compromised, consider patching. Use a high-quality repair mortar that matches the existing concrete’s strength and appearance. Ensure proper curing to avoid weak bonds.
Safety, Cost Trade-Offs, and Sustainability Practices
Cover essential PPE and safe habits to keep the crew protected during grinding. Include work area setup, lockout practices, cord management, and fire precautions. Be ready to reference quick-reference safety checklists as needed.
Discuss tool choices and long-term costs in relation to finish quality and maintenance. Consider dust control, abrasive disposal, and waste reduction as part of the workflow. Share practical sustainable practices without compromising safety or performance.
Safety Precautions and Dust Control
Grinding concrete is a tough job, but it’s safe if you follow these simple rules. First off, gear up right: eye/face protection, respirator or PAPR, hearing protection, gloves, and hard hat if needed.
Set up a booth or work area with good ventilation. Keep electrical cords tidy to prevent tripping hazards. Remember, grinding can create sparks – keep flammable materials away. Before you start, do a lockout/tagout on the power supply.
Now, let’s talk dust. It’s nasty stuff, bad for your lungs and finish. Use water spray or local exhaust ventilation to keep it under control. If you’re using an enclosed booth, make sure it meets filtration standards. Keep your workspace clean – sweep up after each pass.
Cost vs Quality and Eco-Friendly Choices
Investing in a good grinder and quality abrasives might seem pricey, but it’ll save you rework in the long run. A powerful motor and sharp blades mean less time spent on each pass, reducing downtime and wear.
Don’t forget about dust-capture systems. They’re not cheap, but they protect your health and keep your workspace clean. Plus, they can pay for themselves by reducing material waste.
Now, let’s talk eco-friendly choices. Reusable or recyclable abrasives are a great start. Some manufacturers offer recycling programs – look into it. Also, grinding offcuts into smaller pieces for reuse can cut down on waste.
And remember, energy-efficient habits matter too. Keep your grinder in good shape to reduce power consumption. It’s not just about the finish; it’s about leaving a lighter footprint.
Conclusion
Sticking to the right technique and tool setup keeps you from rough swirl marks, saves time, and protects the surface from permanent damage. When you stop and verify before you proceed, you cut the risk of costly mistakes and messy repairs.
Move forward with a simple check-and-do routine: inspect the grinding surface for heat or bluish discoloration, confirm the correct abrasive type and grit for the job, set and secure the grinder with a balanced hook-up, clean and lubricate as needed, test on a scrap area or inconspicuous edge, then follow a consistent pass pattern while watching heat buildup and keeping the tool perpendicular to the surface; if you’re cross-hatching, do so in a deliberate, even pattern and wipe away dust as you go, finishing with a test clean in a hidden spot before you commit to the whole piece.
Common mistakes to avoid include rushing; using the wrong grit or an over-tight tool; and ignoring heat signals or vibration. Safety rules to live by are simple: always PPE up, keep hands clear of the blade edge, steady the workpiece, test on a small area first, and unplug before adjusting or pausing. If the job involves delicate materials, edges, or large areas, or you see persistent chatter or discoloration that you cannot correct, it is wise to call a professional instead of forcing a fix. Stay steady, stay safe, and you’ll finish with a durable, even surface that looks right and lasts.
FAQ
What grinders are used for woodworking and how do I choose one?
Common wood users are random orbital sanders and palm/finish sanders for fine work, or a small angle grinder with wood-specific discs for quick material removal. Check the abrasive label to confirm it’s suitable for wood and follow the manufacturer’s instructions. Key choice factors are your project type, surface finish goal, and how easy the tool is to control in tight spaces.
What techniques help avoid swirl marks?
Keep steady pressure and smooth, continuous motions. Don’t dwell on one spot or stop and start in the same place repeatedly. Light, progressive passes with consistent speed work best for a uniform finish.
What is the proper tool path during grinding?
Plan overlapping passes and move in a controlled, even pattern. Start with a coarser pass to flatten highs, then switch to finer grits as you approach the desired finish. If you can, vary the direction of passes slightly to blend scratches and reduce visible patterns.
What are the benefits of cross-hatching in grinding?
Cross-hatching helps break up a single scratch pattern and promotes a more uniform surface. It can reduce the visibility of swirl marks and improve planed or sanded texture when transitioning to finer grits. Always ensure each direction is clean and complete before moving to the next stage.
How do I choose abrasives and decide between sanding block vs hand sanding?
Match the grit to the job: start with a coarser grit for shaping, then progress to finer grits for finish. A sanding block gives flat, even pressure and helps prevent gouges, while hand sanding with a steady motion is fine for tight areas. Always follow manufacturer guidelines on grit progression and use fresh abrasives that aren’t glazed or torn. Check labels or datasheets for wood suitability and care tips.