
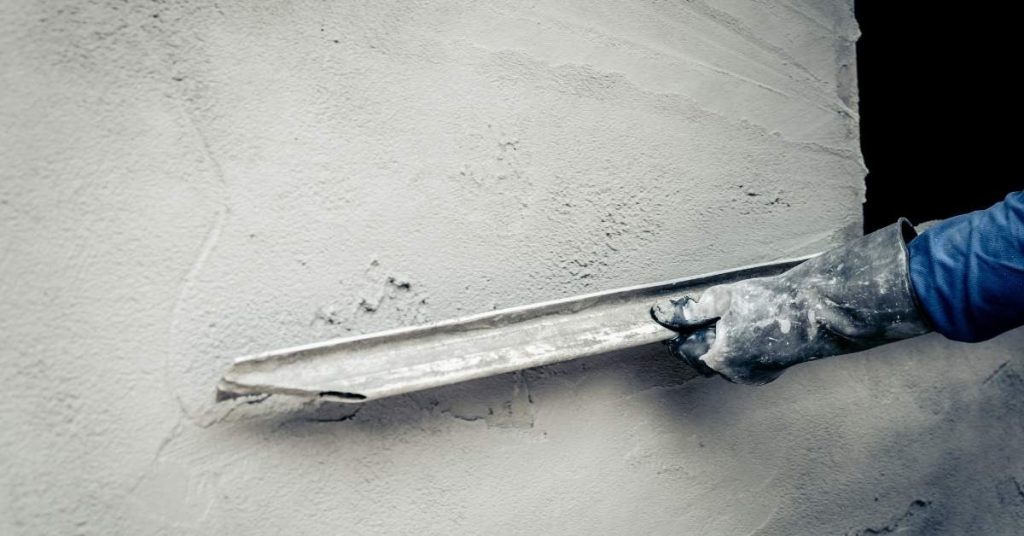
Introduction
Hollow-sounding plaster walls hide voids behind the plaster, so tapping sounds hollow. This usually means the lath or backing has failed or separated from the surface. Understanding this helps you map where stabilization work is needed.
To map the problem, tap in several spots and note where the sound is the weakest. Look for patterns like loose patches, sagging corners, or cracks that repeat in a row. For stabilization, plan careful, targeted repairs and follow the product instructions and local rules when choosing materials.
Key takeaways
- Confirm plaster hollowness with tap maps, note patterns, and measure stability risks.
- Document tools, safety gear, PPE, and environmental checks before diagnostic work.
- Identify common failure patterns to target stabilization without unnecessary demo.
- Prefer non-destructive stabilization first; escalate to invasive methods only when needed.
- Maintain detailed tap mapping records and photos for trend analysis and repairs.
- If in doubt, call a professional; budget-conscious options vary by scope.
Table of Contents
- Introduction
- Key takeaways
- Overview: Why Hollow-Sounding Plaster Matters and Assessment Goals
- Tools, Materials, and Safety Checklist
- Tap Mapping: Method, Patterns, and Record-Keeping
- Common Failure Patterns and Root Causes
- Targeted Stabilization Techniques (Non-Destructive to Invasive)
- Step-by-Step DIY Stabilization Workflow
- Visual Checkpoints, Testing, and Post-Repair Validation
- When to Call a Professional, Costs, and Conservation Considerations
- Conclusion
- FAQ
Overview: Why Hollow-Sounding Plaster Matters and Assessment Goals
A hollow sound usually means there is a separation inside the plaster or lath, or that the substrate has deteriorated. This condition can affect finishes, trim, and the wall’s overall integrity. Occupant hazards aren’t always immediate, but revisits and repairs are more likely if the issue is ignored.
The goals of tap mapping and targeted stabilization are to locate the extent of the voids, identify contributing problems, and plan fixes that preserve structure while minimizing damage to surrounding work. You’ll map the hollows room by room and set priorities for intervention based on risk and accessibility.
Structural vs Cosmetic Concerns
A hollow sound when tapping plaster walls isn’t always a cause for alarm. It’s crucial to understand when it’s mainly an aesthetic issue and when it signals structural or safety problems.
Cosmetic: Hollow sounds with no visible cracks, bulges, or other signs of damage are usually just cosmetic. These areas might need touch-up painting or minor repairs but aren’t likely to cause further issues.
Structural: If you notice hollow spots accompanied by visible damage like cracks, bulging, or crumbling plaster, it could indicate structural problems. This might be due to water damage, settling issues, or even termite activity. These areas need immediate attention as they can lead to further deterioration and safety hazards.
Scope and Priority Setting
Not all hollow plaster walls require immediate repair. To set the scope and priority of your repairs, consider the use, location, and risk associated with each area.
Use: Areas that see heavy traffic or are prone to moisture (like bathrooms) should be prioritized over less used spaces like attics or basements.
Location: Plaster walls in load-bearing structures or supporting upper floors should be addressed before non-load-bearing walls. Similarly, walls shared with neighboring properties might need earlier attention due to potential impact on adjacent buildings.
Risk: Areas with visible damage, active cracks, or signs of water intrusion pose a higher risk and should be prioritized over stable-looking hollow spots. Always address any safety hazards first before moving on to cosmetic repairs.
Tools, Materials, and Safety Checklist
Gather common hand tools, a measuring device, a push or tapping tool, and a level of patience for careful assessment. Have a flashlight and a mirror to inspect tight corners and edges. A notepad or sticker system helps you track findings without losing details.
Wear eye protection, a dust mask, and basic gloves. If you encounter moisture, mold, or suspect lead paint, pause and follow local safety guidelines. For any specialized equipment or procedures, verify requirements on product labels, manufacturer instructions, or local codes before use.
Tap-mapping and diagnostic tools
Before you start, gather these tools to map hollow spots and diagnose issues.
- Tapping tool: A simple tap hammer or even a coin on a key will do. Tap walls gently to listen for hollowness.
- Acoustic aid (optional): Cup your ear to amplify sounds, or use a stethoscope for better accuracy.
- Digital recorder: Record tapping sounds to compare and analyze later.
- Tapping map: Sketch the wall layout and mark hollow spots as you find them. This helps plan repairs.
- Moisture meter (optional): Check for moisture, which can cause plaster problems.
- Thermometer (optional): Identify cold bridges that may contribute to issues.
- Infrared camera (professional): Detects heat loss and helps pinpoint problem areas.
- Endoscope (professional): Inspect hidden spaces without damaging walls.
Quick rule: Always map hollow spots before starting repairs to target the right areas.
Stabilization materials and compatibility
Gather these materials, but first check they’re compatible with your substrate.
- Adhesives: Choose between PVA, vinyl acrylic, or latex for plaster. Check manufacturer guidelines for each.
- Injectables: Polyurethane foam or epoxy resins can fill voids. Ensure they’re compatible with your substrate and moisture levels.
- Pins and screws: Use drywall pins, toggle bolts, or plasterboard screws. Check they match your wall type.
- Plaster repair products: Ready-mix plasters, joint compounds, or spray-on solutions can fill gaps. Ensure they’re suitable for your substrate and finish.
- Mesh tape: For larger repairs, use fiberglass mesh tape compatible with your chosen plaster product.
- Sandpaper: Fine-grit sandpaper to smooth surfaces before painting or finishing.
- Primer: A suitable primer seals the surface and prepares it for paint.
- Paint: Choose a paint that matches your wall finish and is compatible with any repairs made.
Quick rule: Always check material compatibility to avoid further damage or poor results.
PPE and containment
Safety first! Use these tools and practices to protect yourself and contain mess.
- Dust mask: Protect your lungs from plaster dust. Use a respirator for heavy work.
- Goggles: Shield your eyes from debris and dust.
- Gloves: Protect your hands from cuts, scrapes, and chemicals.
- Ear protection (optional): Wear earplugs or earmuffs for loud tools like sanders.
- Drop cloths: Cover floors to contain mess and protect surfaces.
- Tape: Use painter’s tape to secure drop cloths and protect trim.
- Ladder (professional): For high walls, use a stable ladder with safety features.
- Fall prevention (professional): If working at height, use harnesses or other fall arrest systems.
- Stop work if: You suspect asbestos, find extensive damage, or encounter electrical hazards. Consult a professional immediately.
Quick rule: Never compromise safety. If in doubt, stop and consult a pro.
Tap Mapping: Method, Patterns, and Record-Keeping
Develop a repeatable tapping routine, moving from one wall to the next in a logical sequence. Listen for changes in tone as you gently test each panel, seam, and corner. Use a simple map or notes to mark hollow zones as you go.
Document patterns such as straight lines along seams, around openings, or at joints. Record room names, approximate locations, and a short description of each finding. Keep your records clear so you can compare future checks and plan stabilization steps.
Systematic Tapping Procedure
Start at one corner of the room. Tap lightly with your knuckle, not a tool.
Work methodically across the wall in rows, top to bottom. Keep taps even and consistent.
Mark each tap with a small piece of tape or chalk as you go. This helps avoid missed areas.
Consistency is key for accurate results.
Interpreting Sounds and Visual Clues
A dull thud usually means solid plaster. A hollow sound indicates a void behind the wall.
Dull to hollow transition often signals delamination, where plaster has pulled away from the lath or substrate.
Look for cracks, bulges, or other visual signs supporting your acoustic findings. Cracks can indicate structural issues.
Remember, hollow doesn’t always mean bad. Some walls are designed this way. But it’s important to know what you’re dealing with.
Making a Tap Map and Prioritizing Repairs
After mapping, create a simple sketch of the room. Mark hollow areas with an ‘X’ or color code.
Prioritize repairs based on severity and urgency. Structural issues first, then cosmetic ones. Use your tap map to guide you.
For each ‘X’, note any visible damage, like cracks or bulges. This helps plan repairs.
Keep your map simple and clear. It’s a quick reference for your repair plan.
Common Failure Patterns and Root Causes
Look for hollow zones at seams, along plaster margins, and near edges where movement or poor lath support occurs. Repeated vibration, poor attachment, or moisture can progressively loosen plaster backing. Edge failures often signal differential movement or substrate rot.
Moisture-related damage frequently accompanies hollow sounds, especially near plumbing lines or exterior walls. Lath or fixer failure shows up as widespread waviness or multiple hollow pockets. Understanding patterns helps you target the underlying mechanism rather than just the symptom.
Edge separation and joint failures
Plaster often detaches at joints and thresholds due to settlement, vibration, or improper installation. These areas are weak points where the plaster’s bond with the substrate is easily broken.
In a tap map, you’ll hear distinct echoes along these lines, indicating hollowness behind the plaster. Edges around windows, doors, and corners are particularly vulnerable.
Look for: Cracks at joints, visible gaps, or crumbling plaster at edges. Tap mapping will confirm if these areas are hollow.
Fastener and lath degradation
Corroded nails, decaying wood lath, or failed adhesive can cause localized hollowness. Over time, this damage spreads as the plaster loses support.
Tap mapping reveals patchy hollowness, often following the pattern of original nail lines or lath strips. You might hear a mix of solid and hollow sounds in these areas.
Inspect for: Rust stains (corroded nails), visible wood decay, or crumbling adhesive. These signs point to failing fasteners or lath.
Moisture, salts, and biological causes
Leaks, salt deposits, or mold growth can weaken plaster bonds, leading to patchy hollowness. Moisture promotes salt crystallization and mold growth, which further damage the substrate.
Tap maps show irregular patterns of hollowness, often following water intrusion paths. You might hear a mix of solid, hollow, and muffled sounds due to varying degrees of damage.
Check for: Water stains, efflorescence (salt deposits), or visible mold growth. These signs indicate moisture-related damage that could be causing hollowness.

Targeted Stabilization Techniques (Non-Destructive to Invasive)
Start with non-invasive options such as adhesive placement or pinning where feasible, prioritizing minimal disturbance. Assess whether partial removal is needed to access a concentrated void, then plan to control dust and maintain finishes. Choose a method based on access, load, and compatibility with existing plaster.
For more invasive needs, consider staged removal that exposes the affected area while protecting adjacent work. Use stabilization methods that can be re