
Introduction
A hand edger radius guide helps you pick edge profiles around 1/8″, 1/4″, or 3/8″ to shape exposed concrete edges. The choice affects durability and how clean or decorative the edge will look. Always check the product label, manufacturer instructions, and local rules to confirm what radius is allowed for your project.
To use them, match the radius to your edge goal and work with steady, gradual passes along the edge. Evaluate the resulting look and durability as you go, and adjust if the edge feels too sharp or too rounded. If in doubt, verify with the project requirements or consult the supplier for safe guidance.
Key takeaways
- 1/8″, 1/4″, and 3/8″ edge radii affect finish look and durability.
- Choose radius based on project type and location to balance aesthetics.
- Hand edger technique varies; follow consistent pressure and curved motion for clean edges.
- Inspect edges with visual checkpoints and address chips or ragged transitions promptly.
- Safety note: wear eye protection and dust mask; maintain neutral wrist posture.
- Plan time and cost tradeoffs by radius, aligning with site constraints.
Table of Contents
- Introduction
- Key takeaways
- Quick Comparison of 1/8″, 1/4″, and 3/8″ Edge Radii
- How Edge Radius Changes Concrete Performance
- Choosing the Right Radius by Project Type and Location
- Tools and Materials Checklist for Clean Edged Finishes
- Step-by-Step Technique: Using a Hand Edger for Each Radius
- Visual Checkpoints and Troubleshooting Common Edge Problems
- Safety, Ergonomics, and Site Prep Considerations
- Cost, Time, and Planning Tradeoffs by Radius
- Conclusion
- FAQ
Quick Comparison of 1/8″, 1/4″, and 3/8″ Edge Radii
This quick-reference walks through the three radii and how they look in real life. You’ll notice size cues at the edge and how they translate to surface feel and light reflection. Use this as a deciding point before you set up your forms and hand edgers.
Think about where each radius shines: load-bearing edges, joints, counters, or decorative rims. The look versus durability tradeoffs show up in edge sharpness, sandability, and sealant or grout performance. Keep compatibility in mind—different tools and prep steps pair with different radii, depending on your concrete hardness and mix design.
Dimensional specifications and typical use cases
The three common radii are:
1/8″ (3.2mm): Small, subtle edge. Think sidewalks, driveways, and patios.
1/4″ (6.4mm): Medium-sized edge. Popular for patios, pool decks, and curbs.
3/8″ (9.5mm): Large, prominent edge. Used in heavy-duty applications like industrial floors, loading docks, and thick countertops.
Durability vs aesthetics at a glance
The 1/8″ edge is sharp, modern-looking but prone to chipping. It’s great for contemporary designs but needs careful maintenance.
The 1/4″ edge offers a good balance between durability and aesthetics. It’s versatile, resisting chips well while maintaining a clean look.
The 3/8″ edge is robust, built to last with minimal wear. However, it may appear too chunky for some designs, sacrificing some curb appeal for extra toughness.
How Edge Radius Changes Concrete Performance
Radius affects how stress is distributed along the edge. Smaller radii can act as stress concentrators, while larger radii spread loads more evenly. This matters for long runs and high-traffic areas.
Edge radius also links to impact resistance and abrasion life. Think about typical loads from foot traffic or equipment contact and how a radius helps or hurts. Water movement and porosity interact with the edge, and larger radii can slow localized moisture penetration that speeds deterioration.
Crack resistance and stress concentration
Edge radius plays a big role in how concrete handles stress. Here’s why:
Smaller radii, like 1/8″, act as stress concentrators. They focus pressure on tiny points, making cracks more likely.
Think of it like a sharp corner on a glass – it breaks easier than a rounded one. Same goes for concrete edges.
Larger radii, such as 1/4″ or 3/8″, distribute loads evenly, reducing stress concentration. This makes them more resistant to cracking and spalling.
Wear, abrasion, and maintenance implications
Edge radius affects how your concrete wears over time. Here’s what to expect:
Smaller radii, like 1/8″, show wear faster due to stress concentration. They’re more prone to chipping and spalling under heavy traffic or equipment drops.
These edges need more frequent maintenance, like touch-ups with a hand edger, to keep them looking good.
Larger radii, like 1/4″ or 3/8″, wear slower and more evenly. They’re better at handling heavy traffic and equipment impacts.
They require less frequent maintenance, but still need occasional touch-ups to keep their appearance.
Choosing the Right Radius by Project Type and Location
Map radius choices to project type such as indoor floors, outdoor patios, and driveways. Use quick rules of thumb to balance durability and aesthetics, based on use and exposure.
Look at the local environment and substrate as you pick a radius. Freeze/thaw, moisture exposure, and UV wear influence edge performance and crack control. Start with your location and move to the concrete mix design and movement considerations.
Residential, Commercial, and High-Traffic Recommendations
For residential patios and driveways, a 1/4″ or 3/8″ edge radius is usually best. These offer good durability against foot traffic and occasional vehicle wear.
Outdoor concrete curbs typically need a 3/8″ edge radius. It’s tougher and can handle more abuse from vehicles, lawnmowers, and snowplows.
For commercial storefronts and industrial floors with heavy foot traffic, consider a 1/4″ or 3/8″ edge radius. They’re durable enough for high-traffic areas but still give a refined look.
Decorative vs Structural Priorities and Compromises
A 1/8″ edge radius gives that sleek, modern look but can be more prone to chipping. It’s ideal for indoor flooring where traffic is light.
If you’re after a decorative look in high-traffic areas, consider compromising with a 1/4″ or 3/8″ edge radius. They offer better durability while still giving a refined appearance.
For structural longevity, prioritize a 3/8″ edge radius, especially in harsh environments. It’s tougher and can handle more wear and tear.
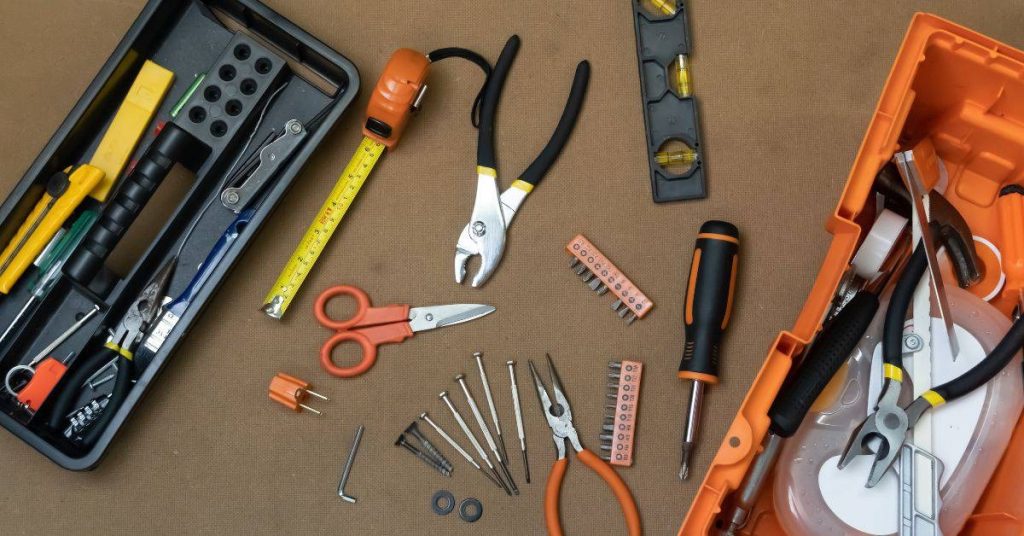
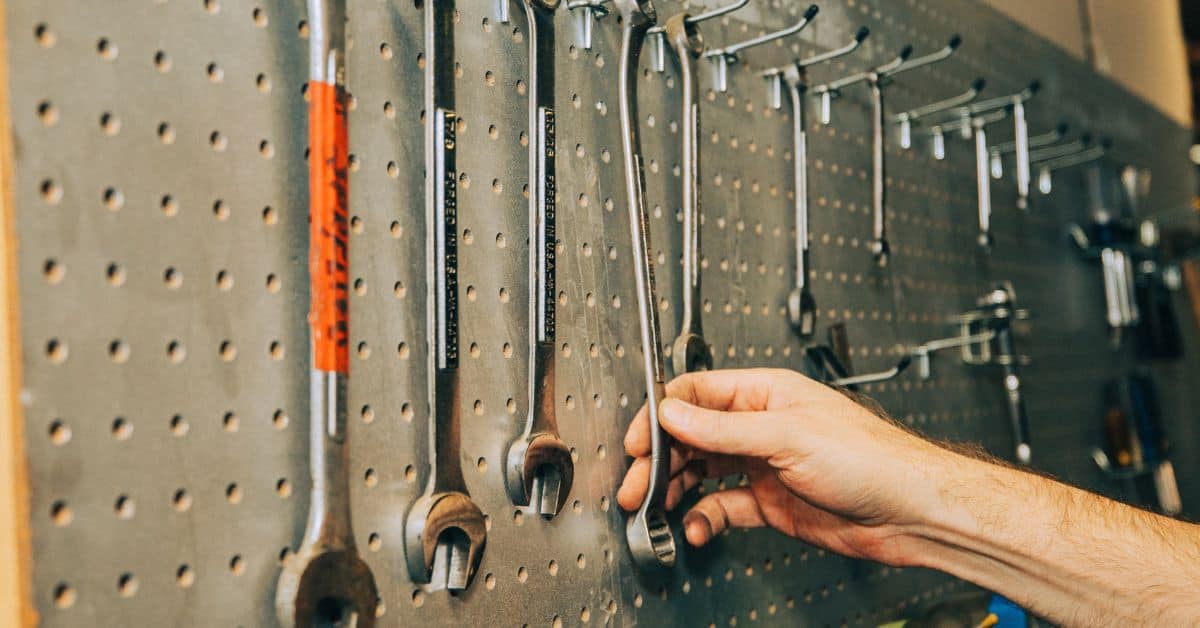
Tools and Materials Checklist for Clean Edged Finishes
Identify hand edgers by radius and note how each option affects edge durability and slip resistance. Expect different handling and results from 1/8″, 1/4″, and 3/8″ edges.
Also list core hand tools like straight and round corner tools, finishing trowels, and sanding blocks. Include guides, calipers, and a few accessories to keep radii consistent, plus optional power tools and safety checks for larger jobs.
Hand edgers, floats, straightedges and finishing aids
Use this checklist before starting to finish your concrete surfaces. It ensures you have the right tools for a clean, professional look.
- Steel Hand Edger: Check it’s in good condition with no bent or broken tines. A damaged edger can leave rough edges and cause rework.
- Magnesium Hand Edger: Ensure it’s the right size for your job (usually 4′ to 6′). Too small, and you’ll spend too much time edging; too large, and it’s unwieldy.
- Adjustable Hand Edger: Confirm it can adjust to your desired edge profile. Check all moving parts for proper function to avoid jamming on-site.
- Float (Magnesium or Wood): Inspect for any warping or cracks. A damaged float can leave swirl marks and a rough surface.
- Straightedge: Check it’s long enough to span your largest pour area. Too short, and you won’t get a straight edge; too long, and it’s unwieldy.
- Finishing Broom (Stiff or Soft): Ensure bristles are intact and not splayed. A damaged broom can leave marks and require rework.
- Egg Beater (for decorative finishes): Confirm it’s the right size for your desired pattern. Check all moving parts for proper function to avoid jamming.
- Finishing Trowel (Square or Round): Inspect for any nicks or dull edges. A damaged trowel can leave marks and require rework.
Quick rule: Always check your tools before starting work. Damaged or wrong-sized tools are a common cause of rework and poor finishes.
Material specs and finishing compounds explained
Before you start your concrete edging job, use this checklist to ensure you have the right materials and understand their role in achieving clean edges.
- Concrete Mix Design: Check the mix design for appropriate water-cement ratio (0.45-0.6) and aggregate size (3/8″ or smaller). Too much water or large aggregates can lead to weak edges that crumble.
- Surface Conditioner: Ensure you have a surface conditioner suitable for your form release agent. Check the label for compatibility; using the wrong one can cause adhesion issues and affect edge quality.
- Sealer: Choose a sealer that’s compatible with your concrete mix and provides the desired finish (gloss, semi-gloss, or matte). Check manufacturer instructions to ensure proper application and curing times.
- Edge Form Release Agent: Verify you have a suitable release agent for your form type (wood, steel, etc.). Using the wrong one can cause adhesion to forms, leading to damaged edges.
- Concrete Edging Tool: Ensure your edger is in good condition and the right size for your job. A dull or incorrect tool can result in rough, uneven edges.
- Float Size: Check you have a float large enough to cover the area efficiently (usually 4′ x 8′). An undersized float can leave visible marks on the surface and edges.
- Straightedge Length: Ensure your straightedge is long enough for your job. A short straightedge can result in wavy, uneven edges.
- Finishing Aid (if using): Check you have the correct finishing aid (e.g., concrete hardener, accelerator) and follow manufacturer instructions to avoid surface discoloration or weak spots at the edges.
Quick rule: Always check product labels and manufacturer instructions before starting any task. Using incompatible products or incorrect application methods can lead to expensive rework and poor edge quality.
Step-by-Step Technique: Using a Hand Edger for Each Radius
Position the hand edger at the edge where the finish starts, then work through the sequence from screed to final pass. The radius you choose influences how each pass feels and when you switch tools during the workflow.
For each radius, describe body stance, edger angle, and smooth motions to avoid gouges. Note how larger radii behave differently on floors versus sidewalks and tailor the technique accordingly.
Step-by-Step Process
This sequence will guide you through using a hand edger to create perfect radii on your concrete surface, ensuring a professional finish.
- Check and prep your tool: Inspect your hand edger for any damage. Ensure the blade is secure and sharp. A dull blade can cause uneven edges and may require professional sharpening or replacement.
- Mark out your radius: Using a compass or a string line, mark out the desired radius on your concrete surface. This ensures accurate cutting and prevents over-edging.
- Secure your edger: Attach your hand edger to your power tool (if using an electric model) or ensure it’s securely held by hand (for manual models). A loose edger can cause wobbling, leading to uneven edges.
- Cut the radius: Starting from one end of your marked line, slowly and steadily cut along the mark. Keep the edger at a consistent angle (around 45 degrees) for a clean edge. Check your progress frequently to ensure you’re following the mark accurately.
- Finish the edge: Once you’ve completed the radius, use the edger to finish off the straight edges. Ensure you cut all the way through the concrete to prevent chipping later on. If you encounter any hard spots or inconsistencies, stop and consult a professional to avoid damaging your tool.
- Clean up: After cutting, clean your hand edger thoroughly to remove any concrete dust or residue. This prevents rusting and ensures your tool is ready for the next use.
Pro tip: Always wear appropriate safety gear when using power tools. This includes safety glasses, work gloves, and ear protection if needed. Safety should never be compromised for speed or convenience.
Timing and sequencing for best edge formation
When using a hand edger on different radii, timing is crucial. Here’s how to sequence your work:
Bleed water: Check the mix design or manufacturer instructions. Smaller radii need less bleed, larger ones more. Adjust accordingly.
Setting time: Larger radii set faster due to their smaller surface area. Plan your passes around this. For example, a 6′ radius might take 45-60 minutes to set, while a 12′ could be 90-120.
First edge pass: Time it right based on the radius and weather. Too early, you’ll have a weak edge; too late, it’s hard to form. Aim for when the concrete is starting to set but still soft enough to shape.
Technique tips and hand positioning for 1/8″, 1/4″, 3/8″
Now that you’ve got the hang of using a hand edger, let’s dive into specific techniques for different radii. Remember, it’s all about pressure, stroke length, and angle.
1/8″ Radius: This is your fine-tuning radius. Lighten up on the pressure, you don’t want to gouge the concrete. Short, smooth strokes are key here. Keep your edger at a shallow angle, around 30 degrees. Think of it like shaving – gentle and steady.
1/4″ Radius: This is your workhorse radius. You’ll use this most of the time. Apply medium pressure, enough to cut through the surface but not so much that you flatten it. Stroke length can be a bit longer here, around 6-8 inches. Keep your edger at a moderate angle, about 45 degrees.
3/8″ Radius: This is for those big, bold edges. You’ll need to apply more pressure here, but be careful not to overdo it and flatten the edge. Longer strokes are fine, around 12-16 inches. Angle your edger at a steeper angle, about 60 degrees.
Visual Checkpoints and Troubleshooting Common Edge Problems
Set visual benchmarks for a crisp edge at each radius, looking for consistent curvature and clean transitions. A tactile check helps confirm sharpness and uniformity along long runs.
Spot defects like undercut, feathering, or chipping and plan fixes in the right order. Use patches or re-rouding as needed, then re-seal after corrections to protect the edge.
Visual checkpoints during and after finishing
Inspect your work immediately after edging to ensure a quality finish. Catch any issues early to avoid costly rework.
- Shadow lines: Check for consistent, crisp shadow lines along the edge. Blurry or inconsistent lines indicate uneven radii or improper tool use.
- Tool marks: Look for any visible tool marks left behind by your hand edger. These should be minimal and easily sanded out.
- Edge sharpness: Run a finger along the edge to check its sharpness. It should feel smooth and well-defined, not rough or jagged.
- Uniformity: Check for consistency along long runs. Uneven sections may indicate improper tool use or pour issues.
- Micro-cracks: Inspect the edge for any micro-cracks. These can widen over time, compromising durability.
- Edge sheen: A consistent sheen along the edge indicates a smooth, even finish.
- Radius consistency: Measure radii at various points to ensure consistency. Inconsistencies may indicate tool slippage or improper technique.
- Curing check: After curing, re-inspect your work for any changes in edge quality. Curing can sometimes reveal hidden issues.
Quick rule: If you’re unsure about an edge’s quality, err on the side of caution and rework it before it cures.
Fixes for common mistakes and when to rework
Address edge problems promptly with these fixes. Knowing when to rework is crucial to maintain durability.
- Feathering: Use a sanding block or orbit sander with 80-120 grit paper for minor feathering. Make controlled passes until the edge is smooth.
- Chipping: Patch chips using an epoxy/concrete repair mix. Follow manufacturer’s instructions for best results.
- Undercut: If undercutting is minor, rescribe the radius with your hand edger. For severe cases, rework the entire edge section.
- Uneven radii: Re-round or rescribe uneven radii using your hand edger. Ensure consistent tool pressure and technique.
- Sealing: After fixing any issues, reseal the edges to protect them from moisture and wear.
- Rework decision: If an edge has major defects (like severe undercutting or large chips), it’s safer to rework the entire section before it cures.
Quick rule: Always prioritize durability over aesthetics. It’s better to rework an edge than risk costly repairs down the line.
Safety, Ergonomics, and Site Prep Considerations
Wear essential PPE and keep guards in place to protect eyes, hands, and hearing. A stable stance and proper tool handling reduce slips and loss of control during edging.
Manage ergonomics with short bursts and micro-breaks to prevent fatigue. Prepare the site with dust control, a clean substrate, and clear routing paths to minimize accidents and rework.
Personal protective equipment and handling best practices
The right gear keeps you safe, dry, and comfortable. Don’t skimp.
- Eye/face shield: Protects from concrete dust and debris. Use a full-face shield for better protection.
- Gloves: Essential for grip and protecting hands from cuts and burns. Choose rubber or latex gloves for wet work.
- Hearing protection: Concrete tools are loud. Use earplugs or earmuffs to prevent hearing damage.
- Dust mask/respirator: Protect your lungs from concrete dust. A P100 respirator is recommended for prolonged exposure.
- Waterproof clothing (optional): Rentable, but worth it on rainy days. Keeps you dry and comfortable.
Preventing surface damage from traffic and weather during cure
Newly edged surfaces are vulnerable. Protect them until they’re fully cured.
Barriers: Use physical barriers to keep foot traffic off freshly finished edges. Rentable, but cheap and effective.
For 1/8” and 1/4” edges, use curing compounds to protect from weathering. Apply immediately after edging and remove after 24-72 hours.
For 3/8” edges, consider moist curing. Wet burlap or plastic sheets can be laid over the edge and secured with weights. Keep wet for 3-7 days, then remove.
Cost, Time, and Planning Tradeoffs by Radius
Outline the core tradeoffs in installation speed, edge quality, and tool setup for each radius. Relate these to common project contexts to help readers choose with intent.
Walk through the labor time differences, setup steps, and maintenance needs. End with a practical decision framework that weighs durability, aesthetics, budget, and maintenance tolerance.
Short-term cost vs long-term value
The radius you choose today can impact your project’s lifespan. Larger radii, like 1/4″ or 3/8″, create stronger edges that resist chipping and cracking. They’re worth the extra upfront cost if durability is your priority.
Smaller radii, such as 1/8″, give a more refined look but may require more maintenance over time. They’re great for high-end projects where aesthetics outweigh potential future repairs.
Consider: How long do you plan to keep the surface? Is durability or looks more important?
Scheduling and crew planning for projects of different sizes
For small jobs, one person can handle setup, edging, and cleanup. But for larger pours, you’ll need a team.
Assign roles: One person sets up the area, another profiles with the hand edger, and a third cleans up. This keeps the process moving smoothly.
For single-day pours, plan your crew’s arrival times to match the concrete’s set time. For larger jobs, stagger tasks over multiple days to maintain consistent edge quality.
Conclusion
Choose the radius that matches the job because durability, appearance, and safety all hinge on that first decision. A small radius can look clean but wears faster; a larger radius adds durability but takes more time and care to keep edges even.
First, verify your project type and location, test the edge on a scrap area, and confirm the tool is sharp and set to the right depth. Move in small sections, keep a steady angle, and check progress after each pass. Clean as you go and recheck with visual checkpoints before you call it finished; test on scrap and inspect edges for uniform rounding and a crisp line.
Common mistakes to avoid are rushing, skipping a test area, or changing the radius mid job without resetting your setup. Don’t force the edger through hard spots or leave tool marks. Always wear eye and hearing protection, keep fingers clear of the working edge, and unplug or switch off the tool when adjusting settings or changing bits. Use good ergonomics and take short breaks to avoid fatigue.
If the slab is large, or you’re dealing with thick drift or rebar, or you see cracks or unexpected movement after edging, it’s wise to call a professional instead of forcing it. Stay disciplined, respect the limits of the radius you chose, and you’ll finish clean, durable edges without damaging the concrete or yourself. You’ve got this—steady work, smart choices, solid results.
FAQ
What are the differences between 1/8″, 1/4″, and 3/8″ hand edger radii?
Each radius creates a different edge profile. A smaller radius gives a sharper, more defined edge; a larger radius makes the edge smoother and more resistant to chipping. Check the edge template on your tool and follow the manufacturer’s instructions for the radius you choose.
How does edge radius affect durability and appearance?
Smaller radii can look crisper but may be more prone to chipping under heavy foot traffic. Larger radii hide minor imperfections and stay looking even after some wear. Consider where the edge will live and how much foot or equipment impact it will take.
What’s the step-by-step process to use a hand edger for these radii?
Set the edger to the desired radius per the tool’s guide. Start at the edge of the slab and roll or rock steadily along the joint, keeping consistent pressure. Clean the edge between passes and inspect for uniformity as you go.
What tools, equipment, and safety steps should I have before starting?
Have the hand edger for your chosen radius, a straightedge or guide, a wheelbarrow or bucket for cleanup, and personal protective gear. Wear sturdy gloves and eye protection, and work with the equipment at a controlled pace to avoid slips. Always follow the tool manufacturer’s safety instructions and check local site rules.