
Introduction
Hairline crack repairs that don’t show are methods that seal the crack and restore a smooth, uniform surface without visible seams. Routing, injection, and surface fill are common DIY options you can choose based on access and how the crack behaved. The goal is to blend the repair so it’s hard to notice after finishing.
Choose the method that fits how the crack is behaving and the surface you’re working on, then follow product labels and safety notes. Prepare the area, clean it well, and work in small, controlled steps to build up the repair gradually. If you’re unsure, check manufacturer instructions or local rules for best practices and acceptable repairs.
Key takeaways
- Inspect crack pattern and moisture before choosing routing, injection, or surface fill.
- Routing is for visible, recessed edges; requires precise groove depth control.
- Injection treats voids behind cracks; ensure access and material compatibility.
- Surface fill hides cracks but may crack again if movement persists.
- Clamp or tape edges during work; protect surrounding surfaces from spill.
- When in doubt, hire a pro and verify credentials and guarantees.
Table of Contents
- Introduction
- Key takeaways
- Understanding Hairline Cracks: Causes and When They Matter
- Overview of Repair Methods: Routing, Injection, Surface Fill
- Choosing the Right Method: Practical Decision Framework
- Step-by-Step DIY Guide — Routing Method
- Step-by-Step DIY Guide — Injection Method
- Step-by-Step DIY Guide — Surface Fill Method
- Pros, Cons, Longevity, and Hidden Risks of Each Method
- When to Hire a Professional and How to Vet Contractors
- Conclusion
- FAQ
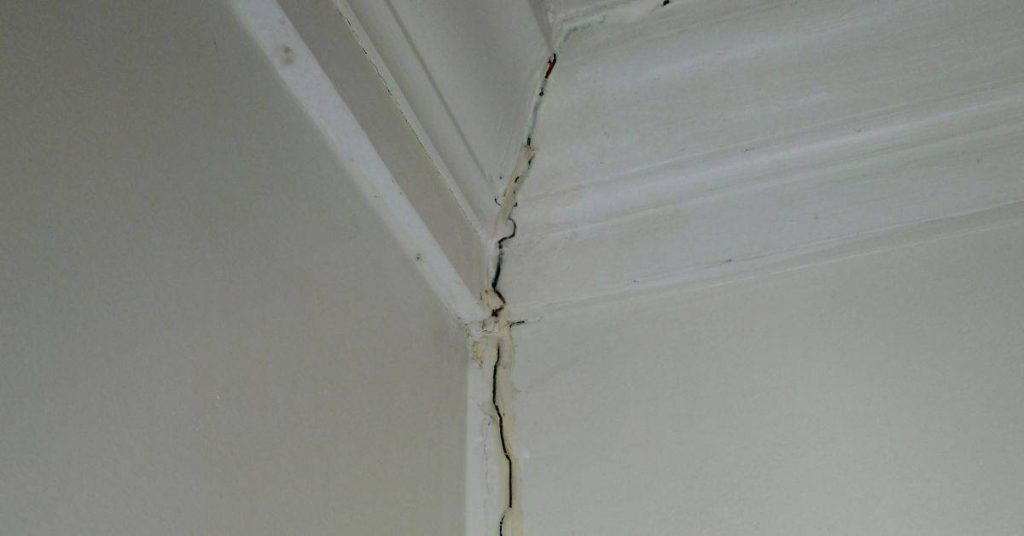
Understanding Hairline Cracks: Causes and When They Matter
Hairline cracks are very thin, often barely visible, and typically run in a random or linear pattern. They can show up in concrete pours, plaster, or masonry surfaces where movement or drying is occurring. Quick cosmetic fixes might hide them, but not every crack needs the same attention.
Common causes include shrinkage, settlement, or minor structural movement, plus exposure to moisture cycles. Decide if cosmetic repair will satisfy the look, or if a deeper check is necessary by inspecting crack depth, width, and location with the right tools. Always verify specifications with the product label, manufacturer instructions, or local rules before proceeding.
Definition and types of hairline cracks
A hairline crack is the smallest type of crack you can find on your concrete surfaces. Visually, they’re thin, usually less than a millimeter wide. You might not even notice them unless you’re looking closely or running your fingers over the surface.
Tactilely, these cracks are shallow too. They don’t penetrate deep into the concrete. If you poke at them with a screwdriver or a coin, there’s no give – they’re just on the surface.
There are two main types of hairline cracks:
Superficial: These are purely cosmetic and don’t affect the structural integrity of your concrete. They usually appear due to minor settling or shrinkage during curing.
Active: While still thin, active cracks are deeper and may indicate underlying issues. They can widen over time if not addressed.
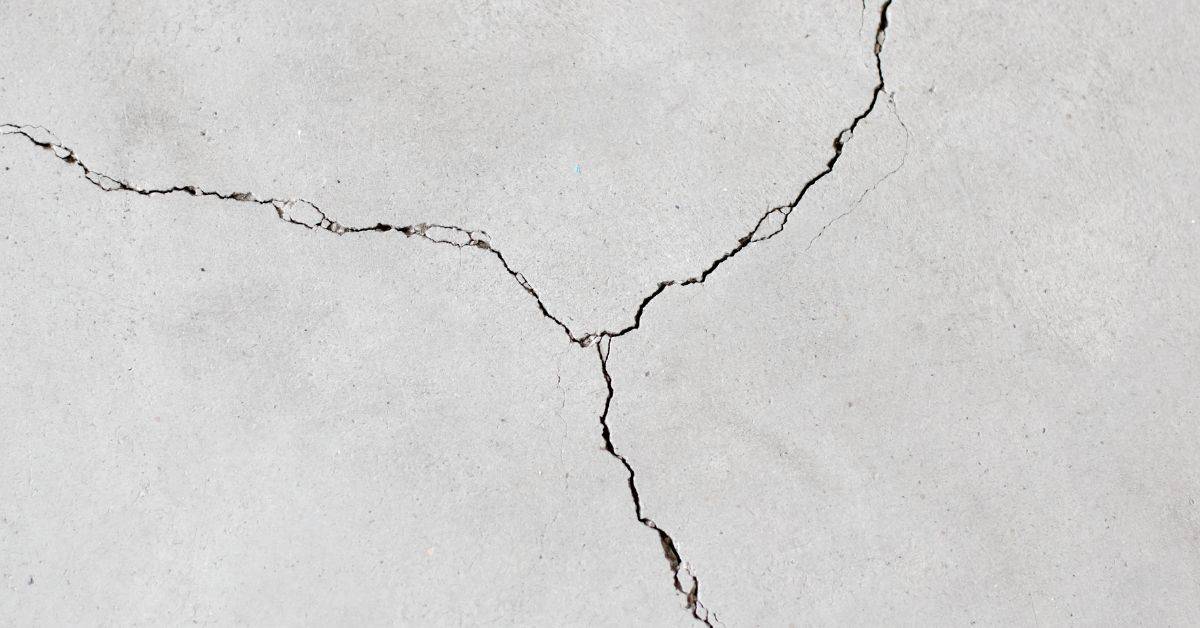
Structural vs non-structural indicators
Not all hairline cracks are created equal. Some are just cosmetic, while others might hint at structural problems.
Non-structural: These are usually straight and stable. They don’t change over time and aren’t accompanied by other signs of movement or damage. If a crack is less than 1/8 inch wide, it’s likely non-structural.
Structural: These cracks can be diagonal or zigzag in shape. They might widen over time, or you might notice other signs of movement around them, like leaning walls or doors that stick. If a crack is wider than 1/8 inch, it could be structural.
Overview of Repair Methods: Routing, Injection, Surface Fill
Routing involves hollowing out the crack edges to create a clean, keyable groove for filler. It’s best for slightly wider, stable cracks where an invisible finish is the goal. Expect to use a router bit and compatible sealant or mortar for a durable repair.
Injection seals the crack from the inside by pumping material through the crack or a tiny inlet. This method is suited for active or deeper cracks and aims to bond the sides together with minimal surface disturbance. Surface fill applies material directly over the exposed crack, primarily for hiding hairline cracks on visible surfaces, but it has limits in movement and durability.
Routing (groove-and-seal) at a glance
Routing is like giving your crack a haircut. It’s best for narrow, surface-level cracks that don’t go deep.
First, you widen the crack slightly using a routing tool. This gives the filler more to grip onto.
Then, you fill it with a flexible sealant. The key here is flexibility – we want something that can move with the concrete as it expands and contracts.
Routing is quick and easy, but remember, it’s only skin deep. It won’t fix internal voids or structural issues.
Injection (epoxy/urethane) at a glance
Injection is like giving your crack a blood transfusion. It’s ideal for cracks that go deep but aren’t too wide.
First, you drill small holes along the length of the crack. These are like tiny entry points for our filler.
Then, you inject epoxy or urethane into these holes. These materials are thick and sticky, perfect for filling internal voids and bonding crack faces together.
Injection is a bit more involved than routing, but it gets deep into the concrete where other methods can’t reach.
Surface fill (skim/patch) at a glance
Surface filling is like putting makeup on your crack. It’s great for hiding small, surface-level cracks, but it doesn’t fix what’s underneath.
You apply a thin layer of patching compound over the crack. This smooths out the surface and makes the crack disappear.
Surface filling is quick and easy, but remember, it’s just a band-aid. It won’t fix internal voids or prevent the crack from coming back if there’s an underlying issue.
Use this method sparingly and only when you’re sure the crack isn’t a sign of something more serious.
Choosing the Right Method: Practical Decision Framework
Start with an assessment of crack depth and movement by observing over time and checking for changes after weather or load changes. Consider the crack’s location and how it will be finished in the space. Prioritize the finish you want, whether ultra‑low visibility or a quicker, lower‑cost fix.
Then match the method to the crack type: routing for shallow, stable lines with a good key; injection for movement-prone or deeper openings; surface fill for façade-visible spots where movement is minimal. Always verify any product data sheet, manufacturer instructions, or local building guidance before choosing.
Assessment checklist for method selection
Before you start, use this checklist to assess the crack. It helps you choose the right repair path.
- Crack depth: Measure using a depth gauge or feel with a coin. Too deep? Injection might be needed.
- Crack width: Use a crack gauge. Narrow cracks suit routing, wider ones need injection.
- Crack activity: Tape and weigh the ends. If it moves, it’s active; epoxy injection is best.
- Crack location: Check for moisture or water marks nearby. Leaks need extra attention.
- Surface condition: Inspect for loose material, dust, or grease. Clean before repair.
- Finish requirements: Consider the final look. Some methods leave visible lines.
- Accessibility: Can you reach the crack easily? Limited access might dictate your method.
- Time constraints: How soon do you need results? Injection takes time to cure.
Quick rule: If in doubt, start with routing. It’s versatile and easy to fix if it fails.
Prioritizing aesthetics versus structural integrity
Aesthetics are important, but so is strength. Here’s how to balance both:
Invisible repairs: Surface fill and routing give the best finish. But they don’t stop cracks from growing.
Injection, on the other hand, stops cracks in their tracks. But it leaves a visible line.
Long-term control: If aesthetics aren’t critical, injection is your best bet. It reinforces the concrete and prevents further cracking.
Remember, a crack that looks good but keeps growing isn’t really fixed. Choose wisely based on your priorities.
Step-by-Step DIY Guide — Routing Method
Prepare the area and select a router tool with a small, clean bite. Gently rout a narrow groove along the crack you can clean out and re‑treat later. Stop if you hit a significantly broader section or suspect active movement.
Clean the groove with a brush and dry thoroughly, then apply a compatible bonding agent and filler to fill and level the surface. Smooth with a trowel or putty knife and let cure per the product label, keeping in mind finish will depend on surrounding texture. Always check the manufacturer instructions for any cure times or surface prep notes.
Step-by-Step Process
This sequence will guide you through routing concrete using a wet saw, ensuring a clean, precise cut and minimal dust.
-
Preparation: Ensure your wet saw is in good working order. Check the blade for any damage or dullness. If unsure, replace it.
Why: A faulty blade can cause kickback and ruin your cut.
Check: Blade should be clean and sharp. -
Marking: Use a chalk line or marker to scribe the cutting line onto the concrete surface.
Why: This ensures you cut along the correct path.
Check: Line should be clear and straight. -
Wetting: Apply water to both sides of the blade and the cutting line using a spray bottle or hose.
Why: Water lubricates the blade, reduces dust, and prevents overheating.
Check: Blade and line should be visibly wet. -
Cutting: Start at one end of your marked line and slowly guide the saw along it. Apply steady pressure but avoid forcing the blade.
Why: This ensures a clean, even cut and prevents blade damage.
Check: Cut should be smooth and straight with no visible blade marks. -
Depth Adjustment: If you need to make a deep cut, adjust the saw’s depth setting. Ensure it’s set correctly before starting.
Why: Incorrect depth can cause kickback or ruin your cut.
Check: Blade should extend no more than necessary for your cut. -
Finishing: Once the cut is complete, use a chisel and hammer to remove any remaining concrete. Clean up the area thoroughly.
Why: This ensures a neat finish and prevents trips or injuries.
Check: Area should be clean with no loose debris.
Pro tip: Always wear appropriate safety gear, including gloves, goggles, and ear protection. Keep your workspace well-lit and clear of obstacles.
Tools and materials checklist for routing
Before you start routing, make sure you have all the necessary tools and materials. This list will help you prepare and avoid common mistakes.
- Router: Ensure it’s in good working condition and compatible with your bits. Check the manufacturer’s instructions for specific requirements.
- Routing bits: Have a variety of bits ready, including straight, flush-trim, and round-over bits. Make sure they’re sharp and suitable for the material you’re routing.
- Clamps: Inspect your clamps to ensure they’re secure and can hold the workpiece firmly in place while routing.
- Safety gear: Check that you have safety glasses, hearing protection, and a dust mask. Also, ensure your router guard is intact and functioning properly.
- Sealant: Have a suitable sealant ready for protecting the routed edges from moisture and pests. Check the product label to ensure it’s compatible with your material.
- Measuring tape or ruler: Verify you have an accurate measuring tool to mark out your routing lines precisely.
- Pencil: Make sure you have a sharp pencil for marking your cutting lines. A carpenter’s pencil is ideal as it can be sharpened with a knife on-site.
- Straight edge or speed square: Check that you have a straight edge to guide your router and ensure accurate cuts.
Quick rule: Always double-check your routing lines before starting. A small mistake here can lead to expensive rework.
Surface prep and routing technique
First things first, clean the crack. Use a wire brush or compressed air to remove any dirt, debris, or loose material. Then, dry it out. Moisture can mess with your sealant’s performance.
Now, mark the route. Use a pencil and a straight edge to draw a line along both sides of the crack. This is your guide for routing. Remember, you want the groove to be slightly wider than the sealant’s width, but not so wide that it makes the damage look worse.
Routing time. Start with a shallow pass. Use your router with a grooving bit (check your router manual for the right size). Set the depth to about half of what you need. Make slow, steady passes along your marked lines. Then, switch to a deeper pass, increasing the depth by small increments until you reach the desired groove width.
Lastly, check your work. Wipe away any dust and inspect your groove. It should be clean, straight, and the right width for your sealant. If not, make adjustments as needed before applying the sealant.
Sealing and finishing for an invisible result
Now that you’ve routed out the damaged area, it’s time to make your repair blend in seamlessly. Here’s how:
Sealant application: Use a flexible, paintable concrete sealant. Check the label for compatibility with your specific concrete mix and any local rules. Apply it evenly over the routed area and about an inch beyond to ensure a smooth finish.
Tooling for a flush finish: Use a trowel or float to spread the sealant, working from the center outwards in overlapping strokes. Be sure to tool the edges well to avoid any raised areas. Let it cure as per manufacturer’s instructions before proceeding.
Blending strategies: To make your repair unobtrusive, match the surrounding concrete’s color and texture. You can use a concrete stain or paint for color, but be sure to test first in an inconspicuous area. For texture, consider using a broom finish or stamping tool that matches your existing concrete.
Step-by-Step DIY Guide — Injection Method
Set up a clean inlet point at a convenient spot on the crack and mix the injection material according to the label. Begin injecting slowly, watching for any back pressure or surface emergence, and seal the entry as you go. Stop if the crack shows unexpected widening or surface movement.
Wipe away excess material from the surface and smooth the area as the filler cures. Allow full cure per the product instructions before loading or exposing the repaired area to moisture. If you’re unsure about materials or entry sizing, verify with the manufacturer data sheet or local guidance before proceeding.
Step-by-Step Process
This step-by-step guide walks you through the process of injecting hairline cracks in concrete, ensuring a strong bond and minimal surface trace.
- Preparation: Inspect the crack, wear safety gear (gloves, goggles), and clear the area. Why: Safety first, clear workspace for easy work.
- Cleaning: Use a wire brush or needle scalpel to remove loose material from the crack. Why: Ensures adhesive bonds well; no loose material.
- Main Injection: Apply injection system’s adhesive into the crack using a caulking gun, following manufacturer’s instructions. Why: Bonds crack internally, minimizes surface trace.
- Pressure Control: Monitor flow to avoid blowouts and excess residue. Use clamps or weights if needed. Why: Prevents waste, ensures complete filling.
- Cleanup & Final Checks: Wipe off any excess adhesive, let it cure as per instructions, then check for proper bonding. When to call a pro: If crack reopens or bond seems weak after curing.
Tools and Materials Checklist for Injection
Use this checklist before starting your injection repair to ensure you have everything needed.
- Injection System: Epoxy or urethane-based system, compatible with your crack’s type. Check: Compatibility and cure time.
- Caulking Gun: For applying adhesive into the crack. Check: Functionality before use.
- Wire Brush or Needle Scalpel: For cleaning the crack. Check: Condition and sharpness.
- Clamps or Weights: To control pressure during injection. Check: Availability and condition.
- Safety Gear: Gloves, goggles, and dust mask. Why skip?: Risks injury, exposure to harmful substances.
- Cleaning Supplies: Rags or shop towels for wiping excess adhesive. Check: Availability before starting.
- Grinding Tool (optional): For blending the repair if needed post-injection. Why skip?: May leave visible marks if not done carefully.
Quick rule: Always verify material compatibility and cure time before use to avoid failed repairs.
Injection Technique and Pressure Control
Proper injection technique ensures a strong, invisible repair. Here’s how:
Start injections from the lowest point of the crack, working upwards to prevent air pockets. Why: Ensures complete filling without voids.
Monitor flow rate; too fast may cause blowouts. Too slow might leave residue. Tip: Use clamps or weights to control pressure if needed.
Stop injecting when adhesive starts to ooze out of the crack’s top. Wipe off excess immediately. Why: Prevents surface residue, ensures minimal trace.
Post-Injection Finishing and Visual Blending
After injection, follow these steps to blend the repair into the surrounding concrete:
Clean any residual adhesive from the surface using a damp cloth. Let it dry completely. Why: Prevents dust or debris sticking to the repaired area.
If needed, grind down any raised edges or residue using a grinding tool. Be careful not to damage surrounding concrete. Tip: Use a light touch and check progress frequently.
Apply a surface treatment (sealer, stain, etc.) that matches the surrounding area. Follow manufacturer’s instructions for best results. Why: Blends repair into surrounding material, protects from weathering.
Step-by-Step DIY Guide — Surface Fill Method
Choose a surface-fill product that matches the substrate and texture where the crack is visible. Clean the crack area thoroughly and prime if required by the product instructions. Apply the filler in thin layers, feathering the edges to blend with the surrounding surface.
Continue applying layers until the patch is flush with the surrounding finish and level. Sand lightly if the product allows and re‑coat to match color or finish. Always verify cure times and compatibility on the product label or manufacturer instructions, and consider local rules if finishing in wet areas.
Step-by-Step Process
This section guides you through preparing, filling, and finishing hairline cracks using the surface fill method.
- Inspect the area. Ensure cracks are hairline (less than 1/8 inch wide) and not structural.
- Clean the area. Remove dirt, dust, and any loose material with a wire brush or vacuum.
- Tape off surrounding areas. Use painter’s tape to protect adjacent surfaces from filler.
- Apply primer. Use a paintbrush to apply a thin layer of acrylic primer, letting it dry according to the manufacturer’s instructions.
- Fill cracks. Using a putty knife, apply filler into the crack, feathering the edges to blend with the surrounding surface.
- Let it cure. Follow the filler’s curing time guidelines, usually 24-48 hours.
- Sand lightly. Once cured, use fine-grit sandpaper (120-220 grit) to lightly sand the filled area, removing any excess filler and smoothing the surface.
- Clean up. Wipe away dust with a damp cloth, then remove painter’s tape.
Tools and materials checklist for surface fills
Before starting, ensure you have the right tools and materials to achieve a successful repair.
- Filler: Choose a lightweight, fast-setting spackling compound or acrylic filler for hairline cracks.
- Primer: Use an acrylic primer to seal the surface and improve filler adhesion.
- Putty knife: A 2-3 inch flexible putty knife is ideal for filling small cracks.
- Sandpaper: Fine-grit sandpaper (120-220 grit) for smoothing the filled area.
- Painter’s tape: To protect adjacent surfaces from filler.
- Wire brush or vacuum: For cleaning the crack before filling.
- Safety glasses: To protect your eyes from debris during sanding.
- Dust mask: To protect against inhaling dust while sanding.
- Rags: For wiping away dust and cleaning up.
Quick rule: Always test adhesion on a small, hidden area first to ensure compatibility with your surface.
Application technique for hairline cracks
Proper application is key to minimizing shrinkage and visible transitions. Here’s how:
First, ensure the filler matches your surface color as closely as possible. If not, you’ll need to paint or stain after filling.
When filling, use a ‘feathering’ motion with the putty knife at the edges of the crack. This helps blend the filler into the surrounding surface, minimizing visible transitions.
Curing: Follow the manufacturer’s instructions for curing time. Proper curing prevents shrinkage and ensures a strong bond.
Sanding, paint matching, and blending
After filling, sanding is crucial to achieve a smooth, seamless appearance. Here’s how:
Start with coarse-grit sandpaper (80-120 grit) to remove any excess filler or rough spots. Then, switch to fine-grit sandpaper (220-320 grit) for a smooth finish.
Paint matching: If your filler doesn’t match your surface color, use touch-up paint that closely matches the existing color. Apply in thin layers, letting each dry before assessing if more coats are needed.
For a seamless appearance, blend the repaired area with the surrounding surface using gentle, circular sanding motions and light pressure.
Pros, Cons, Longevity, and Hidden Risks of Each Method
Routing offers a discreet finish and good adhesion for stable cracks but may require precision and proper edge cleaning. Injection can bond the crack internally and resist movement but might leave subtle surface traces if not done carefully. Surface fill is quick and visually forgiving on visible surfaces but may not handle movement well over time.
Durability depends on crack behavior, substrate, and proper execution of each technique. Maintenance needs vary with environmental exposure and finish compatibility. Always verify product specifications, warranties, or local requirements before choosing a method.
Durability and Maintenance Considerations
Each repair method has its own lifespan and upkeep requirements. Understanding these can help you choose the best option for your needs.
Routing: Once filled, routed cracks are durable but may require periodic touch-ups if new hairline cracks form nearby due to settling or temperature changes.
Injection: Injected repairs last longer as they fill the entire crack depth. However, they might need occasional re-injection if new cracks appear. Regularly check for any signs of water intrusion or movement.
Surface Fill: Surface fills are quick and easy but have the shortest lifespan. They may require frequent touch-ups due to their susceptibility to peeling, chipping, or discoloration from sunlight and moisture.
Common Failure Modes and How to Avoid Them
To ensure your repair lasts, avoid these common mistakes:
- Inadequate surface prep: Insufficient cleaning or drying can lead to adhesion failure. Always follow the surface preparation steps.
- Incorrect material selection: Using the wrong filler for your crack type or substrate can result in visible reappearance. Refer back to our method comparison for guidance.
- Inconsistent application pressure: Too much or too little pressure during injection can cause leaks or incomplete filling. Maintain consistent pressure as explained in the DIY guide – Injection Method.
- Exposure to extreme temperatures: Rapid temperature changes can cause materials to expand and contract, leading to cracking. Protect your repairs from direct sunlight and extreme heat.
- Neglecting post-repair care: Not allowing sufficient drying time or applying paint too early can result in staining or discoloration. Always follow the finishing guidelines.
Regularly inspect your repairs for any signs of these issues and address them promptly to maintain a long-lasting, invisible fix.
When to Hire a Professional and How to Vet Contractors
Hire a professional if cracks show ongoing movement, moisture signs, or you’re unsure about the crack depth and structural implications. Red flags include vague descriptions, missing warranties, or pressure to rush the repair. Request references and a written scope of work before any work begins.
For vetting, check credentials, insurance, and evidence of similar repairs. Compare quotes and ask about their repair method rationale and warranty terms. Always confirm warranties, the expected lifespan of the repair, and how failures would be handled, using product labels or manufacturer instructions as references.
Red flags and certifications to check
Before hiring a professional for hairline crack repairs, look out for these red flags. They might indicate underlying structural concerns:
Widening cracks, especially during dry seasons, could signal settlement issues.
Diagonal cracks in walls or foundations may hint at serious structural problems.
Always ask for credentials. They should have licenses and certifications relevant to concrete repair. Check if they’re insured too. Ask for references and follow up on them.
Questions to ask and comparing quotes
When comparing quotes, ask these questions to ensure you’re getting the best service:
Methods: What repair methods do they plan to use? Ask about routing, injection, or surface fill, and why they chose that method for your specific case.
Materials: What materials will they use? Ask about the quality of sealants, epoxies, or other materials. Cheaper isn’t always better.
Timelines: How long will the repair take? Make sure it fits your schedule and doesn’t disrupt your daily life more than necessary.
Guarantees: What warranties do they offer? A good contractor should stand behind their work. Ask about the duration of the warranty and what it covers.
Conclusion
You can fix hidden cracks without turning your project into a mess, but you must plan, test, and protect the structure and your own safety first.
Think of it as a simple decision flow: choose routing, injection, or surface fill based on crack size and location, verify materials and tools before you start, test in a small area, and proceed in clear, deliberate steps. Start with a safe, controlled patch, observe for movement or moisture, and stop if you see new cracks or if the patch won’t cure properly.
Common mistakes to avoid are rushing a repair, skipping a small test area, and using the wrong method for the crack. Don’t improvise with tools or products not recommended for the method you selected, and always wear eye protection and gloves, work with good lighting, and follow manufacturer directions for any product you use. When in doubt about depth, movement, or water intrusion, stop and call a pro rather than pushing on and risking bigger damage.
If the project demands professional help, don’t hesitate to hire one and use a clear contractor vetting process: confirm experience with your crack type, ask for past results, get written estimates, and review warranties. Address safety, durability, and appearance now, and you’ll get long-lasting results with fewer callbacks. Stay steady, stay smart, and you’ll finish confident.
FAQ
How do I know if a crack is safe for DIY repair or if I should hire a pro?
Look for fresh cracks that are hairline and not widening over time. If the crack is moving, widening, or accompanied by moisture, crumbling, or new staining, pause and consult a professional.
How should I choose between routing, injection, and surface fill for hairline cracks?
Routing works when you need to create a groove for a filler, often on framed surfaces. Injection fills the crack from the inside with material that seals and bonds, good for active or flexible cracks. Surface fill covers the crack on top and is simplest, but may hide movement if the crack widens later.
What safety checks should I do before starting repairs?
Clean the area, wear eye protection, and follow product instructions. Check for hidden wiring, pipes, or loose edges behind the crack before cutting or drilling. If in doubt, stop and verify with the label or manufacturer guidance.
What signs indicate I should stop and call a professional?
Cracks that reappear quickly after repair, large gaps, damp or musty smells, or any crack that runs through structural elements mean it’s time to get a pro. If you’re unsure about the structural role of the wall, pause and seek expert advice.