

Introduction
Grouting a backsplash fills the spaces between properly installed tiles, finishes the surface, and makes routine cleaning easier. It does not fix loose tile, a moving wall, failed mortar coverage, or water entering the wall. Check those conditions before you mix anything.
The dependable approach is simple: choose grout approved for your tile and joint width, protect the counter and cabinets, mix and clean on the exact product’s schedule, then use flexible sealant—not grout—at inside corners and other changes of plane. Related guidance: Creating Clean Inside Corners in Plaster: Corner Tools Vs Hand Technique.
Key takeaways
- Choose grout by the product’s published joint-width range and tile compatibility; do not rely on a universal sanded-versus-unsanded cutoff.
- Before mixing, record the label’s mix ratio, pot life, cleanup stages, cure period, water-exposure limit, and sealing instructions.
- Pack joints with a firm rubber float, remove excess diagonally, and clean only when the grout is firm enough that a damp sponge will not pull it from the joints.
- Use a compatible flexible sealant at corners, the countertop joint, and other movement joints.
- Do not add water to stiffening grout or try to revive material that has passed its stated pot life unless the product instructions explicitly allow a specific procedure.
Table of Contents
- Introduction
- Key takeaways
- Overview and Project Planning
- Tools and Materials Checklist
- Surface Preparation Before Grouting
- Mixing Grout Correctly
- Applying Grout — Step-by-Step Technique
- Cleaning, Sponging, Tooling, and Haze Removal
- Stop Rules, Troubleshooting, and Common Mistakes
- Sealing, Caulking, and Final Inspection
- Conclusion
- FAQ
Overview and Project Planning
Plan grout color, tile sensitivity, joint width, and work sections before opening the bag or pail. Have clean water, a waste bucket, dry cloths, and all protection in place so grout does not sit on the tile while you look for supplies. Good lighting helps reveal low joints and haze before they harden.
Choose the right grout type
Cementitious grout is Portland-cement or cement-based grout mixed from powder and is commonly porous. Many cement-based grouts can be sealed after their specified cure, but the grout and sealer labels control timing and compatibility. LATICRETE cement-grout guidance distinguishes cement grout from epoxy and directs flexible sealant to corners and movement joints.
Premixed or ready-to-use grout is not simply cement grout with water already added. Follow its own directions for cleanup, cure, water exposure, and sealing. Excess cleanup water can affect curing of some ready-to-use products, so use a well-wrung sponge and its stated cleaning method. Related guidance: Cleaning a Basement Concrete Floor: Stain Types, Methods, and Sealing Tips.
Epoxy grout has its own mixing and wash sequence. Its exact technical data sheet controls whether sealing is needed or permitted; do not apply a penetrating or film-forming sealer unless the grout and sealer manufacturers approve that combination.
Sanded and non-sanded labels can help, but allowable joint widths vary by product. Some specialty grouts cover a broad range. Use only a product whose published range includes your actual joints. A non-sanded grout product, for example, may be limited to joints up to 1/8 inch; check the selected product’s published joint-width and tile-compatibility instructions rather than forcing a generic rule.
Test first on glazed, polished, glass, metal, or porous stone tile. Sanded grout, abrasive pads, and some cleaners can scratch delicate finishes. Porous stone may need a compatible grout release or pre-sealer; test it for staining or color change before treating the full backsplash.
Planning and quantity estimation
Measure the tiled area, tile length and width, average joint width, and joint depth. Enter those values in the selected grout manufacturer’s coverage chart or calculator, then add a reasonable allowance for cuts, mixing loss, absorption, cleanup, and future repairs. Buy enough of the same product and color batch for the work where color consistency matters.
Divide the backsplash into sections you can fill and clean within the product’s working and cleanup windows. Begin at an accessible end or lower portion of the backsplash, but let grout behavior—not a fixed number of minutes—tell you when to wash.
Tools and Materials Checklist
Essential tools and materials
- Correct grout: compatible with the tile, joint width, and exposure; use only the manufacturer’s approved liquid or additive.
- Clean mixing pail and measuring container: measure rather than eyeball mix liquid.
- Margin trowel and approved mixer: hand-mix small batches when permitted; use a clean paddle if the label calls for mechanical mixing.
- Firm, sharp-edged rubber grout float: choose one that will not scratch the tile. A wall float can be easier to handle on a backsplash; float shape is not assigned by wall versus floor.
- Dense grout sponge, clean water, microfiber cloths, and a waste bucket: change dirty water rather than spreading residue back over the tile.
- Painter’s tape, drop cloths, and plastic sheeting: protect counters, cabinets, outlets, and adjacent finishes.
- Compatible flexible sealant and caulk gun: for inside corners, countertop transitions, and other movement joints.
- Grout sealer: only if the grout requires or permits it after curing.
Safety gear, dust control, and electrical protection
Read the current label and SDS for the grout, cleaner, sealer, and sealant before starting. Wear the eye and skin protection specified there. When opening or mixing powdered grout, keep dust out of the air: open the bag carefully, pour slowly close to the pail, avoid dry sweeping, and use the dust-control measures and respiratory protection required by the product label, SDS, and applicable local or occupational requirements. Do not select a respirator casually or continue if the required controls cannot be provided.
Use the ventilation required by the relevant label and SDS, especially for premixed grout, epoxy, sealant, or chemical cleaner. If a cleaner requires stronger PPE or ventilation than you can provide, do not use it.
Keep outlets, switches, power strips, and appliances dry. Do not work over damaged, exposed, loose, or water-intruded electrical components. If masking, washing, or cleaning near an outlet could expose it to moisture, de-energize the relevant circuit first and verify the component remains dry; stop and seek qualified electrical help if wiring or an outlet is damaged or wet.
Muriatic acid is not a casual backsplash-cleanup remedy; OSHA has documented a tile-work exposure incident involving it. Use a tile- and grout-compatible cleaner only after identifying the residue and testing an inconspicuous area.
Surface Preparation Before Grouting
Wait until the tile setting material has cured for the period specified by its manufacturer. Check every tile before grouting: stop and reset tiles that are loose, hollow-sounding, cracked, or moving. Grout fills joints between sound tiles; it cannot stabilize a failing installation.
Cleaning and clearing joints
Remove spacers, mortar squeeze-out, dust, and debris so joints are open to the depth required by the grout product. Use a utility knife, non-metallic scraper, or brush carefully; avoid chipping tile edges. Vacuum the joints and clean tile faces with a cleaner approved for that tile, then leave the surface in the condition specified by the grout label. Joints must not contain standing water.
Do not use muriatic acid. First identify white residue as fresh grout haze, cured cement haze, efflorescence, hard-water deposit, or something else. Start with dry removal or a neutral cleaner approved for the tile and grout. For persistent residue, use only a manufacturer-approved cleaner after a small test. Do not use acidic cleaners on marble, limestone, travertine, unknown stone, metal, uncured grout, or any untested surface.
Protecting adjacent surfaces and movement joints
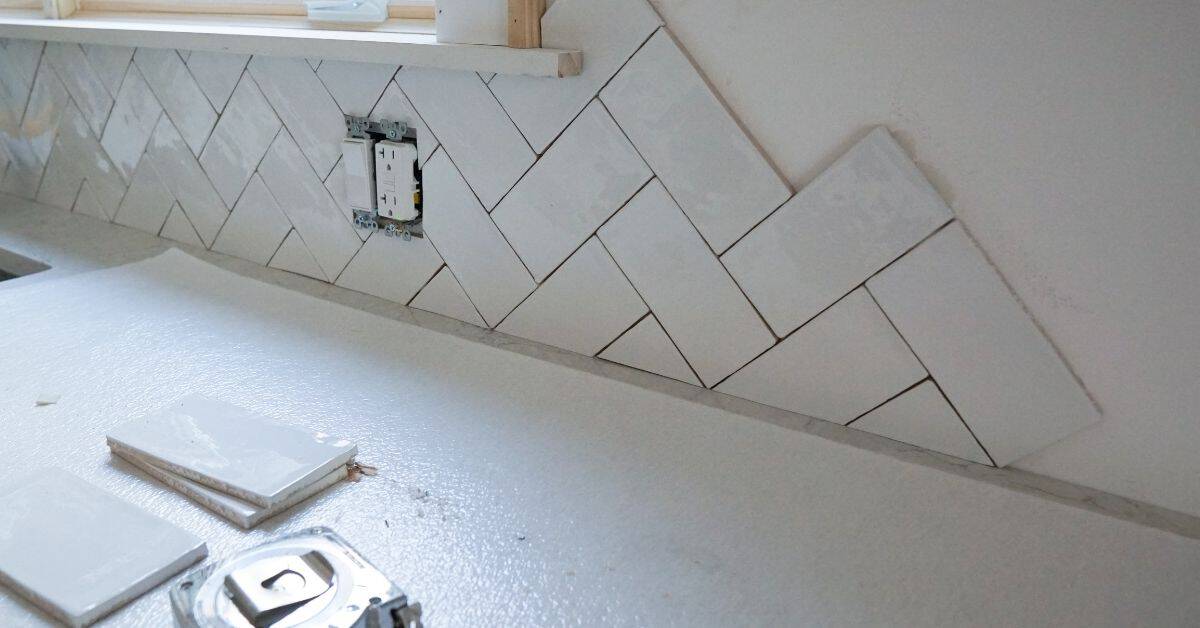
Mask countertops, cabinet edges, trim, outlets, and fixtures. Cover the counter and floor with drop cloths. Identify every change of plane before grouting: inside corners, the backsplash-to-counter joint, tile-to-cabinet or trim interfaces, transitions between dissimilar materials, and movement joints. Keep these joints free of grout so flexible sealant can bond correctly later. Related guidance: Caulk vs Grout at Change-of-Plane: What Pros Do and Why.
Pre-grout check
Confirm the tile and grout are clean, the grout is within shelf life, the package is dry and free of lumps, and room conditions meet the label. Read and note the water ratio, mixing sequence, pot life, initial and final cleanup instructions, cure period, water-exposure restriction, and sealing requirement.
Mixing Grout Correctly
Use the exact product directions. Cementitious, premixed, and epoxy grouts do not share one universal mix, slake, work-time, or cleanup schedule.
Mixing methods and consistency checks
For powdered grout, follow the product’s stated mixing sequence—some products may specify liquid first, while others may differ. Measure each component exactly and mix until the material is uniform and free of dry pockets. A workable batch spreads and packs into joints without running or crumbling. Do not add extra liquid to make application easier; excess liquid can affect strength, color, shrinkage, and cleanup.
Slaking and working time
Some cementitious grouts require a rest period followed by remixing; others do not. Follow the label exactly. If remixing is allowed, remix without adding water unless the product specifically permits an adjustment procedure. Do not assume grout can be reworked once it has started setting.
Small-batch strategy for vertical work
Mix only what you can spread, pack, and clean within the stated pot life and cleanup window. The right batch size depends on the grout, room temperature, humidity, tile texture, and your pace—not a fixed square-foot number. If grout stiffens, exceeds pot life, or requires force to spread and pack, discard it rather than dilute or revive it.
Applying Grout — Step-by-Step Technique
Keep the grout float, sponge, water, cloths, and waste bucket within reach before starting. Work a test section first if the tile is delicate, highly textured, porous, glass, or unfamiliar.
Step-by-Step Process
- Put on the PPE required by the product labels and SDSs. Confirm tiles are firmly bonded, joints are clear, and movement joints are protected from grout.
- Mix a manageable batch according to the product label, including any specified slake and remix step.
- Load a small amount of grout onto the rubber float. Press it across the joints at an angle, making repeated diagonal passes in both directions to pack them fully.
- Hold the float close to the tile face and scrape excess grout diagonally across the joints. Diagonal passes reduce the chance of dragging material out of a joint.
- Inspect the section before washing. Refill pinholes, low spots, and visible voids while the grout is still workable. Keep grout out of corners and other movement joints.
- Wait for the product’s stated initial-cleanup condition: excess grout should be firm enough to clean without pulling grout from joints. Use a well-wrung sponge and gentle diagonal strokes.
- Rinse often in clean water, wring thoroughly, and make the final cleanup pass required by the product. Use a dry microfiber cloth only when the label permits and the surface has reached the appropriate stage.
- Repeat in adjacent manageable sections. Protect the completed backsplash for the stated cure and water-exposure period.
Loading the float and packing joints
Place grout on the face of the float rather than submerging the float in the bucket. Press firmly enough to fill the joints, then remove surface excess with the float edge. The finished joints should appear full and consistent, without pinholes or gaps, before sponging begins.
Work sequence and staging
Work from one reachable area to the next, keeping wet grout away from finished cabinetry and the countertop. Do not chase a fixed 10-, 15-, or 30-minute timetable. Temperature, humidity, tile absorption, joint size, and grout chemistry all change cleanup timing. Test a small area: if the sponge smears grout across the tile or pulls it from joints, wait; if residue is becoming difficult to remove, reduce the next section size and follow the label’s cleanup method.
Cleaning, Sponging, Tooling, and Haze Removal
Cleanup is a staged process, not a single fixed-time wipe. Follow the grout’s instructions for initial and final wash; epoxy products in particular may require a different wash solution and a second cleaning stage.
Bulk removal and sponge cleanup
Remove as much surface grout as possible with the float before using a sponge. When the grout has firmed to the label’s stated condition, use a dense sponge that is damp, not dripping. Wipe lightly and diagonally across the joints. Turn to a clean sponge face after each pass, rinse in clean water, and wring thoroughly.
A repeatable workflow is to use one bucket for rinsing and a second bucket of clean water for the final sponge rinse, changing both as they cloud. Too much water or aggressive scrubbing can wash out joints, cause uneven texture or color, and redeposit residue on tile.
Inspect while the grout is workable
After the initial wash, look for pinholes, low joints, or joints washed down too far. Correct them only according to the grout manufacturer’s repair directions; do not smear fresh material over a joint that has already begun setting. Keep inside corners and perimeter movement joints clear for sealant.
Removing haze and final polishing
Fresh residue belongs in the grout’s specified cleanup window. After initial cure, inspect dry tile under angled light; haze is easier to see when the face is dry. Start with a clean dry microfiber cloth or a compatible neutral cleaner only if the tile and grout instructions allow it.
For cured haze, first determine whether it is cement haze, epoxy haze, efflorescence, or another deposit. Select only a cleaner approved for that grout and tile combination. Test a hidden area, mix or dilute it exactly as labeled, apply it for only the labeled dwell time, and prevent it from drying on the tile. Rinse thoroughly as directed, dry the surface, and reinspect under angled light. Epoxy haze needs an epoxy-compatible remover or the grout manufacturer’s method. Never use sealer on a cloth as a general haze remover.
Stop Rules, Troubleshooting, and Common Mistakes
When to stop and reassess
- Loose, cracked, hollow, or moving tile: stop and repair the tile installation before grouting.
- Grout is stiffening, hardening, or beyond pot life: discard it. Do not add water unless the exact product instructions authorize it.
- Sponge pulls grout from joints: stop washing and let the grout firm further; use less water on the next pass.
- Tile scratches, stains, or changes appearance in a test area: stop and confirm grout, float, pad, and cleaner compatibility.
- Recurring cracks, moisture at the wall, widespread debonding, or substrate movement: stop. These are not cosmetic grout problems and may require a qualified tile professional.
- Unknown tile, damaged electrical components, or inadequate controls for chemical cleaning: stop; do not use acid or another aggressive cleaner.
Troubleshooting guide
| Symptom | Diagnostic check | Likely causes | Immediate remedy | Escalation limit |
|---|---|---|---|---|
| Haze on tile | Inspect dry tile under angled light. Determine whether the residue is fresh grout, cured cement haze, epoxy haze, or another deposit. | Missed cleanup window, dirty sponge water, or incompatible cleaning method. | For fresh residue, use the grout’s stated wash method. For cured haze, test an approved cleaner in a hidden area; use labeled dilution and dwell time, rinse thoroughly, and do not let it dry. | Stop if tile finish changes, the cleaner is not approved, or residue persists after the approved method; consult a tile professional. |
| White, powdery efflorescence | Confirm it is a dry, salt-like deposit rather than haze or hard-water scale. Check for repeated moisture at the counter or wall. | Excess cleanup water, moisture moving through the installation, or recurring water intrusion. | Use dry removal or a tested, manufacturer-approved cleaner for compatible surfaces. Reduce excess water on future work. | Refer recurring deposits or evidence of wall moisture, leaks, or failed backing to a qualified tile professional. |
| Cracked grout | Check whether the crack follows a corner or countertop transition, whether tile moves or sounds hollow, and whether cracks return after repair. | Movement joint filled with grout, moving substrate, loose tile, or an installation problem. | At a change of plane, remove grout and install compatible flexible sealant. Do not patch field-joint cracks until tile and substrate are checked. | Stop for recurring cracks, widespread cracking, loose tile, moisture intrusion, or substrate movement. |
| Low or washed-out joints | Compare joint depth with adjacent joints; look for sponge marks or areas washed down during cleanup. | Early washing, too much water, excessive pressure, or incomplete packing. | While grout is still workable, correct only as the product allows. Once set, remove defective grout to the manufacturer-required depth, clean the joint, and regrout with fresh compatible material. | Do not coat partially set grout with a thin new layer. Seek help if defects are widespread or tile edges are damaged. |
| Pinholes or voids | Inspect dry joints under angled light and press visually along the line for small holes or gaps. | Insufficient packing, trapped air, or premature/over-wet cleanup. | Before initial set, repack as permitted. After setting, remove defective grout to the required depth before regrouting; do not surface-smear a patch. | Stop if voids are widespread or tiles are loose, moving, or poorly bonded. |
| Scratched tile | Stop and compare an untouched test area with the damaged area. Identify whether sanded grout, the float, pad, or cleaner caused the mark. | Abrasive aggregate, abrasive tool, or incompatible cleaner on a delicate finish. | Stop using the suspected material. Clean only by an approved method and obtain the tile manufacturer’s grout/cleaner recommendation before continuing. | Do not continue on delicate tile until compatibility is confirmed; seek professional advice for visible finish damage. |
| Color variation | Compare areas after the stated cure, not while wet. Check whether variation follows separate batches, wetter cleanup areas, or changing room conditions. | Incorrect liquid measurement, inconsistent mixing, batch variation, uneven curing, or excessive cleanup water. | Record the product/color batch, use measured liquid and clean tools for subsequent work, and follow cure conditions. Do not assume sealer will correct color. | Stop before broad recoloring or regrouting if the cause cannot be identified; consult the grout manufacturer or a tile professional. |
| Stiffening grout in the pail | Check the stated pot life and whether the grout has begun hardening or needs force to spread. | Pot life exceeded, batch too large, warm/dry conditions, or unauthorized adjustment. | Remix only if the exact instructions permit it and without added water unless specifically authorized. Otherwise discard the batch. | Do not revive partially set grout with water or use it in the wall. |
Repairing and touching up later
Never save mixed grout for later use. For dry powder, follow the stated shelf life and storage instructions; discard material that is lumpy, damp, contaminated, or past its date. Seal opened packaging as directed and keep it dry, but do not assume any opened bag remains usable for a universal number of weeks.
For a small repair, remove defective grout to the depth and width required by the manufacturer, clean the joint, and use fresh compatible grout. Do not coat fresh grout over partially set material. If cracking, missing grout, moisture intrusion, or debonding is widespread, identify and correct the cause before regrouting; failed backing or recurring movement calls for a qualified tile professional.
Sealing, Caulking, and Final Inspection
Caulking inside corners and transitions
After the grout stage, install a compatible flexible sealant at inside corners, the backsplash-to-countertop joint, perimeter joints, tile-to-cabinet or trim interfaces, and other changes of plane. These locations move differently from the tile field and should not be rigidly filled with grout.
- Remove grout, dust, tape, and loose material so the sealant can bond to clean surfaces.
- Use a tile-rated silicone or other flexible sealant specified for the joint and exposure. A color-matched sealant can make the transition less noticeable.
- For wide or deep joints, use backer material only when required by the sealant manufacturer. That manufacturer determines the backer-rod size and required joint geometry; do not guess or overfill the joint with sealant.
- Apply a continuous bead, tool it promptly, and remove tape before a skin forms if the sealant instructions call for it.
- Allow the sealant’s stated cure before water exposure or cleaning. The finished bead should be continuous, bonded along both sides, and free of gaps.
Sealing grout and verifying results
Seal only when the grout manufacturer requires or permits it. Cementitious grout commonly benefits from a compatible sealer after its specified cure. Ready-to-use grout has product-specific instructions. Whether an epoxy grout needs or permits sealing is controlled by its exact technical data sheet. Follow the sealer label for application, dwell time, removal of excess from tile faces, recoating, and cure.
Water beading is only a rough field observation; it does not prove uniform coverage, penetration, or long-term stain resistance. Judge appearance and cleanability after the stated cure, keep tile faces free of sealer residue, and maintain the surface according to product guidance.
Final inspection checklist and maintenance tips
- Joints: full to a consistent depth and free of visible pinholes, voids, or washed-out areas.
- Movement joints: free of grout and sealed continuously where sealant is required.
- Tile faces: clean and haze-free when inspected dry under angled light.
- Color and texture: reasonably uniform, with no obvious variation from excessive cleanup water or inconsistent batches.
- Sealer: excess removed from tile faces and allowed to cure as directed, if sealing applies.
- Protection: no water, impact, vibration, dirt, or harsh cleaning before grout and sealant reach their stated cure periods.
- Maintenance: after curing, use routine cleaners compatible with the tile, grout, and sealer; avoid untested acids and abrasives.
Conclusion
A clean backsplash grout job depends on preparation, measured mixing, fully packed joints, restrained cleanup water, and product-specific timing. Keep grout out of changes of plane, use flexible sealant there, and protect the work through its stated cure period.
If tiles are loose, the wall is moving, moisture is coming from behind the backsplash, electrical components are damaged or wet, or haze and staining cannot be addressed with a tested compatible method, stop rather than forcing a cosmetic fix.
FAQ
Do I need to seal backsplash grout?
It depends on the exact product. Cementitious grout is commonly sealed after its specified cure; ready-to-use grout has its own instructions; and many epoxy grouts do not need sealing. Follow the grout technical data sheet and, where applicable, the sealer label.
Can I grout the inside corners and the joint above the countertop?
No. Those are changes of plane and should be left for a compatible flexible sealant, usually a tile-rated silicone or other specified sealant.
When should I sponge grout off the tile?
Use the grout manufacturer’s cleanup instructions and the grout’s observable condition. Start when excess grout has firmed enough to clean without pulling material from the joints. Fixed minute counts do not apply to every grout, tile, or room condition.
Can I add water when grout becomes stiff?
Not as a general practice. Remix only if the label permits it, and do not add water unless the exact product instructions explicitly allow that adjustment. Discard grout that has begun setting or passed its pot life.
What should I do about haze after the grout cures?
Identify whether it is cement haze, epoxy haze, efflorescence, or another residue. Test the grout manufacturer’s approved method in a small hidden area, follow the cleaner’s labeled dilution and dwell time, rinse thoroughly, and do not let cleaner dry on tile. Avoid acid on acid-sensitive stone, metal, uncured grout, or unknown surfaces.