
Introduction
Grinding high spots on concrete is the process of removing tiny amounts of surface to bring the floor to a level plane. It’s a hands-on job that starts with locating the high spots and planning the approach, not blasting away blindly. Check your grinder’s guard, power rating, and the manufacturer’s instructions before you begin, and be aware that you may need to recheck levels as you go.
Choose the right grinder for the job by considering surface condition and access, and verify what diamond tooling is appropriate via label guidance. For tooling, note that grit, bond type, and segment shape affect cutting action and dust; always cross-check the label or instructions for guidance. Manage dust control by using proper vacuums or shrouds and keep a clean work area, and stop if you see spalling or new cracks.
Key takeaways
- Accurately locate high spots with a straightedge and leveling technique before grinding.
- Choose grinder type based on floor size, profile, and access; scarifying when needed.
- Diamond tooling matters: select grit, bond, and segment shape for your concrete condition.
- Use dust containment: local exhaust, barriers, and vacuum collection during grinding.
- Too deep grinding risks creating low spots; test with passes and check transitions.
- Safety first: wear PPE, secure area, and plan containment before starting.
Table of Contents
- Introduction
- Key takeaways
- Assessing the Floor Before You Start
- Identifying What’s Causing High Spots
- How Deep Is Safe — Limits, Risks, and What to Check
- Choosing the Right Grinder and When to Scarify
- Selecting Diamond Tooling and Settings
- Dust Control, Containment, and Environmental Considerations
- Grinding Techniques to Avoid Low Spots and Achieve Smooth Transitions
- Safety, Final Inspection, and When to Call a Professional
- Conclusion
- FAQ
Assessing the Floor Before You Start
Before grinding, map out the plan for the job. Identify the slab type, coatings, and any prior repairs that affect depth and sequence. Document your findings to set expectations for grinding and final finish.
Check the substrate condition and structural considerations, including thickness, subgrade, and potential repairs. Inventory coatings, sealers, or toppings and plan for their removal or compatibility with grinding depth and tooling. Run preliminary moisture tests if coatings may trap moisture and note any safety concerns or access limitations.
Visual walk-through and mapping high spots
Start by walking the entire slab, looking for high spots. These could be lumps, ridges, or areas that seem higher than others.
Mark each high spot with a piece of chalk or tape. This helps you keep track during grinding.
Create a simple map of your findings. Sketch out the slab’s layout and mark the locations of high spots. This will guide your grinding passes, ensuring you don’t miss any areas.
Measuring methods and tools to quantify unevenness
To understand how deep you need to grind, you must first measure the height of high spots accurately.
- Straightedge: Place it on the slab, moving it around until it sits level. Mark where it doesn’t touch. This gives a quick visual check but isn’t precise.
- Laser Level: These are accurate and easy to use. Set it to measure down from the ceiling or another flat surface. They’re affordable (around $50) but need batteries.
- Digital Inclinometer: Measures slope, not height directly. Useful for finding gradual slopes but not precise for high spots. Around $20-$40.
- Feeler Gauge: A simple tool with thin blades of varying thickness. Slide them under the straightedge to measure gaps precisely. Inexpensive (around $10).
- Rentable Tools: Some rent shops offer high-tech tools like 3D laser scanners or digital height gauges for around $50-$100 per day.
Cost and time estimation basics
The cost of grinding depends on area, severity, equipment choice, and dust control. Here’s how to estimate:
Area: Measure the total square footage that needs grinding. Larger areas take more time.
Severity: Deeper high spots take longer to grind down. Estimate based on your measurements.
Equipment: Renting a walk-behind grinder costs around $100-$200 per day, plus fuel or electricity. Larger, ride-on machines can cost up to $500 per day.
Dust control adds extra cost and time. Plan for containment, ventilation, and cleanup. Estimate based on your chosen methods.
Identifying What’s Causing High Spots
Identify and verify common causes of high spots, such as pouring inconsistencies, trowel burn, toppings, hard aggregate, or settlement. Note how each cause changes the removal approach you should take. Use simple on-site checks to guide your plan.
Use straightedges or long levels, look for visual cues of high points, and check for toppings or embedded aggregates. Decide how each cause informs tooling and technique, from shallow grinding for surface burn to deeper removal for settlement. Plan your passes with safety margins in mind and document suspected causes for the team.
Visual and Tactile Clues to Diagnose Causes
Before you start grinding, take a close look at your concrete. Visual cues can tell you a lot about what’s causing those high spots.
Thin toppings or overlays will often have a different color or texture than the base concrete. You might see a thin layer that looks like it could be scraped off easily. Laitance, a weak, cement-rich layer on top of the concrete, can feel spongy when you press on it with your finger.
Structural high spots are usually caused by something underneath pushing up. These might not have any visible signs, but they’ll feel solid and unyielding under pressure. If you see a pattern of high spots along joints or cracks, that could indicate settlement issues beneath the slab.
When to Investigate Subbase or Structural Issues
Sometimes, those high spots aren’t just on the surface. They might be signs of deeper problems. Here’s when to take a closer look:
If you see recurring patterns of high spots across your slab, like waves or ridges, that could indicate issues with the subbase underneath. These patterns won’t change no matter how many times you grind the surface.
Joint ridges – those bumps along control joints – can sometimes be too high because of problems below. If they’re consistently higher than other parts of the slab, it might be time to investigate further.
Deflection, or bending, in the slab can also cause high spots. This is serious stuff; if you suspect deflection, stop grinding and call a structural engineer right away. You don’t want to make things worse by grinding down too much and weakening the structure.
How Deep Is Safe — Limits, Risks, and What to Check
Define safe removal depth criteria by considering slab thickness, reinforcement location, and any toppings or overlays. These factors constrain how much material you can remove. Always verify with drawings or a probe test if you’re unsure.
Assess the final use and finish requirements, including traffic type, wear, and cosmetic tolerances. Identify structural indicators such as exposed reinforcement or delamination and stop if you detect issues that require professional input. Establish per-pass and total depth limits and stop rules to protect the slab.
Things to verify before removing material
Before you start digging into your concrete slab, use this checklist to ensure you’re not causing unnecessary damage or compromising the integrity of your structure.
- Check slab drawings: Locate and review your original slab drawings. They’ll show you where reinforcing elements like rebar or fibers are placed.
- Measure slab thickness: Use a concrete saw to cut a small, inconspicuous core from the slab. Measure its thickness to confirm it matches your drawings.
- Locate rebar/fibers: Carefully expose a section of the slab’s underside (if accessible) to visually locate and identify any reinforcing elements.
- Confirm overlay depths: If you’re removing an overlay, ensure it’s thick enough to safely remove without damaging the base concrete. Check manufacturer instructions or local rules for safe removal depths.
- Check for voids: Tap the slab with a hammer; a dull thud could indicate voids beneath the surface. If present, proceed with caution to avoid collapse.
- Inspect for cracks: Check for existing cracks that could worsen during removal. If found, consult a structural engineer before proceeding.
- Avoid cutting into utilities: Before digging, use utility locating services to mark any underground lines. Cutting into them can cause expensive damage and safety hazards.
- Ensure proper ventilation: If using power tools, ensure the area is well-ventilated to prevent carbon monoxide buildup from gasoline-powered equipment.
Quick rule: Always remember: “Measure twice, cut once.” This applies to both measuring your cuts and double-checking your plans before you start digging into your slab.
Practical depth guidance and safe ranges (use with verification)
Before you start removing material, use this checklist to ensure your work is safe and effective. It’s crucial to confirm these points before proceeding.
- Check surface level: Use a laser level or a simple water level to ensure the surface is even before you start digging.
- Verify depth with measurements: Use a tape measure to check the depth at multiple points. Aim for consistency within 1/4 inch.
- Check for utility lines: Before digging, call your local utility protection service (e.g., 811 in the US) to mark any underground lines. Never dig without this confirmation.
- Look out for soft spots: Probe the ground with a rod or a screwdriver to check for soft spots that could indicate unstable soil or voids.
- Confirm soil type: Check if your soil is clay, sand, or loam. Different types require different removal techniques and have varying stability.
- Check for bedrock: In some areas, you might hit bedrock while digging. If so, stop and reassess your plans.
- Inspect for water issues: Check for any signs of standing water or wet soil, which could indicate a problem with drainage.
- Confirm local rules: Always check with your local building department to ensure you’re following all codes and regulations regarding excavation depth.
Quick rule: If you’re unsure about any aspect of your work, always consult a professional. It’s better to be safe than sorry when dealing with excavation.
Structural and finish risks of excessive removal
Use this checklist before you start grinding or removing material from your concrete surface. It’s crucial to understand the potential risks and how to verify they won’t compromise your project.
- Reinforcement exposure: Check for any visible rebar or wire mesh. Grinding too deep can expose these, weakening the slab and compromising its structural integrity.
- Slab thickness: Measure the current slab thickness to ensure you don’t grind below 75% of its total depth. This maintains adequate strength for most residential uses.
- Concrete quality: Inspect the concrete for signs of poor quality, like excessive voids or weak spots. Grinding can exacerbate these issues.
- Moisture content: Check for any dampness or efflorescence, as grinding can increase moisture migration and lead to further damage.
- Coating adhesion: If you plan to apply a coating later, ensure grinding won’t compromise its bonding. Check the manufacturer’s recommendations for surface preparation.
- Trip hazards: Look out for any areas where grinding could create or exacerbate trip hazards, like level changes or cracks.
- Concrete type: Verify that you’re not dealing with lightweight or other specialty concretes that may be more susceptible to damage from grinding.
- Proper equipment: Ensure your grinder is in good condition and suitable for the task. Using a grinder designed for metal on concrete can cause excessive removal.
Quick rule: Always grind perpendicular to the reinforcement and never remove more than 1/8″ (3mm) at a time. This helps maintain structural integrity and prevents finish issues.
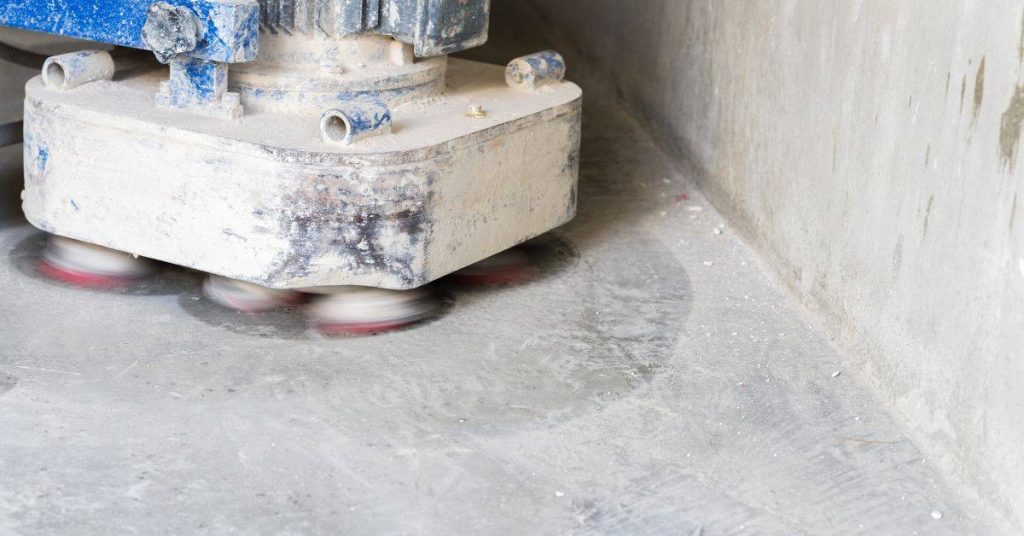
Choosing the Right Grinder and When to Scarify
Choose handheld, walk-behind, planetary, or ride-on grinders based on floor size and irregularities, and set realistic timelines. Understand typical removal rates to plan your work without overestimating progress. Use the right tool for the job you’re facing.
Know when to bring in scarifiers or planers for aggressive removal, such as deep high spots or heavy coatings. Compare this to traditional grinding to limit dust and heat. Plan your workflow to minimize downtime and keep transitions smooth.
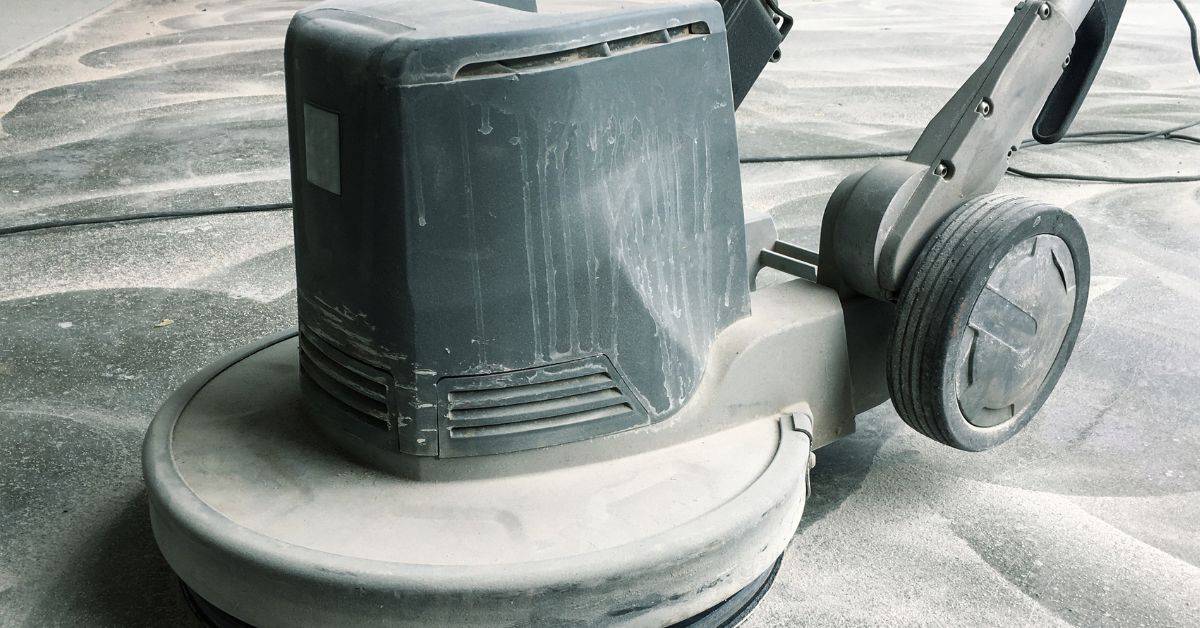
Matching machine size and weight to the job
The right grinder is a balance of power, maneuverability, and removal rate. Here’s how to pick:
Handheld grinders (up to 10″): Ideal for small areas, tight spaces, and light-duty work. They’re easy to handle but have lower removal rates.
Walk-behind grinders (10″-24″): Great for medium-sized floors with moderate irregularities. They offer good removal rates and are versatile. Larger sizes may require more space to maneuver.
Planetary/ride-on grinders (24″+): For large, flat areas with heavy-duty requirements. They’re fast but need ample space and can be too powerful for delicate work or small areas.
When to pick a scarifier or shot blaster instead
Scarifiers and shot blasters are aggressive tools for heavy-duty removal. Use them when:
Deep milling is needed (1/2″+): Scarifiers can remove material faster than grinders, making them ideal for deep high spots or thick toppings.
Very rough profiles exist: Shot blasters are great for removing heavy coatings, rust, or scale. They create a rough profile ready for new coatings.
Traditional grinding is insufficient: If dust and heat generation are concerns, or if the surface is too hard for standard grinding, consider scarifiers or shot blasters.
Selecting Diamond Tooling and Settings
Match bond types to the concrete condition, considering hardness, moisture, and coatings. Choose a bond that resists glazing and provides predictable wear. This helps you control cut depth and finish rate.
Plan grit progression and starting points to avoid over-cutting, and move from coarse to fine grits logically. Consider segment shape, coating compatibility, and how existing coatings or aggregates affect tool density and finish quality. Ensure tooling compatibility with the grinder’s RPM and dust-collection setup.
Bond and grit selection basics
Choosing the right bond type and grit level is crucial for efficient grinding. The bond holds diamonds to the tool, while grit determines aggressiveness.
Hard bonds, like resin or vitrified, are great for hard, dry concrete with no coatings. They last longer but can be aggressive on softer surfaces.
Soft bonds, like electroplated, work well on moist, coated surfaces. They’re less aggressive and more flexible but wear out faster.
Start with a coarse grit (e.g., 30/60) for aggressive removal, then progress to finer grits (e.g., 80/120) for smoothing. This avoids over-cutting and ensures a consistent finish.
Segment shapes and arrangement for aggressive vs. fine removal
Diamond segments come in various shapes, each serving a purpose. Choose wisely based on your removal needs.
Turbo segments have exposed diamonds all around. They’re aggressive, removing material fast but leaving a rough finish. Use them for heavy-duty grinding and profiling.
Turbo-segmented or continuous rim segments have diamonds only on the edges. They offer a balance between stock removal and smoothness, ideal for general-purpose grinding and light smoothing.
For a smoother finish, use smaller, closely spaced segments. This increases contact points, promoting even material removal and a polished look. Always follow the recommended segment spacing for your grinder’s size to maintain efficiency and safety.
Dust Control, Containment, and Environmental Considerations
Compare wet versus dry grinding to determine dust and surface finish implications. Choose a method compatible with the material you’re removing and the site constraints. Plan ahead for moisture management and surface compatibility.
Set up dust control systems with appropriate vacuums and inline HEPA filtration, plus proper ducting and maintenance. Use containment measures to prevent cross-contamination and protect occupants. Establish post-grind cleanup and waste handling routines to verify a clean, safe space.
Choosing wet vs. dry methods and vac systems
Wet grinding is your best bet when working on occupied spaces or sensitive sites due to significantly reduced dust generation. It’s also great for getting a smooth, polished finish.
Dry grinding with HEPA vacuums is ideal for larger areas and minor imperfections. It’s faster but produces more dust. Use it when you can contain the area or work outdoors.
For both methods, use industrial wet vacs for slurry pickup and dry vacuums with inline HEPA filtration for dust collection. Regularly clean and maintain filters to keep them working efficiently.
Containment, filtration, and waste handling
Set up temporary barriers or plastic sheeting around the work area to contain dust. For occupied spaces, use negative-pressure systems to prevent dust from escaping.
Maintain your HEPA filters regularly by cleaning them after each use and replacing them every 25-50 hours of operation, depending on the manufacturer’s guidelines.
Properly dispose of or recycle slurry and dust according to local regulations. Never dump it down drains or into landfills without proper treatment. Always wear appropriate PPE when handling waste.
Grinding Techniques to Avoid Low Spots and Achieve Smooth Transitions
Start with a baseline floor assessment, using a straightedge or laser to identify high and low areas. Set targets for acceptable variance before you begin grinding. This keeps you from chasing issues later.
Plan pass overlap and sequencing to move across the floor and even out high spots. Maintain steady travel speed and avoid dwell to prevent heat buildup and new low spots. Inspect regularly to catch deviations early and adjust as needed.
Proper pass patterns, overlap, and pressure control
When grinding concrete, you’re aiming for a smooth, even surface. Here’s how to get it right:
Overlap your passes. Don’t grind in straight lines like mowing a lawn. Instead, stagger your passes so each one overlaps the last by about half. This helps blend high spots and ensures no low spots are left behind.
Keep moving forward at a steady pace. Stopping and starting can leave marks. And remember, it’s not just about speed – machine weight and feed rate matter too. Check your equipment’s manual to find the sweet spot for your specific grinder.
Incremental removal strategy and monitoring
Listen up, DIYer. You wanna avoid low spots and smooth out your concrete like a pro? Here’s how you do it in small, careful steps.
First off, don’t go at it like a bull in a china shop. Remove material in multiple light passes. This way, you won’t dig yourself into trouble too deep, too fast. Think of it like shaving: slow and steady wins the race.
Now, after each pass, measure your progress. Use a straight edge and a level to check for any low spots or inconsistencies. This’ll help you keep track of where you’re at and where you need to go next.
And here’s the kicker: don’t be afraid to adjust your tools or technique as needed. If you’re finding it hard to get a smooth finish, maybe you need to switch up your tooling or put more pressure on those high spots. Just remember, less is more. You can always take off more, but you can’t put back what you’ve already taken away.
Safety, Final Inspection, and When to Call a Professional
Wear appropriate PPE for eyes, ears, lungs, and skin, and secure the work area to prevent unauthorized access. Review electrical and tool safety before starting. Have a plan for dust containment and emergency procedures.
Perform final inspection checks on surface flatness, cleanliness, and edge protection. Document measurements and compare them to your project goals. Escalate to a structural engineer or specialist if you see cracking, delamination, hollow sounds, or unexpected moisture.
Essential PPE and on-site safety checks
Before starting any concrete work, use this checklist to ensure you’re protected and your site is safe. Check these items every time you start a new task or day of work.
- Respiratory Protection: Wear a NIOSH-approved respirator with a P100 filter when working with concrete. Check the filter’s expiration date and replace it if needed.
- Hearing Protection: Use earplugs or earmuffs to protect against loud noises from power tools. Ensure they fit properly and provide adequate protection (at least 25 dB reduction).
- Protective Clothing: Wear long sleeves, long pants, gloves, and sturdy boots with steel toes. Check for any tears or damage before starting work.
- Eye Protection: Use safety glasses or goggles with side shields to protect your eyes from debris. Ensure they meet ANSI Z87.1 standards.
- Lockout/Tagout Checks: If working around electrical equipment, ensure it’s properly locked out and tagged out before starting work. Check that the tags are still in place and undamaged.
- Ventilation Assessment: Ensure your workspace is well-ventilated to prevent the buildup of harmful dust. Use fans or other ventilation methods as needed, and check them regularly to ensure they’re functioning properly.
- Fire Extinguisher: Have a fire extinguisher on-site and know how to use it. Check that it’s fully charged and easily accessible.
- Emergency Contact Information: Keep emergency contact information for local services (e.g., poison control, hospital) readily available in case of accidents or emergencies.
Quick rule: Always prioritize safety over speed. Skipping safety checks can lead to serious injuries, rework, and costly delays.
Final cleanup, verification, and acceptance criteria
Once the grinding is complete, it’s time to clean up, verify your work, and ensure everything meets project tolerances. Use this checklist before signing off on the job.
- Remove dust: Clean the surface thoroughly using a wet-dry vacuum or a damp cloth to remove all concrete dust. This prevents contamination of subsequent layers and ensures accurate visual checks.
- Check for low spots: Use a straightedge to check for any low spots or hollows in the slab. Place the straightedge on the surface at multiple points and check for gaps, which could indicate areas that need further grinding.
- Verify flatness: Measure the flatness of the concrete using a 10-foot straightedge and a feeler gauge. Check the manufacturer’s guidelines or local building codes to ensure your slab meets the required flatness tolerance (typically Fmin 30 for residential work).
- Inspect edges: Check all edges of the slab for uniformity and proper slope. Ensure there are no sharp corners or lips that could cause tripping hazards.
- Check for cracks: Inspect the entire surface for any cracks, even hairline ones. Cracks can compromise the integrity of the concrete and should be addressed before proceeding with further work.
- Ensure proper curing: Verify that the concrete has been properly cured according to the manufacturer’s instructions or local best practices. Improper curing can lead to weak, cracked, or discolored concrete.
- Check moisture levels: Use a moisture meter to check the slab’s moisture content. Ensure it falls within acceptable ranges (typically 4-6% for most flooring installations) before proceeding with further work.
- Document results: Record all measurements, observations, and test results from your verification process. Keep these records on file to document that the concrete meets project tolerances and to protect yourself from any future disputes.
Quick rule: Always double-check your work against project tolerances and local building codes. Skipping this step can lead to costly rework, delays, or even code violations down the line.
Triggers for professional consultation
Before you proceed with any concrete work, use this checklist to determine if you need to consult a structural engineer or flooring contractor. These professionals can provide expert advice and prevent costly mistakes.
- Exposed Reinforcement: Check for any exposed rebar or wire mesh. If found, it’s a sign of concrete deterioration that needs professional assessment.
- Deep Removal Needs: If you plan to remove more than 2 inches (5 cm) of concrete, consult a pro first. Deep removal can affect structural integrity and may require additional support.
- Subbase Failure: Inspect the subbase for signs of failure like excessive movement, cracking, or soft spots. If present, do not proceed without professional evaluation.
- Uneven Slab: Measure the slab’s levelness. A difference of more than 1/4 inch (6 mm) over a 10-foot (3 m) span may indicate structural issues that need attention.
- Cracking Patterns: Check for cracks wider than 1/8 inch (3 mm). Hairline cracks are normal, but wider ones may require professional intervention.
- Moisture Issues: Look for signs of excessive moisture or water damage. These can weaken the concrete and should be addressed by a pro.
- Structural Alterations: If you plan to remove load-bearing walls, cut holes larger than 36 inches (91 cm) in diameter, or change the slab’s size or shape, consult an engineer first.
- Unusual Settling: Check for signs of settling like doors not closing properly, cracks in walls, or sloping floors. These could indicate a structural problem that needs professional attention.
Quick rule: If you’re unsure about any aspect of your concrete work, it’s always better to err on the side of caution and consult a professional.
Conclusion
Grinding high spots is a precise job. Do it right and you’ll get a smooth floor that lasts, without creating new trouble or hazards you’ll regret later.
First, check the concrete and plan your approach step by step: test a small area, confirm high spots, pick the right grinder and tooling, set up dust control, and then work methodically from high spots toward flat areas. Start slow, keep it clean, and verify progress frequently. If anything looks unpredictable, pause and recheck before you keep going.
Common mistakes to avoid are rushing the work, grinding too deep in one pass, and skipping dust containment or PPE. Don’t guess about depths or tool settings—measure, test, and adjust. Always keep the surface dry, the containment secure, and your feet and hands protected. Stay mindful of edges, transitions, and possible low spots that can cause trips or telegraphs of damage elsewhere in the slab.
If the floor shows severe cracks, moisture issues, or you’re unsure about the cause of the high spots, don’t push through. When in doubt about material limits, tool choice, or the risk of structural damage, call a pro. Stay focused, follow the plan, and you’ll finish confident that the result is safe, durable, and well worth the effort.
FAQ
How do I accurately locate and identify high spots on a concrete floor?
Walk the floor with a straightedge or a long level and mark any areas that dip or stick up. Photographs or a simple depth check with a dial indicator can help you confirm obvious high spots. If in doubt, cross-check with the manufacturer’s guidance for your slab or the grinder you plan to use.
Which grinder is best for DIYers to tackle high spots without overdoing it?
Choose a grinder with enough weight and control to smooth without gouging. For DIY work, a handheld or small- to mid-size planetary grinder with proper guards is common. Always follow the tool’s label and manufacturer instructions for use and maintenance.
What diamond tooling should I select for grinding high spots, and how do I avoid creating new issues?
Use the grit, bond type, and segment shape that match your floor condition per the tool label or manual. Start with a conservative grit and test on a small area before full use. If you’re unsure, check the tooling datasheet and local recommendations before grinding.
How do I manage dust and keep the job site clean during grinding?
Use a grinder with integrated dust collection or attach a compatible vacuum hose. Keep containment to the work area and seal doors or vents if needed. After grinding, clean the area thoroughly and inspect for missed spots or loose material.