
Introduction
Freeze-thaw on brick patios means water trapped in bedding, drainage, and joints can crack or lift bricks when temperatures swing below and above freezing.
This article covers how to select bedding, manage drainage, and fill joints so a DIY patio can survive those cycles. You’ll focus on simple checks you can do before you work and during the build.
Start by surveying for pooled water, loose bricks, and deep gaps, then plan bedding and joint materials with good drainage in mind. Read labels and manufacturer instructions for freeze-thaw performance and compatibility with brick, and follow any local rules or guidance. Choose bedding and joint fill options that you can install with your tools and climate, and test fits before full application.
Key takeaways
- Verify brick bedding and slope prevent water pooling; adjust based on local codes.
- Use proper joint fill and bedding compatible with freeze-thaw cycles for longevity.
- Install drainage routes and elevation transitions to channel water away from patios.
- Regularly inspect for cracks, delamination, or settled sand; repair early to avoid damage.
- Safety: shut off tools, wear eye protection, and use proper lifting for heavy pavers.
- Document material specs, follow manufacturer guidance, and check local code requirements.
Table of Contents
- Introduction
- Key takeaways
- How Freeze-Thaw Cycles Damage Brick Patios
- Designing Patio Drainage and Slope to Prevent Water Retention
- Bedding Systems Compared: Unbonded Sand, Mortar, and Modern Engineered Systems
- Joint Fill That Survives Freeze-Thaw: Selection and Placement
- Installation Best Practices to Reduce Freeze-Thaw Damage
- Retrofits and Repairs: Diagnosing Causes and Choosing Fixes
- Maintenance, Seasonal Care, and Compatible De-Icing Strategies
- Tools, Materials Checklist, Specs to Check, and Simple Field Tests
- Conclusion
- FAQ
How Freeze-Thaw Cycles Damage Brick Patios
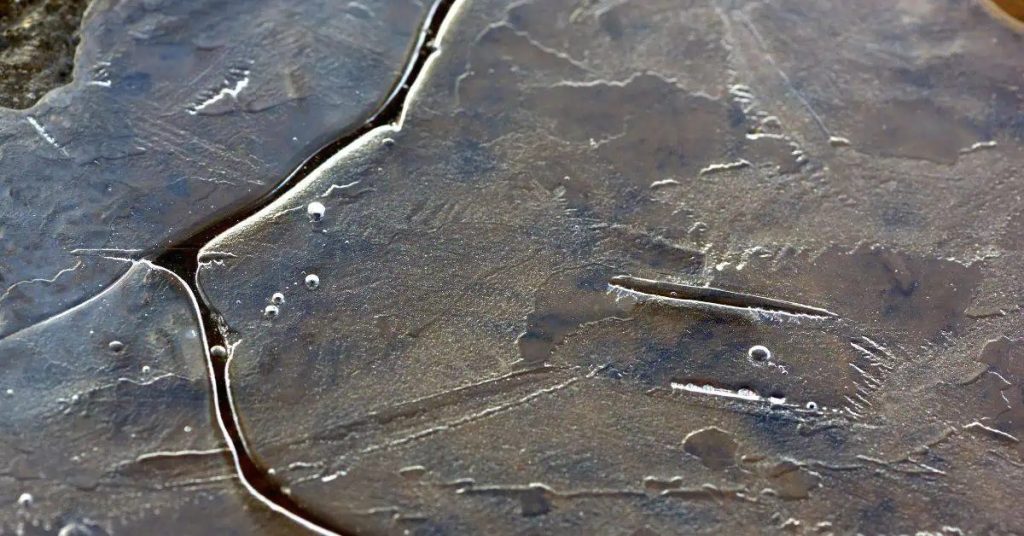
Freeze-thaw damage begins when water in the brick pores freezes and expands. This puts stress on the brick surface and internal matrix, creating microcracks. Repeated cycles widen those flaws and can push through bedding and joints, leading to progressive failure.
As cracks form, moisture penetrates deeper and moves into the bed area and edge restraints. The result is a pattern of spalling, settled pavers, and loose joints. The damage often starts small but follows a predictable path toward wider separation and rocking slabs.
Freeze-thaw mechanics at the material level
The materials you choose for your brick patio significantly impact its resistance to freeze-thaw damage.
- Porous bricks: These can absorb more water, leading to greater expansion when frozen. Look for dense, low-porosity bricks. Avoid highly absorptive clay bricks.
- Mortar type: Type N or Type S mortars are recommended due to their higher cement content and better freeze-thaw resistance. Avoid using mortar with a low cement content.
- Joint fill material: Polymeric sand or other freeze-thaw resistant jointing compounds help prevent water from penetrating the joints.
- Sealers: Applying a sealer can reduce water absorption, but it’s not a substitute for using appropriate materials. Use sealers sparingly and reapply as needed.
- Bedding material: A well-compacted bed of sand or gravel provides a stable base and helps drain water away from the bricks. Avoid using fine sands that can clog pores and retain moisture.
Typical failure patterns and signs to watch for
Freeze-thaw damage follows a predictable pattern, starting with small defects that worsen over time. Keep an eye out for these common signs:
Spalling: This is when the face of the brick begins to flake or pop off in small pieces. It’s often first noticeable around the edges and corners.
Joint loss: As water freezes and thaws, it can cause the jointing material to dislodge, leading to a loss of joint fill and increased vulnerability to further damage.
Settlement: Uneven settling or heaving of the bricks can lead to cracking and an uneven surface. This is often caused by poor drainage or inadequate bedding material.
Climate and site factors that increase risk
The frequency and duration of freeze-thaw cycles, along with other climate factors, can accelerate the deterioration of your brick patio.
Freeze frequency: Areas with more frequent freeze-thaw cycles will experience greater damage. In these regions, it’s crucial to use appropriate materials and provide adequate drainage.
Thaw duration: Longer thaw periods allow for increased water absorption by the bricks and mortars, leading to more significant expansion when temperatures drop. Keep your patio as dry as possible during the thaw season.
Road salt exposure: De-icing salts can accelerate damage by increasing the rate of freeze-thaw cycling and promoting efflorescence. If possible, minimize salt exposure or use alternative de-icers.
Microclimate: Areas with unique microclimates, such as those near large buildings or bodies of water, may experience different freeze-thaw patterns. Consider these local factors when designing your patio.
Designing Patio Drainage and Slope to Prevent Water Retention
Direct water away from paved areas with a deliberate surface slope and clear edge details. Proper drainage reduces ponding where freeze-thaw cycles concentrate with the pore water. Drainage features should be integrated into the patio plan from the start.
Consider both surface runoff and sub-surface flow pathways. Ensure grading guides water toward approved outlets or low-lying drainage channels. A well-designed system minimizes lingering moisture that drives freeze-thaw damage.
Recommended slopes and runoff principles
For a patio to drain effectively, it needs a gentle slope. Check your local building codes, but typically, you’re looking at around 1–2% effective slope.
Here’s how to calculate that: for every 8 inches of horizontal run, the patio should drop by 1 inch. This helps water sheet off the surface without puddling.
Remember: too steep a slope can cause tripping hazards and rapid water flow can erode joints.
Sub-surface drainage and underdrains
Underdrains help move water away from the patio base. You’ve got options:
– Perforated pipe: Lay this along the patio’s low side, with a slope towards the exit point.
– Gravel layer: A 4–6 inch layer beneath the base can help water drain. Use clean, angular gravel for best results.
Consider using a drainage membrane or geotextile if your soil is fine and prone to clogging.
Edge details, transitions, and landscaping interfaces
Proper edge details prevent water from pooling and causing frost heave. Here’s how:
– At walls, ensure the patio slopes away from the wall to prevent water buildup.
– For steps, create a small landing at the top step to direct water downwards.
– With planting beds, maintain a slight slope away from the patio and use a durable edge restraint to prevent soil from washing onto the patio.
Bedding Systems Compared: Unbonded Sand, Mortar, and Modern Engineered Systems
Loose sand beds allow some movement and easy adjustment during installation, but rely on proper edging to stay in place. Mortar beds lock pavers but transfer stresses differently and can crack under freeze-thaw cycles. Engineered bedding aims to balance strength with drainage and flexibility.
Each option has trade-offs for long-term stability and maintenance. Consider how movement, drainage, and edge support interact with your climate. Check manufacturer instructions and local guidance to choose the best fit.
Loose sand (unbonded) bedding: advantages and limitations
Unbonded sand, also known as loose sand or dry-set, is a simple and cost-effective bedding option for your brick patio. It allows for natural movement of the bricks, which is crucial to accommodate freeze-thaw cycles.
Advantages: Unbonded sand provides excellent drainage, preventing water from pooling on your patio’s surface. It also allows for easy installation and repair.
Limitations: While unbonded sand offers many benefits, it has its drawbacks too. Over time, the fine particles can wash away due to rain or improper jointing, leading to instability. Edge restraints are necessary to prevent the sand from shifting outwards. Additionally, proper joint strategy is crucial to maintain a stable and durable patio.
Mortar-bedded and semi-bonded installations
For increased stability, you might consider using a mortar bed or slurry-set for your brick patio. This method involves mixing sand with cement to create a semi-rigid base.
Advantages: A mortar bed provides better resistance against lateral movement and helps maintain the level of your patio over time. It also reduces the risk of bricks shifting during freeze-thaw cycles.
Limitations: While mortar beds offer more stability, they can be less forgiving when it comes to natural expansion and contraction due to temperature changes. This could potentially lead to cracking if not designed and installed correctly. Additionally, proper curing is crucial to ensure the mortar’s strength and durability.
Modern screeds and stabilized bedding options
In recent years, several modern bedding systems have emerged that offer improved performance compared to traditional methods. These include cementitious screeds, stabilized sand, and proprietary bedding products.
Advantages: These advanced bedding systems provide enhanced stability, better resistance against freeze-thaw cycles, and improved longevity. They also often allow for faster installation times.
Limitations: While these modern options offer many benefits, they typically come at a higher cost compared to traditional methods. It’s crucial to check manufacturer guidance and ensure compatibility with your chosen bricks and jointing materials. Additionally, some systems may require specialized equipment or training for proper installation.
Joint Fill That Survives Freeze-Thaw: Selection and Placement
Joint-fill choices include polymeric compounds, traditional mortar, flexible sealants, and open joints, each with distinct performance. Polymeric blends can resist moisture ingress if correctly installed. Mortar joints offer rigidity but may crack with cycles of freezing and thawing.
Flexible sealants accommodate movement while sealing the joints for moisture control. Open joints rely on the bed and deck structure to shed water naturally. Verify product labels and installation steps before proceeding.
Polymeric Sand and Joint Stabilizers
Polymeric sands are a mix of fine silica sand, polymer additives, and pigments. They work by binding together when wet, creating a stable, hard surface that resists weed growth and insect intrusion.
Installation: Apply polymeric sand after laying your bricks and before grouting. Use a rubber squeegee to force the sand into the joints, ensuring they’re completely filled. Brush off excess sand.
Polymeric sands are great for freeze-thaw resistance but have limits. They struggle with heavy water flow or poor drainage. Ensure your patio has proper slope and drainage to prevent water buildup.
Mortar and Pointed Joints for Permanence
Mortar repointing involves removing old mortar from between bricks, then refilling with new. It’s a traditional method that provides long-lasting results.
Joint Profiles: Use concave or weathered joints to encourage water runoff. Vee joints can trap water, leading to freeze-thaw damage.
Consider differential movement – how much your patio will shift over time due to temperature changes and settling. A flexible mortar or one with added fibers can help accommodate this.
Open Joints and Permeable Fills for Drainage
Open joint systems use wider gaps between bricks, filled with gravel, aggregate, or other permeable materials. These allow water to infiltrate quickly, reducing the risk of trapped moisture.
Installation: After laying your bricks, fill the joints with your chosen material. Ensure it’s level with the top of the bricks for a smooth surface.
Open joint systems are excellent for drainage but offer less resistance to weed growth and insect intrusion compared to polymeric sands or mortar. Consider using a combination of methods for best results.

Installation Best Practices to Reduce Freeze-Thaw Damage
Prepare the site with clean subgrade and appropriate drainage before laying any bedding. Place bedding evenly and compact in a controlled manner to prevent voids. Proper curing conditions help the system gain strength without trapping moisture.
Jointing should follow the product’s guidelines, with attention to timing and moisture management. Protect fresh work from rapid temperature swings and precipitation. Always cross-check local rules and manufacturer data during planning.
Timing, Weather Windows, and Material Temperature
Choosing the right time to lay your patio is crucial. Material temperature and weather conditions can affect the outcome of your bedding and joints.
- Minimum temperatures: Lay pavers when temps are consistently above 50°F (10°C). Below this, materials may not set properly.
- Protect from precipitation: Keep bedding and joints dry. Rain can wash out joint fill and weaken the bond between paver and bedding.
- Material temperature: Store and use materials at recommended temps. Cold materials can cause cracking or weak bonds.
- Avoid extreme heat: High temperatures can cause pavers to warp or bedding to set too quickly, leading to weak spots.
- Check forecasts: Plan your work around weather windows. A few days of dry weather is ideal for laying and finishing joints.
Compaction, Leveling, and Vibration Techniques
Proper compaction ensures a solid base that supports your pavers and prevents soft spots. Here’s how to do it right.
Use a plate compactor: This tool applies even pressure across the bedding. Rent one if you don’t own.
Vibrate the paver: After laying each paver, vibrate it gently to settle the bedding and remove air pockets. This ensures consistent load transfer.
Avoid over-compaction: Too much compaction can cause the base to become too dense, preventing water drainage. Maintain a balance for optimal results.
Jointing Sequence and Finishing for Long Life
Filling joints correctly helps prevent water intrusion and freeze-thaw damage. Here’s the right way to do it.
Fill joints immediately: After laying pavers, fill joints as soon as possible to prevent weed growth or debris from getting in.
Use the right joint fill: Choose a joint fill designed for freeze-thaw climates. Polymeric sands and stabilized aggregates are good options.
Strike mortar joints carefully: If using mortar, strike joints within 24 hours of laying pavers. This ensures a strong bond between paver and mortar.
Activate polymeric sands: Follow manufacturer’s instructions to activate polymeric sands. This creates a stable joint that resists washout and freeze-thaw damage.
Retrofits and Repairs: Diagnosing Causes and Choosing Fixes
Diagnose root causes by inspecting drainage, edge restraints, and bedding condition. Look for persistent wet spots, movement, and cracking patterns that indicate water intrusion. Decide whether spot repairs, partial reconstructions, or a full rebuild is warranted based on scope.
Document observed failures and compare them to installation records. Use this information to estimate effort and materials. When in doubt, consult product labels and local codes to confirm suitable remedies.
Assessing what to repair versus replace
Before you start patching, step back and assess the damage. You’re looking for signs of bedding or joint failure, movement, or material degradation.
First, check joints. If they’re cracked or crumbling, that’s a sign of trouble. But if it’s just a few isolated spots, you might be able to get away with spot repairs.
Next, look at the bedding. If it’s soft or unstable, that could mean extensive damage. But if it’s still firm and level, you might not need a full rebuild.
Finally, check for movement. If your patio is heaving or settling, that’s a sign of serious trouble. It might be time to consider a partial reconstruction or even a full rebuild.
Repair techniques for joints, bedding, and drainage
If you’ve decided that spot repairs are enough, here’s how to tackle them.
For joints, your best bet is usually repointing. Scrape out the old fill, clean the joint, then pack it with new material. Use a pointing trowel for a neat finish.
If your bedding is shot, you might need to replace it. Dig down, remove the old stuff, compact the base, and lay fresh bedding. It’s more work, but it’ll give you a solid foundation.
Don’t forget about drainage. If water’s pooling, you might need to install localized drains. These can be as simple as digging a small trench with a slope towards a drain point.
When a full rebuild is the safer choice
Sometimes, spot repairs just aren’t enough. Here are some signs that it’s time for a full rebuild.
If you’re seeing extensive frost heave, that means your patio is moving as a whole. That kind of movement can’t be fixed with spot repairs. It needs a solid, stable base from scratch.
Another sign is base contamination. If your base is full of organic matter or other contaminants, it won’t support your patio properly. A full rebuild gives you a chance to start fresh.
A full rebuild might seem like a big job, but if your patio’s failing systemically, it’s the most cost-effective long-term solution. It’ll give you a solid, durable patio that’ll last for years to come.
Maintenance, Seasonal Care, and Compatible De-Icing Strategies
Schedule routine inspections to spot early signs of distress, such as settlement or cracks. Seasonal care includes cleaning debris and ensuring drainage paths remain clear. Regular upkeep helps catch problems before they worsen.
Choose de-icing methods that minimize chemical harm to bedding and joints. Some products can accelerate deterioration in certain systems, so verify compatibility with your chosen materials. Always verify recommendations on product labels and manufacturer notes.
Visual checkpoints and inspection schedule
Use this checklist regularly to catch freeze-thaw damage early. Inspect after thaw cycles and seasonal transitions.
- Cracking: Look for hairline or wider cracks. Ignoring these can lead to further damage and paver displacement.
- Paver movement: Gently step on pavers. If they wobble, bedding may have washed out.
- Joint integrity: Check if joints are filled and intact. Open or missing joint material can cause water to seep beneath the surface.
- Weed growth: Remove any weeds growing between pavers. They can push up pavers and clog joints.
- Moss or algae: Inspect for organic growth, which can trap moisture and accelerate deterioration.
- Efflorescence: Check for white powdery deposits on pavers. While not harmful, it may indicate water issues beneath the surface.
- Paver discoloration: Look for stains or discoloration, which could signal chemical damage from de-icing products.
- Drainage performance: Ensure water drains properly. Standing water can cause freeze-thaw damage and paver displacement.
Quick rule: Inspect your patio every spring and fall, or after significant thaw cycles. Address any issues promptly to prevent further damage.
Cleaning, vegetation control, and joint topping
Regular cleaning keeps joints filled and prevents organic growth from damaging your patio. Here’s how:
Use a stiff-bristled broom or blower to remove debris from joints. This helps maintain proper drainage and prevents weed growth.
For weeds, use a narrow-tipped tool like a weeding knife or dandelion digger to remove them at the root. Regularly applying a pre-emergent herbicide can also help prevent new weeds from growing.
To refresh joint material, use polymeric sand or other joint-stabilizing compounds. Follow manufacturer instructions for application and care. Never use mortar or cement-based products as they can trap water and cause damage during freeze-thaw cycles.
De-icing product compatibility and safe use
Avoid harsh de-icers like sodium chloride (rock salt) on your brick patio. They can damage pavers, mortar, and bedding.
Instead, opt for safer alternatives like calcium magnesium acetate (CMA), potassium chloride, or sand. These products are less corrosive but still effective at melting ice.
Before applying any de-icing product, test it on a small, hidden area of your patio first. This ensures the product doesn’t react negatively with your specific type of brick or mortar.
Remember: Always follow manufacturer instructions for application rates and storage. Overuse can lead to chemical buildup and damage over time.
Tools, Materials Checklist, Specs to Check, and Simple Field Tests
Compile a practical set of tools and materials for on-site work, including items for bedding, jointing, and surface cleaning. Cross-check the latest manufacturer specs and local standards before purchasing. Quick field tests can verify drainage and compaction without specialized equipment.
Use label directions and data sheets to confirm mixing ratios and cure times. For drainage checks, perform simple surface tests to observe water movement after simulated rainfall. When in doubt, rely on official product instructions and local regulations for guidance.
Tools and equipment checklist for installation and repair
Before you start, make sure you have the right tools to get the job done right. Use this checklist to ensure you’re well-equipped.
- Tape measure: To ensure accurate dimensions and cuts.
- Level: For checking and maintaining proper slope for drainage.
- String line: To set straight edges and maintain alignment.
- Shovel: For moving materials and leveling the base.
- Rake: To spread and level bedding sand and joint fill.
- Compactor (plate or vibrating): To ensure proper compaction of base, bedding, and joint fill.
- Grout float: For finishing and leveling joint fill.
- Safety gear: Include work gloves, safety glasses, ear protection (if using power tools), and steel-toed boots.
Quick rule: Missing a tool can lead to improper installation or injury. Double-check your list before starting any task.
Material specs and standards explained
Understanding material specifications is crucial for selecting the right products that can withstand freeze-thaw cycles.
- Brick: Check compressive strength (min. 2,000 psi) and freeze-thaw durability rating (ASTM C67).
- Bedding sand: Ensure it’s clean, angular, and has a max. particle size of #50.
- Joint fill: Choose a polymer-modified or portland cement-based mix with good freeze-thaw resistance (min. 200 cycles).
- Concrete base: Check compressive strength (min. 3,000 psi) and ensure it’s properly reinforced.
- Local codes: Consult local building codes for minimum requirements.
- Manufacturer datasheets: Always review these to understand product limitations and recommended applications.
Quick rule: Using subpar materials can lead to premature failure, costly repairs, or even replacement.
Simple field tests and visual performance checks
Conduct these quick on-site tests to ensure your patio is properly installed and will perform well under freeze-thaw conditions.
- Slope runoff test: After a rain, check for proper water runoff. If water pools, adjust slope or address drainage issues.
- Infiltration observation: Pour water onto the patio surface. It should absorb quickly and evenly; slow absorption may indicate poor bedding or joint fill.
- Tapping/bed stability check: Gently tap bricks with a hammer. A solid sound indicates good compaction; a hollow sound suggests improper installation.
- Joint inspection: Check joints for proper filling and finishing. Open or poorly filled joints can allow water penetration.
Quick rule: Regular field tests help catch potential issues early, preventing costly repairs down the line.
Conclusion
Even with the best plans, the most important thing is to guard against water entering the system. Proper drainage, the right bedding, and a durable joint fill keep bricks from cracking, spalling, or sinking when winter comes.
Take this as your action plan: assess the slope and drainage first, confirm your bedding system choice aligns with the climate, verify the joint fill type and placement, plan safe de-icing strategies, and then verify tools, materials, and simple field tests in a small area before wide-scale work. Move step by step, document measurements, and test a small patch to confirm your results before committing to the whole patio.
Common mistakes to avoid are skipping a proper slope and drainage check, using an incompatible bedding or joint fill for freeze-thaw cycles, and neglecting seasonal care or de-icing compatibility. Always wear eye and hand protection, keep foot traffic away from fresh work, and test correction ideas on a limited area first to prevent irreversible damage.
If the project calls for major repointing, a complete bedding swap, or persistent drainage problems, don’t push past simple tests. When in doubt, or if excavation and regrading are needed, call a pro. Stay methodical, stay safe, and you’ll keep the patio strong and looking good for many winters to come.
FAQ
What bedding choice best resists freeze-thaw in brick patios?
Stick with a stable, well-draining bedding that won’t retain water. Follow manufacturer instructions for any engineered bedding system, and avoid dumping loose, wet sand. Check labels or datasheets for recommended grain size and compaction guidance.
How can I confirm my patio has proper drainage and slope to shed water?
Look for a consistent downward drain path away from the house. Use a simple level or straightedge along several joints to spot high spots or low spots. If water ponds after rain, revise the slope before winter to reduce freeze-thaw risk.
What joint fill materials hold up to freeze-thaw for brick patios?
Choose a joint fill that resists water absorption and doesn’t crumble when it freezes. Read product labels for freeze-thaw performance and follow installation directions closely. If unsure, compare options on the label and ask the supplier for specifics about cold-weather use.
What signs indicate I need to repair bedding or drainage before winter sets in?
Look for loose bricks, gaps opening up, or water pooling in the joints. Cracking around edges or sunk sections usually means bedding or subgrade issues. Address these early by following the product instructions and local guidance before it freezes.