
Introduction
Flooring over a plank subfloor means the finish floor sits on wide wood boards, which can cup, crown, or warp. Causes include moisture changes, improper acclimation, and movement between boards. Look for edges higher than the center, gaps, and soft spots as visual signs.
Testing involves feeling for high spots, checking moisture in the room and subfloor, and inspecting fasteners. Fixes range from letting the subfloor dry, re-fastening loose boards, or replacing badly warped planks, then re-laying the finish floor with proper acclimation. If unsure, check product labels, manufacturer instructions, or local rules for proper methods and safety.
Key takeaways
- Cupping causes higher center boards with edges dipping; leaves gap at joints.
- Cupping vs crowning: cupping sinks edges up or center down; crowning opposite.
- Visual signs: warped planks, uneven subfloor, and liquid stains indicating moisture.
- Tests and diagnostics: moisture meter, pry bar, and feel for hollow spots.
- Fix steps by severity: reduce moisture, then acclimate, then replace cupped boards.
- Safety first: wear eye protection and respirator when sanding or cutting; ventilation.
Table of Contents
- Introduction
- Key takeaways
- What Is Wood Floor Cupping and Why It Matters
- Visual Signs and Quick Checks (Visual Checkpoints)
- Common Causes Specific to Plank Subfloors
- Tests and Diagnostics (Tools and Materials Checklist)
- Step-by-Step Fixes by Severity
- Prevention and Long-Term Maintenance Strategies
- Costs, Safety Precautions, and Impact on Home Value
- Conclusion
- FAQ
What Is Wood Floor Cupping and Why It Matters
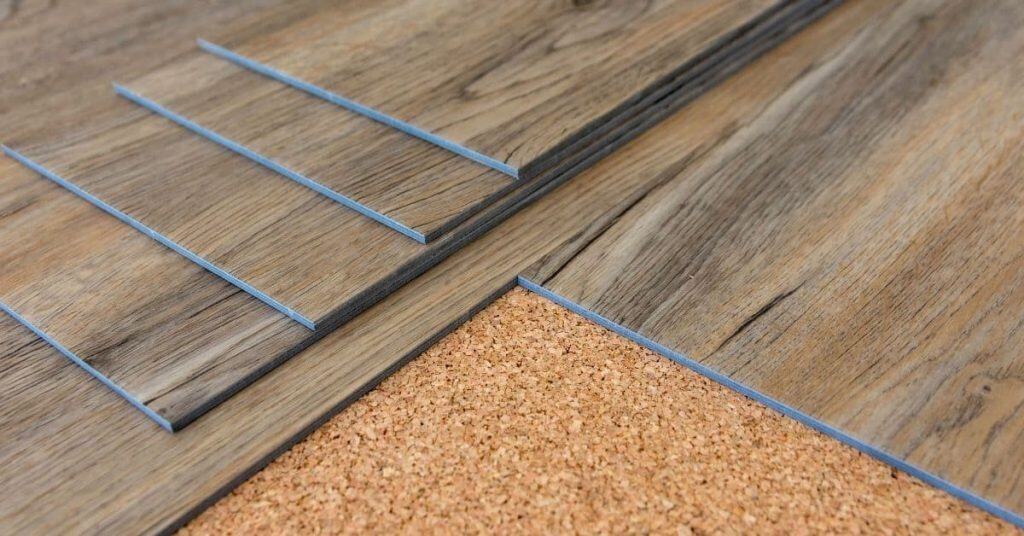
Cupping is when the wood grain on each plank edge curls upward toward the center, leaving the edges lower. It contrasts with crowning, where the center rises, and buckling, where panels or boards shift laterally. This shape usually signals moisture imbalance or substrate movement beneath the subfloor.
For a plank subfloor, cupping matters both structurally and aesthetically. Moisture-driven movement can loosen fasteners, create gaps, and compromise subfloor integrity. Visually, cupping creates an uneven surface that can interfere with subsequent flooring installation and reveal underlying moisture issues.
Clear definition and mechanics
Cupping is when wood planks or subfloor edges curl upward at the center while edges remain lower. This isn’t like crowning (center up) or buckling (lateral movement). Cupping signals moisture imbalance or substrate movement.
The cause? Moisture imbalance through the thickness of a board. Here’s how it works: edges absorb more moisture, swell, and rise while the center stays relatively dry, sinks, and creates that concave shape.
Why plank subfloors change the risk profile
Plank subfloors differ from plywood or OSB. They’re made of individual boards, not a solid sheet. This affects moisture movement and floor stability.
Moisture can travel between board joints, causing cupping at those points. Fasteners might loosen due to this movement, creating gaps and compromising subfloor integrity.
Plank subfloors also have less inherent stiffness compared to plywood or OSB. This means they’re more susceptible to long-term deflection, exacerbating cupping issues over time.
Visual Signs and Quick Checks (Visual Checkpoints)
Cupping typically presents with edges higher than the center and may show gaps at joints. You might notice moisture staining or edge lift when you run your hand along a plank. Different from crowning, warping, or hollow spots, cupping has a distinct concave center with raised edges.
At a glance, look for central high spots after changes in humidity and any gaps at board joints. Note water stains or mineral deposits near walls or cabinets. Quick tactile tests and simple checks can help confirm cupping before taking structural measurements.
What to look for (patterns, locations, progression)
Use this checklist when you suspect cupping but aren’t sure. It helps identify patterns and track progression.
- Check across rooms: Cupping often starts in one room and spreads. Check all rooms with hardwood floors.
- Look near water sources: Plumbing leaks or high humidity can cause cupping near kitchens, baths, or laundry rooms.
- Inspect edges first: Cupping often starts at the edges of rooms and works inward. Check edges thoroughly.
- Check corners: Corners are stress points. Cupping may start here if conditions are right.
- Observe progression: Early cupping is subtle. Look for slight edge lift or gaps at joints. Advanced cupping is obvious, with significant gaps and edge lift.
- Note moisture stains: Stains near walls or cabinets may indicate long-term moisture exposure causing cupping.
- Feel for soft spots: Cupped boards feel soft underfoot due to internal wood structure changes. Press gently at the center of suspect boards.
- Check mineral deposits: White, powdery deposits near walls or cabinets may indicate long-term moisture exposure causing cupping.
Quick rule: If you find patterns or progression, act fast. Cupping worsens over time and can lead to costly repairs.
Simple measurements and photos to document damage
Use this checklist to measure and photograph cupping for future reference. It helps track severity and changes over time.
- Use a straightedge: Place it across suspected cupped boards. If it rocks or wobbles, you’ve found cupping.
- Measure gaps: Use a ruler to measure gaps at joints. Record these measurements.
- Take photos: Photograph suspect areas from multiple angles. Include a timestamp and scale (like a coin or ruler) in each shot.
- Check edges: Place a straightedge along board edges. If it doesn’t sit flush, you’ve found edge lift.
- Recheck over time: Cupping worsens with time. Recheck suspect areas every few months to track progression.
- Compare photos: Compare new photos with old ones to see if cupping has worsened or improved.
Quick rule: Regular measurements and photos help you understand the extent of cupping and when it’s time for repairs.
Common Causes Specific to Plank Subfloors
Moisture sources unique to plank subfloors include crawlspace humidity, moisture coming from slabs, or leaks from above that affect wide planks. Acclimation timing and seasonal humidity swings also play a big role in how planks settle. Fastener density and edge support influence edge curl on installation.
Underlayment and vapor barrier choices matter too; improper barriers can trap moisture under planks and encourage cupping. Installation mistakes such as poor seaming or cutting near moisture sources can expose edges and lead to cupping on plank subfloors.
Subfloor moisture sources (crawl spaces, concrete slabs, leaks)
Plank subfloors are susceptible to moisture from below. Here’s what you need to know:
Crawlspaces: High humidity in crawlspaces can drive moisture up into your plank subfloor. Ensure proper ventilation and consider using a vapor barrier.
Concrete Slabs: Moisture from concrete slabs can wick up into the wood, causing cupping. Use a moisture barrier between slab and subfloor.
Leaks: Water leaks from above can pool on your plank subfloor, leading to localized cupping. Inspect for and fix any leaks before installing flooring.
Installation and acclimation problems
Proper installation and acclimation are crucial with plank subfloors:
Moisture: Don’t install flooring over damp subfloors. Wait until they’re dry to the touch.
Acclimation: Wood moves with humidity changes. Allow planks to equilibrate with your home’s environment before installing.
Fastening and Gaps: Use appropriate nail-down patterns and fasteners. Leave expansion gaps between planks to accommodate movement.
Environmental and maintenance contributors
Seasonal changes and home care practices can affect your plank subfloor:
Humidity Swings: Wood expands and contracts with humidity. Maintain consistent indoor humidity levels.
HVAC Control: Proper HVAC control helps maintain stable indoor conditions, reducing wood movement.
Cleaning Practices & Vapor Barriers: Avoid over-wetting the floor during cleaning. Use a proper vapor barrier under your plank subfloor to prevent moisture buildup.
Tests and Diagnostics (Tools and Materials Checklist)
Identify where moisture is coming from and how it affects the subfloor, framing, or crawlspace. Distinguish cupping caused by moisture from other structural issues. Start with non destructive checks and move to targeted tests as needed.
Use a moisture meter for wood subfloors and consider in situ concrete RH testing alongside a secondary calcium chloride method if needed. Visual and flatness checks help track cupping indicators and overall subfloor condition.
Using moisture meters correctly
Before you start, understand your moisture meter. It’s crucial for accurate readings.
- Pin vs Pinless: Pinless meters are non-invasive, great for quick checks. Pin meters give deeper readings but may damage the subfloor.
- Where to take readings: Take top and bottom readings on your plank subfloor. Check concrete slab moisture too.
- Interpret readings: Relative readings help spot trends. Confirm with manufacturer EMC (equilibrium moisture content) ranges.
- Calibrate regularly: Follow manufacturer’s calibration steps and intervals for accurate results.
- Avoid edge readings: Edges can give false highs due to surface evaporation.
- Test multiple points: Take readings in a grid pattern, especially near walls and plumbing.
- Safety first: Wear PPE when handling meters. Follow safe handling/cleanup procedures.
Quick rule: Always compare readings to manufacturer EMC ranges for your specific subfloor species.
Additional diagnostic tests (humidity, thermal, probe)
Sometimes you need extra tools to get the full picture of moisture issues.
- RH probes/hygrometers: Measure relative humidity in crawlspaces and walls. Ideal range: 30-50%.
- Infrared/thermal scans: Spot cold spots indicating possible moisture or air leaks.
- Probe/drill tests: Drill small holes to insert probes deep into the subfloor. Check for high RH readings.
- Concrete RH testing (ASTM F2170): In-situ test for concrete slab moisture using calcium chloride. Target: ≤75% or as specified by adhesive/finish.
- Flatness checks: Check subfloor flatness visually and with a straight edge. Warping, cupping indicate structural issues.
- Joist condition check: Inspect joists for water damage, rot, or sagging.
- Mold inspection: Look for signs of mold growth, indicating persistent moisture problems.
Quick rule: Use these tests to confirm suspicions raised by initial moisture meter readings.
When to call a pro for advanced testing
Some issues require expert intervention and lab analysis.
- Persistent high RH: If readings consistently exceed 75% despite repairs, it’s time to call a pro.
- Unknown vapor drive: When the moisture source is unclear, intrusive testing may be needed.
- Mold presence: If you find mold, stop work and call a professional. Mold indicates serious moisture problems.
- Structural concerns: If subfloor or framing shows signs of significant damage, consult an engineer or architect.
- Lab analysis: Sometimes concrete slab or wood samples need lab testing for accurate diagnosis.
- Intrusive testing: Drilling holes or removing sections of the subfloor should be done by professionals to avoid further damage.
Quick rule: If in doubt, err on the side of caution. Call a pro for advanced testing and diagnosis.
Step-by-Step Fixes by Severity
Begin with moisture control as the top priority. Address leaks, improve ventilation, and reduce humidity before any subfloor work. Favor reversible, non invasive fixes whenever possible.
Proceed with a staged plan: first control moisture and dry the space, then stabilize damaged areas with reversible repairs. If cupping persists, plan structural repairs while preserving as much of the existing floor as possible and document changes for future reference.
Step-by-Step Repair Process
Follow this clear, numbered sequence to address moisture-induced cupping in your plank subfloor. Safety checks and preparation lead the way, followed by main repair work, and concluding with cleanup or final checks.
- Preparation: Safety first! Turn off power, wear protective gear, and clear the area.
- Inspection: Re-check moisture readings. Mark affected areas for reference.
- Main Work: Control moisture source (leaks, ventilation). Dry space using dehumidifiers and fans.
- Repair: Remove cupped boards if necessary. Clean, repair, and refasten subfloor.
- Final Checks: Re-measure moisture levels after repairs. Ensure no further cupping before reinstalling flooring.
Immediate and reversible remedies
For minor or recent cupping, these quick fixes can help stabilize your plank subfloor until a full repair is possible.
Dehumidify the area to reduce relative humidity (RH). Aim for 30-50% RH. Use dehumidifiers and fans to circulate air.
Ensure proper ventilation in crawlspaces or basements. Install temporary vapor barriers if necessary. Keep the area dry and well-ventilated until repairs can be made.
Moderate repairs (partial removal, repair, refasten)
When cupping is more pronounced but not severe, partial removal and repair may be necessary.
Remove affected boards carefully. Dry the subfloor thoroughly using dehumidifiers and fans. Repair any damage found, then replace underlayment if needed.
Reinstall flooring planks properly, ensuring they’re securely fastened and acclimated to the environment.
Severe solutions (full removal, replacement, structural fixes)
For severe cupping or persistent moisture issues, full floor removal and replacement may be required.
Remove the entire plank subfloor. Replace with a stable underlayment. Install a proper vapor barrier to prevent future moisture intrusion.
If necessary, perform structural fixes like joist stabilization or plywood replacement. Sand and refinish the floor once it’s completely dry and stable.
Prevention and Long-Term Maintenance Strategies
Identify root causes specific to plank subfloors, such as moisture ingress, gaps, and plank movement, to tailor prevention. Establish a practical moisture management plan that fits your climate and home layout. Regular monitoring helps catch issues early.
Be vigilant for cupping, crowning, or gaps and take homeowner friendly steps to minimize recurrence. Include airflow improvements, climate control, and temporary fixes while awaiting long term repairs. Create a simple maintenance calendar to guide seasonal inspections.
Environmental control and HVAC guidance
Maintain indoor relative humidity (RH) between 30-50% to prevent subfloor issues. This range keeps moisture levels low enough to prevent mold growth and warping, yet high enough to avoid excessive dryness that can cause cracking.
In summer, use air conditioning to keep RH in check. In winter, consider using a humidifier if RH drops below 30%.
If you live in a damp climate, use a dehumidifier year-round to maintain optimal RH levels. Regularly empty and clean the dehumidifier to prevent mold growth.
Installation best practices and material choices
Choosing the right materials during installation can significantly impact your subfloor’s longevity. Here are key factors to consider:
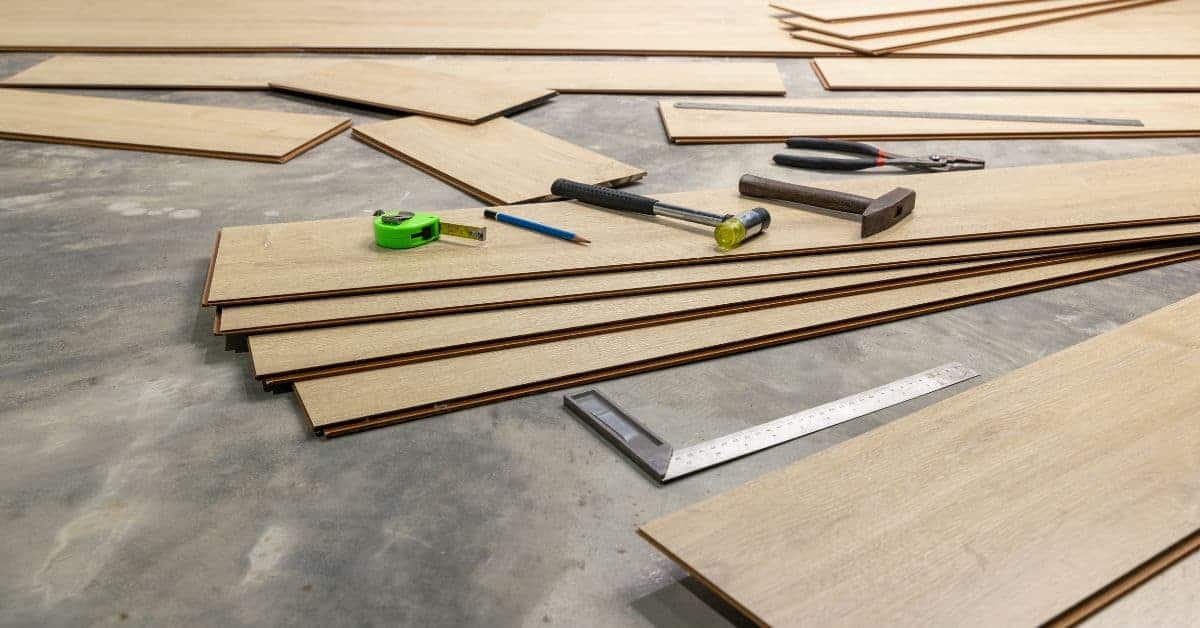
- Acclimation: Allow planks to acclimate in your home for at least 72 hours before installation to reduce movement due to humidity changes.
- Fasteners: Use appropriate fasteners like ring-shank nails or screws designed for wood subfloors. Avoid using too many fasteners, as this can cause excessive nail pops.
- Adhesive: Consider using an adhesive suitable for your subfloor type to enhance bond strength and prevent delamination.
- Underlayment/Vapor Barrier: Use a quality underlayment or vapor barrier to protect against moisture ingress. Foam, felt, or plywood underlayments are common choices.
- Engineered vs Solid Boards: Engineered boards offer better stability and resistance to moisture changes but may not be as durable as solid wood. Choose based on your specific needs and budget.
Cleaning, spills, and routine inspections
Regular cleaning and inspection help maintain a stable subfloor environment. Use this checklist to keep your plank subfloor in top shape:
- Monthly: Vacuum or sweep the floor to remove dirt and debris that can cause scratches or wear.
- Quarterly: Inspect for signs of cupping, crowning, or gaps. Check under heavy furniture for any hidden issues.
- Biannually: Test moisture levels in key areas using a simple at-home moisture check. Look for leaks around plumbing fixtures and appliances.
- Immediately after spills: Clean up liquid spills promptly to prevent absorption into the subfloor, which can lead to warping or mold growth.
- Safely: Use mild cleaning products suitable for wood floors. Avoid harsh chemicals that can damage the finish or cause discoloration.
Quick rule: Inspect your subfloor regularly and address any issues promptly to prevent minor problems from becoming major ones.
Costs, Safety Precautions, and Impact on Home Value
Consider the factors that influence cost, such as repairing cupped wood, subfloor work, moisture control, underlayment, and finishing. Differentiate DIY friendly tasks from professional needs and note that regional price variations exist. Use this to decide what to tackle yourself and what to hire out.
Safety steps during repairs include PPE, dust control, ventilation, and monitoring air quality for hazards like mold or compromised structural members. Keep clear records of tests, evaluations, and repairs to support resale and professional verification if needed.
Typical cost drivers and budgeting tips
When tackling cupped subfloors, expect to spend between $10 – $25 per square foot. Here’s a breakdown:
Diagnostics: Moisture testing kits ($20 – $50), professional moisture meter rental ($50 – $100/day).
Removal & Replacement: Fasteners ($3 – $8 per box), new subfloor panels ($4 – $10 each), labor ($60 – $90/hour).
Materials & Labor: Underlayment ($2 – $5/sq ft), finishing materials, and labor vary.
Safety and mold concerns during repair
Wear PPE: gloves, goggles, and a respirator. Contain damp materials to prevent spread of spores.
If you suspect mold, stop work immediately. Call an environmental specialist (cost varies).
Ventilate the area during repair, check air quality post-repair.
Be aware of structural hazards; if unsure, consult a pro.
Resale and disclosure considerations
Unresolved cupping can affect home inspections, appraisals, and buyer perception. Document all repairs for full disclosure.
Keep records of moisture tests, repair steps, and dates. This boosts resale value and protects you legally.
Minor fixes may not impact value much, but severe cases can cost thousands in repairs and lower perceived value.
Consider professional verification of repairs for peace of mind and better resale potential.
Conclusion
Dealing with a cupped floor on a plank subfloor isn’t glamorous, but you can make it durable and good-looking if you focus on safe, verifiable steps. The core idea is to test, fix only what you can confirm, and protect the structure so the cure lasts rather than creating new problems.
First, check the obvious signs and then verify with a simple sequence: inspect for cupping and high spots, measure moisture, confirm the subfloor condition, plan fixes by severity, gather your basic tools, work in small sections, keep things dry, and re-check as you go. Do each step in order, and only move on when results are clear. Test first, then repair, and pace yourself to avoid undoing what you already did.
Common mistakes to avoid are trying to lift or replace large areas without a plan, using fasteners or adhesives that aren’t compatible with plank subfloors, and skipping moisture checks or dry-out steps. Safety rules are simple: shut off power, wear eye and respiratory protection, keep the area well ventilated, and don’t work on a wet or unstable surface. Test a small area before committing to a full course of action.
If you detect ongoing moisture, structural concerns, or the fixes would require major subfloor work, call a professional instead of pushing ahead. When in doubt, prioritize safety and durability over speed, and you’ll preserve value and avoid costly mistakes. You’ve got this—steady work now pays off with a solid, long-lasting floor.
FAQ
What commonly causes wood floor cupping on plank subfloors?
Cactors include moisture imbalances between the top of the board and the underside, changes in humidity, and water from spills or leaks. Poor acclimation before installation and moisture from concrete or subfloor can drive cupping. Check for sources of moisture and fix them before planing or sanding.
How can I tell cupping from crowning just by sight?
Cupping hollowed edges point upward with the board center lower, while crowning shows edges higher and the center bowed up. Look for a dish-like effect across the width. Compare multiple boards to see consistent edge drop or center high spots.
What are the steps to fix cupping on a plank subfloor?
First, address moisture sources and allow the area to stabilize. If cupping persists, you may need to dry out the subfloor, remove and re-fasten boards, or planing/sanding as a last resort per manufacturer guidance. Follow safety and labeling instructions for any fasteners or patch materials.
How should I use a moisture meter to get accurate readings?
Use a moisture meter on both the top of the boards and the subfloor to compare readings. Check the meter’s instructions for proper probe depth and calibration. If readings are inconclusive, consult the product label or manufacturer instructions for acceptable ranges and local recommendations.