
Introduction
Alligatoring is when cracked, ridged paint film looks like alligator skin. It happens when the top layer loses flexibility and the underlayer shows through. This tells you that the surface needs attention beyond a quick touch-up.
A practical plan is to assess the damage, remove loose paint, and decide whether you can patch or you should strip. For patching, scrape, sand, and fill any cracks with an appropriate filler, then recoat after the filler dries per product instructions. If the surface is too compromised or the coating keeps failing, stripping may be the safer route—check local rules and product labels to pick the right method.
Key takeaways
- Inspect substrate moisture and ambient conditions before patching to avoid failures.
- Match patch products to existing paint and substrate per manufacturer instructions.
- Remove all loose coating and feather edges to create a stable repair surface.
- Wear PPE and ventilate when sanding or stripping to avoid health risks.
- Test repair in inconspicuous area before full-scale coating to verify payoff.
- Document progress and monitor for new cracking after each coat application.
Table of Contents
- Introduction
- Key takeaways
- What “Alligators” (Crocodile Cracking) Is
- Common Causes and Contributing Factors
- Assessing Severity and Repair Decision Flow
- Tools and Materials Checklist
- Surface Preparation Step-by-Step
- Patch and Repair Strategies
- When to Strip and Recoat: Criteria and Methods
- Preventing Recurrence and Long-Term Maintenance
- Conclusion
- FAQ
What “Alligators” (Crocodile Cracking) Is
Alligator cracking refers to a surface that pucker-cracks in a pattern like reptile skin. It starts as tight, shallow fissures that track across the coating. Over time, those cracks link up and the paint film begins to delaminate or peel away in sheets.
This problem isn’t simply a cosmetic issue; it signals the coating has lost its edge adhesion and moisture control. Understanding the progression helps you decide if you can spot-repair or if cutting back to sound material is needed. Check the product label or manufacturer instructions for guidance on repair limits and timing.
Visual characteristics and stages
Alligatoring, also known as crocodile cracking, is a paint defect that resembles the scales of an alligator’s skin. It starts small but worsens over time.
Early stage: You’ll notice fine cracks, barely visible from a distance, forming tiny squares or rectangles on your painted surface. This is when you can still easily repair it.
Moderate stage: Cracks deepen and widen, becoming more noticeable. Some paint may start to flake off. Repairing becomes trickier but still manageable.
Advanced stage: Large sections of the paint peel away, exposing the substrate underneath. The surface looks severely damaged. At this point, full stripping and repainting might be necessary.
Underlying physical mechanisms
Alligatoring happens due to issues at the coating level. Here’s what’s going on:
The paint loses its elasticity. Over time, and especially with temperature changes, it can’t flex with the surface anymore. Instead, it cracks.
The paint fails to adhere properly to the surface. This could be due to poor preparation or incompatible materials. As a result, the paint lifts off in large pieces when cracked.
There’s too much film thickness. Applying too many coats or using high-build paints can lead to excessive film thickness. The paint can’t dry properly and forms a weak, brittle layer that cracks easily.
Common Causes and Contributing Factors
The most frequent culprits are improper surface prep and incompatible coatings. Skipping cleaning or using a primer not suited to the substrate invites trouble. Application too thick or in unsuitable conditions also invites alligator cracking.
Material incompatibility between old and new coatings can trap moisture and cause failure. Operator errors, such as recoating too soon or overworking a fresh layer, also play a big role. When diagnosing, compare the current layer to the manufacturer specs and local rules before proceeding.
Improper surface preparation and contaminants
Before you start painting, it’s crucial to prep the surface right. Dirt, oil, or soluble salts can prevent paint from sticking properly, leading to alligatoring later on.
Check for dirt: Use a damp cloth to wipe the surface. If it comes off dirty, clean it thoroughly with soap and water, then rinse and let it dry.
Test for oil: Dab some denatured alcohol onto the surface. If it beads up or leaves an oily residue, you’ve got oil to deal with. Clean it with a suitable solvent like mineral spirits.
Soluble salts can also cause problems. They’re not as common but can be present in some concrete or plaster surfaces. A simple water test can help identify them: if the surface turns white after wetting, you might have soluble salts. If so, treat the surface with a suitable primer or sealant before painting.
Overcoating and incompatible systems
Applying new coats of paint over old, brittle layers is asking for trouble. The new paint can’t stick properly to the weak underlying layer, leading to cracking.
Check your primer and paint: Make sure they’re compatible with each other and suitable for the surface you’re painting. Different paints have different bases – oil-based, latex, etc. – and they don’t always play nice together.
If you’re unsure about the existing paint, it’s better to strip it off completely before applying a new coat. This might seem like more work, but it’ll save you from having to deal with alligatoring in the future.
Also, be mindful of how many coats you’re applying. Too many layers can lead to brittleness and cracking. Stick to the recommended number of coats for your paint type.
Environmental and substrate issues
Moisture, temperature changes, substrate movement, and UV exposure can all contribute to or worsen alligator cracking. Here’s how:
Moisture: Paint doesn’t like water. If moisture gets trapped under the paint film, it can cause lifting and cracking. Make sure your surface is dry before painting and use a suitable primer to seal out any remaining moisture.
Temperature changes: Paint expands and contracts with temperature changes. If these movements are too extreme or happen too quickly, they can cause the paint to crack. Use paints that are designed for your climate’s temperature range.
Substrate movement: Concrete and other substrates can move over time due to settling, expansion, or contraction. This movement can cause the paint on top to crack. To mitigate this, use a flexible paint that can move with the substrate.
UV exposure: Prolonged exposure to sunlight can break down the paint’s binder, leading to brittleness and cracking. Use paints with good UV resistance for exterior surfaces.
Assessing Severity and Repair Decision Flow
Begin with a visual and tactile inspection of cracks, edges, and delamination. Tap the surface gently to hear hollow spots that indicate deeper separation. If sound and feel are solid, spot repair may be possible.
If you find widespread cracking with loose areas, plan for partial replacement or a full strip depending on sound substrate. Baseline the decision on adhesion tests and the extent of coating damage. Always verify repair criteria against the product data sheet and local requirements before moving forward.
Simple adhesion and flex tests to perform
Before you decide on a repair, do some quick field checks. These help you understand the severity of the ‘alligatoring’ and what’s causing it.
Cross-Cut Test: Use a utility knife to cut through the paint at an angle. If the paint flakes off easily, adhesion is poor. This indicates a full strip might be needed.
Tape Test: Apply painter’s tape over the affected area and pull it off quickly. If the paint comes off with the tape, it’s not well-adhered and needs attention.
Flex Test: Try to bend or flex the surface gently. If the paint cracks further or peels, it’s too weak for spot repairs and a full strip is likely required.
When spot repair is appropriate vs full strip
Spot repairs can save time and money, but they’re not always the best solution. Here’s when to patch versus strip completely.
Spot Repair: If ‘alligatoring’ is limited to a small area (<10 sq ft), the substrate is in good condition, and there’s no history of recurring issues, spot repair might be enough. Just ensure you address the underlying cause to prevent further damage.
Full Strip: When ‘alligatoring’ covers a large area (>20 sq ft), the substrate shows signs of deterioration, or you’ve had similar problems before, it’s time for a full strip. This ensures you’re addressing all affected areas and preventing future issues.
Visual checkpoints and documentation for scope
Before starting any work, document the current state of the surface. This helps justify your chosen repair method and aids in future reference.
- Photograph: Take pictures of the affected areas from different angles to show the extent and severity of ‘alligatoring’.
- Map failure areas: Sketch or use a digital tool to mark out where the problems are. This helps plan your repair strategy.
- Note any patterns: If ‘alligatoring’ is worse in certain areas, note this down. It might indicate an underlying issue that needs addressing.
- Check for contaminants: Look for signs of mold, mildew, or other contaminants. These need to be removed before painting.
- Assess substrate condition: Check the surface beneath the paint. If it’s damaged, you might need to do some repair work before painting.
- Note any recurring issues: If you’ve had ‘alligatoring’ problems before, make a note of this. It could indicate an ongoing issue that needs addressing.
- Check for incompatible systems: Ensure the existing paint system is compatible with your chosen repair method. Overcoating incompatible systems can cause further issues.
- Document environmental factors: Note any environmental factors (e.g., sun exposure, moisture) that might be contributing to ‘alligatoring’.
Quick rule: Always document your findings. It helps you make informed decisions and provides a record for future reference.
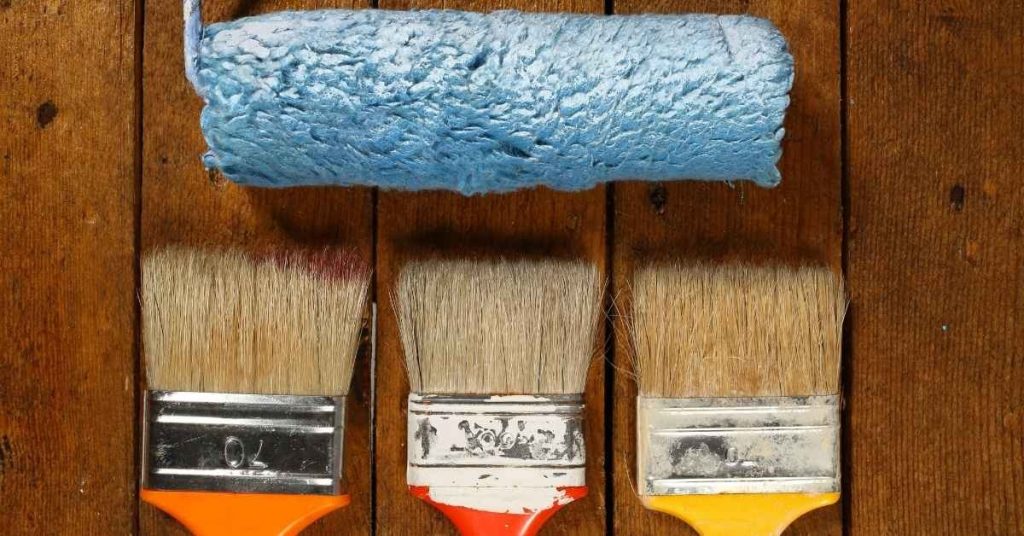
Tools and Materials Checklist
Put on PPE: eye protection, glove, and a respirator or dust mask as needed. Have hand tools like scrapers and putty knives ready, plus a rigid squeegee for smoothing. Bring power tools such as a drill with a whisk or a variable-speed sander for feathering edges.
Stock abrasives appropriate for the substrate and repair stage, along with compatible primers, fillers, and topcoats. Keep clean rags and a bucket for wash water, plus masking materials for containment. Always cross-check the product label or manufacturer instructions to confirm compatibility and cure guidance.
Personal protective equipment and safety essentials
Before you start any work, make sure you’ve got the right gear to keep yourself safe.
- Safety glasses: Protect your eyes from debris during sanding and scraping.
- Dust mask or respirator: Essential for sanding and stripping tasks. Choose a P100 filter for fine particles.
- Gloves: Use gloves to protect your hands from chemicals and sharp edges.
- Long sleeves and long pants: Cover up to minimize skin exposure to paint, dust, and other contaminants.
- Steady ladder or scaffolding: For high areas. Ensure it’s stable before starting work.
- Proper ventilation: Open windows or use fans to keep the area well-ventilated during sanding and stripping.
- Disposal considerations: Have a plan for disposing of old paint, rags, and other waste materials safely.
- Hearing protection: If using power tools with high decibel levels.
Quick rule: Always prioritize safety. Don’t start work without the right gear.
Abrasives, scrapers, and power tools
Choose the right tools for the job to make your repair go smoothly.
- Sanding grits: Start with 120-grit sandpaper for general use. For fine finishing, use 220 or higher.
- Scraper types: Use a sharp, flat scraper for wide areas and a flexible one for curves and corners.
- Power tools: A palm sander is good for large areas. For smaller spots, use a detail sander.
- Safety tips: Always wear safety glasses when sanding. Secure your ladder or scaffolding before climbing.
- Scrapers: Use a sharp scraper to remove loose paint quickly and efficiently.
- Power tool speeds: Start at a low speed, then increase as needed. Be careful not to gouge the surface.
- Sandpaper backing: Choose sandpaper with a flexible backing for curves and irregular surfaces.
Quick rule: Match your tools to the job. Using the wrong tool can damage the surface or cause injury.
Primers, fillers, and paint compatibility (material specs explained)
Choose the right primers and fillers to ensure a smooth, durable finish.
- Primer type: Choose a primer that matches your topcoat. For example, use an oil-based primer for oil-based paint.
- Filler type: Use a lightweight spackling compound for small holes and cracks. For larger areas, use a heavy-duty filler.
- Paint compatibility: Check manufacturer datasheets to ensure your topcoat is compatible with the primer and filler you’ve chosen.
- Drying time: Allow enough drying time between coats to avoid trapping moisture or solvents under the next layer.
- Sandability: Choose a product that sands easily. This will make your job much smoother.
- Adhesion promoters: If you’re painting over a difficult surface, use an adhesion promoter primer to improve bond strength.
- Primer and filler application: Apply primers and fillers evenly using a brush or putty knife. Follow manufacturer instructions for ideal coverage.
Quick rule: Always check compatibility before mixing products. Incompatible materials can cause peeling, cracking, or other issues down the line.

Surface Preparation Step-by-Step
Start with a thorough cleaning to remove dirt, oil, and loose paint. Rinse and allow to dry completely before inspecting for damage. Remove all obviously failed coating in areas that will be repaired.
Feather edges with a light abrasive to create a uniform transition zone. Vacuum up dust, then wipe with a compatible cleaner. Prime or treat bare or porous zones per the product data sheet instructions before applying patch material.
Step-by-Step Process
Follow this clear, numbered sequence to prepare your surface for painting. It starts with safety checks and ends with final inspections.
- Wear appropriate PPE (personal protective equipment). Safety first!
- Inspect the area. Identify any hazards or issues that need addressing.
- Maintain a clean workspace. Remove any debris, dust, or obstacles.
- Perform adhesion and flex tests as mentioned earlier to ensure your surface is ready for painting.
- After testing, perform any necessary repairs or treatments before moving on to the next step.
- Clean the surface using appropriate methods (see below).
- Remove loose paint and establish a suitable profile with sanding or scraping.
- Feather edges to create a smooth transition between the repaired area and the existing surface.
- Inspect your work. Ensure all surfaces are clean, dry, and free of contaminants before priming.
Contaminant removal and cleaning methods
Effective cleaning is crucial for durable paint adhesion. Here’s how to remove common contaminants without damaging your substrate.
Degreasing: Use a degreaser suitable for your surface type (e.g., TSP or a commercial degreaser). Apply, let it sit, then scrub and rinse. Be sure to follow the manufacturer’s instructions.
Rinsing: Rinse thoroughly with clean water after degreasing. Allow the surface to dry completely before proceeding.
Removing soluble salts or mildew: For salt efflorescence, use a wire brush or acid wash (follow safety guidelines). For mildew, apply a solution of bleach and water (1 part bleach to 3 parts water), let it sit, then scrub and rinse.
Mechanical removal: feathering, sanding, and profiling
Remove loose paint, create a smooth transition, and establish the correct surface profile for your coating system.
Removing loose paint: Use scrapers or power tools to remove any flaking or peeling paint. Be careful not to damage the substrate.
Feathering edges: Sand or scrape along the edge of the repair, gradually reducing the amount of material removed until you reach the existing surface. This creates a smooth transition between the repaired area and the original surface.
Profiling: Use sandpaper to create the desired surface profile for your chosen coating system. This could be light (e.g., for gloss paints) or heavy (e.g., for textured coatings). Always follow the manufacturer’s recommendations.
Feather edge techniques and visual checkpoints
Use these techniques to create a tangible edge and this checklist to ensure your surface is ready for primer.
- Visible Edge: You should see a clear, visible edge where the repaired area meets the existing surface.
- Smooth Transition: Run your hand over the edge. It should feel smooth and even.
- No Sharp Edges: Check for any sharp edges or corners that could compromise the final finish.
- No Dust or Debris: Ensure there’s no dust, debris, or contaminants on the surface.
- Dry Surface: The surface should be completely dry before priming.
- No Tackiness: The surface shouldn’t feel tacky or sticky to the touch.
- Consistent Profile: Check that the entire surface has a consistent profile suitable for your chosen coating system.
- No Missing Spots: Ensure there are no missed spots, especially in corners or hard-to-reach areas.
- No Previous Coatings: Make sure all previous coatings have been removed where necessary.
Quick rule: If you’re unsure about any aspect of your surface preparation, perform a simple adhesion test (as mentioned earlier) to confirm it’s ready for painting.
Patch and Repair Strategies
For small damaged areas, clean, dry, and apply a compatible filler or patching compound. Smooth and feather into the surrounding coating, then prime and topcoat to match. Follow manufacturer cure times for best adhesion.
Medium repairs require lifting and re-bonding effective substrate sections. Use appropriate patch materials and dress the edges before priming. Large areas may demand a cut-back and selective replacement of the coating system, with full-coverage priming and re-coating according to the instructions.
Small-area spot repair workflow
For small damaged areas, follow these steps for a seamless repair:
Step 1: Lightly sand the area with fine-grit sandpaper to create ‘tooth’ and remove any loose paint. Be careful not to sand too aggressively as it may cause more damage.
Step 2: Feather the edges using a flexible abrasive or sanding sponge to blend the repair into the surrounding area. This helps prevent visible lines between the repaired area and the rest of the wall.
Step 3: Apply a primer specifically designed for your paint type. Priming seals the surface, improves adhesion, and helps achieve an even finish. Allow it to dry according to the manufacturer’s instructions.
Step 4: Fill any small holes or cracks using a lightweight spackling compound or paintable caulk. For larger gaps, use a flexible filler. Apply in thin layers, allowing each to dry before sanding lightly and applying the next.
Once filled, apply a topcoat of paint matching your existing wall color. Blend the edges using a technique called ‘tack rag’ – lightly touch up the area with paint, then immediately wipe off any excess with a clean cloth. This helps create a smooth transition between the repaired area and the rest of the wall.
Large-area patching and blending techniques
For larger damaged areas, follow these strategies for an effective repair:
Step 1: Stagger your feathering. Instead of a single, wide feather edge, create multiple, narrower ones. This helps distribute the transition over a larger area, making it less noticeable.
Step 2: Match texture and sheen. If your wall has a specific texture or sheen level, try to match it as closely as possible during the repair process. For textured walls, use a flexible filler that can be sanded to match the existing texture. For sheen, choose a paint with the same gloss level as your existing paint.
Step 3: Use glazing or scumble coats. After filling and sanding, apply a thin layer of glaze or scumble coat – a mixture of paint and clear glaze medium. This helps blend the repaired area into the surrounding wall by subtly altering the color and sheen.
Finally, apply a topcoat of matching paint. Remember, patience is key when repairing large areas. Take your time to ensure each step is done correctly to achieve a seamless finish.
Using flexible fillers and surfacers
Flexible fillers and surfacers are ideal for areas with movement or stress, such as corners, joints, or areas near windows and doors. Here’s how to use them:
When to select: Choose flexible products when you’re repairing an area that experiences frequent expansion and contraction due to temperature changes or structural movement.
How to apply: Apply flexible filler in thin layers, allowing each to dry before sanding lightly. This helps prevent the filler from cracking or peeling as it dries. Once filled, apply a surfacer – a primer with built-in filler – to seal the surface and improve adhesion for your topcoat.
How they help: Flexible fillers and surfacers accommodate substrate movement by flexing with the wall. This helps prevent recurrence of damage caused by stress or movement, extending the life of your repair.
When to Strip and Recoat: Criteria and Methods
Strip when the base coat is compromised across a substantial area and adhesion tests show failure over most of the surface. If the substrate remains sound, full stripping may still be unnecessary, but check the data sheet for strip criteria.
Consider safe removal methods specified by the manufacturer and local rules, such as mechanical abrasion or chemical stripping. Ensure proper containment and disposal, then re-prime and re-coat according to the recommended system for your substrate and climate conditions.
Objective criteria forcing a full strip
Before you grab your stripping tools, step back and assess the situation. You’re looking for signs that tell you it’s time to strip down to bare substrate.
Widespread alligatoring – those deep, wide cracks in the paint – is a sure sign. It means the paint has lost its bond with the surface beneath.
Substrate deterioration, like crumbling drywall or rotting wood, also demands a full strip. You need to address these issues before applying new paint.
Multiple incompatible layers can cause problems too. Different types of paint or finishes can’t bond properly, leading to peeling and flaking. If you’ve got more than two coats of paint on top of each other, it might be time for a full strip.
Stripping methods, pros/cons, and safety notes
There are three main stripping methods: mechanical, chemical, and heat. Each has its pros, cons, and safety considerations.
Mechanical stripping, like sanding or scraping, is labor-intensive but effective. It’s good for small areas and doesn’t require harsh chemicals. But it creates a lot of dust and can damage the substrate if not done carefully.
Chemical strippers are fast-acting and easy to use. They dissolve old paint, making it easy to wipe off. However, they’re toxic, flammable, and emit strong fumes. Always use them in a well-ventilated area with proper PPE.
Heat stripping uses infrared or open-flame tools to soften the paint for removal. It’s efficient but poses fire risks. Never use it on surfaces near flammable materials or in poorly ventilated spaces.
Post-strip substrate prep and verification
After stripping, don’t rush into applying new paint. You need to prepare the surface properly and ensure it’s ready for coating.
First, clean the surface thoroughly. Remove any residue or dust that could interfere with adhesion. Use a damp cloth or sponge, but avoid soaking the substrate.
Inspect the surface for any signs of damage or deterioration. If you find issues, repair them before proceeding. You might need to sand down raised grain or fill in holes with a suitable filler.
Finally, prime the surface. This seals the substrate and provides a better bond for your new paint. Choose a primer that’s compatible with both your old substrate and the new paint you’ll be using.
Preventing Recurrence and Long-Term Maintenance
Choose a coating system compatible with the substrate and traffic level, and follow the label’s application guidelines. Stick to recommended cure times and avoid applying when conditions are outside the specified range. Regular inspections help catch early signs before they advance.
Maintain cleanliness and promptly address any standing moisture or surface damage. Use proper recoating windows and patch techniques that preserve edge adhesion. Document the product and batch details to verify future compatibility if you need to touch up later.
Selecting compatible coating systems and application best practices
When choosing a new paint system, match its flexibility to your substrate. Too rigid? It’ll crack again. Too flexible? It won’t stick.
Follow manufacturer’s drying and overcoating windows. Rushing it causes alligatoring. And don’t forget, proper film thickness control—too thick, it cracks; too thin, it peels.
Use quality application tools. Roller covers should match paint type. Spray guns need regular cleaning to prevent clogging.
Environmental and maintenance controls
Keep moisture in check. Seal any leaks before painting. Use primers that block moisture if you can’t fix the source.
UV protection’s key outdoors. Use paints with UV blockers, or apply a clear coat over top.
Inspect regularly. Spot repairs early to prevent small issues becoming big problems.
Clean dirt and mildew off surfaces before painting. It helps your new paint stick better and last longer.
Troubleshooting common post-repair issues
Blistering? Check for moisture trapped under the paint. Scrape off blisters, let it dry, then repaint.
Edge lifting? It’s usually a sign of poor adhesion. Sand, clean, and prime before repainting.
Sheen mismatch? You might’ve used different paints. Remove all old paint, prep, and start fresh.
If you see any issues early, address them right away. Ignoring them just makes them worse.
Conclusion
Fixing crocodile cracking comes down to solid prep, careful patching, and ongoing maintenance. Do the work safely and you’ll protect the surface, look good, and avoid costly callbacks.
Start by sizing up the cracks, decide whether a patch will fix it or if you need to strip and recoat, gather the right tools and materials, clean and dry the surface in steps, apply the patch or repair in the correct order, test a small area first and follow cure times, then recoat or seal as needed and schedule regular checks to head off trouble.
Common mistakes to avoid are skipping surface cleaning or moisture checks, rushing repairs without proper adhesion or drying times, and using the wrong patch material or finish for your surface. Always test in a hidden spot first, wear eye protection and gloves, and work with a steady, controlled pace to prevent damage or future failures.
If cracks are wide, moving, or you find moisture behind the paint, or if the area is large and layered with old coatings, it makes sense to call a professional rather than pushing ahead. Stay practical, stay safe, and use the steps you’ve learned to keep the coating durable and looking right for years to come.
FAQ
Is patching my alligator cracks always the right first step, or should I consider stripping first?
Patching is usually the first step if the cracks are caused by surface issues and the paint is still sound. If the substrate is damaged or the cracks are deep and wide, stripping and addressing the underlying problem may be necessary. Check the surface for rot, big pops, or moisture issues before deciding.
What patching method should I use for alligator cracks on interior walls?
For small to moderate cracks, a vinyl or elastomeric patch is common. For larger cracks, you may need a patching compound designed to flex with the surface. Always follow the product label and apply in thin layers to minimize feathering and reveals.
How do I decide if the patch will hold up after repainting?
Make sure the wall is dry, clean, and sound before patching. Push on the patch area to ensure it’s firmly bonded and not soft. If you see more cracking after patching, reassess moisture, prep, and whether you need to strip and start fresh.
What steps help prevent alligator cracks from coming back after patching?
Address moisture and movement sources first. Use compatible primer and paint with good adhesion properties. Keep the patched area dry during curing and avoid overloading the patch with too much paint or heavy textures. If in doubt, check manufacturer instructions for compatibility.