

Table of Contents
- Introduction
- Understanding the 3-4-5 Method
- Step-by-Step Guide to Using a String for Rectangle Layout
- Common Applications of the 3-4-5 Method
- Troubleshooting Common Layout Issues
- Safety Precautions During Layout
- Cost-Effective Tips for Sourcing Materials and Tools
- Planning Considerations for Different Project Scales
- Common Mistakes to Avoid When Using the 3-4-5 Method
- Visual Aids and Diagrams for Enhanced Understanding
- Conclusion
- FAQ
Introduction
The 3-4-5 method, combined with string lines, provides a quick and efficient way to lay out perfect rectangles. In this article, you’ll discover how to apply these simple tools to achieve accurate measurements and angles, ensuring your projects are both precise and professional.
Understanding the 3-4-5 Method
The 3-4-5 method is a simple and effective technique for ensuring precise right angles using the Pythagorean theorem. By measuring three units along one side, four units along another, and ensuring the diagonal between them measures five units, you can confirm a perfect 90-degree angle.
This method is invaluable for DIY enthusiasts and professionals alike, as it ensures accuracy in projects ranging from building decks to laying out foundations. Avoiding common mistakes, such as incorrect measurements, can save time and resources. Understanding and applying the 3-4-5 method can significantly enhance the quality and precision of your construction work.
Step-by-Step Guide to Using a String for Rectangle Layout
Learning to use a string for a rectangle layout is essential for creating precise right angles, and the 3-4-5 rule is a simple yet effective method to achieve this. By gathering materials such as string, stakes, a measuring tape, and a marker, you can set up a perfect rectangle layout by marking the first corner and adjusting the string accordingly.
Understanding the 3-4-5 method not only ensures accuracy but also saves time and resources on the jobsite or during DIY projects. This technique allows you to check and correct the layout efficiently, ensuring that your construction work proceeds smoothly and without costly errors.
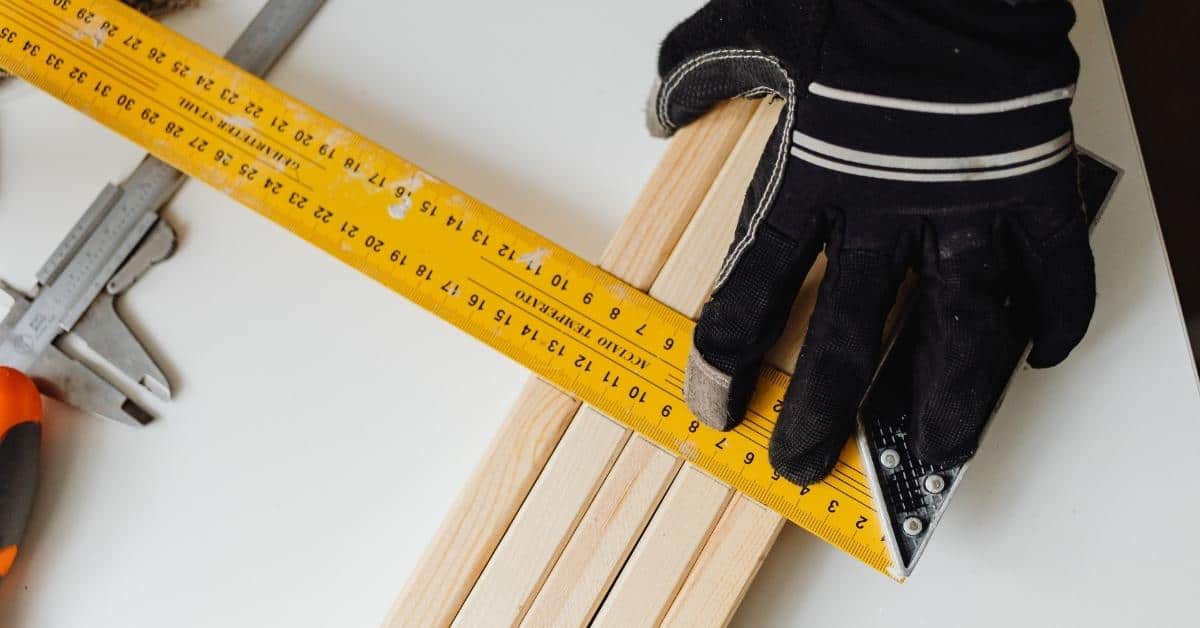
Tools and Materials Needed
To lay out a rectangle using a string, you need a few basic tools. These tools ensure accuracy and make the job easier. Don’t skimp on quality here; good tools make a big difference.
- Measuring Tape – Essential for measuring distances accurately. Make sure it’s at least 50 feet long.
- String Line – Use a durable nylon string. It’s less likely to stretch and mess up your measurements.
- Wooden Stakes – You’ll need these to anchor the string. Get sturdy ones that won’t snap easily.
- Line Level – This helps ensure your string is level. A small, lightweight option is best for ease of use.
- Mallet – Useful for driving stakes into the ground without damaging them. A rubber mallet is gentle but effective.
- Marker Flags – Handy for marking key points and corners. They’re visible and easy to move if needed.
Pro tip: Invest in a high-quality measuring tape and string line. Cheap ones can stretch or break, leading to inaccurate layouts and wasted time.
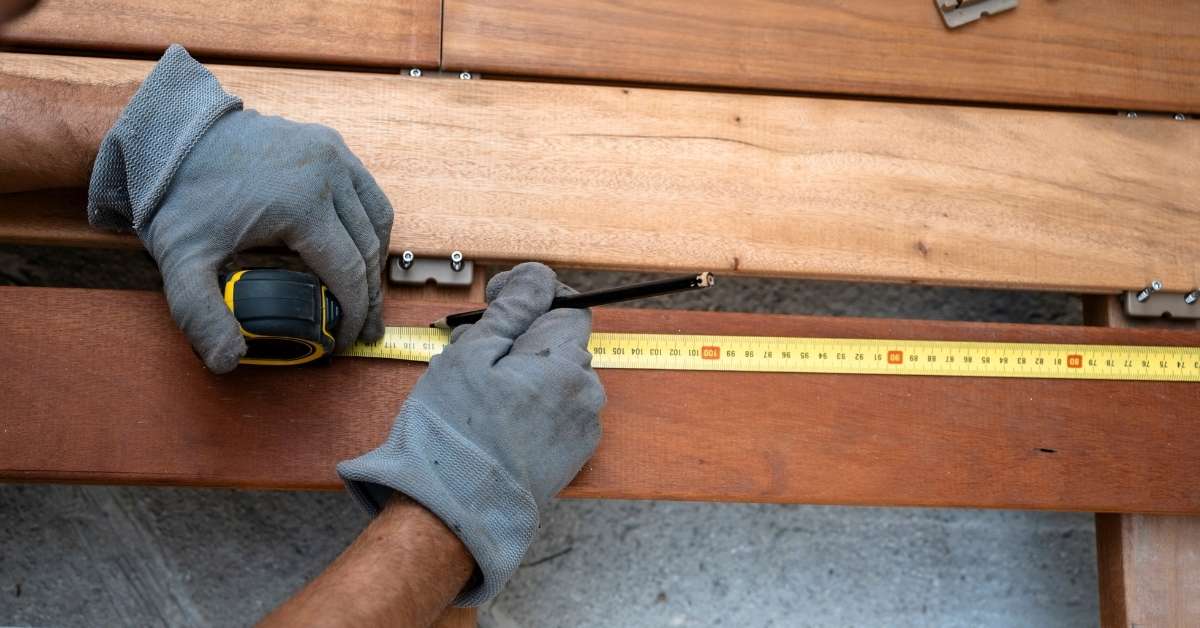
Practical Steps for Laying Out Rectangles with String
Using string for rectangle layout is a straightforward method that ensures precision in your DIY projects. This approach, combined with the 3-4-5 rule, helps you achieve accurate right angles and straight lines. Follow these steps to set up your layout efficiently.
- Gather Your Tools: Ensure you have a measuring tape, durable string, wooden stakes, a line level, and a rubber mallet. These are essential for a precise layout.
- Mark the First Corner: Choose a starting point and drive a stake into the ground. This will be your first corner. Make sure it’s secure.
- Measure and Mark: Use your measuring tape to measure three units along one side and four units along the other, marking each point with a stake.
- Check the Diagonal: Measure the diagonal between the two marked points. It should be five units. Adjust the stakes until the diagonal is exact.
- Secure the String: Tie the string tightly between the stakes, ensuring it is taut and level. Use the line level to verify that the string is straight.
- Verify Angles: Double-check all measurements and angles. If the diagonal isn’t correct, remeasure and adjust until it is.
- Finalize the Layout: Once satisfied with the layout, mark the ground with chalk or paint for a clear guide during construction.
Ensuring Precision
Precision is crucial in layout work. Always double-check your measurements and keep the string tight to avoid sagging. A small error here can lead to significant issues later on. Take your time to get it right.
Common Applications of the 3-4-5 Method
The 3-4-5 method is a simple yet effective technique used to create perfect right angles. By measuring three units along one side, four units along another, and ensuring the diagonal between them measures five units, this method helps ensure accuracy in various construction and design projects.
For DIY enthusiasts and professionals alike, the 3-4-5 method is invaluable in tasks such as laying out building foundations and aligning garden pathways. It is also a trusted technique in woodworking and carpentry to ensure square corners, as well as in tiling projects to maintain straight and even layouts. Understanding and applying this method can significantly enhance the precision and quality of your work.
Residential Construction
The 3-4-5 method is a reliable way to ensure your corners are square when laying out a foundation or framing a wall. Start by measuring one side of the corner to be 3 feet, the other side to be 4 feet, and the diagonal between them should be 5 feet. If the diagonal isn’t exactly 5 feet, adjust your lines until it is. This method is simple and effective, saving you from headaches later in the build.
Before you start, check base compaction. A poorly compacted base can throw off your measurements and lead to uneven settling. Use a level to double-check your work. If your base isn’t level, your 3-4-5 triangle won’t be accurate, and you’ll end up with a skewed structure.
Don’t eyeball it. Precision matters. A small mistake at the beginning can lead to major issues down the line. Always have a tape measure handy and take the time to get it right. This isn’t just about following a method; it’s about ensuring your home stands strong and true.
Troubleshooting Common Layout Issues
Troubleshooting common layout issues is essential for ensuring accuracy and precision in your projects. Key problems often include misalignment, string sagging, incorrect measurements, uneven terrain, and obstructions that can distort your work.
Addressing these challenges effectively can save time and prevent costly mistakes. By understanding how to correct these issues, you can maintain true right angles, ensure straight lines, and adapt to varying ground conditions, ultimately achieving a professional-quality result.
Correcting Measurement Errors
When working on layout, measurement mistakes can mess up your project. Here are some common errors to watch out for and how to fix them.
- Not Using a Level Skipping the level can lead to crooked lines. Always check your work with a level to keep everything straight.
- Ignoring Tape Measure Slack Not pulling the tape measure tight can give you a false reading. Make sure it’s taut for an accurate measurement.
- Relying on Memory Trying to remember measurements is a recipe for disaster. Write them down immediately to avoid mistakes.
- Wrong Starting Point Measuring from the wrong spot throws off the whole project. Double-check your starting point before you measure.
- Using the Wrong Tool Using a ruler when you need a tape measure can lead to errors. Choose the right tool for the job.
Double-check these points as you work to avoid headaches later. A little caution now saves a lot of trouble down the line.
Safety Precautions During Layout
When performing layout tasks, adhering to safety precautions is crucial to prevent accidents and injuries. Wearing appropriate personal protective equipment (PPE) like gloves, safety glasses, and steel-toed boots is essential. Additionally, maintaining a clear work area free of debris and tripping hazards ensures a safer environment.
Understanding and implementing these safety measures not only protects individuals but also enhances overall efficiency on the job site. Safe handling and storage of tools, along with awareness of surroundings, help avoid unnecessary risks. Proper lifting techniques are vital to prevent strain or injury, especially when dealing with heavy materials or equipment.
Safe Handling of Tools
Handling tools safely is crucial when working on a layout. The right tools help you get the job done efficiently and prevent accidents. Here’s what you need to know about the essential tools and how to use them safely.
- Hammer drill: Essential for drilling into hard surfaces like concrete. Always use the right bit and wear eye protection to avoid flying debris.
- Measuring tape: Accurate measurements are key. Keep it straight and double-check your numbers to avoid costly mistakes.
- Utility knife: Ideal for cutting materials. Keep it sharp and retract the blade when not in use to prevent accidents.
- Level: Ensures everything is straight and even. Always check it twice before securing any structure.
- Screwdriver set: Necessary for assembling and disassembling. Use the correct size to avoid stripping screws.
Pro tip: Invest in quality tools. They last longer and are safer to use, reducing the risk of mishaps on-site.
Cost-Effective Tips for Sourcing Materials and Tools
Finding cost-effective ways to source materials and tools can significantly reduce project expenses. By identifying local suppliers offering discounts or bulk purchasing options, and exploring online marketplaces for second-hand items, you can secure affordable resources. Renting specialized tools for one-time projects and timing purchases with seasonal sales can further enhance savings.
These strategies are vital for DIY enthusiasts and professionals alike, as they help stretch budgets without compromising on quality. Engaging with construction forums and communities can provide valuable insights and opportunities for group buys. Negotiating prices or seeking price matches can also ensure you get the best deals, making your projects more financially sustainable.
Planning Considerations for Different Project Scales
Understanding the scale of your project is crucial when planning layout tasks. Small, medium, and large projects each demand unique approaches to ensure precision and efficiency. For small-scale projects like garden beds, the 3-4-5 method can be adjusted for simplicity. Medium-scale projects, such as driveways, benefit from using string and stakes for accuracy. Large-scale projects, like building foundations, often require additional tools or professional help.
Considering the scale helps avoid common challenges and improves project outcomes. For DIY enthusiasts, adapting methods to project size can save time and reduce errors. On larger sites, professional assistance ensures compliance with regulations and safety standards. By planning effectively, you can tackle projects of any size with confidence and achieve lasting results.
Common Mistakes to Avoid When Using the 3-4-5 Method
Accurate measurements are crucial when using the 3-4-5 method to ensure precise rectangle layouts. Common mistakes, such as miscalculating sides or angles, can lead to skewed results. Ensuring that strings are taut and of correct length is essential to avoid inaccuracies.
For DIY enthusiasts and jobsite professionals, double-checking measurements can prevent costly errors. Verifying calculations before marking helps maintain the integrity of the layout. If mistakes are identified, re-measuring and adjusting the layout can correct the issue efficiently.
Incorrect Measurements
Getting your measurements wrong in the 3-4-5 method can throw off your entire project. Start by using a reliable tape measure. Don’t rely on old or worn-out tools. They can stretch or have faded markings, leading to errors. Double-check that your tape measure is accurate before you begin.
When measuring, ensure the tape is perfectly straight. Any sagging or bending can skew your results. Hold it taut and level to get a precise reading. Measure twice to confirm your numbers. It’s better to spend a few extra minutes now than to redo work later.
Don’t forget to check base compaction before starting. A soft or uneven base can shift under your tape, giving you false measurements. Make sure the ground is solid and level to avoid any surprises. Remember, precision is key. A small mistake here can lead to big problems down the line.
Misaligned Corners
Getting corners right is crucial for any project. A common mistake is ending up with misaligned corners, which can throw off your entire layout. To avoid this, start by ensuring your base is level and compacted. If the base isn’t solid, your measurements won’t matter. Always check base compaction before you begin marking out your lines.
When using the 3-4-5 method, it’s easy to get sloppy with your measurements. Precision is key. Double-check your tape measure and make sure it’s taut. Even a small sag can lead to a big error. Also, don’t rush the process. Take your time to verify each measurement and mark clearly.
Finally, always cross-check your work. Measure diagonally from corner to corner. If the diagonals aren’t equal, you’ve got a problem. Fix it before you proceed. Remember, a little extra effort now saves a lot of headaches later.
Visual Aids and Diagrams for Enhanced Understanding
Visual aids and diagrams are essential tools for mastering the layout process. They provide a clear, step-by-step illustration of techniques such as the 3-4-5 triangle method for creating right angles and using string lines to outline a rectangle accurately.
Understanding these visual guides can significantly improve your accuracy and efficiency on a DIY project or jobsite. By recognizing common mistakes through visual examples, you can learn how to correct them and achieve precise results. This not only saves time but also ensures the structural integrity of your work.
Diagram of the 3-4-5 Triangle
The 3-4-5 triangle is a simple, reliable tool for checking right angles on your project. Imagine a triangle where one side is 3 units, the next is 4 units, and the hypotenuse is 5 units. This setup guarantees a perfect 90-degree angle. Use this method when laying out foundations or walls to ensure everything is square.
Start by measuring out one side to be 3 units long. From the same starting point, measure another side to be 4 units. The diagonal connecting these two points should be exactly 5 units. If it’s not, your angle is off. Adjust until you get it right. Precision here saves headaches later.
Don’t eyeball it. Use a tape measure for accuracy. If you skip this step, you might end up with crooked walls or uneven surfaces. Check base compaction before starting, as uneven ground can throw off your measurements. Trust the 3-4-5 rule; it’s a classic for a reason.
Step-by-Step Layout Diagram
We’re going to lay out your project step by step. Follow these actions to get a clear and efficient layout.
- Measure the area where you’ll be working. Double-check your measurements.
- Mark the boundaries using chalk or a similar tool. Make sure lines are straight.
- Place your layout diagram on the ground. Use stakes to secure it.
- Adjust the diagram as needed to align with your measurements.
- Verify all angles with a square to ensure accuracy.
- Review the entire layout before proceeding with any construction.
Common mistake: Skipping the angle check can lead to a crooked layout. Always verify with a square.

Conclusion
Getting your rectangles right with the 3-4-5 method and a simple string is a game-changer. It’s quick, reliable, and doesn’t need fancy tools. Just remember, precision is key. Measure twice, cut once. Rushing through the layout can lead to costly mistakes.
Always keep an eye on your tools and materials. A frayed string or a bent tape measure can throw off your whole project. Keep everything in good shape, and you’ll save yourself a lot of headaches. And don’t skimp on safety. A little caution goes a long way.
Whether you’re laying out a garden bed or a new deck, planning ahead makes all the difference. Think through your steps and avoid common pitfalls. With practice, you’ll get faster and more confident. Stick to these basics, and you’ll have solid, square layouts every time.
FAQ
What is the 3-4-5 method?
The 3-4-5 method is a simple way to create a right angle using a triangle. Measure 3 units on one side, 4 on the other, and the diagonal should be 5. It’s a reliable trick to ensure your corners are square.
Why use a string for layout?
Using a string helps you lay out straight lines over long distances. It’s cheap, easy, and you can see exactly where your lines are going. Just make sure to pull the string tight to avoid sagging.
Can I eyeball the layout instead?
Don’t do it. Eyeballing might seem quicker, but it leads to crooked lines and wasted materials. Take the time to measure properly for a professional-looking result.
What materials do I need for this method?
You’ll need a tape measure, string, and some stakes or nails to hold the string in place. A pencil or chalk line is useful for marking. These are basic tools every DIYer should have.
How accurate is this method?
The 3-4-5 method is very accurate for creating right angles. Combined with a tight string line, you’ll get straight and square layouts. It’s a tried-and-true technique used by pros.