

Key Takeaways
- Gather Essential Supplies: Use clean mixing containers, accurate measuring tools, and PPE for safety.
- Optimal Weather Conditions: Apply form release agents in dry weather, ideally between 50°F and 90°F.
- Allow Proper Drying Time: Let the release agent dry for 30 minutes to 1 hour before pouring concrete.
- Conduct Test Patches: Always test a small area to ensure the release agent does not stain the concrete.
Introduction
Creating effective DIY form release agents that do not stain concrete is a practical approach for those engaged in concrete projects. By using the right ingredients and following precise mixing instructions, you can ensure that your concrete surfaces remain clean and free from unwanted marks. Proper preparation and the right tools are essential for success. Gathering the necessary supplies, such as mixing containers, measuring tools, and protective gear, will help streamline the process and enhance the overall quality of your work. With careful planning and execution, you can achieve reliable results that meet your concrete needs.
Essential Supplies and Equipment
To create DIY form release agents that won’t stain concrete, gather the right supplies and equipment. Here’s what you’ll need for successful mixing and application:.
- Mixing Containers: Use clean, durable buckets or containers. Avoid those that previously held chemicals.
- Measuring Tools: Accurate measuring cups and spoons are crucial for correct ingredient ratios.
- Stirring Tools: A long-handled stir stick or power mixer ensures thorough mixing.
- Spray Equipment: A spray bottle or garden sprayer applies the release agent evenly.
- Personal Protective Equipment (PPE): Wear safety goggles, gloves, and a mask to protect against dust and fumes.
- Storage Containers: Airtight containers prevent contamination and evaporation of leftover mixture.
- Cleaning Supplies: Keep rags, sponges, and water ready for immediate cleanup.
- Scale: A digital scale provides precision by measuring ingredients by weight.
- pH Test Strips: Check the acidity or alkalinity of your mixture to ensure performance.
- Drop Cloths: Protect your work area with coverings to catch spills and keep it clean.
- Labels: Mark storage containers with contents and date for easy tracking.
- Protective Gear: Consider a disposable apron or coveralls to protect clothing from spills.
- Heat Gun or Hair Dryer: Useful for quick drying in humid conditions before pouring concrete.
- Test Panels: Create small test panels to evaluate the release agent’s effectiveness.
- Measuring Jugs: Large jugs help mix bigger batches for extensive projects.
Having these supplies ensures you can make a reliable form release agent that minimizes concrete staining. Mix in a well-ventilated area, maintaining temperatures between 50°F and 80°F (10°C to 27°C) for optimal results.
Use the mixture within a few days for best effectiveness. Check the consistency; it should resemble thin syrup for optimal application. Always test on a scrap piece of formwork before proceeding with the full project to ensure compatibility and performance.
Preparation and Scheduling Considerations
Proper preparation and scheduling are key to a successful DIY form release project. Planning ensures your concrete stays stain-free and the application process goes smoothly.
First, assess the weather. Ideal temperatures for applying form release agents range from 50°F to 90°F (10°C to 32°C). Avoid working in rain or high humidity, as these conditions can impact the agent’s effectiveness.
Scheduling during dry periods is best.
Next, think about your formwork setup timing. Allow the form release agent to dry before pouring concrete. Generally, let it sit for 30 minutes to an hour, depending on the product.
This ensures proper adhesion and prevents staining.
Plan your cleanup in advance. Have cleaning supplies ready to remove excess release agent from tools and surfaces, keeping your work area tidy and preventing concrete contamination.
If tackling a large project, break it into phases. This helps manage time and resources, ensuring each step gets the attention it needs. Good scheduling and preparation can greatly improve your concrete’s final quality.
Additional Considerations:
- Tools and Equipment: Ensure brushes and sprayers are clean and working well before starting.
- Test Patch: Test a small area to confirm the release agent doesn’t stain the concrete.
- Humidity Levels: Aim for levels below 70% for the best results.
- Local Regulations: Review rules on concrete pouring, especially in urban areas.
Monitor the concrete’s curing process after pouring. Keep it moist for at least 7 days to achieve optimal strength and durability.
Finally, consider help availability. If working with a team, ensure everyone knows their roles and the schedule to streamline the process.
Failure Modes & Fixes
- Mode: Applying form release agent in unsuitable weather can lead to ineffective results. Fix: Schedule application during dry periods with temperatures between 50°F and 90°F.
- Mode: Not allowing the form release agent to dry properly before pouring concrete can cause adhesion issues. Fix: Let the agent sit for 30 minutes to an hour as per product guidelines.
- Mode: Failing to prepare cleanup supplies can lead to contamination and a messy work area. Fix: Plan cleanup in advance and have necessary cleaning supplies ready.
Detailed Instructions for Mixing and Application
Follow these step-by-step instructions to mix non-staining form release agents, ensuring your concrete surfaces are protected.
Mixing the Form Release Agent:
Gather your ingredients based on your chosen recipe. Use this basic mixing method:.
- Measure base oil: Pour the required amount of base oil (e.g., mineral or vegetable oil) into a clean mixing container.
- Add emulsifier: Mix in the emulsifier (such as soap or a commercial agent) at a 1:10 ratio with the oil.
- Incorporate water: Slowly add water while stirring continuously until the mixture is smooth and creamy.
- Optional colorant: Add a small amount of colorant or dye for visibility, ensuring it won’t stain the concrete.
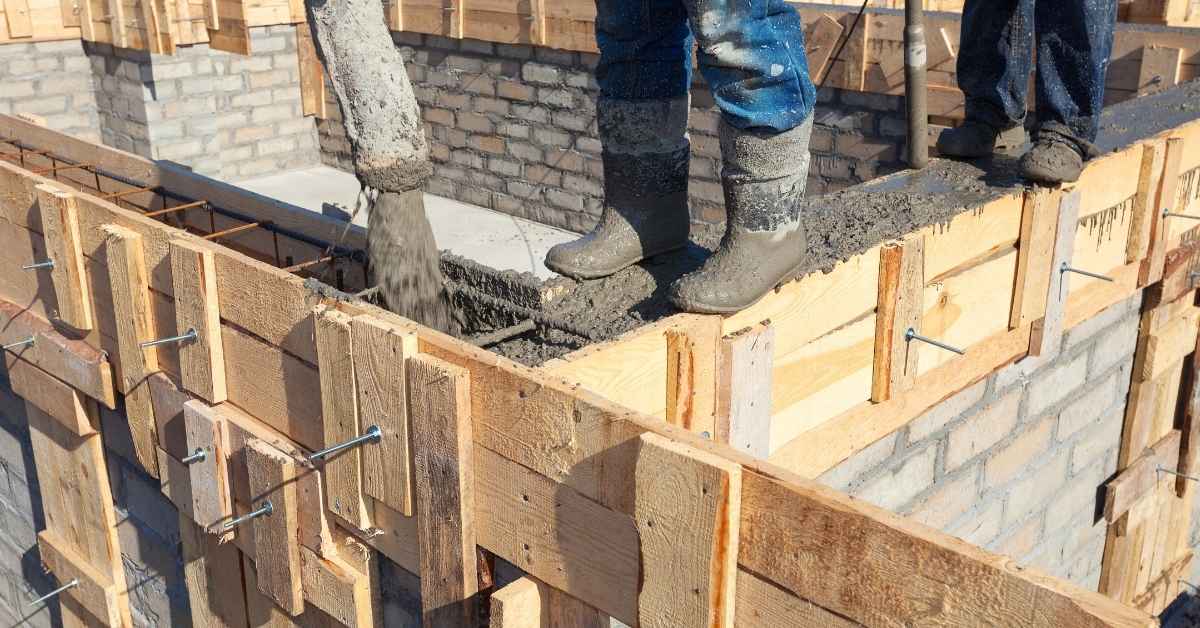
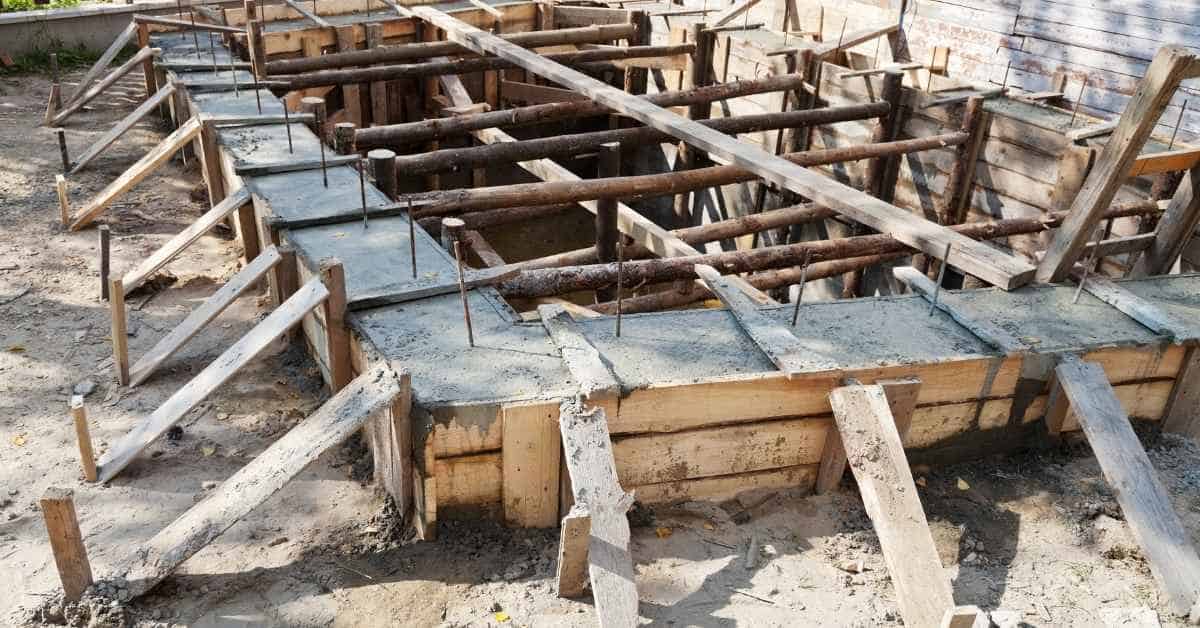
- Prepare form surfaces: Clean the forms, removing dust and debris before application.
- Apply evenly: Coat all form surfaces thoroughly for complete coverage.
- Allow drying: Let the agent dry for at least 30 minutes before pouring concrete. Drying times vary with humidity and temperature, typically 15 to 60 minutes.
- Inspect forms: Check for missed spots and reapply if necessary to maintain a uniform coating.
By following these steps, you can mix a non-staining form release agent for a clean concrete finish.
Application Guidelines:
Use these best practices when applying the form release agent:.
- Test patch: For larger projects, conduct a small test patch to ensure the agent performs well and doesn’t alter the concrete’s appearance.
- Tools ready: Prepare all necessary tools before starting the application.
By taking these precautions, you enhance the effectiveness of your form release agent, ensuring a smoother concrete finish and easier form removal.
Common Challenges and Their Solutions
In concrete pouring, challenges are common, but effective solutions make a big difference. This section tackles frequent issues with non-staining form release agents and offers practical ways to solve them.
1. Inconsistent Release from Forms:
Inconsistent release can cause surface blemishes. Ensure the form release agent is applied evenly. Using a sprayer helps achieve a uniform coat. Test on a small area before the full pour for consistent results.
2. Adhesion Problems:
If the concrete sticks to the forms, check the release agent’s compatibility with the concrete mix. If problems persist, apply a second coat after the first has dried adequately.
3. Environmental Factors:
Weather affects form release performance. High humidity or rain can dilute it, while heat causes evaporation. Plan pours in optimal weather. In adverse conditions, use a thicker release agent for better coverage.
4. Residue on Concrete Surface:
Residue can affect the finish. Clean forms thoroughly before applying the agent. If residue occurs, gently wash with mild detergent and water, then rinse.
5. Compatibility with Stains and Sealers:
For staining or sealing concrete, ensure the release agent is compatible. Some agents hinder adhesion or affect stain appearance. Check labels and test a patch if unsure about compatibility.
The Science Behind Non-Staining Form Releases
Understanding the science behind non-staining form releases is crucial for achieving clean, blemish-free concrete surfaces. These products rely on specific chemical properties and interactions to prevent adhesion between the formwork and the concrete.
Non-staining form release agents typically consist of a blend of oils, waxes, and emulsifiers. The oils create a barrier that prevents the concrete from bonding to the form, while the waxes enhance the release properties and reduce the likelihood of. staining..
Emulsifiers stabilize the mixture, ensuring even application and effective performance.
Compatibility with various types of concrete mixes is a key aspect of non-staining form releases. Certain additives in concrete, like pigments or retarders, can react negatively with some release agents, causing discoloration. Therefore, using a release agent formulated specifically for your concrete type is essential for optimal results.
Application method is another important consideration. Non-staining form releases should be applied evenly and in the right amount to ensure complete coverage. Over-application can lead to pooling, which may cause staining, while under-application can result in poor release performance.
The curing process of the concrete also affects the effectiveness of non-staining form releases. Proper curing minimizes moisture loss and reduces the risk of chemical reactions that could lead to staining. Understanding these scientific principles will help you select and apply the right non-staining form release for your project.
Key Factors to Consider:
- Ensure temperature is within the recommended range, typically between 50°F and 90°F (10°C to 32°C), for optimal performance of the release agent.
- Consider humidity levels; high humidity can affect curing time and the release agent’s effectiveness, so adjust application timing accordingly.
- Test a small area before full application to verify compatibility with your specific concrete mix and to check for any adverse reactions.
- Use a spray application method for even distribution, allowing for a consistent release layer that minimizes the risk of staining.
When selecting a non-staining form release, look for products that specify compatibility with your concrete’s additives. This ensures that the chemical interactions will not compromise the integrity or appearance of the concrete.
Regularly check your application equipment to prevent clogs, which can lead to uneven application and potential staining issues. Keeping your tools clean and well-maintained is essential for achieving the best results.
Helpful Hints and Alternative Options
Explore practical tips and alternative options for making and using non-staining form release agents. These insights can improve your DIY projects and keep your concrete free from unwanted marks.
Consider these helpful hints when selecting or creating a form release agent:.
- Test Before Use: Test your release agent on a small, hidden area of your formwork to ensure it doesn’t stain the concrete.
- Consistency is Key: Keep a consistent mixture ratio for even application and performance.
- Application Techniques: Use a sprayer or brush for even application; avoid pooling, which can cause staining.
- Environmental Conditions: Apply in temperatures between 50°F and 85°F (10°C to 29°C) for best results.
- Storage and Shelf Life: Store homemade agents in a cool, dry place; check for separation or consistency changes before use.
- Layering Technique: Apply a second layer after the first dries for added protection against staining.
Consider these alternative options for non-staining form releases:.
- Vegetable Oil: Apply lightly to formwork for a simple, effective barrier without staining.
- Commercial Non-Staining Releases: Look for commercial agents designed for various concrete types.
- Wax-Based Products: Wax-based releases offer clean separation and are less likely to mark the concrete surface.
Keeping forms clean and well-maintained reduces staining risk. Regularly inspect and clean formwork after use to prevent residue buildup, which can transfer to future concrete pours. For optimal performance, apply your release agent at a thickness of about 1-2 mils.
Too thick can cause excess residue, while too thin may not separate adequately.

Conclusion
Take the next step in your DIY project by gathering your supplies and starting the mixing process today!
FAQ
What supplies do I need to create a DIY form release agent?To create a DIY form release agent, you will need mixing containers, measuring tools, stirring tools, spray equipment, and personal protective equipment (PPE). Additionally, having storage containers, cleaning supplies, and a digital scale can help ensure the process goes smoothly.
How long should I let the form release agent dry before pouring concrete?It is recommended to allow the form release agent to dry for at least 30 minutes to an hour before pouring concrete. This drying time can vary based on humidity and temperature, so always check the specific product guidelines for best results.
What should I do if the weather conditions are not ideal for applying the release agent?If the weather is not suitable, such as during rain or high humidity, it’s best to postpone the application. Ideal conditions are temperatures between 50°F and 90°F (10°C to 32°C) to ensure the release agent works effectively.
Why is it important to test a small area before full application?Testing a small area helps confirm that the release agent does not stain the concrete and performs as expected. This step allows you to adjust any variables before applying it to the entire project, ensuring a successful outcome.