
Introduction
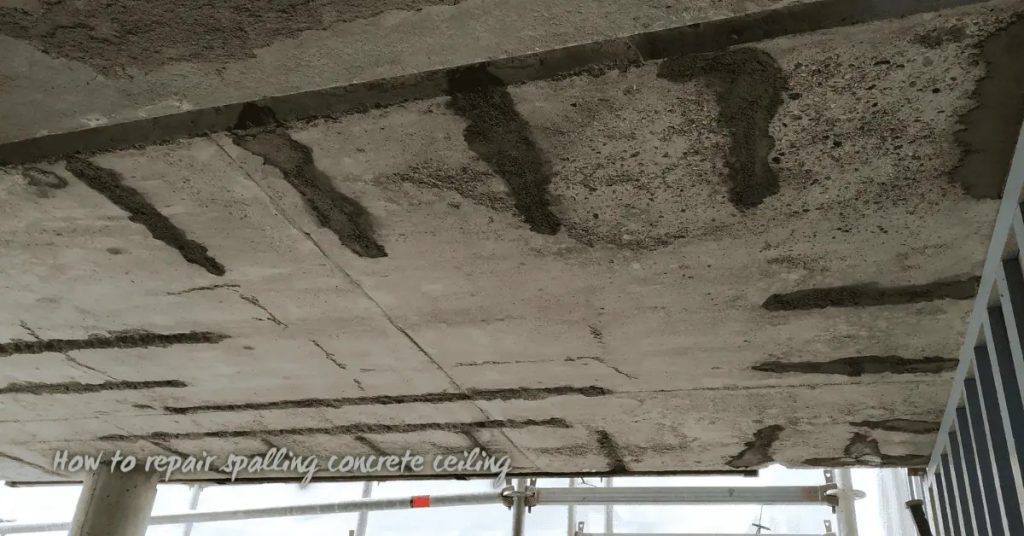
Edge spalling at concrete joints is when the concrete along the joint flakes or chips away. It often shows up where the edge is thin, stressed, or exposed to moisture. A straightforward fix is to prepare the edge, restore sound support, and plan better joint detailing.
To detail joints so it stops, use properly shaped edges, consistent joint depth, and clean, dry surfaces. Choose a suitable sealant or grout and install with the manufacturer’s guidance or local rules, then finish to protect the edge. Regular inspection and maintenance help catch early signs and keep the joint performing.
Key Takeaways
- Understand edge spalling risks at joints to prioritize sealant and load details
- Detail joints with proper edge chamfers, sealed interfaces, and drainage to prevent water intrusion
- Use compatible materials and verify movement allowances to reduce stress concentrations
- Follow safety protocols when inspecting: PPE, edge hazards, and fall protection considerations
- Inspect joints regularly; look for spalling edges, cracking, and sealant degradation
- Plan for retrofit fixes with clean preparation, compatible patch materials, and cure time
Table of Contents
- Introduction
- Key Takeaways
- Why Edge Spalling Matters: Scope, Costs, and Safety Implications
- Root Causes and Mechanics of Edge Spalling
- Joint Types and How Detailing Affects Edge Resilience
- How to Detail New Joints to Prevent Edge Spalling — Step-by-Step
- Materials, Standards, and Acceptance Criteria
- Inspection, QA/QC, and Visual Checkpoints for Early Detection
- Retrofits and Repairs: Detailing Fixes to Stop Recurring Spalling
- Tools, Materials Checklist, Drawings, and Practical Examples
- Conclusion
- FAQ
Why Edge Spalling Matters: Scope, Costs, and Safety Implications
Edge spalling at concrete joints undermines edge integrity and can lead to more frequent repairs. It results from joints not being detailed to handle movement and edge loading. Proper detailing helps prevent deterioration from the edge outward.
For DIY readers, detailing joints correctly supports long-term performance and safer use of the surface. On site, ensure joint width remains consistent with design expectations and avoid joints that are excessively narrow or wide. An experienced installer checks that the concrete mix and aggregate size suit the joint spacing and loading conditions, and if spalling appears, plan repairs and re-detailing to prevent recurrence.
What Is Edge Spalling Vs. Other Concrete Distress
Edge spalling is a specific type of concrete distress that occurs at the edges or corners of slabs and walls. It’s characterized by the flaking or chipping away of the outer layer of concrete, exposing the aggregate beneath.
Other common types of concrete distress include:
- Scaling: The peeling off of thin layers of concrete from the surface.
- Cracking: Fractures in the concrete that can be map, diagonal, or vertical.
- Popping: Small pieces of concrete breaking away from the surface due to internal pressure.
Understanding these differences helps target corrective actions. Compare visual observations with known distress types in reference materials and review relevant literature and standards to familiarize yourself with edge spalling characteristics. If observations match, proceed with appropriate mitigation strategies. Correct any misdiagnosis by re-evaluating based on accurate identification criteria.
Typical Locations and Project Types at Risk
Edge spalling is more likely to occur in certain areas and under specific conditions. Identifying these at-risk locations helps prioritize inspections and preventive measures.
Typically, edge spalling occurs:
- At corners and edges: Where concrete is most exposed to external forces.
- In high-traffic areas: Such as walkways, driveways, or loading docks.
- In harsh environments: Like areas with frequent freeze-thaw cycles or exposure to de-icing salts.
Assess the specific project’s design, materials, and construction methods for potential risks. Consult industry guidelines and past project records to identify common trends. If the project matches typical at-risk characteristics, implement additional inspections and preventive detailing. Re-evaluate risk assessment if issues arise in unexpected locations or project types.
Root Causes and Mechanics of Edge Spalling
Edge spalling occurs when joints are not detailed correctly, allowing edges to chip or flake under load. Proper detailing creates clean joint faces, correct depth, and a solid seal to manage cracking. Without this, edges are vulnerable and durability suffers.
On site, verify the cutting tool and blade size are appropriate and in good condition to ensure clean edges. An experienced installer plans joint spacing and uses the right tools and materials for cutting and sealing, which helps prevent spalling. If joints are too narrow or shallow, recut or fill and re-cut to meet specifications.
Load, Restraint, and Stress Concentration Mechanics
Edge spalling often results from excessive stresses at concrete joints. Understanding how loads, restraints, and stress concentrations contribute to this issue is crucial for effective detailing.
Review typical joint details and consider various loading scenarios to identify potential stress concentrations. Verify your understanding of load transfer mechanisms at joints and the role of restraints in inducing stresses.
If restraints are present, consider their impact on stress distribution and the potential for spalling. Re-evaluate joint detailing to mitigate stress concentrations and optimize load transfer.
Material and Environmental Drivers (Durability Issues)
Material choices significantly impact the durability of concrete joints. Identifying material and environmental factors affecting concrete durability helps prevent edge spalling.
- Concrete mix design: Review for appropriate water-cement ratio, adequate cement content, and suitable aggregate type. Consider using air-entraining agents or admixtures for improved durability.
- Cement type: Select a cement with suitable strength development and durability properties, such as Type II or Type V cement for sulfate-resistant applications.
- Exposure conditions: Assess potential environmental attacks on the structure. Consider using more durable materials or applying protective measures in harsh environments.
- Aggregate quality: Ensure aggregates are clean, sound, and free from harmful impurities. Avoid using lightweight or reactive aggregates that may compromise durability.
- Protective coatings/sealers: Apply appropriate coatings or sealers to protect concrete surfaces from moisture ingress and other environmental attacks.
Construction Causes: Formwork, Finishing, and Vibration Problems
Several construction-stage factors can increase the risk of edge spalling. Identifying and addressing these issues significantly reduces this risk.
Assess potential vibration sources, such as heavy equipment or traffic, that may affect concrete at edges during construction. Review formwork design, finishing techniques, and consolidation methods used to ensure they do not contribute to spalling.
If overfinishing or inadequate consolidation is observed, implement corrective measures to improve edge quality. Optimize formwork design, improve finishing techniques, and ensure proper consolidation at edges to minimize spalling risk.
Joint Types and How Detailing Affects Edge Resilience
Common joint types include construction, contraction or control, isolation, and expansion. Each type requires specific detailing to protect edge resilience. The way a joint is filled and finished affects how edges resist cracking and spalling.
For DIY work, understanding these differences helps you choose the right filler and detailing approach for each joint. Proper detailing reduces edge stress and improves long-term performance under movement and weather exposure. Verify that the joint type matches expected movement and loading, and follow manufacturer instructions for chosen materials.
Control/Contraction Joints: Spacing, Depth, and Location
Properly spaced and detailed control/contraction joints help manage shrinkage and thermal movement, reducing the risk of edge spalling. Measure joint spacing and depth on-site; ensure they match plans and are consistent throughout the structure.
Joint spacing: To prevent excessive stress at edges, check design specifications and relevant codes like ACI 301 for appropriate spacing. Typically, this ranges between 24 to 48 inches depending on slab thickness.
Joint depth: Insufficient depth can result in incomplete cracking and increased edge stress. Verify joint depth meets design requirements, usually around 1/4 to 1/3 of the slab thickness.
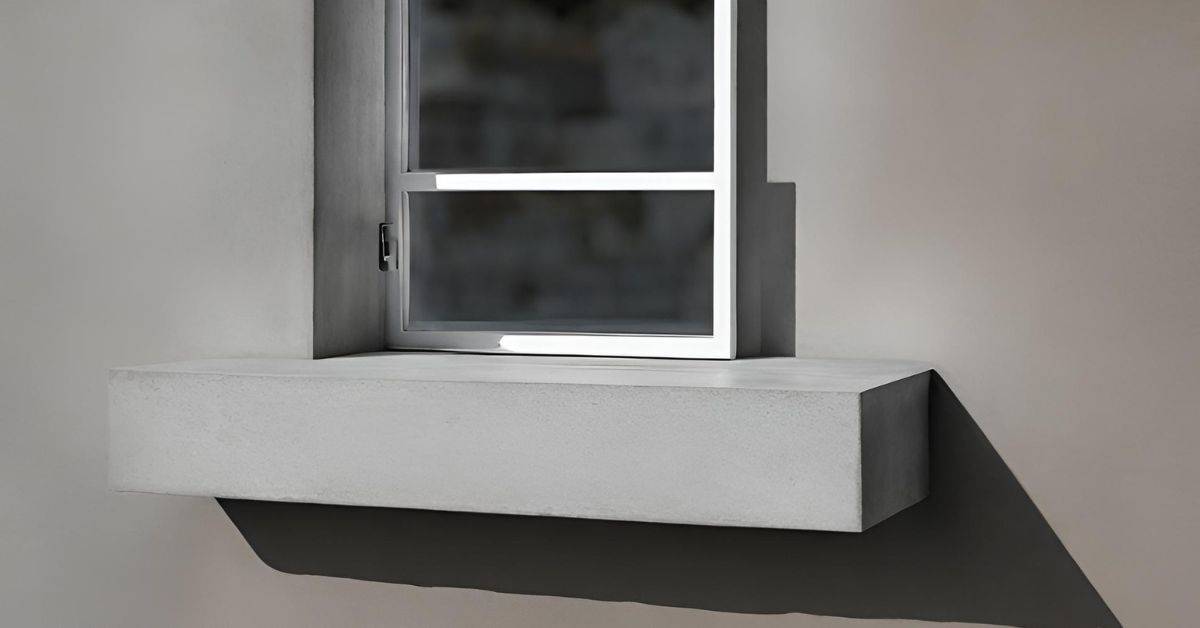
Expansion & Isolation Joints: Profile, Backing Material, Sealants
Appropriate joint profiles, backing materials, and sealants protect edges from spalling due to differential movement. Inspect joint profiles on-site; confirm backing material is installed correctly; test sealant application for proper adhesion and flexibility.
- Joint profile: Saw-cut or formed joints should meet design requirements. Incorrect profiles can lead to cracking. Verify profiles comply with design specifications.
- Backing material: Closed-cell foam, cork, or other materials must be durable and compressible. Inadequate backing can cause staining or weak bond. Check materials for durability and compressibility.
- Sealants: Sealants should be compatible with concrete and meet relevant standards like ASTM C920. Incorrect sealants can result in poor adhesion or flexibility. Ensure sealants are properly applied and meet required standards.
Construction Joints & Rebar/Dowel Detailing
Properly detailed construction joints with adequate reinforcement continuity minimize stress concentrations at edges, reducing spalling risk. Measure and verify rebar/dowel sizes and spacings on-site; ensure lap splices are correctly detailed and installed.
Rebar/Dowel Size: Inadequate size can result in insufficient edge support. Verify sizes comply with design specifications and relevant codes such as ACI 318. Common sizes range from #4 to #8 rebar or 1/2 to 3/4 inch dowels.
Rebar/Dowel Spacing: Wide spacings can lead to excessive stress at edges. Check design specifications for appropriate spacing, typically around 6 to 12 inches on center.
How to Detail New Joints to Prevent Edge Spalling — Step-by-Step
Detailing new joints during design and construction helps prevent edge spalling. Plan clean, straight joint edges and the right joint spacing, then choose compatible materials for filling and sealing. Finish with careful compaction and surface finishing to protect the edge.
Proper detailing matters because skipped steps can lead to premature edge spalling and shorter slab life. Verify a clean, straight joint edge with a simple visual check and confirm the joint width suits the slab and loading. For heavy use or freeze‑thaw exposure, add reinforcement or an expansion joint and plan repairs if spalling has already occurred.
Step-by-Step Process
Follow these practical steps to detail new joints and prevent edge spalling. This sequence starts from preparation to finishing, focusing on realistic DIY/home-improvement actions.
- Prepare the area: Ensure safety by clearing debris and marking joint locations accurately.
- Review joint type: Confirm the correct joint type, size, and location based on your project’s requirements.
- Detail joints: Using appropriate tools, mark out and cut expansion, contraction, or construction joints as per design specifications.
- Check alignment: Verify that joints are straight, level, and properly spaced to distribute stresses evenly.
- Finish and protect: Apply sealants, protective materials, and formwork as required. Inspect the work for any missed or incorrectly detailed steps.
Design-Phase Specifications and Drawings to Include
Proper design ensures effective joint detailing. Verify that all necessary details are included in the plans, such as:
Joint types: Expansion, contraction, or construction joints based on project requirements.
Joint spacing: Appropriate spacing to control cracking and distribute stresses evenly.
Review project requirements and standards to ensure compliance with relevant codes and regulations. Update drawings and specifications to include any missing details for new construction or repair scenarios.
On-Site Best Practices During Placement and Finishing
Proper on-site practices minimize edge spalling risk. Before starting work, review site-specific conditions and understand the impact of each action on joint integrity:
Use appropriate concrete mix designs that balance strength and durability to resist edge spalling.
Follow best practices for placement methods, such as using vibration techniques to minimize voids and ensure proper consolidation.
Address any observed issues promptly, such as excessive vibrations or improper curing, to prevent further damage.
Cutting, Sealing, and Protecting the Joint After Placement
Protecting joints ensures long-term performance. Inspect joint condition before applying any treatments:
Use appropriate cutting tools to create clean, uniform joints that promote proper stress relief.
Select suitable sealants and protective materials based on joint type and exposure conditions. Follow manufacturer instructions for application and curing.
Remove and reapply any incorrectly applied sealants or protective materials to ensure optimal performance.
Materials, Standards, and Acceptance Criteria
Joint Detailing for Edge Spalling Control
This section guides you through materials selection, standards application, and acceptance criteria for detailing joints to prevent edge spalling. It focuses on specifying compatible materials and following proven practices.
Proper joint detailing is crucial as skipping it can lead to premature edge spalling and reduce the lifespan of concrete. Inspect joints visually for width, depth, and alignment. Typical widths range from 1/4 inch to 3/8 inch. Use a compatible, properly cured sealant. If joints appear too narrow or shallow, reform and refill them.
Concrete Mix and Admixture Considerations for Edge Durability
Specifying the right concrete mix traits enhances edge toughness, reducing spalling likelihood:
- Slump: Specify an appropriate slump (100-150mm) for good workability and consolidation without compromising edge strength.
- Air entrainment: Include air entrainment admixtures for freeze-thaw resistance, aiming for 4-7% air content to prevent surface scaling and spalling.
- Water-cement ratio (w/cm): Limit w/cm to 0.45 or lower to improve concrete strength and durability at the edges.
- Cementitious material content: Ensure adequate cement content (280-350 kg/m³) for sufficient edge strength and durability. Check site records and adjust mix design as needed to meet these targets.
Joint Materials: Sealant Types, Backer Rods, and Compressible Fillers
Correct selection of joint materials is crucial for proper functioning and longevity. Consider the following:
- Sealants: Select appropriate sealant type based on expected joint movement and environmental conditions. Common options include polyurethane, silicone, and acrylic sealants.
- Backer rods: Choose backer rods with suitable compressibility (5-20% compression) to accommodate joint movement without overstressing the sealant.
- Compressible fillers: Use compressible fillers like foam or cellular rubber for wide joints, ensuring they can withstand expected movements and maintain a tight bond with the concrete.
- Avoid: Using rigid materials that cannot accommodate joint movement. Incorrect materials may cause cracking, staining, or weak bonds, leading to premature joint failure.
Relevant Standards and Performance Criteria to Cite
Citing relevant standards ensures compliance with industry best practices. When selecting standards, ensure they cover the following aspects:
Concrete mix design: Standards should provide guidelines for concrete strength, durability, and workability, such as ASTM C192 and ACI 301.
Joint materials: Ensure cited standards cover joint sealants (e.g., ASTM C920), backer rods, and compressible fillers, including their selection, application, and performance criteria.
Construction methods: Standards should address proper formwork, finishing, and vibration techniques to minimize construction-induced spalling. Examples include ACI 347 and ASTM C1506.
Regularly review and update cited standards to ensure they are current, applicable, and cover all necessary aspects of concrete mix design, joint materials, and construction methods.
Inspection, QA/QC, and Visual Checkpoints for Early Detection
Regular inspection and visual checkpoints help catch edge spalling at concrete joints early. Focus on joint edges during QA/QC to identify rough or crumbling areas before they worsen.
On-site checks can be simple: run a finger along the joint edge and note any roughness. If you see cracks or crumbling, address them promptly to protect the joint and delay more extensive repairs. Skipping regular checks may hide problems until they affect performance.
Pre-Pour and Formwork Inspection Checklist
Before concrete placement, use this checklist to ensure proper formwork and joint formation for durability.
- Formwork alignment: Verify plumb and level using a spirit level or laser level. Incorrect alignment can lead to improper joint formation and structural issues.
- Formwork cleanliness: Inspect formwork for dirt, grease, or other contaminants that could affect concrete adhesion. Contaminants can cause weak joints and increase the risk of spalling.
- Joint former installation: Check that joint formers are properly installed at correct locations and depths. Improperly installed joint formers can result in poorly formed joints, leading to edge spalling.
- Formwork integrity: Inspect for any cracks, gaps, or weak points in the formwork. Damaged formwork can cause improper concrete curing and joint formation.
- Joint spacing: Measure and verify that joints are spaced according to design specifications (typically 24-36 times the slab thickness).
- Rebar/dowel alignment: Ensure rebar or dowels are properly aligned and supported. Misaligned reinforcement can cause weak joints and increase the risk of spalling.
- Backing material: Check that backing materials (if used) are clean, dry, and properly installed behind joint formers.
- Temperature and humidity: Verify that conditions are suitable for concrete placement according to mix design requirements.
Quick rule: Always recheck and correct any issues before proceeding with the pour.
Post-Pour, Saw-Cut, and Sealant Installation QA Items
After concrete placement and curing, use this checklist to ensure proper joint formation and sealing for durability.
- Saw-cut timing: Verify that saw-cuts were made at the correct time (as per design) to prevent random cracking. Incorrect timing can lead to weak joints and increased risk of spalling.
- Saw-cut depth: Measure saw-cut depths to ensure they match design specifications (typically 1/4-1/3 of slab thickness).
- Saw-cut straightness: Inspect saw-cuts for straightness using a level or string line. Crooked cuts can cause improper joint formation and increase the risk of spalling.
- Sealant adhesion: Check that sealant is properly adhered to both sides of the joint. Poor adhesion can lead to water intrusion and joint deterioration.
- Sealant depth: Measure sealant depth to ensure it matches design specifications (typically 1/4-1/3 of joint width).
- Backer rod installation: Verify that backer rods are properly installed and centered within the joint.
- Temporary protection: Confirm that joints have been temporarily protected from traffic, equipment, or other sources of damage. Damage during curing can cause weak joints and increase the risk of spalling.
- Joint appearance: Inspect joints for any signs of cracking, honeycombing, or other defects.
Quick rule: Always recheck and correct any issues before proceeding with final curing.
Service-Life Inspection Schedule and Trigger Points
Regularly inspect joints during the structure’s service life to monitor edge integrity and intervene timely.
- Inspection frequency: Conduct visual inspections at least annually, or as recommended by design specifications. Regular inspections help catch issues early, preventing costly repairs.
- Visual signs of distress: Look for cracking, spalling, discoloration, or other signs of joint deterioration. These signs indicate that intervention may be necessary.
- Rebound hammer test: Conduct a rebound hammer test to assess concrete surface hardness and detect any soft spots indicating deterioration.
- Ultrasonic pulse velocity (UPV) test: Use UPV testing to measure the rate at which sound waves travel through the concrete, providing insight into its internal quality. Low UPV readings may indicate cracking or other defects.
- Joint movement: Check for excessive joint movement, which can indicate settlement or other structural issues.
- Sealant condition: Inspect sealants for signs of deterioration, such as cracking, peeling, or discoloration. Damaged sealants should be replaced to prevent water intrusion and joint deterioration.
- Joint width and depth: Measure joints to ensure they maintain their original dimensions. Changes in joint size can indicate movement or settlement.
Quick rule: If signs of distress or test results indicate deterioration, initiate repair or maintenance procedures promptly.
Retrofits and Repairs: Detailing Fixes to Stop Recurring Spalling
Repair detailing targets the root causes of edge spalling, from applying proper edge protection to evaluating whether a joint should be replaced. It emphasizes installing durable edge protection to distribute stress and prevent repeat damage. Skipping edge protection during repairs can lead to recurring spalling and more joint stress.
A practical approach starts with a simple on-site check for deterioration or instability, and a trusted installer confirms the joint is structurally sound before proceeding. If the joint is unstable or severely deteriorated, full joint replacement should be considered as part of the repair strategy. Properly detailed edge protection is essential to distribute stresses and reduce the chance of future spalling.
Surface Repairs and Edge Protection Options
If spalling is caught early, surface repairs can prevent further damage. Inspect the surface for cracks or delamination.
For minor damage, use a suitable patching material to repair the affected area. Ensure the surface is clean and stable before applying repairs.
Exposed edges are susceptible to spalling. Install edge protection using metal or plastic strips to prevent further deterioration.
Replacing or Upgrading Joint Systems
Enhance durability and reduce future maintenance by improving your joint system. Inspect existing joints for signs of deterioration such as cracked sealant or missing backer rod.
If joints are severely damaged, replace them with new ones detailed according to current standards. If joints are functional but outdated, upgrade them to meet current best practices.
Ensure proper joint design including width, spacing, and type (e.g., saw-cut, formed) to prevent recurring spalling.
Structural Retrofit Options for Severe Cases
In severe cases, structural retrofits can restore integrity and prevent progressive deterioration. Check for signs of reinforcement exposure or delamination.
Thoroughly assess the concrete condition to identify root causes of spalling. If spalling is extensive and affects reinforcement, consider full-depth patching or replacement.
If structural integrity is compromised, evaluate the need for retrofits such as additional reinforcement or grouting. Address root causes to prevent recurrence; consult with a structural engineer if necessary.
Tools, Materials Checklist, Drawings, and Practical Examples
A clear set of tools and materials, plus drawings and practical examples, supports accurate joint detailing. The section focuses on what you need and how to use it to prevent edge spalling at concrete joints. It emphasizes matching materials, accurate drawings, and real-world examples to guide placement and sealing.
With a complete checklist, you can plan the work, verify fit, and spot issues like voids or misalignment before you pour or seal. This helps you avoid future failures, reduces call-backs, and keeps the project on track. For best results, follow the drawings closely, ensure fillers are flush with the surface, and recheck joints if you see cracking or delamination.
Tools and Materials Checklist for Contractors and Inspectors
The following list outlines essential tools and equipment required for a successful concrete installation. Having these items on hand ensures proper preparation, placement, finishing, and maintenance of your concrete surface.
- Concrete Mixer: Blends cement, water, and aggregates to create consistent concrete batches. Essential for large pours; optional for small projects where a wheelbarrow and shovel can be used.
- Wheelbarrow: Transfers mixed concrete from the mixer to the placement area. Essential for all projects; consider renting if not frequently used.
- Shovel: Moves concrete, levels forms, and spreads material. Essential for all projects; a sturdy, pro-grade shovel is recommended for frequent use.
- Rake (Magazine or Bull Float): Screeds and evens out the concrete surface after placement. Essential for achieving a smooth finish; can be rented if not frequently used.
- Trowel (Finishing Trowel): Finishes and seals the concrete surface, providing a smooth, durable top layer. Essential for all projects; consider buying a high-quality trowel for frequent use or renting for occasional projects.
- Edging Tool: Creates clean edges around the perimeter of the slab. Optional but recommended for professional results; can be rented if not frequently used.
- Joint Sealer: Applies a protective sealant to control cracking and prevent water intrusion. Essential for all projects; ensure sufficient material is ordered based on project needs.
- Safety Gear (Hard Hat, Safety Glasses, Work Gloves): Protects workers from potential hazards during concrete installation. Essential for all projects; ensure proper fit and functionality before starting work.
Pro tip: When combining tools, consider the sequence of operations: mix, place, level, finish, edge, seal. This order ensures a smooth workflow and helps prevent mistakes that could compromise the final concrete surface.
Visual Checkpoints and Annotated Detail Examples
Use this checklist during installation to ensure quality and prevent costly mistakes.
- Joint Width: Verify joint width matches design specifications. Use a tape measure to confirm.
- Alignment: Check that joints are straight and aligned with adjacent surfaces. Use a level or alignment tool.
- Sealant Presence: Ensure proper sealant is applied along the entire joint. Look for any gaps or missing areas.
- Previous Damage: Inspect for signs of previous damage, such as cracks or spalling. If found, assess severity before proceeding.
- Repair Completion: Check that all repairs are complete and properly sealed before installing new materials.
- Sealant Type: Verify sealant type matches the material being sealed and is suitable for the application. Check product label or datasheet.
- Tool Condition: Ensure tools used for cutting, mixing, or applying sealant are in good condition to prevent damage.
- Weather Conditions: Check that temperature and humidity conditions are within the manufacturer’s recommended range for application.
Quick rule: Always visually inspect joints before and after installation to ensure quality and prevent costly rework.
Common Detailing Mistakes and Quick Fixes
To ensure a durable, long-lasting concrete structure, avoid these common detailing mistakes.
- Skipping proper joint detailing: Premature edge spalling and reduced service life can result from inadequate joint detailing. Always follow specified dimensions for joint width.
- Insufficiently wide joints: Narrow joints restrict concrete shrinkage and movement, leading to cracking. Increase joint width as needed to allow for proper shrinkage and movement.
- Improper aggregate sizes: Aggregate size exceeding one-third of the joint width can cause edge spalling. Reduce aggregate size or increase joint width to prevent this issue.
Double-check these points before starting work to avoid common mistakes and ensure a successful outcome.
Conclusion
Edge spalling at concrete joints is a practical concern that affects safety, durability, and appearance. By applying disciplined detailing and careful testing, you can stop recurrence and extend the life of the joint without costly damage or downtime.
Proceed with a clear, small-step plan: confirm the joint type and exposure, check the design details and material compatibility against the project standards, review acceptance criteria, inspect a small test area first, document results, and then apply the chosen detailing or retrofit method with proper QA/QC checks and drawings referenced during installation.
Common mistakes to avoid include rushing repairs, skipping small-area testing or load- and moisture-related checks, using incompatible materials, and neglecting follow-up inspections after new detailing is in place. Maintain a steady safety routine: control access to the work area, wear appropriate PPE, and verify environmental conditions before starting any repair or retrofit.
If the joint shows signs beyond simple detailing, or if existing conditions are complex, consider bringing in a professional for an assessment and staged repairs. With careful planning and methodical execution, you can protect edge integrity and keep the project moving forward with confidence.
FAQ
What Are the Early Signs of Edge Spalling at Concrete Joints to Look For?
Look for small chips or flaking along joint edges and increased roughness where concrete meets formwork. Note any cracking that runs parallel to joints or peeling near joint interfaces. If you see moisture staining or dusting, it can indicate surface deterioration near the joint.
How Can Detailing Practices Help Prevent Edge Spalling in New Joints?
Use appropriate joint geometry and protective detailing at edges to reduce freeze-thaw and moisture-related stress. Follow manufacturer instructions for coatings, sealants, or form-release agents chosen for the project. Check product labels and local guidance to ensure compatibility with the concrete mix and reinforcing.
What Should I Consider When Evaluating Retrofit Options to Stop Recurring Spalling?
Assess whether surface repair, resurfacing, or replacement is suitable given joint location and exposure. Review drawings to ensure new detailing aligns with reinforcement and load paths. Consult the material manufacturer instructions and local rules to select compatible repair products and application methods.
What Maintenance or Inspection Steps Help Reduce Recurrence of Edge Spalling?
Schedule regular visual checks of joint edges after seasonal cycles and construction cycles. Clean joints and re-seal or re-coat as specified by the product datasheet. Use manufacturer guidance to determine when prevention coatings or sealants should be refreshed and how to prepare joints for maintenance.