

Introduction
Drywall over uneven studs means the wall won’t sit flat until you use shims and surface planing to true the mounting plane. Uneven studs cause visible wavy walls, so you fix by backing the drywall with shims where needed and planing high spots on the framing or fastener line. Work from stud to stud, check for a straight, flat reference with a straightedge, and adjust as you go.
Once the surface is truly flat, fasten the drywall with care so you don’t telegraph the unevenness through the sheetrock. Keep an eye out for pinch points and high spots after initial screws, and plan to skim or retack as needed to avoid waves. If in doubt, check the product label, manufacturer instructions, and any local rules for your project.
Key takeaways
- Identify high and low studs before drywall to prevent surfacing inconsistencies.
- Choose shim, plane, or rebuild based on span, access, and time constraints.
- Use a level line and straightedge to map stud elevations accurately.
- Shimming and furring require solid fasteners and careful alignment for even walls.
- Planing high studs should be gradual, checking drywall fit after each pass.
- Always wear eye protection and a dust mask; secure work area.
Table of Contents
- Introduction
- Key takeaways
- Recognizing Uneven Studs and How They Cause Wavy Walls
- Deciding: Shim, Plane, or Rebuild — Decision Framework
- Tools and Materials Checklist
- Measuring and Marking Stud High/Low Points Accurately
- Shimming and Furring Techniques (Step-by-Step)
- Planing and Cutting Back High Studs Safely
- Drywall Hanging Techniques to Minimize Telegraphing
- Finishing, Troubleshooting, and Inspection Checkpoints
- Conclusion
- FAQ
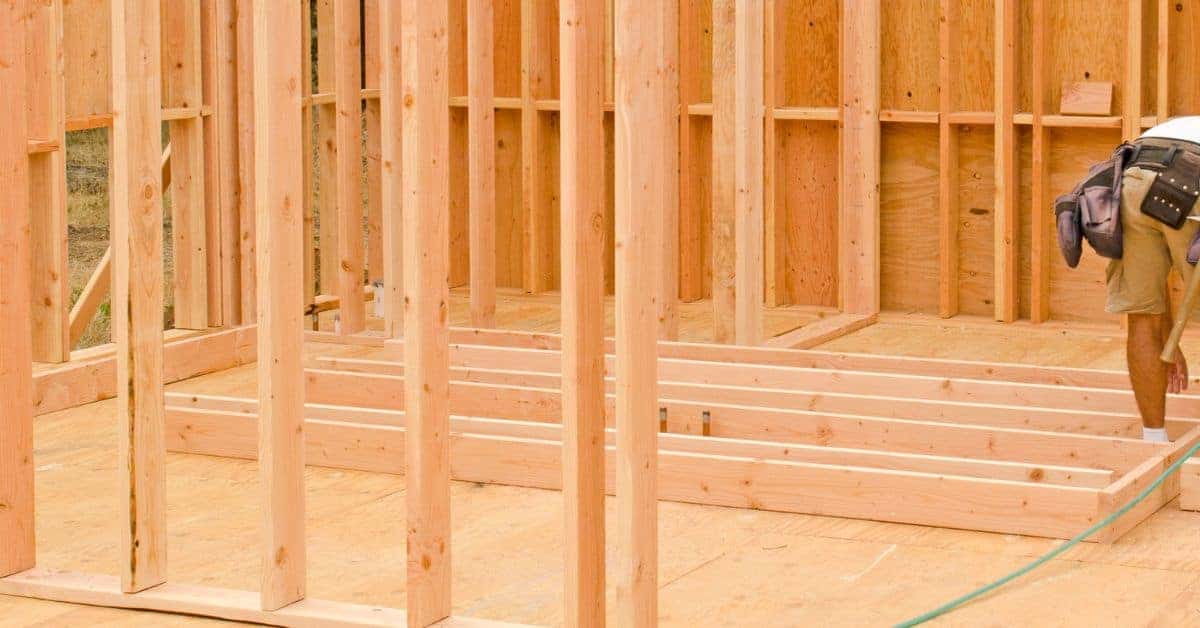
Recognizing Uneven Studs and How They Cause Wavy Walls
Uneven studs are not perfectly aligned from top to bottom or across walls. Look for visible gaps, crowns, or left over high spots when you run a level or straight edge along the wall surface. Wavy walls show up as ridges, bulges, or dips once drywall is mounted and painted. Quick signs include panels that never sit flat, or screws that pop or dimples that travel in lines.
Stud deviation can telegraph through the drywall as you press or tap along the surface. Pressing along edges may reveal soft spots or high points. If you notice consistent light gaps behind cut drywall edges, that often signals irregular framing that needs attention before proceeding.
Visual and simple-tool diagnosis
Before you start shimming, it’s crucial to identify the uneven studs. Here’s a simple way to do it with tools you likely have on hand.
- Straightedge: Press a long level or straight 2×4 against the wall. Look for gaps that indicate high spots.
- Level: Use a level to check for low spots. If the bubble isn’t centered, you’ve found an uneven stud.
- Sightlines: Stand back and look at the wall’s sightline. Wavy or bowed lines indicate uneven studs.
- Optional – Laser Level (around $50 to rent): For a more precise diagnosis, use a laser level. It projects a line across the wall, making it easy to see highs and lows.
- Tip: Do this in good lighting and from different angles to get a clear picture of the wall’s condition.
Structural and environmental causes
Uneven studs don’t just happen. Understanding the cause helps you fix the problem right. Here are common culprits:
Warping and Bowing: Studs can warp or bow over time due to moisture or improper drying during manufacturing.
Improper Nailing: If studs weren’t nailed properly, they can shift and become uneven. This is more common in older homes.
Moisture and Settling: Moisture can cause wood to swell or rot, leading to unevenness. Foundation settling can also push walls out of plumb, causing studs to appear uneven.
Deciding: Shim, Plane, or Rebuild — Decision Framework
Choosing between shimming, planing, or a rebuild depends on access to the back of the wall, the severity of the misalignment, and the time you can dedicate to the project. Consider how much of the wall must be brought into plane to achieve a flat surface. Weigh the potential knock-on effects to adjacent studs and utilities.
Use a simple checklist: can you safely access the studs to add shims or install furring? Is the deviation minor and localized, or does it compromise a large area? If the wall is deeply out of plane, planing or rebuilding may be more reliable in the long run. Always verify any safety or code requirements before deciding, and refer to manufacturer or local rules for specifics.
When shimming is the right choice
Shimming is your best bet when you’ve got minor issues with low studs. It’s quick, cheap, and non-invasive.
Here are scenarios where shimming works:
- Studs are only slightly lower than others (<1/2 inch).
- You can’t access the back of the wall to plane or replace studs.
- Walls are load-bearing, and you don’t want to risk structural integrity by planing or replacing studs.
Pro tip: Use 1/4 inch or 1/2 inch plywood strips as shims. They’re sturdy and easy to work with.
When planing or replacing studs makes sense
Planing or replacing studs is a bigger job, but sometimes it’s necessary. Here’s when:
Planing (shaving off material) is good for:
- Studs are significantly low (<1 inch).
- You can access the back of the wall.
- Walls aren’t load-bearing, and you’re comfortable working with power tools.
Safety note: Always wear safety gear when planing. Dust can be harmful if inhaled.
Replacing studs is necessary for:
- Studs are severely damaged or rotted.
- Walls are load-bearing, and you need to ensure structural integrity.
- You’re doing a major renovation that allows for wall reconstruction.
Tools and Materials Checklist
Assemble a basic set of hand tools for quick adjustments and safe operation. Include a level, straightedge, utility knife, pry bar, and a saw or rotary tool for trimming. Have a hammer, tape measure, marking pencil, and a square ready for setup and layout.
Gather materials for shimming, furring, and drywalling. This includes shims or furring strips, screws, joint tape, and setting materials. Donning proper safety gear such as eye protection, gloves, and a dust mask is essential, along with a plan for clean, safe work top and dust containment.
Shims, fasteners, and furring materials
Before you start installing drywall, use this checklist to ensure you have the right shims, fasteners, and furring materials. This will help prevent common issues like uneven walls and drywall damage.
- Shims: Check for thin, tapered pieces of wood or plastic. They should be no wider than your drywall’s thickness (usually 1/2″ or 5/8″).
- Furring strips: Ensure they’re straight and long enough to span the distance between studs (typically 16″ or 24″ on center). They should be made of treated wood to prevent rot.
- Drywall screws: Confirm they’re coarse-thread, with a bugle head for better holding power and easier driving. Check lengths; they should be long enough to penetrate studs by at least 3/4″.
- Adhesive: If using, check it’s designed for drywall and has a suitable open time (check manufacturer instructions).
- Shim material: Ensure shims are made of strong, rigid material that won’t warp or bend under pressure.
- Screw length: Measure screw lengths against stud depths to ensure they’re long enough but not too long (to avoid puncturing drywall).
- Fastener spacing: Check you have enough screws; plan for 8-12″ on center along studs.
- Furring strip spacing: Ensure strips are spaced evenly to provide consistent support for your drywall (usually every 16″ or 24″).
Quick rule: Always use shims when attaching drywall to furring strips. This ensures a tight, even fit and prevents drywall from warping over time.
Planing and cutting tools
Before you start any cutting or planing work, go through this checklist to ensure you have the right tools and they’re in good working order. This will save you time and prevent costly mistakes.
- Hand Planes: Check for sharp blades. Run your thumb gently along the edge to feel if it’s sharp. If not, sharpen using a sharpening stone or take it to a professional.
- Block Planes: Similar to hand planes, check blade sharpness and ensure the frog (the part that holds the blade) is secure.
- Belt/Reciprocating Planers: Inspect belts for wear. Replace if necessary. Check blades on reciprocating planers for dullness or damage.
- Oscillating Tools: Ensure blades are securely fastened and in good condition. Check blade type to match the task at hand (e.g., wood, metal, grout).
- Saws (Circular, Jigsaw, etc.): Inspect blades for dullness or damage. Tighten any loose screws or bolts.
- Blades: Ensure all blades are clean and free of debris to prevent binding during use.
- Safety Equipment: Check that safety glasses, hearing protection (for power tools), and dust masks are in good condition and readily available.
- Guides and Fences: Ensure they’re secure and adjustable for accurate cutting. Check for wear or damage.
Quick rule: Always double-check blade sharpness and tool safety features before starting any work to prevent accidents and ensure smooth, efficient cuts.
Measuring and Marking Stud High/Low Points Accurately
Develop a repeatable workflow to map deviations along the wall. Start with a level or straightedge at several heights to catch vertical variation. Record the relative high and low points as you go to build a map of the wall surface.
Prioritize studs to correct first by focusing on the most pronounced deviations that affect drywall layup. Mark the high and low points on each stud with clear, legible indicators. Use these marks to guide shimming, furring, or planing decisions and keep measurements consistent across sessions.
Establishing reference lines and recording deviations
Before you start, set level/flat reference lines. Use a laser level or long straight edge with a bubble level. Snap chalk lines along the top and bottom of your wall.
Now, measure from these lines to each stud’s face. Write down every measurement. This is your map of highs and lows. Use a notebook or take photos for reference.
Mark each stud with its deviation. A + for high, a – for low. For example, if a stud is 1/8″ too high, mark it as +1/8″. This helps you plan your shimming or planing work.
Visual checkpoints during prep
Use this checklist after each corrective step. It helps catch errors before they compound.
- Re-check level/flat lines: Ensure your reference lines haven’t shifted.
- Verify stud marks: Make sure your high/low marks are still accurate and visible.
- Check shim placement: Ensure shims are under the correct studs, not too many or too few.
- Measure again: Re-measure from reference lines to each stud. Compare with original measurements.
- Inspect planed areas: Check for splinters or rough edges after planing.
- Check fasteners: Ensure screws or nails are secure and won’t pop out during drywall installation.
- Re-measure wall length: Make sure you haven’t shortened the wall with excessive shimming or planing.
- Double-check level: Use a long straight edge to ensure the wall is still level from top to bottom.
Quick rule: Always re-measure and double-check after each step. It’s better to spend extra time now than fix mistakes later.
Shimming and Furring Techniques (Step-by-Step)
Begin by locating the low studs and placing shim material to bring them into plane with the neighboring studs. Work from corners and switch to center areas, ensuring the wall remains plumb and true as you go. Secure shims with screws or nails so they won’t shift during drywall hanging.
When using furring, attach it securely to the studs and cassette the surface to create a flat plane for drywall. Check the overall alignment frequently with a straightedge, adjusting as needed. Keep to safe fastening practices and avoid over-tightening to prevent binding or damage.
Step-by-Step Process
This step-by-step guide walks you through the process of shimming and furring uneven studs to create a smooth surface for hanging drywall.
- Preparation: Gather your tools, materials, and safety gear. Ensure the work area is clear and well-lit.
- Check stud alignment: Use a 4-foot level or laser level to mark reference lines on the floor and ceiling, indicating where each stud should be.
- Measure deviations: Compare each stud’s position to the reference line. Mark high and low points with a pencil.
- Shim installation: Starting from the bottom, install shims between the stud and the bottom plate, working your way up. Stack or taper shims as needed to fill gaps evenly.
- Furring strips/blocking: For larger gaps or when continuous support is needed, attach furring strips or blocking to maintain a flat surface for drywall.
- Secure shims and furring: Use appropriate fasteners (nails, screws) to secure shims and furring strips. Ensure they’re driven flush with the stud’s face.
- Final check: Before hanging drywall, perform a visual inspection to ensure all shims and furring strips are securely fastened and level.
- Cleanup: Remove any debris or leftover materials from the work area.
Selecting and installing shims
Choosing the right shim material is crucial for a stable, long-lasting repair. Common choices include wood, plastic, or metal.
Wood: Use thin, uniform pieces like cedar or pine shingles, split into strips. Avoid plywood as it can warp.
Plastic and Metal: These offer durability but may be more expensive. Ensure they’re rated for the load they’ll bear.
Installation involves stacking or tapering shims to fill gaps evenly. Fasten with nails or screws driven flush with the stud’s face, ensuring they won’t interfere with drywall installation.
Using furring strips and blocking
Furring strips provide continuous support for drywall, while blocking fills larger gaps or reinforces specific areas. Use 1×4 or 1×6 boards for furring strips and matching material for blocking.
Attach furring strips to the studs’ faces using screws or nails, spacing them evenly (usually every 12-16 inches). Ensure they’re level and flush with the studs.
For larger gaps, install blocking between studs. Secure it with appropriate fasteners, ensuring a continuous bearing surface for drywall.
Planing and Cutting Back High Studs Safely
Planing involves removing material from high studs to create a flush surface. Start with small material removal and test fit regularly to avoid overcutting. Be mindful of utilities and wiring paths that run through the stud area before you remove material.
Work with controlled cuts and check for obstructions or nails that could misalign the plane. Maintain tool safety by keeping hands clear of blades and protecting the surrounding surface. Recheck the plane with a straightedge after each adjustment to ensure a consistent finish.
Hand planing vs power planing: pros and setup
Both hand and power planers can smooth out high studs, but they have different advantages. Hand planers give you more control for fine-tuning, while power planers are faster and easier to use.
Hand Planing: Use long, steady strokes with the grain of the wood. Start with a low setting and take shallow passes to avoid gouging. Secure the stud with clamps to keep it stable.
Power Planing: Set the depth to match your shim thickness. Make multiple shallow passes, letting the planer do the work. Always use a guard to protect from kickback.
If you’re dealing with structural members, consider hiring a pro. They have specialized tools and know-how to avoid compromising your home’s integrity.
Dealing with hidden obstacles (wiring, plumbing, fire blocks)
Before you start planing, locate and mark any in-wall services. You don’t want to damage wiring, plumbing, or fire blocks.
Use a stud finder to trace wires and pipes. Mark their locations clearly. If you’re unsure about what’s behind the wall, get an inspection. A professional can identify hidden hazards and help you plan your work safely.
Fire blocks are crucial for fire safety. Don’t remove or damage them unless absolutely necessary. If you must, replace them with fire-rated material.
Always plan your cuts around these obstacles. It’s better to leave some material unplaned than risk damaging hidden services.
Drywall Hanging Techniques to Minimize Telegraphing
Plan sheet layout to minimize the chance of telegraphing the studs through the finished surface. Align full sheets with the longest possible runs to reduce seams that could reveal irregularities. Fasten with a consistent pattern to avoid creating points of stress along the wall.
Consider where joints fall relative to known high or low points. Stagger joints and keep screw lines neat and orderly, avoiding overdriving screws. Use appropriate setting tools and check for flatness as you go to keep the finish even.
Fastening, screw setting, and backing best practices
When it comes to hanging drywall, getting your screws right is half the battle in preventing telegraphing. Here’s what you need to do:
Screw spacing: Aim for about 8-12 inches apart along studs and joists. This gives you even support without overloading the screw heads.
Screw depth: Drive screws just below the surface, but not so deep they pull through. A good rule of thumb is to leave about 1/32″ proud of the drywall surface. Use a screwdriver with a magnetic tip to help you set them right.
Backing: For hollow walls, use backing compounds or fiberglass mesh tape to fill voids and prevent telegraphing. Apply in thin layers, let it dry, then sand smooth before taping and texturing.
Layering, back-blocking, and floating joints
To minimize telegraphing, layer your drywall like a pro. Stagger seams by offsetting sheets at least 6″ from each other.
Back-blocking is key at joints. Apply setting compound to the back of the joint tape before pressing it in place. This fills voids and reduces sanding later.
For floating, use a wide knife (10″ or more) with thin coats of setting compound. Work from one side of the room to the other, applying even pressure. Let it dry, then lightly sand before priming.
Finishing, Troubleshooting, and Inspection Checkpoints
In finishing, use proper taping, mudding, and sanding techniques to smooth transitions. Look for waviness or ridges under primer and adjust accordingly before final coats. Decide when a rework is needed versus a localized repair based on the overall surface quality.
During inspection, run a level or straightedge across walls at multiple heights. Note any remaining deviations and determine the best corrective path. Keep documentation of what was adjusted for future reference and verify compliance with any local rules or manufacturer instructions as needed.
Skim Coats and Repair Techniques for Small Irregularities
Use this checklist when you’ve hung your drywall but notice minor waviness or imperfections.
- Feathering edges: Check if edges are feathered out to avoid sharp lines. If not, use a taping knife to feather joint compound onto the wall.
- Multiple thin coats: Apply multiple thin coats of joint compound instead of one thick coat to minimize sanding and reduce the risk of cracking or shrinking.
- Spot-sanding: Lightly spot-sand any high spots or ridges with a fine-grit sanding sponge. This helps smooth out minor imperfections.
- Check for nail pops: Inspect the wall for any nail pops that may cause small bumps. If found, set the nails back and re-mud.
- Inspect screw heads: Ensure all screw heads are fully recessed or countersunk to avoid raised spots. Fill with a little mud if necessary.
- Tape seams: Make sure all seams and butt joints are taped properly. Any missed spots can cause waviness.
- Check for voids: Feel along the wall for any hollow spots that indicate a void behind the drywall. Fill with joint compound if found.
- Lighting check: Use a flashlight to cast light across the wall at an angle to reveal any imperfections you might miss with the naked eye.
Quick rule: If minor repairs don’t fix the issue, it’s time to consider reworking or reframing.
When to Remove Drywall and Redo Framing
Use this checklist when you’ve tried repairs but the wall is still wavy or uneven.
- Large gaps: Check for large gaps between drywall sheets that can’t be filled with joint compound. If found, removal and reframing may be necessary.
- Waviness pattern: Inspect the waviness pattern. If it follows a consistent stud line, the problem might be with the framing itself.
- Stud spacing: Measure stud spacing. If it’s inconsistent or too wide (over 16″ or 24″ O.C.), reframing may be needed for better support.
- Sagging studs: Check if studs are sagging or out of plumb. This can cause a wavy wall and may require reframing.
- Fire blocks: Inspect fire blocks to ensure they’re properly installed and not causing interference with the drywall.
- Obstructions: Check for any hidden obstacles (wiring, plumbing) that might be preventing the drywall from sitting flat against the studs.
- Structural issues: If waviness is due to structural problems like settling or termite damage, removal and reframing is a must.
Quick rule: If you’ve tried repairs but the wall is still wavy, it’s time to consider removing the drywall and addressing the framing issues.
Visual Checkpoints and Quality Acceptance
Use this checklist before painting or finishing your walls to ensure they’re ready for prime time.
- Lighting test: Use a flashlight to cast light across the wall at an angle. This helps reveal any imperfections that might not be visible with the naked eye.
- Tape lines: Inspect tape lines for any bubbles, wrinkles, or missed spots. These can cause waviness and should be addressed before painting.
- Screw holes: Ensure all screw holes are filled and sanded smooth. Any raised spots will show through paint.
- Joints: Check joints for any voids, gaps, or ridges that need to be addressed before painting.
- Sanding: Lightly sand the entire wall with a fine-grit sanding sponge. This helps smooth out any remaining imperfections and prepares the surface for paint.
- Dust off: Wipe down the wall with a damp cloth to remove any dust or debris from sanding.
- Prime test: Apply a small patch of primer to an inconspicuous area. If it absorbs evenly, your wall is ready for paint. If not, more prep work may be needed.
Quick rule: Always do a final visual and tactile check before painting or finishing your walls to ensure they’re flat and smooth.
Conclusion
Fixing wavy walls starts with knowing where the misalignment comes from and choosing a safe path forward. When in doubt, prioritize a solid, flat base and don’t rush the planing or shimming—quality is the difference between a wall that lasts and one that telegraphs every flaw.
Check that you have identified high and low studs, decide whether to shim, plane, or rebuild, assemble and verify your tools and materials, measure carefully, then shim or plane in small, controlled steps, recheck with a straightedge, and finally hang and finish with attention to taped joints and finishing passes. Do the work in a logical order, test a small area first, and stop if you see excessive gaps, soft framing, or new wavy lines appearing.
Common mistakes to avoid are underestimating the extent of the unevenness, skipping the safety steps, and trying to save a failed approach by force. Safety rules to follow include wearing eye protection, securing ladders and harnessing when needed, double-checking measurements before cutting, and never taking a shortcut on fasteners or edge support. If a wall is severely out of plumb, or you run into framing damage, call a professional rather than guessing—good walls save time and money in the long run, and you want a solid, straight result you can trust.
FAQ
How can I tell if shimming is enough to reduce a wavy wall without rebuilding?
Check the wall surface after installing shims and provisional studs. If the surface looks flat within your sight line and passes a straight edge test without gaps behind the nail line, you’re likely close. If you still see high or low spots, add or adjust shims carefully and recheck before hanging drywall.
What should I inspect before planing high studs to avoid creating new gaps?
Look for any pull from adjacent studs and check for twist or bow. Planing should remove only the high portions, not shave away more than needed. Recheck adjacent studs and ensure you don’t shorten the stud too much or weaken the wall frame.
How do I decide between shimming, planing, or furring for a stubborn wall?
Shimming is quickest for small trips in the plane of the wall. Planing works best when a few studs are consistently high. Furring can help when you’re dealing with multiple inconsistencies and need a flat surface for drywall, but it adds depth and fastener considerations. Always verify with the manufacturer’s guidance and local rules.
What should I do to avoid telegraphing from rough framing when hanging drywall?
Ensure the studs are flat and evenly spaced before you start hanging. Use a straightedge to check the face of each stud and correct high spots before drywall goes up. If you must cut or shave, do it in small increments and recheck alignment frequently.