
Introduction
Concrete edging defines a decorative boundary that bridges lawn and landscaping with a clean, durable profile. There are several decorative options, from smooth cast edges to textured or saw-cut profiles, and the choice affects ease of installation and the overall look. Choose a style that matches your landscape and check product labels for details on color options and cure times.
Prepare the site by removing sod along the intended line and setting a straight edge to guide placement. Follow the product instructions for mixing or coloring agents and aim for an even finish and consistent thickness. For longevity, seal or protect the edge as recommended and maintain the border by keeping turf back from the edge and repairing any cracks as soon as they appear.
Key takeaways
- Plan edge height and clearance to prevent trip hazards near planting beds.
- Choose decorative options: exposed aggregate, integral color, or stamped patterns to suit landscape.
- Include sod removal and trenching steps in installation plan to avoid rework.
- Mix and color per manufacturer guidance; test stain on scrap before application.
- Seal the edges and establish a maintenance schedule to extend life.
- Verify local permits and safety guidelines before on-site work; use PPE always.
Table of Contents
- Introduction
- Key takeaways
- Planning and Design Principles for Concrete Edges
- Decorative Options and Finishes
- Curbing and Edge Installation Process (Step-by-Step)
- Tools, Materials, and Specs Explained
- Cost Factors and Budgeting for Concrete Edges
- Safety, Permits, and on-Site Requirements
- Common Mistakes to Avoid and Troubleshooting
- Choosing a Contractor and Client Experience
- Conclusion
- FAQ
Planning and Design Principles for Concrete Edges
Assess the site conditions, including topography, drainage patterns, soil, sunlight, and nearby plants to understand constraints and opportunities for edge placement. Define goals that balance function with aesthetics and plan edge relationships that work with existing hardscapes and irrigation.
Evaluate sightlines and scale to ensure edge height and profile suit the landscape and support key focal points. Consider drainage and soil impacts, and draft a simple maintenance plan to guide long-term upkeep and resealing or repainting as needed.
Site Assessment and Goals
Begin by thoroughly inspecting your site to understand its unique conditions. This crucial step ensures that your concrete edges function well and complement the existing landscape.
Assess: Topography, drainage patterns, soil type, sunlight exposure, and nearby plants. These factors will help you determine constraints and opportunities for edge placement.
Define clear goals for your edges. Balance functional needs such as trenching, mowing, weed control, and water management with aesthetic considerations like line quality, texture, color, and alignment with landscaping styles.
If the site has significant slopes, consider edging materials and designs that accommodate grade changes to prevent erosion or pooling.
Scale, Proportion, and Sightlines
When choosing edge height, width, and curvature, follow these rules of thumb to ensure your edges complement rather than overpower the landscaping.
Edge Height: Generally, taller edges work well with larger plants and hardscapes. For smaller-scale plantings, opt for a low-profile edge to avoid overwhelming nearby greenery.
Edge Width: Narrower edges are typically more suitable for formal or contemporary styles, while wider edges can create a more rustic or casual look. Consider the scale of surrounding elements when selecting an appropriate width.
Curvature: Curved edges can soften harsh lines and guide the eye through the landscape. However, they may not be suitable for all styles. Evaluate sightlines from key viewpoints to ensure your chosen edge design enhances rather than detracts from the overall aesthetic.
Decorative Options and Finishes
Explore colors, stains, stamps, overlays, and textures to match different landscape styles and maintenance needs. Consider how each option pairs with surrounding ground covers and hard surfaces to create a cohesive transition.
Look at edge profiles and textures such as broomed, honed, exposed aggregate, or stamped finishes, and plan joint patterns and color schemes that align with adjacent mulch, pavers, and planting beds. Schedule installation in a way that coordinates with irrigation, drainage, and planting for long-term stability.
Color, stain, and pigmentation choices
Concrete edges can be colored in several ways, each with its unique appearance and maintenance requirements. Integral colors are mixed into the concrete during batching, providing a consistent, uniform look throughout the edge.
Surface stains offer a more natural, varied appearance by penetrating the concrete’s surface. They are applied after the concrete has cured and can be used to mimic the look of other materials like wood or stone.
Sealers protect the concrete’s surface and enhance its color. They come in various types, including acrylic, epoxy, and polyurethane, each with different durability and maintenance needs. Test samples on-site to ensure the desired effect and longevity.
Profiles, textures, and edge shapes
The profile of a concrete edge refers to its shape when viewed from above. Common profiles include rounded, bullnose, saw-cut, and ribbed edges. Each offers a different visual appeal and functionality.
Textures are created by the finishing process after the concrete is poured. Broomed finishes create a non-slip surface, while stamped textures mimic other materials like brick or stone. Exposed aggregate finishes reveal the natural stones used in the concrete mix.
When selecting profiles and textures, consider the edge’s functionality, safety, and visual appeal. High foot traffic areas may require non-slip textures, while minimal foot traffic might allow for sleek, smooth surfaces with simple profiles.
Integrating plants and transitions
To soften the appearance of concrete edges and create a cohesive look with landscaping, consider incorporating plants and transition elements. Plantings can be used to frame the edge and provide visual interest.
Expansion joints allow for movement in the concrete due to temperature changes or settling. They can be filled with sand, sawdust, or other materials to prevent weed growth and maintain a neat appearance.
Transition strips, such as metal edging or plastic strips, can be used to create a visual break between the concrete edge and adjacent mulch, pavers, or planting beds. This helps to avoid abrupt visual breaks and creates a more natural look.
Curbing and Edge Installation Process (Step-by-Step)
Plan the foundation by surveying the site and laying out edge lines with appropriate setbacks from landscape beds and drainage. Decide on material, profile, and finish options, and determine whether a DIY approach or professional help is best for your project.
Set up forms, spacing, and reinforcement, then follow through with a staged workflow from layout to pour to finish. During curing, check level and alignment, and document any adjustments needed for final satisfaction.
Concrete Curb Installation Steps
Follow these steps to install concrete curbs and edges effectively. Each phase is critical for a successful, durable outcome.
- Preparation: Ensure safety measures are in place, gather necessary tools, and review layout plans.
- Form Setup: Install forms along layout lines, ensuring they’re level, square, and properly braced for stability.
- Reinforcement: Integrate rebar or wire mesh as per design requirements to enhance stability.
- Pouring: Pour concrete into forms starting from one end and working towards the other. Use a vibrator to remove air pockets.
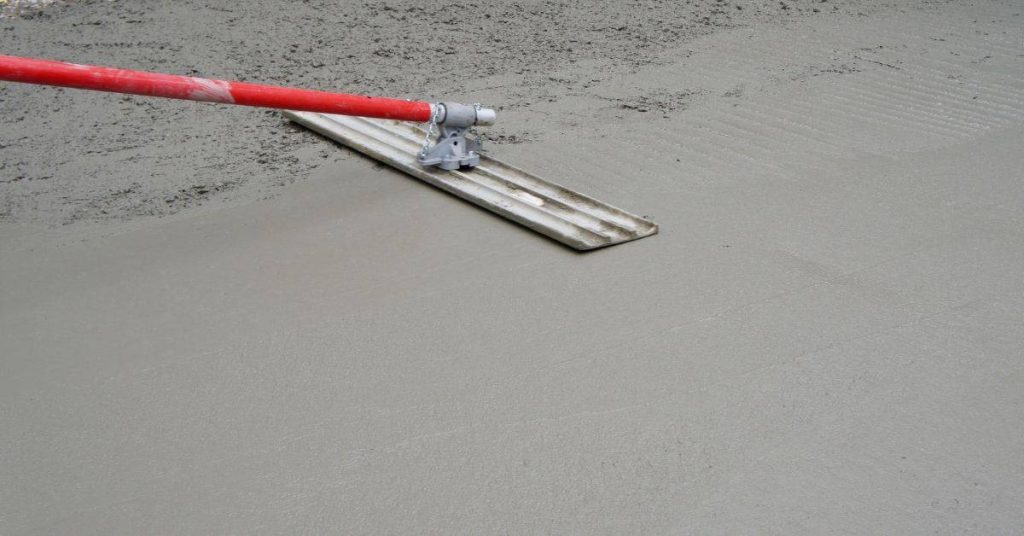
- Finishing: Strike off excess concrete, smooth the surface with a bullfloat, then apply desired finish such as broom or exposed aggregate.
- Curing: Cover poured concrete with plastic sheeting or curing compounds to retain moisture and promote proper curing. Remove forms after 24-48 hours.
- Cleanup & Final Checks: Remove debris, inspect for levelness, alignment, slope, edge integrity, and final finish.
Marking, sod removal, and base prep
Proper preparation is key to a solid foundation for your curb or edge. Begin by marking lines using stakes and string, ensuring setbacks from landscape beds and alignment with adjacent hardscape.
Next, remove sod along the marked lines, ensuring a clean, level surface. Then, prepare and compact the base using appropriate materials (e.g., gravel, crushed stone) to provide a stable foundation. Ensure the base is level and properly sloped for drainage.
Before proceeding, verify that the base meets these requirements by performing a quick check with a level or string line. If necessary, regrade or recompact the base to achieve the desired results.
Mixing, coloring, and additives
Selecting the right concrete mix is crucial for a uniform appearance. Consult local building codes or manufacturers’ recommendations to determine the appropriate mix design.
When adding colorants or admixtures, follow package instructions carefully to ensure consistent results. For exposed aggregate or stamped finishes, adjust the water-to-cement ratio as needed to accommodate these techniques.
Before pouring, inspect each batch for consistency in color, texture, and workability. If a batch appears inconsistent, discard it and remix if necessary to maintain quality control.
Extrusion/Placement, Joints, and Curing
Minimize cracking and enhance curb/edge longevity by properly placing and curing concrete. Use forms that match your desired profile for extrusion or forming techniques, maintaining consistent joint spacing to control cracking.
After pouring, strike off excess concrete and smooth the surface using a bullfloat. Apply your chosen finish (e.g., broom, exposed aggregate) while the concrete is still workable. Ensure placed concrete is level, aligned, and has proper edge integrity before proceeding with curing.
Cure poured concrete by covering it with plastic sheeting or applying curing compounds to retain moisture. Remove forms after 24-48 hours, but keep the concrete moist for at least seven days to promote proper curing. In windy or hot conditions, implement wind barriers or adjust curing methods to prevent rapid drying.
Tools, Materials, and Specs Explained
Build a compact, role-based toolkit for both small and large installations, identifying must-haves, safety gear, and setup steps. Keep a simple list handy for bids and repeat projects.
Understand concrete types, aggregates, slump targets, air-entraining agents, and curing methods, plus how these relate to edging profiles and surrounding landscaping materials. Use this knowledge to compare bids and interpretation of specs fairly.
Essential tools and equipment checklist
The right tools ensure efficient and safe installation of your concrete edges.
- Shovel: For moving materials, digging trenches, and leveling. Check for a sturdy handle and sharp edge.
- Wheelbarrow: Essential for transporting materials around the jobsite. Ensure it’s in good condition with no wobbly wheels or cracks.
- Tape measure: Accurate measurement is key to a successful installation. Use a reliable, clearly marked tape measure.
- Level: Crucial for ensuring your edges are even and stable. Check for accuracy before use.
- Concrete mixer (rentable): For mixing small to medium batches of concrete. Ensure it’s in good working order and available for the duration of your project.
- Concrete edger (optional, rentable): For creating clean, precise edges. Check that it’s compatible with your chosen edge profile.
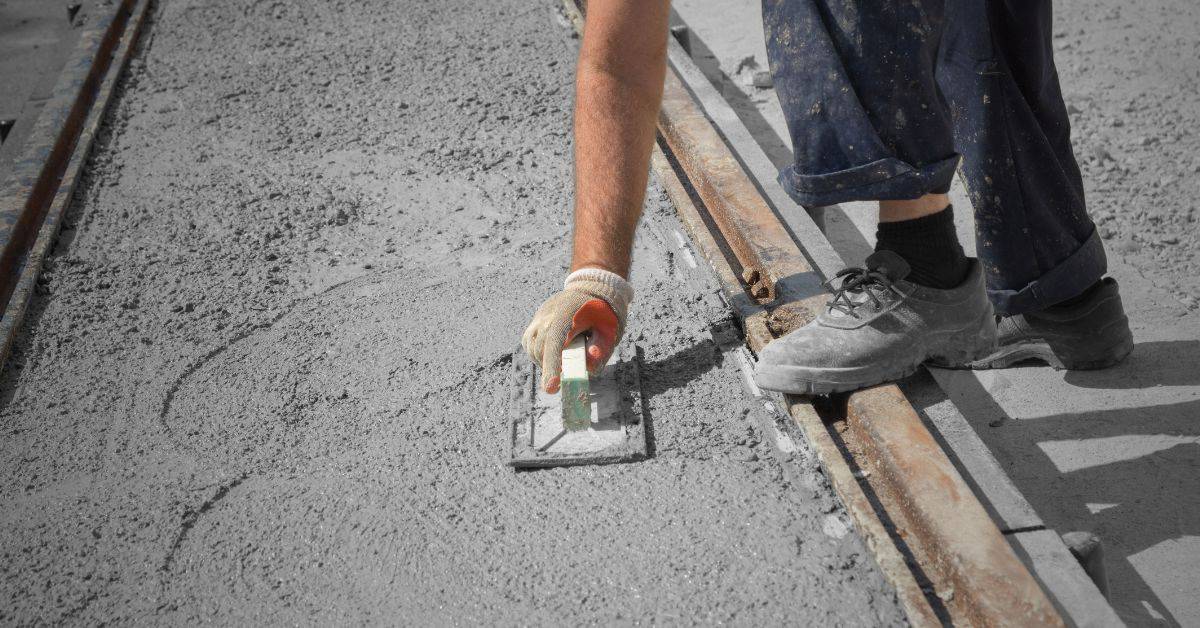
- Trowel: For finishing and smoothing the concrete surface. Inspect for a straight edge and no nicks or bends.
- Gloves: Protect hands from cuts, abrasions, and concrete burns. Choose durable, comfortable gloves that fit well.
- Safety glasses: Essential for protecting eyes from debris and hazards. Ensure they provide adequate coverage and are in good condition.
Concrete Mixes, Additives, and Material Specifications
Selecting appropriate materials ensures durable, attractive concrete edges with longevity.
- Normal Concrete: Standard mix suitable for most applications. Verify strength grade (e.g., 2500 psi) to meet your project’s needs.
- Fast-Setting Concrete: Ideal for projects requiring quick turnaround. Ensure it meets required strength and durability standards.
- Polymer-Modified Concrete: Offers enhanced durability and resistance to chemicals, abrasion, and freeze-thaw cycles. Verify compatibility with your chosen edge profile.
- Aggregates (Gravel, Sand): Affect concrete’s strength, workability, and finish. Ensure they meet local standards and project requirements.
- Air-Entraining Agents: Improve freeze-thaw resistance. Check for compatibility with your chosen mix and edge design.
- Colorants (Liquid, Powder, Integral): Add color to your concrete edges. Choose the type that best suits your edge design and application method.
- Water-Cement Ratio: Affects concrete’s strength and durability. Ensure it meets local standards or project-specific requirements.
- Cure Methods (Moist Curing, Membrane Curing): Protect concrete from moisture loss during curing. Choose a method that suits your project timeline and conditions.
Cost Factors and Budgeting for Concrete Edges
Identify the main cost drivers such as labor time, material choices, and preparation requirements, and note how site accessibility and grading affect pricing. Consider how drainage and existing edging influence overall costs.
Break down budgeting for decorative options and finish methods, and use a straightforward estimation method to compare bids. When evaluating proposals, request itemized line items to spot potential hidden costs.
What influences price and how to estimate
Estimating the cost of concrete edging involves understanding several factors that can significantly impact the bottom line. Here’s a step-by-step approach:
1. Calculate base cost per linear foot: Start by measuring the total length of edging needed. Multiply this by your chosen material’s cost per linear foot, including labor.
2. Adjust for complexity and access: More intricate profiles or difficult site access can increase costs. Apply a multiplier based on these factors (e.g., 1.2-1.5x for complex profiles, 1.05-1.2x for challenging access).
3. Factor in finish level: Decorative options like stamps, dyes, or staining can increase costs. Check local quotes to verify pricing and adjust your estimate accordingly.
Lifetime Cost, Maintenance, and Return on Investment
The long-term costs and benefits of concrete edging are crucial factors in your decision-making process. Consider the following:
- Expected lifespan: Well-installed, properly maintained concrete edging can last for 25-30 years or more. High-quality materials and finishes can extend this lifespan.
- Maintenance needs: While concrete is relatively low-maintenance, some finishes may require periodic cleaning, sealing, or touch-ups. Include these costs in your long-term budget.
- Property appeal and ROI: Well-executed edging can enhance your property’s curb appeal, potentially increasing its resale value. High-quality materials and attractive designs can provide a strong return on investment.
Safety, Permits, and on-Site Requirements
Before starting work, confirm safety prerequisites, utility locates, permits, and liability steps. Wear the required PPE and set up a clear on-site plan to protect workers and neighbors. Verify utility marks with the locator service and follow an emergency plan if lines are damaged.
Skip locating utilities or ignoring permits; that can lead to damaged lines, injuries, and project delays. A pro verifies all marks before starting and keeps the site organized to support reliable, long-term edge stability. Stake: skipping utility locates could result in damaged lines or injury; Quick check: look for and follow locator marks; Pro check: an experienced installer verifies utilities are marked before starting work; If No marks are present, or they’re faded, contact 811 or local utility locator to re-mark utilities.
Utility checks and permit basics
Before starting any construction work, it’s crucial to ensure the safety of yourself and your property by checking for underground utilities. Contacting local utility locating services is the first step in this process.
In the US: Call 811 to have underground lines marked before digging. This service is free and helps prevent damages and injuries.
Verify readings with the locator, create a utility plan, and establish an emergency response for any damages or strikes. Always proceed with installation while avoiding marked areas.
On-site safety best practices
Safety is paramount during on-site work. Wear appropriate personal protective equipment (PPE), including eye/face protection, gloves, boots, and hearing protection.
Use traffic control devices to manage access paths and maintain a clear work zone. When working with extrusion equipment, always follow the manufacturer’s guidelines for safe operation.
When working on slopes: If the slope is greater than 3:1, use fall protection and secure edges to prevent injuries. Maintain clearances from hazards such as irrigation and electrical lines.
Common Mistakes to Avoid and Troubleshooting
Identify design errors such as drainage misjudgments, scale mismatches, and edge misalignment, and explain corrective steps during planning. Use proactive checks to prevent these issues from escalating during construction.
Emphasize base preparation and curing specifics to prevent settlement and cracks, and provide practical quick fixes for common failures while outlining prevention strategies for future projects.
Design pitfalls and drainage failures
Certain design choices can lead to water pooling and plant stress. Here are common mistakes to avoid:
- Improper slope: Water may pool, causing plant stress and potential structural damage.
- Inadequate outlet paths: Without proper drainage, water can accumulate near structures, leading to issues.
- Incorrect edge alignment: Misaligned edges can cause water to flow improperly, leading to pooling.
- Under- or over-exposed edge profiles: Incorrect exposure can lead to water accumulation or excessive erosion.
To prevent these issues, ensure a consistent slope away from structures, provide proper outlet paths, and maintain correct edge alignment and exposure. Regularly inspect your landscape for standing water or pooling, and address any issues promptly by regrading or adding drainage channels as needed.
Installation mistakes and cure-time issues
Proper installation is crucial for the longevity of your concrete edges. Here are common mistakes to avoid:
- Inadequate compaction: Poorly compacted subbase can lead to settlement and cracking.
- Incorrect joint spacing: Improperly spaced joints can cause excessive cracking under stress.
- Improper curing schedule: Incorrect curing can result in delamination or reduced durability.
- Insufficient reinforcement: Without proper reinforcement, edges may crack or break under pressure.
To prevent these issues, ensure your subbase is properly compacted, maintain correct joint spacing, follow the recommended curing schedule, and use adequate reinforcement. Regularly inspect your concrete edges during the curing process for any signs of cracking or delamination, and adjust your curing schedule as needed.
Maintenance missteps to avoid
Proper maintenance is key to extending the lifespan of your concrete edges. Here are common mistakes to avoid:
- Using harsh chemicals: Harsh cleaning agents can damage the surface and reduce its lifespan.
- Improper power-washing: High-pressure washing can cause damage if not done correctly.
- Missed resealing: Regular sealing is necessary to protect against moisture and other elements.
- Neglecting seasonal checks: Regular inspections help identify and address potential issues early.
To prevent these issues, follow recommended maintenance intervals and methods. Avoid using harsh chemicals and ensure proper power-washing techniques are used. Reseal your concrete edges according to the manufacturer’s instructions, and perform regular seasonal checks for signs of wear or damage.
Choosing a Contractor and Client Experience
Vet contractors carefully by checking licenses, insurance, bonding, local reputation, and emergency contactability. Review portfolios and testimonials for consistency, similar edge treatments, and before/after comparisons, and verify sources. Ensure written proposals cover scope, materials, tolerances, timelines, and clear change‑order processes, plus a defined warranty and service level.
Doing this matters for a predictable outcome and solid support after install. A thorough vetting process helps prevent subpar workmanship, financial risk, and misaligned expectations. Quick checks like confirming the contractor’s business address matches the license jurisdiction and confirming prompt communication during the process can save time and avoid frustration, while a clear final inspection and punch list set concrete criteria for project sign‑off.
What to look for in portfolios and testimonials
When evaluating a contractor’s past work, before-and-after photos can provide valuable insights. Ensure they show consistent quality across different projects, with particular attention to similar edge treatments.
Ask for recent local references. This helps verify the longevity of their installations and ensures they’re familiar with local conditions. If before/after photos are convincing, proceed to the next evaluation step.
Common mistakes include overlooking relevant details in portfolios. To fix this, always request more information or examples if necessary.
Questions to ask and contract essentials
Before signing any agreement, review the written proposal for clarity and completeness. It should outline the project’s scope, timeline, and expectations.
Inquire about their process, including timelines, itemized pricing, warranty details, and how change orders are handled. Clear material specs and tolerances in the proposal indicate they’ve understood your requirements well.
If the proposal lacks necessary details, request clarification or revision before moving forward with contract negotiation.
Visual checkpoints and final inspection checklist
Before making your final payment, use this checklist to inspect the completed work. It ensures project outcomes match your expectations.
- Color match: Verify consistency across all edges.
- Joint placement: Confirm proper spacing and alignment.
- Grade: Inspect for proper slope to facilitate water runoff.
- Transitions: Ensure smooth connections with adjacent surfaces.
- Cleanup: Check for debris removal and overall site cleanliness.
Quick rule: Address any defects or incomplete items before signing off to avoid future issues.
Conclusion
Designing concrete edges that integrate with landscaping comes down to clear planning, careful execution, and safe practice. When you combine steady design decisions with proper materials and field testing, you protect durability, appearance, and long-term performance.
First, verify that your final edge plan aligns with the landscape, ensure the layout and edging height are set, confirm tool and material needs, test a small area or mock-up, respect local permits and on-site requirements, set a sensible pour and cure sequence, and then inspect alignment and edges before final setting. Keep the work as simple as possible and document any adjustments for future maintenance, using safety first as the baseline for every step.
Common mistakes to avoid include rushing the setup or cure, skipping small-area testing, and failing to account for drainage and soil movement, which can lead to cracking or heaving. Always wear appropriate PPE, keep children and pets away from the work zone, and follow manufacturer instructions and local rules for mixes, forms, and curing. Plan for edge maintenance and weather exposure, and never compromise on form stability or edge support.
If the project is large, involves drainage or structural considerations, or requires permits beyond basic on-site requirements, calling a professional is the right choice. A well-chosen contractor can keep the work within budget and timeline while protecting existing planting beds and irrigation lines. With careful planning and disciplined execution, you can achieve a clean, durable edge that enhances your landscape for years to come.
FAQ
What are common types of decorative concrete edging for landscaping?
There are several decorative options, including stamped or textured profiles, exposed aggregate, and colored concrete. Precast edging and thin concrete strips can also create clean lines beside lawns and beds. Check product labels or manufacturer instructions for available finishes and durability.
How can I mix and color concrete for edging safely and effectively?
Follow the manufacturer’s guidelines on mixing ratios and additives. Use consistent mix portions to avoid color variations. Refer to product labels for pigment options and any limits on color intensity.
What does the edging installation involve when sod removal is needed?
Prepare the area by marking the edge line and removing existing sod where the edging will sit. Excavate to the required depth, set the edging in place, and backfill with suitable material to stabilize it. After installation, replace sod or replant nearby to blend with the landscape.
What maintenance helps concrete edging last longer?
Keep the edge clean to prevent organic buildup and inspect for cracks or movement after heavy freezes or pulls from lawn equipment. Seal or reseal as recommended by the product maker to protect against moisture and staining. Use gentle cleaning methods to avoid damaging the surface.