

Key Takeaways
- Terrazzo originated in 15th-century Italy as a cost-effective flooring solution using leftover marble chips, now celebrated for its aesthetic appeal and sustainability in modern applications.
- Key materials for a DIY faux terrazzo floor project include white cement, decorative chips, mixing tools, and protective gear, with proper preparation and mixing essential for success.
- Ensuring the surface is well-prepared, achieving the correct cement mix consistency, and proper curing and sealing are crucial steps for durability and longevity of a faux terrazzo floor.
Introduction
Did you know that terrazzo, a flooring material with roots dating back to the 15th century, can now be recreated in a DIY fashion using simple materials like cement and decorative chips? This modern twist on a classic technique allows home enthusiasts to bring a touch of Italian renaissance elegance into their spaces without the high cost of traditional terrazzo.
Imagine walking into a room and stopping to admire a stunning floor with intricate patterns that you can proudly say you crafted yourself. Creating a faux terrazzo floor isn’t just a cost-effective solution; it’s a creative project that lets you add personal style to your home, making it uniquely yours.
Together, these two perspectives—inspiring with historical richness and personal creativity—create a compelling invitation to explore the art of DIY faux terrazzo flooring, offering both historical context and an invitation to personalize one’s living space.
Understanding Terrazzo: History and Modern Applications
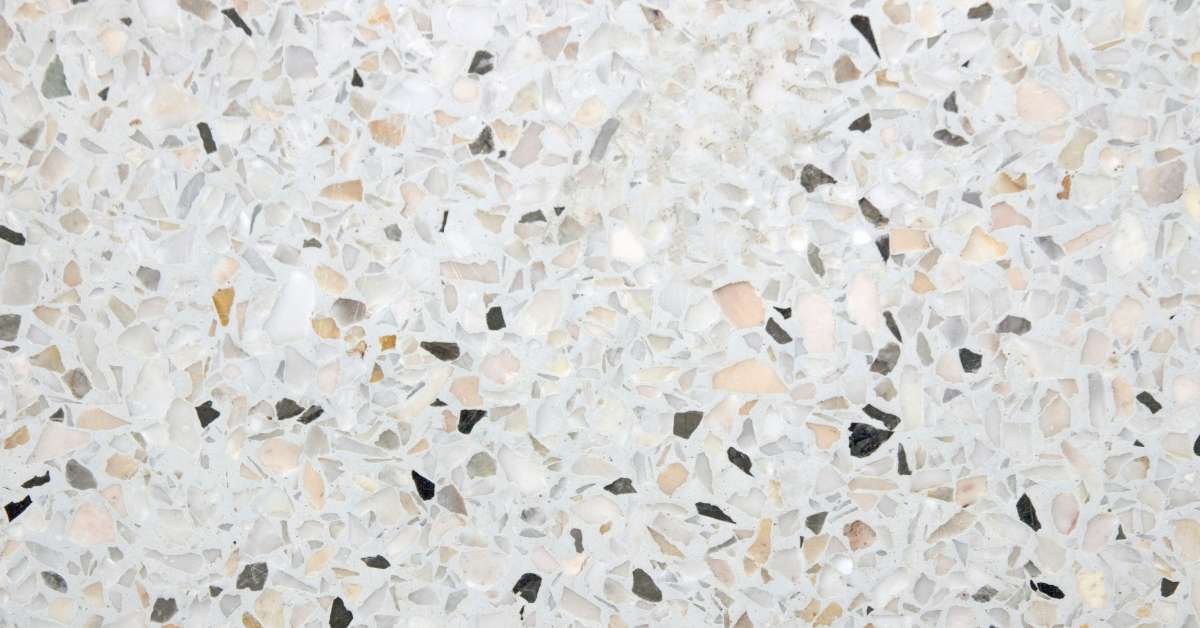
Understanding the rich history of terrazzo provides insight into its modern applications and enduring charm. Terrazzo, a composite material poured in place or precast, has its roots in the 15th century Italian renaissance. Originally, it was developed as a cost-effective flooring solution by Venetian workers who utilized leftover marble chips from upscale projects. The chips were set in clay and then ground down to a smooth finish, resulting in a durable and decorative surface. Today, terrazzo is celebrated for its aesthetic appeal and sustainability, finding applications in both residential and commercial spaces.
In modern applications, terrazzo has evolved significantly, with innovative techniques and materials allowing for a broader range of designs. It is often used in flooring, countertops, and wall treatments. The use of decorative chips—such as glass, marble, and granite—combined with a variety of binding agents, including cement and epoxy, provides limitless possibilities for customization. This material’s blend of durability and versatility makes it a popular choice for those looking to make a stylish yet practical statement.
Terrazzo’s resurgence in popularity can be attributed to its environmental benefits, as it often incorporates recycled materials, and its longevity, which minimizes the need for replacement. Understanding the history and evolution of terrazzo enriches our appreciation of its contemporary applications and inspires innovative uses in modern design.
Gathering Your Materials: What You’ll Need
Embarking on a DIY faux terrazzo project requires careful planning and the right materials. Before starting, it’s essential to gather all necessary items to ensure a smooth and efficient process. Here’s a comprehensive list of what you’ll need:
- White Cement: The base of your faux terrazzo. Opting for white cement can enhance the brightness and aesthetic appeal of the floor.
- Decorative Chips: Choose from a variety of materials like marble, glass, or granite to achieve your desired design.
- Sand: Used in combination with cement to create the terrazzo mix.
- Water: Essential for mixing with the cement to achieve the right consistency.
- Mixing Tools: A drill with a mixing paddle or a cement mixer to ensure a homogeneous mixture.
- Trowels: For spreading and smoothing the terrazzo mix.
- Grinder or Polisher: Used to smooth the surface once the terrazzo has set.
- Sealant: A protective layer to enhance durability and longevity.
- Protective Gear: Gloves, masks, and goggles to ensure safety during the project.
These materials will be referenced throughout the following steps, highlighting their specific roles in achieving a successful faux terrazzo floor.
Key Points
- White Cement and Decorative Chips: Essential for creating the base and design of the faux terrazzo.
- Mixing Tools and Trowels: Necessary for preparing and applying the terrazzo mix.
- Protective Gear: Important for ensuring safety during the project.
Quick Facts
- Approx. Time: The time needed to gather all the materials for the DIY faux terrazzo floor project can vary depending on availability and procurement methods. On average, it may take 1-2 hours to collect and organize all the essential materials listed.
- Pitfalls: One common pitfall is underestimating the quantity of materials required, leading to interruptions during the project. Another pitfall is using low-quality materials, which can result in a subpar final outcome.
- Tip: To avoid these pitfalls, carefully assess the required quantities based on the project scope and add a buffer to ensure you have enough materials. Additionally, invest in high-quality materials to achieve a professional-looking faux terrazzo floor.
Note: Times, costs, and steps can vary based on local regulations. Always consult manufacturer instructions.
Preparing the Surface: Essential Steps for Success
With materials at hand, the next step is preparing the surface—a critical phase that lays the groundwork for a successful faux terrazzo installation. Proper preparation of the surface is crucial for the success of your faux terrazzo floor. This step ensures that the terrazzo adheres well and results in a durable finish.
- Clean the Surface: Remove any dirt, dust, or debris from the existing floor. A clean surface ensures better adhesion of the terrazzo mix.
- Repair Any Cracks or Imperfections: Use a patching compound to fill any cracks or holes. This creates a smooth base for the terrazzo mix.
- Apply a Primer: A bonding primer will help the terrazzo adhere to the surface more effectively. Allow it to dry completely before proceeding.
- Mark the Area: Use tape to outline the area where you will apply the terrazzo, ensuring straight edges and defined boundaries.
Materials used in this step include cleaning supplies, patching compound, and primer. By ensuring the surface is well-prepared, you set the stage for a long-lasting and visually appealing faux terrazzo floor.
Why It Matters: A well-prepared surface prevents future issues like chipping or unevenness, ensuring your project stands the test of time.
Key Points
- Clean the surface thoroughly to ensure better adhesion of the terrazzo mix.
- Repair any cracks or imperfections using a patching compound to create a smooth base.
- Apply a bonding primer and allow it to dry completely for effective terrazzo adhesion.
Quick Facts
- Approx. Time: Approximately 1-2 hours, depending on the size of the area and drying times of the primer.
- Pitfalls: One potential pitfall is not allowing the primer to dry completely before proceeding, which can affect the adhesion of the terrazzo mix. Another pitfall could be skipping the step of repairing cracks or imperfections, leading to an uneven surface.
- Tip: Ensure the bonding primer is given sufficient time to dry as per the manufacturer’s instructions before applying the terrazzo mix. Additionally, thorough inspection and repair of any cracks or imperfections in the surface before proceeding will result in a smoother and more durable finish.
Note: Times, costs, and steps can vary based on local regulations. Always consult manufacturer instructions.
Mixing Cement: Achieving the Perfect Consistency
With the surface prepped and ready, the next critical step is mixing the cement. The key to a successful faux terrazzo floor lies in the consistency of the cement mix. Here’s how to achieve the perfect blend:
- Measure the Ingredients: For a standard mix, combine one part white cement, two parts sand, and the chosen amount of decorative chips. Adjust based on the size of the area.
- Mix Thoroughly: Use a drill with a mixing paddle or a cement mixer to combine the cement and sand first. Gradually add water until you achieve a thick, creamy consistency. Finally, fold in the decorative chips.
- Test the Mixture: The mixture should hold its shape without being too dry or too runny. If needed, adjust the water content accordingly.
Materials referenced in this step include white cement, sand, decorative chips, water, and mixing tools. Achieving the correct consistency is crucial for workability and the final appearance of your faux terrazzo floor.
Why It Matters: A well-mixed cement ensures even distribution of decorative chips and prevents issues like cracking or weak spots.

Adding Decorative Chips: Tips for a Unique Design
Now comes the fun part: adding decorative chips to personalize your design. Decorative chips are what give terrazzo its distinctive look. Here are some tips to ensure your design is unique and visually appealing:
- Selecting Your Chips: Consider the color scheme and overall aesthetic you want to achieve. Mixing different materials like marble, glass, or granite can add depth and interest.
- Distribution: Evenly distribute the chips throughout the cement mix for a consistent look. Avoid clumping to prevent uneven surfaces.
- Layering Techniques: For added dimension, consider layering chips of different sizes or colors. This can create a more dynamic visual effect.
- Pressing Chips: Once poured, gently press additional chips into the surface to enhance the design. Be careful not to disrupt the overall consistency.
Materials used in this step include decorative chips and trowels. By thoughtfully incorporating decorative chips, you can create a truly personalized terrazzo floor that reflects your unique style.
Why It Matters: The arrangement and choice of decorative chips directly impact the aesthetic and character of your faux terrazzo floor.
Curing and Sealing: Ensuring Durability and Longevity
With your design in place, it’s time to focus on durability. Once your faux terrazzo floor is laid, proper curing and sealing are essential to ensure its durability and longevity:
- Allow Time to Cure: After application, let the terrazzo cure for at least 24 to 48 hours. This process allows the cement to harden and strengthens the overall structure.
- Polishing the Surface: Once cured, use a grinder or polisher to smooth the surface. This step enhances the floor’s sheen and prepares it for sealing.
- Apply a Sealant: Choose a high-quality sealant suitable for terrazzo floors. Apply evenly with a brush or roller, ensuring complete coverage. This protective layer helps prevent stains and water damage.
- Final Cure: Allow the sealant to dry completely, which may take several hours to a full day, depending on the product used.
Materials referenced in this step include a grinder or polisher and sealant. Proper curing and sealing not only enhance the floor’s appearance but also extend its lifespan.
Why It Matters: Sealing the terrazzo protects it from wear and tear, maintaining its beauty and functionality for years to come.
Maintenance and Care: Keeping Your Terrazzo Floor Looking New
Your stunning floor is complete, but maintaining its beauty requires ongoing care. Once your faux terrazzo floor is installed, regular maintenance is key to preserving its appearance and functionality. Here are some tips for keeping it in pristine condition:
- Regular Cleaning: Sweep or vacuum regularly to remove dirt and debris that can scratch the surface. Use a damp mop with a pH-neutral cleaner to maintain shine without damaging the sealant.
- Immediate Spill Cleanup: Address spills promptly to prevent staining. Use a soft cloth or paper towel to blot the area, avoiding harsh rubbing that can dull the finish.
- Periodic Re-Sealing: Over time, the sealant may wear down. Plan to re-seal your floor every 1-2 years, or as needed, to maintain its protective layer.
- Protective Measures: Use mats or rugs in high-traffic areas to reduce wear. Furniture pads can prevent scratches from chairs and tables.
By following these maintenance steps, you ensure that your faux terrazzo floor remains as vibrant and durable as the day it was installed.
Why It Matters: Proper care extends the life of your terrazzo floor, preserving your investment and maintaining its aesthetic appeal.

Conclusion
As we journey through the history and modern applications of terrazzo, its enduring appeal becomes evident. This time-honored material, born from practical ingenuity during the Italian Renaissance, has evolved into a versatile and environmentally friendly choice for contemporary design. From floors to countertops, terrazzo’s aesthetic flexibility and sustainability continue to capture the imagination of designers and homeowners alike.
Creating a faux terrazzo floor is not just about replicating a classic look; it’s about understanding the interplay of materials and techniques. Each step, from gathering the right materials to the meticulous surface preparation, sets the foundation for a successful project. Attention to detail in mixing the cement and artfully arranging decorative chips can transform a simple floor into a work of art.
The challenges of a DIY faux terrazzo project are real but surmountable with careful planning and execution. Achieving the perfect cement consistency requires precision, while the curing and sealing process demands patience and thoroughness. These challenges, however, are opportunities to engage creatively with the process, resulting in a personalized space that reflects your unique style.
A key takeaway is the importance of ongoing maintenance and care, which helps preserve the beauty and functionality of your terrazzo floor. Regular cleaning, prompt spill management, and periodic re-sealing are essential practices that ensure the longevity of your investment. These steps not only protect the floor’s surface but also maintain its vibrant aesthetic appeal.
For those considering embarking on this rewarding endeavor, it’s crucial to be aware of local building codes and safety regulations. Consulting with professionals or securing necessary permits may be required to ensure compliance and safety. Additionally, using protective gear throughout the process is non-negotiable to safeguard your health.
Now that you’re equipped with the knowledge and insights into creating a faux terrazzo floor, the next step is to take action. Gather your materials, plan meticulously, and embark on a project that not only enhances your space but also offers a personal touch. By embracing this challenge, you’re not just crafting a floor; you’re creating a legacy in your home, a testament to craftsmanship and creativity.
FAQ
Question 1 What materials do I need to make a DIY faux terrazzo floor using cement and decorative chips?
Answer To make a DIY faux terrazzo floor, you will need white cement, decorative chips (such as marble, glass, or granite), sand, water, mixing tools, trowels, a grinder or polisher, sealant, and protective gear like gloves and goggles. These materials are essential for achieving a successful and visually appealing faux terrazzo floor.
Question 2 How important is the preparation of the surface before starting the faux terrazzo floor project?
Answer Properly preparing the surface before applying the terrazzo mix is crucial for ensuring adhesion and a durable finish. This includes cleaning the surface, repairing any imperfections, applying a primer, and marking the area. A well-prepared surface sets the foundation for a long-lasting and visually appealing faux terrazzo floor.
Question 3 What is the significance of curing and sealing the faux terrazzo floor after it is laid?
Answer Curing the terrazzo floor for at least 24 to 48 hours allows the cement to harden and strengthens the structure. Sealing the floor with a high-quality sealant helps prevent stains and water damage, enhancing its durability and longevity. Proper curing and sealing not only protect the floor but also maintain its appearance and functionality over time.
Quick Facts
- Time Needed: The time needed to gather all the materials for the DIY faux terrazzo floor project can vary depending on availability and procurement methods. On average, it may take 1-2 hours to collect and organize all the essential materials listed.
- Common Pitfalls: Common pitfalls include underestimating the quantity of materials required, leading to interruptions during the project, and using low-quality materials, which can result in a subpar final outcome.
- Best Practice: To avoid pitfalls, carefully assess the required quantities based on the project scope and add a buffer to ensure you have enough materials. Additionally, invest in high-quality materials to achieve a professional-looking faux terrazzo floor.