
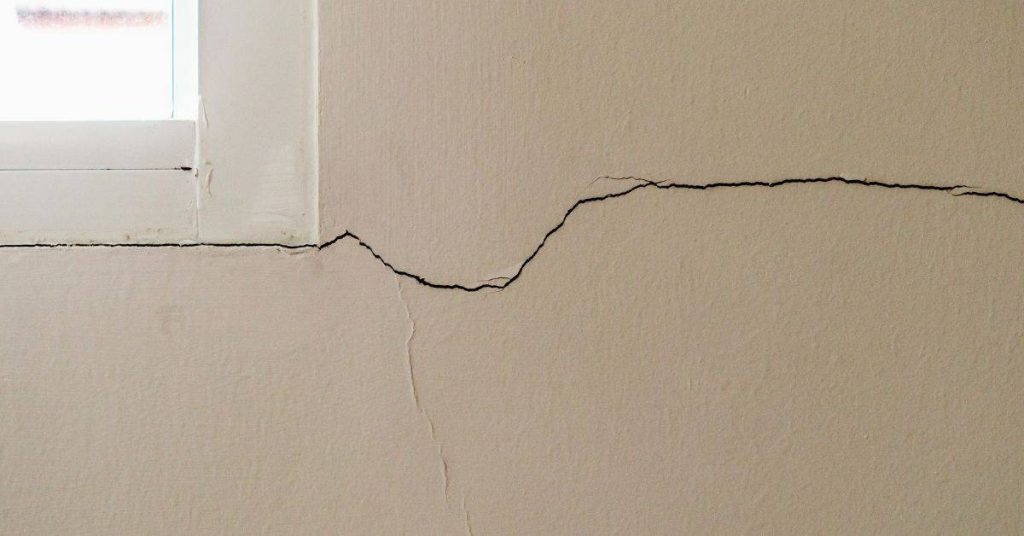
Introduction
Crack monitoring on slabs is watching cracks for changes to tell if the slab is moving. You use simple tell-tales or gauges to notice width changes over time, so you can decide if action is needed. Keep it plain and repeatable, with measurements at the same spots.
Start with an initial measurement of the crack width at a stable reference point and note where it sits. Then look for crack depth and track movement over time by rechecking at regular intervals and across key spots. Use basic monitoring tools and always check product labels, manufacturer instructions, and local rules for safety and limits.
Key takeaways
- Regularly inspect slabs and record crack width and any depth signs.
- Note movement by marking crack ends and comparing over time with reference points.
- Choose monitoring gear suitable for size, accessibility, and budget constraints.
- Install gauges or marks on clean surfaces and protect from moisture.
- Document readings clearly and store data in a simple, organized log.
- Safety: stop work if cracking accelerates and seek structural engineer advice.
Table of Contents
- Introduction
- Key takeaways
- Why Monitor Slab Cracks?
- Types of Slab Cracks to Prioritize
- Initial Assessment — Measuring Crack Width and Depth
- Monitoring Equipment and How to Choose It
- Installation and Best Practices
- Interpreting Readings — When Movement Is Active
- Safety, Documentation, and When to Call an Engineer
- Cost-Effective DIY Monitoring and Common Pitfalls
- Conclusion
- FAQ
Why Monitor Slab Cracks?
Monitoring cracks in a slab keeps people safe, protects the structure, and helps catch trouble early so you can slow or stop movement before it becomes a big repair. It isn’t a fix by itself—data from careful tracking informs decisions about when and what to repair, and the act of monitoring should be treated as a diagnostic tool that guides action rather than a cure.
Think of this as a practical, ongoing checkup for your concrete: it reveals what’s causing cracks (shrinkage, settlement, changes in load) and how those cracks change over time, so you know if things are stable or slipping toward bigger problems. Keeping good records also helps extend slab life, keeps repair scopes reasonable, and protects assets by catching shifts early. You’ll focus on simple methods like visual crack mapping, measuring crack widths, using basic gauges or sensors, and logging findings in a clear, repeatable way, with inspection intervals and documentation that adapt to seasonal cycles, moisture, and temperature changes. If you’re unsure about a tool or method, check the product label or manufacturer instructions and follow local rules, using safe ranges or alternatives when needed.
Risks and consequences of ignored movement
Ignoring slab cracks can lead to progressive damage. Active movement can cause structural issues, like delamination or punching shear.
Water ingress is another risk. Cracks let in moisture, leading to corrosion of reinforcement and further deterioration.
Serviceability loss is also a concern. Cracking can affect the slab’s ability to support loads, causing deflection and discomfort for users.
Early detection through monitoring helps prevent these issues from worsening or becoming costly to repair.
Triggers for starting a monitoring program
A monitoring program should start when there’s reason to suspect active movement. Common triggers include:
New construction defects. Cracks appearing soon after pouring could indicate problems with the mix, placement, or curing.
Seismic events or nearby excavation can cause settlement, triggering cracks and needing monitoring to assess stability.
Post-repair verification is another trigger. Monitoring ensures repairs have been effective and no further movement occurs.
Temperature changes, seasonal cycles, or significant moisture changes can also warrant starting a monitoring program.
Types of Slab Cracks to Prioritize
This section helps you sort cracks by what caused them and how serious they are, so you know what to monitor and what’s cosmetic. Define a clear priority: structural versus non-structural, and which cracks need ongoing monitoring versus quick fixes. We’ll list crack types by appearance and likely origin, so you can spot patterns like settlement, shrinkage, or overloading.
That context saves you from chasing cosmetic fixes when a crack could signal movement, and it guides your monitoring plan. You’ll learn practical checks—baseline surveys, gauges, calipers, and simple photo or pattern tracking—and how often to record results. Use the results to decide when to call in a pro for a structural assessment and how to document location, size, and changes over time.
Surface, shrinkage, and thermal cracks
These cracks usually form on the surface of slabs due to drying shrinkage, temperature changes, or minor settlement. They’re typically low-risk but should still be observed.
Drying shrinkage occurs as concrete loses moisture after placement. It often appears as hairline cracks at the top of a slab, running horizontally or vertically.
Thermal contraction happens when temperature drops cause the slab to shrink. These cracks are usually thin and diagonal or stepped, with no visible signs of instability.
While these cracks may not pose immediate structural concerns, monitor them periodically for any widening or changes in appearance.
Structural-pattern cracks (settlement, flexural, punching)
These cracks often indicate more serious issues related to loading or foundation problems. They require systematic monitoring and may need professional assessment.
Settlement cracks are typically diagonal or stepped, with visible signs of instability like sloping floors or doors sticking. They can be caused by soil settlement, inadequate compaction, or other foundation issues.
Flexural cracks run horizontally along the length of a slab and indicate excessive bending due to overloading or insufficient reinforcement. They may widen over time if the loading continues.
Punching shear cracks form around columns or walls, with cracks radiating outwards. They signify that the slab is failing in shear, which can lead to collapse if not addressed.
Initial Assessment — Measuring Crack Width and Depth
Establish a baseline by picking representative crack sites along each affected slab edge or control joint and recording width, length, and depth with clear tolerances. Use a mix of width methods (comparator, crack gauge, caliper, or scale in high‑resolution photos) and depth cues (visual with markings, endoscopy if available, or non‑destructive probes where feasible). Create a standardized data sheet and include date, time, location, crack ID, and the three measurements, plus any movement since the last reading.
Why it matters: consistent initial measurements let you track trends over time and spot real changes, not just noise. Document orientation, distance from joints, crack type, temperature context, and photo baselining with scale for reliable comparisons. Be mindful of potential error sources—zero gauges, clean surfaces, a stable environment—and note any uncertainty to aid interpretation.
Measuring initial crack width (tools and procedure)
To establish a baseline, you need to measure the initial width of cracks accurately. Here are some tools and procedures to help you.
- Crack Gauges: Inexpensive, easy to use. Available in various ranges (0-1mm, 0-2mm, etc.).
- Digital Calipers: More precise (+/- 0.05mm). Use the ‘depth’ function for crack width.
- Comparators: High accuracy (+/- 0.1mm), but more complex to use and expensive.
- High-Resolution Photos with Scale: Non-contact, useful for inaccessible cracks. Requires consistent lighting and scale reference.
- Rentable Tools (e.g., Laser Crack Meters): High-end, accurate (+/- 0.1mm). Around $50/day to rent.
Detecting and measuring crack depth and extent
Crack depth is crucial but harder to measure. Here are some methods:
Visual Estimation: Use reference markings (e.g., coins, nails) for scale. Works best for shallow cracks.
For deeper cracks, consider these options:
Endoscopic Access: Uses a flexible camera on a cable to see inside cracks. Requires crack opening of at least 6mm and is invasive.
Non-Destructive Probes: Use thin probes (e.g., metal rods, plastic strips) to measure depth without damaging the slab. Works best for wider cracks (>3mm).
If cracks are deep or complex, consider consulting standards or a specialist. They can advise on intrusive investigation methods like core drilling or ground-penetrating radar.
Monitoring Equipment and How to Choose It
Monitoring falls into three main categories: simple tell-tales (visual indicators), mechanical gauges (dial or lock-in devices), and electronic sensors (wired or wireless data loggers). Each type measures crack width, width change over time, or crack movement, and you’ll see them used in slabs differently depending on the job. The big trade-offs are cost, accuracy, and how tough they are in real construction conditions.
Choosing equipment comes down to how long you need the data, how much you’re willing to maintain, and how you’ll access it later. Think about installation effort, exposure to moisture and temperature, and whether you want manual notes or automated data logging. A practical approach is to match task needs to sensor resolution and maintenance, then plan for simple calibration and routine checks to keep things honest.
Tell-tales and simple crack monitors
Adhesive tell-tales are your basic, low-cost visual indicators. They’re like tiny flags that stick to the slab surface. When a crack forms or grows, it’ll break these flags, showing you where and how much movement has occurred.
Two-part plastic monitors work similarly but give you a bit more info. You mix two parts together, apply it across a suspected crack line, and let it set. If the slab moves, the monitor will show you the direction and amount of displacement.
Why use them? They’re cheap, easy to install, and great for short-term checks or low-budget projects. But remember, they only give you a snapshot in time. Once they break or change, you can’t reset them.
Mechanical and electronic gauges
For more accuracy, consider mechanical dial gauges or electronic dataloggers. Dial gauges have a needle that moves with slab displacement. They’re simple to use but require manual readings.
Electronic gauges are the high-tech option. They measure crack width changes over time and can log data for later review. Some even send alerts if movement exceeds set thresholds. But they need power (batteries or external) and may require calibration.
Considerations: Mechanical gauges are tough but less accurate. Electronic ones offer better precision but need protection from moisture and temperature extremes. Both should be installed carefully to avoid damaging the slab.
Matching equipment to objectives
Choosing the right tool depends on what you’re trying to achieve and your site conditions.
- Short-term stability check: Tell-tales or simple mechanical gauges are fine. They’ll show if there’s immediate movement.
- Long-term trend: Electronic dataloggers are best. They track changes over time, giving you trends and patterns.
- Forensic investigation: High-precision electronic gauges can help pinpoint causes of movement.
- Budget-conscious: Start with tell-tales or low-cost mechanical gauges. Then upgrade as needed.
- Rentable tools: Some gauges can be rented, saving you money if you only need them temporarily.

Installation and Best Practices
Choose the right sensor type and mounting method for slabs, then place them to cover critical crack paths and avoid dead zones. Surface-mounted extenders or embedded sensors each have tradeoffs; adhesive or mechanical fasteners affect longevity and reuse. Prepare and document every step so readings stay reliable and repeatable.
Clean and dry the area, manage moisture, and follow surface treatment instructions so the sensor sticks and lasts. Plan a simple labeling system and data log cadence so you can correlate readings with seasons and loads. Do periodic checks for drift, air gaps, or loose mounts and address issues promptly.
Surface prep, mounting, and alignment
Before installing sensors, prepare the surface to ensure strong adhesion and accurate readings. Start by cleaning the area thoroughly with a wire brush or compressed air to remove dust, dirt, and loose material.
Adhesion is key. Use a primer or adhesive surface treatment designed for your sensor type. Follow manufacturer’s instructions carefully. Let it cure as directed before mounting sensors.
Use mounting extenders if needed, but keep them short to minimize measurement error. Align them parallel to the slab’s plane