
Introduction
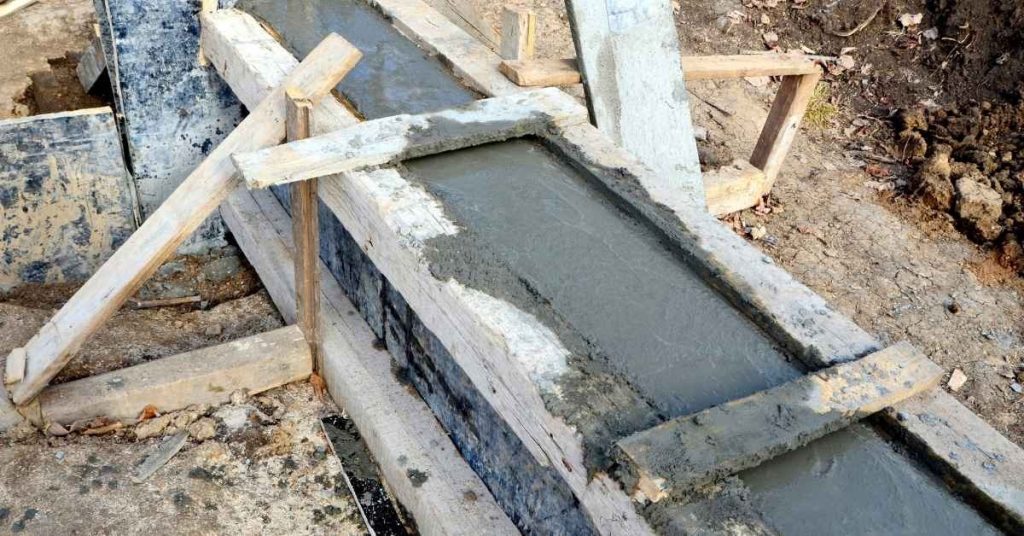
Honeycombing and blowouts are defects in concrete caused by improper compaction. This article explains how to spot these issues and why they happen in DIY pours. We’ll cover how to use a vibrator correctly and what to check to avoid problems.
Identify honeycombing by looking for voids, exposed aggregate, and a rough, porous surface near the edges. Blowouts show up as larger voids and broken areas where air or excess water caused gaps during placing. To prevent them, use the vibrator correctly, work in stages, and check the mix and formwork guidance from the manufacturer and local requirements.
Key takeaways
- Identify honeycombing by visible voids, rough pockets, and surface cratering early.
- Use proper vibration technique to settle concrete without over-compactation.
- Choose low-frequency, appropriately sized vibrator for DIY pours and forms.
- Avoid over-quick pours; work in lifts to minimize blowouts and honeycombing.
- Inspect forms and pour path for air pockets and flow around embeds.
- Plan a safety checklist, PPE, and crew signals to prevent accidents.
Table of Contents
- Introduction
- Key takeaways
- Why Proper Vibration Matters for DIY Concrete Pours
- Symptoms and Visual Checkpoints on Site
- Common Causes and Operator Mistakes with Vibrators
- Selecting the Right Vibrator and Accessories for DIY Jobs
- Proper Vibration Techniques for DIY Formwork
- Tools and Materials Checklist + Material Specs Explained
- Repair Methods for Honeycombing and Blowouts
- Safety, Planning, and Cost Considerations for Diyers
- Conclusion
- FAQ
Why Proper Vibration Matters for DIY Concrete Pours
Internal vibration helps move air out of concrete and coats the aggregate evenly. It promotes uniform density throughout the pour and reduces visible voids. Proper vibration supports a stronger, more durable finished surface.
When to involve a professional or engineer depends on the project scope and structural requirements. For large, code-critical pours, seek guidance before proceeding. Always consult the manufacturer instructions and local rules for safety and compatibility.
What honeycombing and blowouts are
Honeycombing refers to the presence of voids or air pockets within concrete. These develop when air becomes trapped during placement, leading to weakened areas prone to cracking.
Blowouts, on the other hand, occur when forms fail or rupture due to excessive pressure from wet concrete. This can result in uneven surfaces and structural compromise.
Understanding these issues helps prevent concrete damage and maintain structural integrity. Inspect the pour visually after vibration and before stripping forms to check for air pockets or voids (honeycombing) and form failures/ruptures (blowouts). If present, re-vibrate or add more concrete.
Long-term structural and durability impacts
Unresolved honeycombing and blowouts can lead to reduced lifespan and safety risks. Voids allow water ingress, promoting corrosion of reinforcement and weakening the concrete.
Cracking, delamination, or rust after initial curing may indicate these issues. Assess the pour’s integrity visually and with non-destructive testing (NDT) methods like ultrasound or radiography to identify structural concerns.
Address long-term impacts by repairing damaged areas, reinforcing as needed, and implementing corrosion protection measures. Consult a structural engineer for code-critical projects to ensure safety and compliance.
Symptoms and Visual Checkpoints on Site
Look for honeycombing as pocked or rough surfaces that reveal voids beneath. Compare new pours with nearby cured sections for color and sheen differences. Note exposed aggregate or dull finishes that indicate poor compaction.
Listen for hollow or dull tapping sounds and feel for soft spots under the surface. Inspect edges for missing concrete or blown-out connections. Check for visible segregation or uneven thickness that signals improper mix or pour technique.
How to spot honeycombing vs surface blemishes
Use this checklist during final inspections to distinguish shallow surface defects from deeper honeycomb voids.
- Visual Inspection: Look for pocked, rough, or uneven textures. Compare new pours with surrounding cured sections for color gaps, exposed aggregate, or inconsistent sheen/finish.
- Gentle Probing: Gently probe suspect areas with a screwdriver or similar tool to gauge depth and firmness of defects. Shallow depressions with solid bases usually indicate surface blemishes.
- Texture Variation: Feel for sudden changes in texture that may suggest underlying voids.
- Sheen Discrepancy: Check for inconsistent sheen or finish between areas, which could hint at honeycombing beneath.
Quick rule: If probing reveals a shallow depression with a solid base, it’s likely a surface blemish. For honeycombing, repair with grout or epoxy; for surface blemishes, clean and prepare for finish application.
Indicators of an imminent or occurred blowout
Monitor forms during concrete placement to identify signs of form failure using this checklist.
- Form Bulging: Keep an eye out for bulging forms, which could indicate excessive pressure build-up.
- Concrete Loss: Feel for sudden loss of pressure or soft spots under the surface that may suggest a blowout has occurred.
- Gasket Leaks: Inspect gaskets for leaks, as this could lead to blowouts if not addressed.
- Loose Fasteners: Check fasteners for tightness. Loose ones can cause form connections to fail and result in blowouts.
Quick rule: If forms show signs of bulging or excessive leaks, stop pouring immediately and assess the formwork to prevent a blowout.
Visual checkpoints for cold joints and segregation
Use this checklist during final inspections to identify patterns suggesting poor sequencing, overworking, or compaction issues.
- Thickness Changes: Check for abrupt thickness changes that may indicate improper mix design or pour stratification.
- Unexpected Voids: Inspect panel faces using a straightedge or level to detect unexpected voids, which could suggest segregation.
- Aggregate Separation: Look for visible aggregate separation, sudden texture changes, laitance, or sandy wash on the surface that may indicate segregation.
- Thin Concrete Zones: Inspect high-traffic zones for thin or patchy concrete, which could suggest improper compaction.
Quick rule: If visible aggregate separation and sudden texture changes are present, it’s likely segregation due to poor sequencing or compaction. Repair segregated areas with grout or epoxy; re-pour if necessary, ensuring proper mix design, placement, and compaction techniques.
Common Causes and Operator Mistakes with Vibrators
Identify errors such as incorrect placement relative to rebar and forms, shallow or deep insertion, and improper on/off timing. Over- or under-vibration can lead to honeycombing or blowouts. Prioritize consistent practice to avoid these issues.
Placement angle and insertion depth affect compaction; use short, controlled pulses and avoid hitting rebar or corners. Moving the vibrator too quickly or staying in one spot can trap air or cause segregation.
Incorrect insertion depth, spacing, and timing
Proper placement of the vibrator probe is crucial for effective compaction. Incorrect insertion can lead to voids and uneven consolidation, resulting in honeycombing or blowouts.
Insertion Depth: If inserted too shallowly, the probe may not reach the full concrete layer, leaving uncompacted areas. Conversely, inserting it too deeply can cause damage to rebar or formwork. To avoid this, verify probe placement relative to formwork and rebar using a labeled diagram or datasheet.
Spacing: If probes are placed too far apart, proper consolidation may not be achieved between them. Inspect probe spacing visually before pouring concrete to ensure adequate compaction. To prevent these issues, use a checklist for probe insertion that includes depth, spacing, and timing. Train operators on proper technique using a test panel or sample pour.
Over-vibration and segregation problems
Excessive vibration can cause coarse aggregate to settle and paste separation, weakening the concrete. This is because prolonged or intense vibration causes the heavier aggregates to sink while the lighter cement paste rises to the surface.
Vibration Duration: Consult manufacturer’s instructions for recommended vibration duration and frequency. Observe concrete surface behavior; excessive vibration may cause it to bleed excessively or segregate. If this occurs, reduce vibration time or frequency to prevent paste separation.
To avoid over-vibration, implement a habit of using short, controlled pulses rather than continuous runs. Monitor concrete surface behavior for signs of over-vibration and adjust accordingly.
Poor form setup and bracing mistakes
Common errors in formwork setup can increase the risk of blowouts under vibrator-induced pressure. These mistakes include insufficient ties, weak joints, and poor sealing.
- Insufficient Ties: Inadequate tying allows formwork to move or shift during vibration, leading to blowouts. To avoid this, add additional ties to strengthen formwork and prevent movement.
- Weak Joints: Poorly connected joints can leak concrete or allow blowouts to occur. Ensure joints are properly sealed using a suitable sealant or tape.
- Poor Sealing: Gaps between forms allow concrete to escape, leading to blowouts and waste. Inspect formwork for any visible gaps before pouring concrete.
To prevent these issues, implement a pre-pour inspection routine for formwork. This should include checking ties, joints, and seals using a visual checklist or manufacturer’s guidelines. Address any identified issues before pouring concrete to minimize the risk of blowouts.
Selecting the Right Vibrator and Accessories for DIY Jobs
Selecting the right vibrator for a DIY pour hinges on form size, concrete consistency, and access. Needle/immersion units excel in tight or narrow forms where penetration is needed, while external pad systems cover larger areas more quickly. Always check manufacturer guidance and rental terms to match the tool to the project and to verify recommended accessories and duty cycles.
This choice matters because proper vibration reduces honeycombing and blowouts and makes cleanup easier. For small boxes or narrow widths with limited access, immersion vibrators can improve penetration and compaction; for deeper pours or broader forms, external pads can area-vibrate more effectively. Consider form dimensions, slump, and site access, then plan for backup options or rentals and confirm that power sources, hoses, and clamps will reach the pour without strain, along with any required PPE and maintenance routines as per guidance.
Types of vibrators and practical use-cases
When selecting a concrete vibrator for your DIY job, you’ll encounter two main types: needle/immersion (probe) vibrators and external/vibration pad systems. Each has its own strengths and is suited to different scenarios.
Needle/Immersion Vibrators are ideal for deep pours and narrow forms where access is good. They work by inserting a probe into the concrete, allowing it to move freely and compact the material effectively. This type of vibrator is particularly useful in preventing honeycombing and blowouts in hard-to-reach areas.
External/Vibration Pad Systems, on the other hand, are perfect for wide, shallow pours and hard-to-reach areas. They work by transferring vibrations through formwork to compact the concrete. While they can be less effective at preventing honeycombing in deep pours, they excel in situations where access is limited.
What to check: probe size, power, and compatibility
Before renting or purchasing a concrete vibrator, it’s crucial to verify certain specifications to ensure the equipment matches your DIY formwork needs.
- Probe Size: Ensure the probe fits your form dimensions. An undersized probe may not reach all areas of the pour, leading to inadequate compaction and potential honeycombing or blowouts.
- Power Output: Confirm the vibrator’s power output matches your concrete volume needs. A low-power unit may struggle to compact large volumes efficiently.
- Compatibility: Verify the vibrator is compatible with your power source (electric or pneumatic). Using an incompatible power source can damage the equipment and void warranties.
- Duty Cycle: Check the manufacturer’s guidelines for recommended duty cycles to prevent overheating and ensure optimal performance.
- Noise Levels: Consider noise levels, especially if working in residential areas or during restricted hours.
- Safety Features: Ensure the vibrator has safety features like automatic shut-off when overloaded or tipped.
- Warranty and Support: Verify warranty coverage and available support from rental shops or manufacturers.
- Probe Material: Check probe material for durability and suitability to your concrete mix (e.g., ste