

Introduction
A proper surface profile is the texture and cleanliness of concrete that coatings need to bond.
Before applying anything, clean the floor thoroughly to remove oils, dust, and contaminants. Profiling options like shot blasting or diamond grinding are used to create the key texture; choose based on the concrete and the coating.
After blasting or grinding, verify the profile quality by inspecting the texture and feel and noting any high spots or contaminants. Different coatings have their own profile recommendations, so always follow the coating manufacturer’s instructions and local rules. If in doubt, test a small area and consult the label before committing to a full job.
Key takeaways
- Clean the concrete surface thoroughly before profiling or coating to ensure adhesion.
- Use appropriate profiling method (diamond grinding or shot blasting) to achieve target roughness without over-grinding.
- Verify surface profile quality with manufacturer-recommended tests or general guidelines, not guesses.
- For epoxy or urethane coatings, ensure profile is clean, dry, and free of contaminants.
- Wear proper PPE and dust control measures during profiling to protect workers.
- Plan budgeting and scheduling with realistic buffers; avoid rework from over-grinding mistakes.
Table of Contents
- Introduction
- Key takeaways
- Why Proper Concrete Surface Preparation Matters
- Assessing the Existing Floor Condition Before You Prep
- Surface Profiling Targets: What “Right Profile” Means and Why over-Grinding Hurts
- Mechanical Methods Compared: Diamond Grinding, Shot Blasting, and Hybrid Approaches
- Tools and Materials Checklist for Controlled Profiling
- Practical Step-by-Step Techniques to Hit the Profile Without over-Grinding
- Dust Control, Waste Handling, and Safety During Surface Prep
- Budgeting, Scheduling, and a Simple on-Site Decision Checklist (Plus Common Mistakes to Avoid)
- Conclusion
- FAQ
Why Proper Concrete Surface Preparation Matters
Your coating’s performance starts with the substrate. Proper prep drives adhesion, service life, and the overall project cost, so skip or rush it at your peril.
The three non‑negotiables are cleaning, profiling, and verification. Cleaning removes dust and contaminants, profiling creates a coating‑friendly texture, and verification confirms readiness before you apply the coating system per its datasheet or instructions. If prep is off, bond failures, rework, and warranty issues follow.
The three-step sequence: clean, profile, verify
Proper concrete surface preparation is a three-step process. Each step builds on the last to ensure your coating adheres well and lasts.
Cleaning removes dust, oils, and contaminants that could hinder adhesion. It’s like preparing a canvas for painting – you need a clean surface.
Profiling follows. This creates a coarse texture or profile suitable for your coating system. It gives the coating something to ‘grab onto’.
Lastly, verification. This step checks if your surface is ready – clean, dry, and with the right profile. It’s like checking your work before signing off.
Consequences of poor prep: failures and hidden costs
Skipping or rushing these steps can lead to bond failures. Your coating could delaminate, blister, or wear out prematurely.
These aren’t just cosmetic issues. They cost you time and money. Rework is expensive – stripping off failed coatings and starting over isn’t cheap.
Plus, there are indirect costs. Downtime for repairs, lost productivity, even damage to your reputation if it’s a commercial project.
So, while proper prep takes time and effort upfront, it saves you money and hassle in the long run.
Assessing the Existing Floor Condition Before You Prep
Begin with a practical walkthrough to map exposure risk and prioritize prep methods. Note traffic patterns and identify areas that will need tougher prep versus lighter treatment.
Catalog contaminants and old coatings, then plan removal or encapsulation based on type and hardness. Document surface damage, moisture indicators, and porosity so the spec decision is clear and repeatable.
Visual checkpoints and simple tests
Before you start any prep work, walk the space with these visual checks and quick tests to catch common issues.
- Stains: Look for discoloration. It could be contaminants or old coatings that need removal.
- Laitance: Feel for a smooth, powdery layer. If present, it needs to be removed as it affects adhesion.
- Cracks (micro and macro): Check for hairline cracks and larger ones. They may need repair before coating.
- Unevenness: Feel the surface. Uneven slabs might need leveling or grinding.
- Delamination: Tap the slab with a hammer. A dull sound indicates delamination, which needs fixing.
- Rising cracks: Check if cracks are moving upwards. This could indicate slab movement or moisture issues.
- Spalling: Look for flaking concrete. It’s a sign of damage that needs repair.
- Porosity-induced issues: Feel the surface. High porosity can lead to coating failures and needs treatment.
Quick rule: Don’t skip these checks. They help avoid costly surprises later.
Contaminant detection and when to test further
Before you start removing contaminants, identify what you’re dealing with. Some contaminants need specific removal methods.
Solvent wipe tests: Use a clean white cloth dampened with solvent to wipe the surface. If the cloth picks up residue, it’s contaminated. Test different solvents until you find one that works.
If the surface feels greasy or slippery, perform an adhesion pull test. Apply pressure-sensitive tape, let it sit, then pull it off. If the surface comes off with it, there’s a contaminant that needs removal.
Moisture testing: If you suspect moisture issues, perform tests like relative humidity, calcium chloride, or ASTM F2170/F1869 equivalents. Follow coating manufacturer requirements for specific test methods and acceptable limits.
Surface Profiling Targets: What “Right Profile” Means and Why over-Grinding Hurts
The profile should provide a mechanical anchor and uniform roughness that matches the coating system’s bond requirements. Use a clear target pattern or surface roughness value aligned with manufacturer guidance.
Over-grinding weakens the slab and wastes material, energy, and time. Always verify the profile against the coating guidance and perform any required adhesion or moisture checks before proceeding.
Visual and tactile indicators of an acceptable profile
The right profile should look and feel uniform, like a consistent texture on the entire surface. Here’s what to check:
Visually: The surface should have a consistent, matte appearance with no shiny or smooth spots. It should look like it has a light ‘etching’ across the whole area.
Tactilely: Run your hands over the surface. It should feel uniformly rough, not too harsh nor too smooth. Imagine the texture of fine sandpaper – that’s the goal.
Over-grinding risks and how to recognize them early
Spotting over-grinding early helps prevent major issues. Here’s what to look for:
Thin slab: If you can see the surface changing color or becoming translucent, that’s a sign you’re getting too close to the rebar.
Feathered edges: When grinding edges, be careful not to create ‘feathers’ – thin, sharp edges that are weak points. They’ll look wispy and feel sharp to touch.
Exposed aggregate: If you start seeing small stones or gravel on the surface, you’re exposing the aggregate layer, which can lead to a weak bond with your coating.
Mechanical Methods Compared: Diamond Grinding, Shot Blasting, and Hybrid Approaches
Understand what each method is best at achieving: leveling, coating removal, or roughening, and how that feeds into your target surface profile.
Consider strengths and limitations like removal rate, dust, heat, and finish consistency. Use hybrids when sequencing helps reach the right profile with less over‑removal, while keeping safety and dust control in mind.
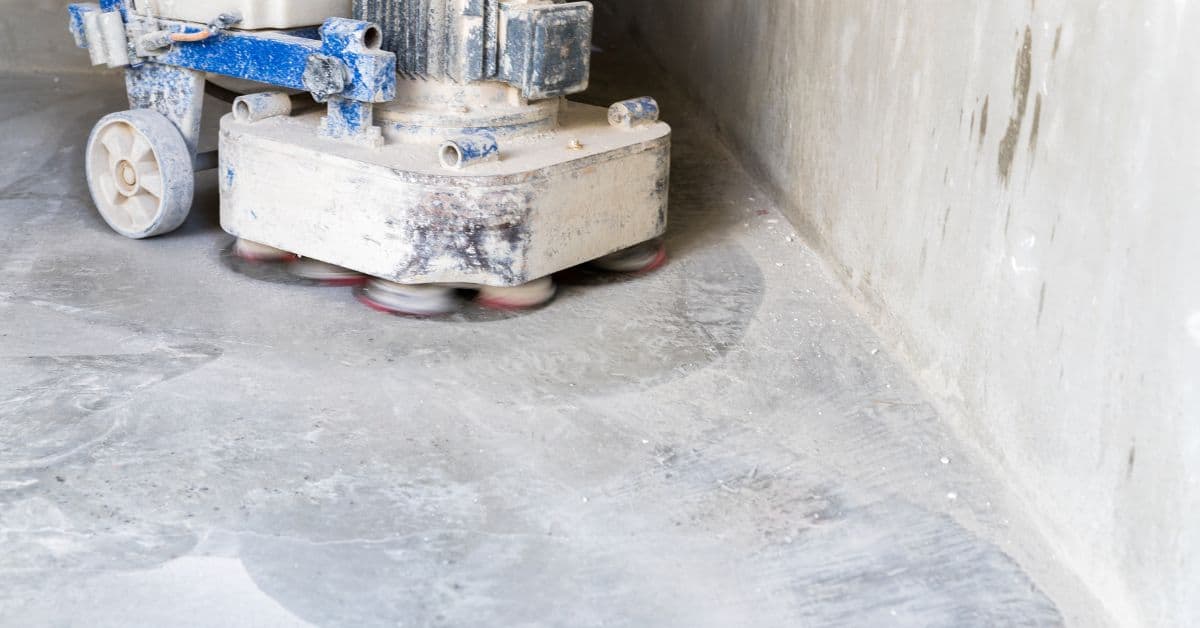
Diamond grinding: control, finish, and ideal scenarios
Diamond grinding is your go-to method when you need a precise, low-profile finish. It’s perfect for sensitive areas where controlled removal is crucial.
Grinding uses diamond-impregnated discs or segments to cut into the concrete surface. This provides a consistent, smooth profile with minimal dust and heat generation.
Ideal scenarios include preparing surfaces for thin coatings, leveling uneven slabs, or exposing fresh concrete for better adhesion.
Shot blasting: speed, aggressiveness, and reuse factors
Shot blasting is the fastest way to remove old coatings, expose aggregate, or roughen a surface. It uses high-velocity steel shot propelled by compressed air.
This method generates more dust and noise than grinding but offers quick results. It’s great for preparing surfaces that need aggressive cleaning or texturing.
However, be cautious when using shot blasting on thin slabs or areas with sensitive finishes, as it can cause damage if not controlled properly.
When to use a hybrid or sequential approach
A hybrid approach combines the benefits of both grinding and blasting. It’s useful when you need to achieve a uniform profile with minimal slab damage.
For instance, start by shot blasting to remove old coatings and contaminants. Then follow up with diamond grinding to level any remaining imperfections and fine-tune your surface profile (CSP).
Alternatively, you might use grinding first for leveling, then blast to expose aggregate or create texture. Always consider safety and dust control when switching methods.
Tools and Materials Checklist for Controlled Profiling
Make sure tooling matches the equipment and is calibrated for the job. Confirm bonding, grit, RPMs, and attachment methods before work starts.
Define measurement aids and pass/fail criteria to prevent over-grinding, and keep documentation of tool wear and surface readings for traceability.
Essential equipment and tooling choices
Before you start profiling, make sure your gear is right for the job. Here’s a quick checklist.
- Concrete grinder: Choose one with enough power (HP) and disc size to handle your floor area.
- Shot blaster: Select a machine that matches your floor size and complexity.
- Tooling types: Use directional tools for edges, non-directional for large areas. Swap as needed.
- Grit sizes (grinding): Start with coarse (36-60), finish with fine (80-150).
- Shot media (blasting): Use steel shot for aggressive profiling, plastic or glass for lighter jobs.
- Dust collection: Ensure your grinder has a compatible dust collector and bags.
- Tool wear indicators: Check grinding wheel or shot blaster tips before each pass. Replace when worn.
- Compatibility: Make sure all tools fit your machine, including bonding, RPM ranges.
Quick rule: Wrong gear can lead to over-grinding or poor profiling. Always check before you start.
Measurement and verification tools
Regularly check your progress to avoid over-grinding. Here’s how:
- Replica tape: Use it to measure surface profile depth at regular intervals.
- Profile comparator: Compare readings with target profile (e.g., ICRI/SSC spec).
- Test patches: Apply and test for adhesion, moisture before coating.
- Documentation: Keep a log of surface readings, tool wear, adjustments.
- Pass/fail criteria: Set clear targets to avoid over-grinding. Sign off when done.
Quick rule: Regular checks keep your profile on target and coatings happy.
Practical Step-by-Step Techniques to Hit the Profile Without over-Grinding
Set a conservative objective for the target profile and plan a test area before full production. This helps catch issues early and avoids waste.
Use incremental passes with appropriate tools and document each step. Stop and reassess if the profile drifts from the target or if heat and dust indicators rise beyond acceptable levels.
Step-by-Step Process
This clear, numbered sequence helps you achieve the right surface profile for coatings without over-grinding. Follow these practical steps to ensure a successful DIY job.
- Preparation and Safety: Clear the area, wear appropriate PPE, and set up your tools. Ensure diamond grinding or shot blasting equipment is in good working order.
- Main Work – Initial Pass: Start with a coarse grit or aggressive method (e.g., heavy shot blasting) to remove major contaminants and create initial texture.
- Check Progress: Inspect the surface visually and tactually. Ensure no large contaminants remain and the profile is developing as expected.
- Main Work – Refining Passes: Switch to finer grits or less aggressive methods (e.g., diamond grinding with a lower feed rate) to refine the profile, removing only the necessary material.
- Final Checks: Before applying any coating, ensure the surface is clean and dry. Use your visual and tactile indicators to confirm you’ve hit the right profile without over-grinding.
Progressive grit and machine setting strategy
Starting coarse and backing off helps dial in texture gradually, preventing unnecessary depth. Here’s how to approach this:
Start aggressive: Begin with a coarse grit or aggressive method to remove major contaminants and create initial texture.
Gradually refine: Switch to finer grits or less aggressive methods as you progress. This allows for better control over material removal, helping you hit the target profile without over-grinding.
Monitor closely: Keep a close eye on the surface during each pass. Adjust your method or grit size as needed to maintain a consistent, controlled profile.
Test patches and adhesion verification before full application
Running test panels helps validate your methods and set parameters for full-scale work. Here’s how to do it:
Prepare representative samples: Choose areas that mimic your main surface in terms of age, condition, and substrate.
Test each major step: Apply your profiling method to these patches, checking adhesion and profile after each significant change (e.g., grit size or machine setting).
Set acceptance criteria: Based on test results, establish clear criteria for what constitutes an acceptable profile. This helps you know when to stop grinding and start coating.
Dust Control, Waste Handling, and Safety During Surface Prep
Choose dust control methods based on the equipment and room layout, such as vacuums, shrouds, or water suppression. Match the approach to the job to keep the space clean and compliant.
Set up containment, waste capture, and labeling procedures that meet local regulations. Cover respiratory protection, training, and emergency plans to protect workers and the surroundings.
Dust control systems and method-specific considerations
When it comes to dust control during concrete surface prep, you’ve got options. Each method – grinding, shot blasting, or hybrid approaches – has its own best practices.
Grinders: Vacuum-equipped grinders are your go-to for dust-free work. They suck up debris as you grind, keeping the air clean and your workspace tidy. But they can be pricey and may not be suitable for large areas or heavy-duty prep.
Shot Blasting: For this aggressive method, contain the blast area with a dust-tight enclosure. HEPA filters can help capture fine particles. It’s faster but messier than grinding, so plan accordingly.
Hybrid approaches combine methods for optimal results. Dust control here depends on the combo – use vacuum grinders for fine work and enclosed shot blasting for heavy prep.
PPE, site controls, and environmental factors
Safety first, always. Here’s what you need to protect yourself and your surroundings during surface prep.
PPE: Wear a respirator with HEPA filters, safety glasses, ear protection, and gloves. Long sleeves and pants are a must too.
Site Controls: Set up temporary barriers around the work area to contain dust. Use negative pressure ventilation to suck dust away from workers and neighbors. Keep adjacent areas clear of prep activities.
Environmental factors matter too. High humidity can affect adhesion, while extreme temperatures can impact prep quality. Plan your work around these factors for best results.
Budgeting, Scheduling, and a Simple on-Site Decision Checklist (Plus Common Mistakes to Avoid)
Identify the main cost and time drivers in surface prep, including labor, equipment, and consumables. Plan around potential downtime and the coating schedule.
Use a concise on-site decision checklist to pick the right prep method, then lay out a practical schedule with buffers. Watch for common traps like over‑grinding, under‑prepping, or skipping moisture checks that lead to delays.
Cost drivers and when extra prep is worth it
Before you start, understand what drives up costs in surface prep. This helps you decide if investing more upfront will save you later.
- Labor: More prep means more time spent. Estimate accurately.
- Equipment rental: Better tools cost more but can speed up work and reduce downtime.
- Consumables: Blasting/grinding media wears out. Plan for replacement.
- Dust containment: Proper control saves on cleanup and disposal costs.
- Downtime: Coatings can’t be applied until surface is prepped and cured. Schedule accordingly.
- Waste disposal: Contaminated materials need proper, often costly, disposal.
- Moisture mitigation: Addressing moisture upfront prevents costly repairs later.
- Contaminant removal: Removing grease, oil, or other contaminants saves on rework.
Quick rule: If prep seems slow or costly, consider if it’s better to do it right the first time rather than risking coatings failure and rework.
Quick decision checklist and top mistakes to avoid
Use this checklist on-site to choose the right prep method. It helps you avoid common pitfalls that cause delays.
- Surface condition: Inspect for cracks, spalls, or other defects. Ignoring them can lead to coating failure.
- Coating compatibility: Ensure chosen coating works with the substrate and prep method. Incompatibility causes adhesion issues.
- Substrate type: Different substrates (concrete, steel, etc.) require different prep methods. Using the wrong one leads to poor performance.
- Desired profile: Check if the surface profile meets coating manufacturer’s specs. Over-grinding or under-prepping causes adhesion problems.
- Moisture check: Test for moisture. Skipping this can trap moisture under coatings, causing delamination.
- Metrology checks: Verify surface flatness and level. Out-of-tolerance surfaces cause application issues.
- Access/space constraints: Consider if equipment and workers can safely access the area. Restricted access causes delays.
Quick rule: Always test, verify, and document surface conditions before starting prep work to avoid costly mistakes.
Conclusion
Getting the surface right isn’t optional; it locks in safety, durability, and a clean, lasting finish. If you profile correctly and avoid over-grinding, your coatings will bond better and stay looking good longer.
Before you start, confirm the existing floor meets the target profile, pick your method (diamond grinding, shot blasting, or a hybrid), set up dust control and PPE, test a small area, document the result, then progress in measured passes, double-check the profile as you go, then clean and protect the surface for a proper cure.
Avoid common missteps: don’t skip profiling or jump too deep too soon, don’t mix methods without a plan, and don’t ignore moisture or edge conditions. Safety rules are non-negotiable: wear a respirator and eye protection, use hearing protection, control dust, and power down equipment before changing bits or discs. Stay disciplined about waste handling and follow the site’s ventilation and containment practices.
If the area is large, the floor is irregular, moisture or structural issues exist, or you’re unsure about coating compatibility, call a professional rather than pushing on. Stay practical, stay safe, and you’ll hit the right profile—and avoid costly mistakes.
FAQ
Should I clean the concrete surface before applying coatings, and what’s the right method?
Yes. Remove all dust, oil, grease, and curing compounds as best you can. Use a degreaser or heavy-duty cleaner, scrub if needed, and rinse well until the water sheets clean. Dry completely before you start profiling or coating.
What profiling methods should I consider, and when is diamond grinding better than shot blasting?
Diamond grinding gives a smooth, consistent profile and is good for flat floors needing a clean top layer. Shot blasting roughens the surface fast and can remove contaminants and coatings but may leave a rougher finish. For delicate edges or thin coatings, grinding is gentler on the substrate; for heavy coatings or old glue, shot blasting can be faster.
How do I verify I achieved the right surface profile for epoxy or urethane coatings?
Check for a visibly open surface with good tooth, and test with a simple adhesion scratch or tape pull if you know a quick DIY test. Compare the surface to the coating’s labeled profile target and follow the manufacturer’s instructions. If in doubt, re-profile a small area before committing the whole floor.
What should I consider when choosing machines for profiling on a home project?
Match the machine to the floor size and condition. A planned approach with a portable grinder and lightweight diamond segments works for small areas; for larger jobs, consider a rental grinder with proper dust control. Ensure the machine has effective dust containment and easy maintenance.
Are there environmental or site conditions I should account for during surface prep?
Keep dust under control and protect nearby areas from splash or spill. Work in a ventilated space and avoid moisture that can ruin profile quality. If you have moisture or humidity concerns, check coating compatibility and dry-time guidance from the product label.