
Introduction
A concrete slab that is “too thin” means it lacks the mass and reinforcement to carry the loads and ground movements expected of it, and it will show that by failing sooner than a properly sized slab. Expect visible signs like cracking, sagging, or edge spalling, and check manufacturer guidance, product labels, and local rules to confirm required thickness and reinforcement for your job. Keep the answer practical: if it looks marginal, treat it as a risk and get more info before loading it up or finishing the surface.
If you’re working the job yourself, think in terms of options rather than miracle fixes — you can strengthen a thin slab with overlays, adding reinforcement, or removing and re-pouring areas, but each approach has limits and prep requirements. Before picking a repair path, verify materials, substrate condition, and load needs, and when in doubt consult a structural pro or local authority for what your situation requires.
Key takeaways
- Confirm slab thickness with a licensed inspector or appropriate gauge before repair.
- Visible cracks may indicate underlying voids, rebar corrosion, or insufficient bearing area.
- Temporary safety measures: restrict access, post signage, and support compromised edges during work.
- For short-term mitigation, limit heavy loads and avoid drilling until thickness verified.
- Permanent repair options require compatible materials and follow local code and manufacturer guidance.
- Documentation: record thickness measurements, inspection dates, and action taken for future audits.
Table of Contents
- Introduction
- Key takeaways
- Why Slab Thickness Matters: Mechanics and Risk
- Common Causes of an Overly Thin Slab
- Real-World Failure Signs and Visual Checkpoints
- Structural and Load-Related Issues Caused by Thin Slabs
- Testing and Inspection Protocols to Assess Slab Thickness and Condition
- Short-Term Mitigation and Temporary Safety Measures
- Permanent Repair and Strengthening Options
- Materials, Standards, and Safety Considerations to Verify Before Repair
- Conclusion
- FAQ
Why Slab Thickness Matters: Mechanics and Risk
Slab thickness controls the bending stiffness and the amount of concrete available to resist tensile stresses; thinner slabs flex more and reach cracking strain sooner. Check design documents or product data sheets to confirm the intended thickness before assuming behavior.
When thickness is the primary design variable, all other sizing—reinforcement layout, joint spacing, and load paths—depends on it, so undersizing shifts loads into unintended modes. If you don’t have the drawings, note that thickness directly affects expected service life and inspect for early distress accordingly.
Load distribution and bending
The thickness of a concrete slab plays a crucial role in how it distributes loads. A thinner slab can’t spread concentrated loads as effectively to the supporting soil.
Imagine a thin slice of bread (thin slab) vs. a thick slice. The thin slice bends more under pressure, right? Same with slabs – less thickness means more bending.
Bending causes tensile stresses on the bottom face. Too much bending can lead to cracking and failure. That’s why thicker slabs can handle heavier loads better.
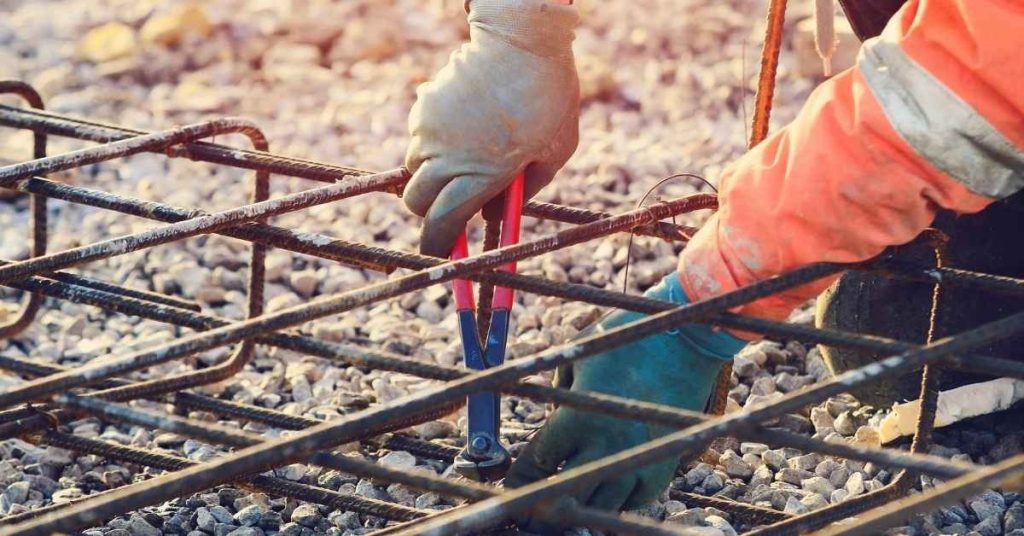
Reinforcement interaction and cover
Concrete reinforcement needs a certain thickness of concrete around it (cover) to work properly. This cover protects the steel from corrosion, provides fire resistance, and helps transfer forces.
A thin slab may not provide enough cover. Inadequate cover reduces bond between concrete and steel, weakening their composite action. Less bond means less strength – like trying to hold a rope with just your fingertips instead of wrapping your whole hand around it.
Insufficient cover also leaves reinforcement more exposed to oxygen and moisture, speeding up corrosion. Corroded rebar can expand, cracking the concrete and further weakening the structure.
Common Causes of an Overly Thin Slab
Thin slabs usually stem from design omissions, specification errors, or field measurement mistakes like incorrect formwork or screed settings during placement. Review the contract drawings, submittals, and on‑site setpoints to see where responsibilities and instructions were missed.
Other common contributors include value engineering cuts, soil settlement reducing effective thickness, and miscommunication between crew and inspector. If you suspect a cause, check sampling records, concrete delivery notes, and any as‑built documentation to establish accountability.
Design and specification errors
Mistakes during the design and specification phase can lead to slabs that are too thin. Avoid these common pitfalls:
- Incorrect drawings: Ensure plans are accurate before starting work.
- Omitted details: Check for missing information, like reinforcement schedules or edge formwork.
- Wrong slab type: Verify the specified slab design (e.g., one-way vs. two-way) is suitable for the load and support conditions.
- Inadequate thickness calculation: Double-check calculations to ensure the slab can handle anticipated loads.
- Overlooking live loads: Consider all expected loads, including heavy equipment or vehicles.
Regularly review and update plans throughout the project to catch any errors early.
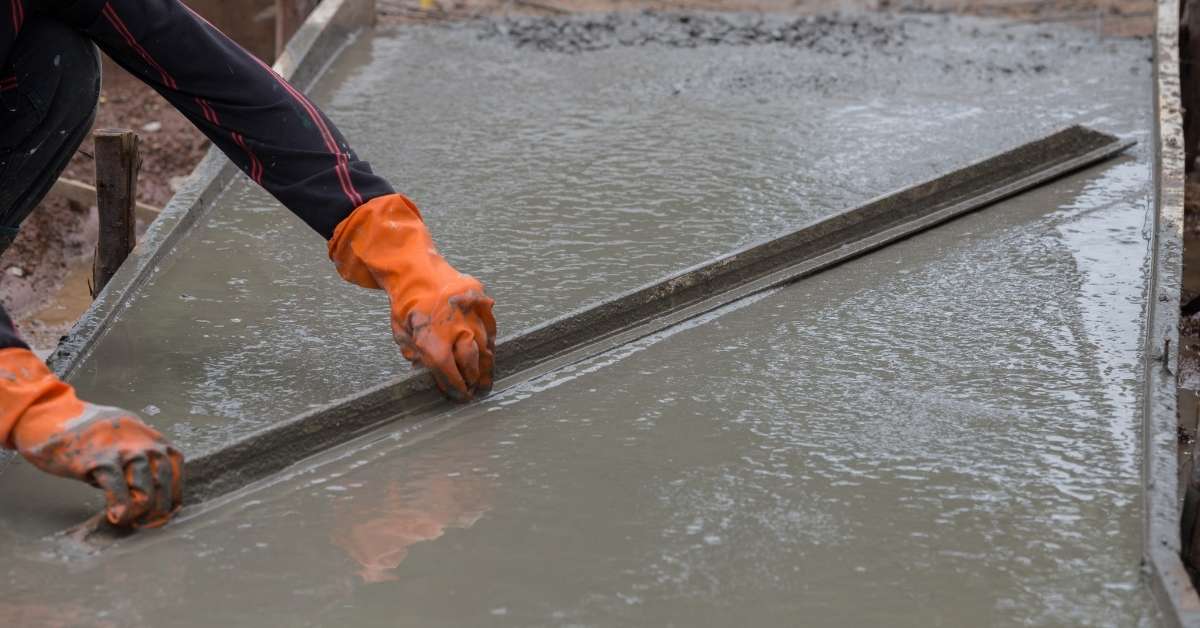
Placement and workmanship issues
Problems during concrete placement can result in slabs that are thinner than intended. Keep an eye out for:
Insufficient formwork: Ensure forms are sturdy, well-supported, and properly braced to maintain the desired slab thickness.
Mis-set screed: A poorly set screed can lead to inconsistent slab thickness. Make sure it’s level and stable before striking off.
Over-excavation or deliberate underpouring: Both can reduce the final slab thickness. Monitor excavation depths and ensure concrete is placed as designed.
Soil settlement, erosion, and undermining
Loss of subgrade support after the slab has been poured can effectively reduce its thickness. To mitigate this:
Preparation is key: Compact soil properly before excavation to minimize settlement.
Protect against erosion: Install erosion control measures, like silt fences or straw wattles, around the site to prevent washout.
Monitor for undermining: Keep an eye out for signs of soil loss beneath the slab. Address any issues promptly to maintain slab integrity.
Real-World Failure Signs and Visual Checkpoints
Start at the surface: look for map cracking, popouts, crazing, and joint failures that indicate tensile distress; these are the earliest, easiest to spot symptoms. Photograph and record locations, then move on to more telling signs like exposed or corroded reinforcement and spalling.
Deeper structural indicators include excessive deflection, continuous cracking across bays, and slab rocking at supports—these suggest the slab is not carrying load as intended. Prioritize inspections from visible surface faults down to support reactions to build a practical checklist for further testing.
Cracking patterns and progression
Use this checklist to identify cracking that suggests your concrete slab is too thin.
- Map cracking: Fine cracks forming a grid pattern. Confirm by measuring crack spacing and width. If skipped, could indicate inadequate thickness or poor curing.
- Long flexural cracks: Cracks running along the length of the slab. Check for these near supports and midspan. They may be signs of insufficient thickness.
- Corner cracks: Cracks at corners, especially where walls meet slabs. Inspect for these; they can indicate thin edges or poor support.
- Crack width: Measure crack widths. Widening cracks may suggest ongoing issues with slab thickness.
- Crack direction: Check if cracks are diagonal, radial, or concentric. Diagonal cracks often indicate thin edges; radial and concentric may point to support problems.
- Crack location: Note where cracks appear – top, bottom, or sides of the slab. Top cracks suggest surface issues; bottom cracks could indicate support problems.
- Crack progression: Track if cracks are growing longer, wider, or deeper over time. Progressing cracks may signal ongoing thickness-related issues.
- Crack symmetry: Check if cracks appear on both sides of supports or midspan. Symmetrical cracking suggests uniform loading; asymmetrical may indicate support problems.
Quick rule: If cracks are numerous, wide, or progressing, your slab might be too thin.
Spalling, delamination, and surface deterioration
Use this checklist to spot signs of surface loss and layer separation that may indicate an insufficient slab section or poor cover.
- Flaking: Small pieces breaking off the surface. Confirm by trying to scrape off more with a coin or screwdriver. If so, it could be due to thin cover or weak concrete.
- Popping sounds: Hear popping or cracking noises when walking on the slab. Listen for these; they may indicate delamination between layers.
- Soft spots: Areas that feel soft or spongy underfoot. Press down gently to check; soft spots could suggest delamination or insufficient thickness.
- Discoloration: Dark patches or stains on the surface. Inspect for these; they can indicate moisture intrusion due to thin cover or poor curing.
- Chipping: Edges or corners breaking off in chunks. Check for this; it may suggest thin edges or poor reinforcement cover.
- Delamination: Layers of concrete separating from each other. Try to lift the surface with a flathead screwdriver; if it lifts easily, there’s delamination.
- Efflorescence: White powdery deposits on the surface. Look for this; it can indicate moisture migration due to thin cover or poor curing.
- Crazing: Fine hairline cracks forming a network on the surface. Inspect for these; they may suggest drying shrinkage issues due to thin slab or poor curing.
Quick rule: If you find multiple signs of surface deterioration, your slab might be too thin or have inadequate cover.
Deflection, ponding, and unevenness
Use this checklist to measure sag, localized ponding, or trip hazards that reveal loss of stiffness consistent with thin or under-supported slabs.
- Sagging: Measurable deflection in the middle of the slab. Use a straight edge and feeler gauges to check; excessive deflection could indicate insufficient thickness or poor support.
- Ponding: Water pooling on the surface after rain or snow melt. Observe this; it may suggest inadequate drainage due to thin slab or poor design.
- Trip hazards: Uneven surfaces causing tripping. Check for these; they can indicate deflection, settlement, or other thickness-related issues.
- Unevenness: Slab not level when measured with a straight edge. Use a long level to check; unevenness may suggest thin edges, poor support, or soil settlement.
- Waviness: Visible waves or ripples in the slab surface. Inspect for these; they can indicate thin slab, poor compaction, or other construction issues.
- Cracking at supports: Cracks appearing near supports. Check for these; they may suggest support problems or inadequate thickness.
- Sinking edges: Edges of the slab sinking lower than the middle. Observe this; it could indicate thin edges, poor support, or soil settlement.
- Bouncing: Slab bouncing when walked on. Feel for this; excessive bounce may suggest insufficient thickness or poor support.
Quick rule: If you find multiple signs of deflection, ponding, or unevenness, your slab might be too thin or have inadequate support.
Structural and Load-Related Issues Caused by Thin Slabs
Reduced thickness lowers bending capacity and increases midspan deflection under the same load, which can lead to serviceability complaints and accelerated fatigue. Observe for increased vibration and dynamic response under moving or point loads, which thin sections handle poorly.
Thin slabs also change failure modes: local punching, shear cracking around concentrated loads, and progressive widening of cracks become more likely as load redistributions occur. Verify load assumptions in the design package and consider real loads on site before judging adequacy.
Reduced Bearing and Punching Risks
A thin concrete slab is like a weak foundation for a house of cards. It can’t support as much weight as it should, especially under heavy loads.
Imagine you’re standing on an ice sheet. If it’s thick, you feel safe. But if it’s too thin, one wrong step and CRACK! You go through. That’s bearing failure in a nutshell.
Now, think about a point load like a heavy piece of machinery or a column on your slab. A thin slab can’t spread that weight out evenly. It concentrates the stress under that point. Too much pressure, and PUNCH! The concrete around it gives way. That’s local punching shear failure.
So, keep an eye out for these signs of trouble: cracks radiating from heavy loads or columns, or sudden dips where loads are concentrated.
Greater Deflection and Serviceability Problems
A thin slab is like a trampoline. It bends more under load than it should, causing all sorts of headaches.
First off, excessive deflection can ruin your finishes. Tiles crack, flooring buckles, and paint chips. Not to mention doors that won’t close properly or equipment that wobbles.
But it’s not just about aesthetics. Too much bending can make your slab feel unsafe, even if it hasn’t collapsed yet. People notice the bounce in their step, and they worry.
So, keep an eye out for signs of excessive deflection: doors that don’t close properly, tiles that crack, or equipment that wobbles. And remember, a little bit of bounce is normal, but too much can spell trouble.
Reinforcement Exposure and Corrosion Progression
A thin slab means less concrete cover over your reinforcement. That’s like leaving a wound uncovered – it’s just asking for trouble.
See, when cracks form in a thin slab, they expose the reinforcement to air and moisture. That’s all corrosion needs to start: oxygen, water, and a bit of salt or acid from the concrete itself.
Once corrosion starts, it’s like a vicious cycle. The rust swells, pushing against the concrete cover, causing more cracks. More exposure, more corrosion. It’s a progressive failure that weakens your slab over time.
So, keep an eye out for signs of reinforcement exposure: cracks that widen over time, or spalling – when chunks of concrete pop off, leaving the rebar exposed. If you see these signs, it’s time to act fast before the problem gets worse.
Testing and Inspection Protocols to Assess Slab Thickness and Condition
Use a staged approach: start with visual mapping and simple nondestructive checks such as cover meters and chain‑drag sounding, then move to thickness checks with ground‑penetrating radar or core sampling where needed. Confirm reinforcement layout and concrete cover by checking instrument readings against drawings or by taking targeted cores.
Destructive testing (cores) gives the definitive thickness, strength, and condition data, while lab testing can identify mix characteristics and deterioration. If you lack manufacturer or engineer guidance, document findings and consult a structural engineer to plan further invasive testing safely.
Visual inspection and visual checkpoints
Before you start testing, use this checklist to visually inspect your concrete slab. It’s quick, easy, and can help you pinpoint potential thin areas.
- Cracking: Check for cracks. They can indicate a thin or damaged slab.
- Delamination: Look for flaking or peeling of the surface. This could mean the slab is too thin and weak.
- Unevenness: Feel for dips, bumps, or waves. These can indicate variations in thickness.
- Spalling: Check for chipping or crumbling edges. This might be a sign of a thin slab with exposed aggregate.
- Rebar exposure: Look for visible rebar. If it’s exposed, the slab is likely too thin and at risk of corrosion.
- Ponding water: Check where water collects after rain. This can indicate low spots due to a thin or uneven slab.
- Measure thickness: Use a simple concrete probe to measure the slab’s thickness in various locations, especially around cracks and low spots.
- Document findings: Take photos of any distress and note measurements. This will help you track changes over time.
Quick rule: If you find more than a few areas of concern, it’s time to move on to nondestructive testing.
Nondestructive testing options and what they reveal
Once you’ve done a visual inspection, use these nondestructive tests to learn more about your slab’s thickness and reinforcement without damaging it.
- Concrete meters: Use a concrete meter to measure the slab’s thickness. It uses a signal that bounces off the bottom of the slab to calculate its depth.
- Ground-penetrating radar (GPR): GPR sends electromagnetic waves into the slab and analyzes the returning signals. It can show you the location and size of rebar, as well as any voids or delaminations.
- Ultrasonic testing: This method uses high-frequency sound waves to measure the thickness of the slab. It’s particularly useful for finding variations in thickness over a small area.
- Magnetic flux leakage (MFL): MFL is used to detect and locate rebar within the slab. It can help you understand the layout and condition of your reinforcement.
Quick rule: These tests give you a better understanding of what’s going on beneath the surface, but they won’t tell you everything. You might still need to take core samples for lab analysis.
When and how to core and lab-analyze samples
If your visual inspection and nondestructive tests reveal issues, it’s time to take core samples for lab analysis. Here’s when and how to do it.
- Where to core: Core in areas where you’ve found distress or variations in thickness. Make sure to core at least one inch away from any cracks or edges.
- How much to core: You’ll need enough material for testing and analysis. A standard core is 2 inches in diameter and about 3 inches long.
- What to test: Test the cores for compressive strength, composition (like water-cement ratio), and thickness confirmation. This will give you a clear picture of your slab’s condition.
- Lab analysis: Send your cores to a certified lab for testing. They’ll have the equipment and expertise to provide accurate results.
- Interpret results: Use the lab’s findings to guide your repair decisions. If the slab is too thin or weak, you might need to reinforce it or even replace it.
Quick rule: Coring and lab analysis give you the most accurate information about your slab’s condition, but they’re also the most invasive and expensive tests.
Short-Term Mitigation and Temporary Safety Measures
Immediately control loads: restrict traffic, limit stored weight, and reroute concentrated loads away from suspect areas to reduce risk while you assess. Temporary shoring, adding distributed loading plates, or propping under critical spans can buy time until a permanent repair is planned.
Implement simple monitoring—deflection gauges, visual tags at cracks, and regular inspections—to detect worsening conditions during the interim. Follow manufacturer instructions for any temporary materials used and check local regulations for permitted shoring practices.
Load restriction strategies and signage
First things first, you need to control the load on your thin concrete slab. That means limiting vehicle and equipment traffic.
Establish exclusion zones around areas with thin slabs. No heavy machinery or vehicles allowed in those zones.
Communicate these limits clearly. Use temporary signage to warn site users about the slab’s reduced capacity. Make sure everyone understands they need to keep off until you’ve fixed it.
Temporary shoring and load transfer
While you’re planning your permanent fix, you can ease the stress on thin areas with some temporary support. This is called shoring.
Use props or shores to spread the load from the slab onto something stronger nearby. You might use steel posts and beams, or even timber if it’s strong enough.
Remember, this is a short-term solution only. It buys you time while you plan your permanent fix, but it won’t solve the problem long-term.
Emergency surface repairs and temporary overlays
Sometimes, you need a quick fix to stop water getting in or dust coming off. That’s where emergency surface repairs come in.
Use a concrete patching compound to fill cracks and holes. It’s not strong like proper repair, but it’ll do for now.
For larger areas, you might use a non-structural overlay. This is like a thin layer of new concrete on top. But again, this isn’t a permanent fix. It just buys you time until you can do the job properly.
Permanent Repair and Strengthening Options
Permanent choices range from localized patch repairs and bonded overlays to external reinforcement (plates, fiber systems) or full slab replacement; selection depends on the extent of deficiency and load demands. Evaluate durability, compatibility with the existing concrete, and how each option affects long‑term maintenance when comparing solutions.
For targeted strengthening, confirm the chosen system’s installation requirements and verify bond or anchorage capacity before proceeding. If in doubt about structural performance after repair, get a design-level assessment from a licensed engineer and retain installation documentation.
Sectional repair and full slab replacement
If your concrete slab is too thin, you might need to consider repairs. There are two main methods: sectional repair and full slab replacement.
Sectional Repair: This involves cutting out the damaged or insufficiently thick section and replacing it with new concrete. It’s less disruptive but may leave visible joints.
Full Slab Replacement: If the entire slab is too thin, a full replacement might be necessary. This is more expensive and time-consuming but ensures a uniform thickness throughout.
The best choice depends on the extent of the problem, your budget, and how much disruption you can afford. Always consult with a structural engineer before proceeding.
Bonded overlays, bonded toppings, and local beef-ups
Instead of replacing the entire slab, you can add a new layer of concrete on top to increase thickness. This is called a bonded overlay or topping.
To work effectively, the existing slab must be clean, dry, and free from contaminants for proper bonding. You might also need to use fiber reinforcement to prevent cracking in the new layer.
For localized issues, you can perform ‘local beef-ups’ by thickening specific areas of the slab where needed. This is less intrusive but may not provide a uniform solution.
These methods are cost-effective and less disruptive than full replacement, but they rely on the existing slab’s integrity for support.
Structural strengthening techniques (plates, CFRP, underpinning)
For severe cases where the slab is structurally compromised, you might need to consider advanced strengthening techniques.
Steel Plates: These can be bolted or welded onto the underside of the slab to increase its strength. They’re effective but may require additional support for the increased load.
Carbon Fiber Reinforced Polymer (CFRP): CFRP strips can be bonded to the surface of the slab to reinforce it. This method is less intrusive than steel plates but requires a clean, dry surface for bonding.
Underpinning: If the problem lies with the foundation, underpinning might be necessary. This involves strengthening or replacing the foundation to support the existing slab more effectively.
These methods are complex and should only be undertaken by experienced professionals after thorough assessment and design by a structural engineer.
Materials, Standards, and Safety Considerations to Verify Before Repair
Before any remedial work, confirm the material specifications, applicable standards, and manufacturer installation instructions for repair products and reinforcement systems. Collect product data sheets, safety data sheets, and any relevant test certificates to ensure compatibility with the existing slab.
Also verify jobsite safety: fall protection, shoring design reviews, and hazardous material handling should be documented and in place prior to starting repairs. If code or standard applicability is unclear, check local regulations or ask the product manufacturer and your structural engineer for clarification.
Material specs to verify and what to check
Before you start any repair, go through this checklist. It helps ensure your fix lasts.
- Concrete strength: Check it matches the original design. Too low, slab can’t handle loads.
- Aggregate condition: Look for signs of deterioration like excessive cracking or crumbling. Bad aggregates weaken concrete.
- Rebar type and size: Ensure rebar is as specified. Wrong size or type reduces strength.
- Bond surfaces: Inspect old and new surfaces where they’ll meet. Clean, rough surfaces bond best.
- Cement type: Check it’s compatible with the original. Wrong type can cause issues.
- Water-cement ratio: Too much water weakens concrete. Check it’s right for your repair.
- Admixtures: Ensure they’re suitable and used correctly. Wrong ones can harm concrete.
- Lab confirmation: For critical repairs, test samples to confirm material properties.
Quick rule: Don’t skip checks. Each matters for a strong, lasting repair.
Relevant codes, standards, and documentation
Check local building codes to ensure your repair complies. Ignoring them can lead to trouble later.
Look up structural design standards too. They guide safe repairs.
Find as-built drawings if you can. They show what was built, helping you match your repair.
Note: If you’re unsure, consult a structural engineer. It’s worth the peace of mind.
Site safety and load-control during remediation
Safety first! Here’s what to do:
Temporary shoring: Support the slab while you work. Prevents collapse.
Traffic control: Keep people and vehicles away from the repair area. Safety barriers help.
Monitoring: Watch for signs of distress during and after your repair. If something’s amiss, act fast.
Conclusion
The core idea is simple: a slab that’s too thin is a safety and durability risk, and you should approach fixes with a clear plan, solid checks, and respect for what the load and structure actually require.
Check in plain terms: first look for obvious failure signs and measure thickness with the right tools, then compare what you find to the loads the slab carries, verify with the project’s standards, note cracking or settlement patterns, confirm moisture or corrosion concerns, and decide on a temporary safety plan before any permanent repair is attempted.
Avoid these mistakes: don’t push a thin slab back to service with a cosmetic patch; don’t rely on guesswork or unapproved materials; don’t skip testing, warnings, or small-area trials. Always use proper safety rules: isolate the area, wear PPE, and start with low-risk checks before any invasive work.
If the tests show significant under-thickness, unpredictable cracking, or questionable load paths, call a professional and follow their guidance. When you follow solid checks, sensible temporary measures, and proven repair options, you’ll restore strength, avoid costly mistakes, and keep the project moving with confidence.
FAQ
What are the telltale signs that a slab is too thin in the field?
Cracking that runs in long, irregular lines, pulling or spalling along edges, and excessive bounce when you walk on it are common flags. You may also see basement walls or posts settling differently on the slab compared to nearby ground. If the slab shows unusual flex or deflection under load, treat it as a concern.
How does a thin slab affect load paths and structural safety?
Thin slabs don’t transfer vehicle or equipment loads as well as intended, which can transfer stress to the edges or underlying soil. That can cause cracking, settlement, or edge failure that compromises support for attached structures. Don’t ignore movement or new cracks—address it before it worsens.
What should I check to confirm thickness and condition before repairing?
Look for the original slab thickness markings on nearby forms or the structural drawings if you have them. Measure where possible with proper tools, and note any deterioration like cracking, crumbling edges, or exposed rebar. Refer to product labels, manufacturer instructions, and local safety guidance for acceptable repair options.
What are practical next steps if I suspect a thin slab?
Stop heavy use in the area and keep people away from the cracked or moving zones. Get a qualified pro to confirm thickness and determine if temporary stabilization or permanent repair is needed. If you proceed yourself, rely on documented methods from reputable sources and follow all label directions and local requirements.