

A concrete slab can move again after mudjacking or polyjacking because lifting restores its elevation and may fill support gaps at that time, but it does not automatically stop the condition that removed support in the first place. Ongoing erosion, concentrated runoff, soil shrinkage or settlement, edge washout, a leak, changing loads, slab cracking, or movement at joints can still affect the slab afterward. Before approving another lift, confirm that the slab has actually changed elevation, document where and when it changes, and investigate what remained unresolved at the site.
This is not a material-versus-material question. A cementitious grout lift and a polyurethane lift can both be appropriate in the right setting, but neither method is a stand-alone cure for every drainage, soil, or slab-condition problem. The useful question now is: what does the post-repair pattern show?
The timeline after a lift: when a raised slab starts acting differently again
Start with a short timeline rather than relying on the impression that the slab “dropped back down.” Write down what the slab looked like before it was raised, what changed immediately after the work, and what has changed since. A slab that looks acceptable for months and then develops an edge gap after repeated rain presents a different question from one that rocks the day after lifting.
Note events that occurred between the repair and the new symptom: heavy rainfall, irrigation changes, downspout changes, a plumbing event, freeze-thaw weather, landscaping work, or new vehicle traffic. Also note whether the apparent change is a confirmed loss of elevation, a crack that is now easier to see, a widening joint, a drainage change, or an adjoining slab moving independently.
Concrete itself does not stay dimensionally identical through every season. Slabs can shrink, curl, and respond to temperature and moisture differences. Joints are also intended to permit movement between adjoining concrete elements. That means a visible joint gap or a crack is evidence worth recording, not automatic proof that the injected material failed. ACI guidance on slabjacking similarly notes that raising a slab does not correct poor underlying soil conditions that may continue to affect support.
Step 1: Confirm that the slab moved after the lift
Establish a dated baseline before interpreting the cause. A single glance across a patio, walk, driveway, or garage floor is not a reliable elevation record. Choose reference features that are likely to remain fixed relative to the suspect slab, such as an appropriate wall face, threshold, or a documented nearby point that is not part of the moving concrete.
- Mark repeatable locations. Use painter’s tape, a small removable mark, or a simple sketch to identify the same corners, joints, crack ends, and drainage low points for each inspection.
- Measure the surface consistently. Use a straightedge with an appropriate level, or another suitable elevation-measuring tool, at the same marked locations. Record the method used so later readings are comparable.
- Measure gaps rather than guessing. Record the visible gap at slab edges, along walls, near steps, and at joints. A gap can change because one element moved, because backfill washed away, or because the adjoining element moved differently.
- Photograph from the same positions. Take wide photos for context and close photos of cracks, joints, edges, and runoff paths. Include a date and a scale reference next to cracks where practical.
- Record the pattern. Is the issue confined to one corner? Does it run across several slabs? Is it limited to a joint? Does it appear after rain or only under a vehicle wheel path?
Do not treat crack appearance alone as settlement proof. Drying shrinkage, temperature-related movement, and curling can still affect a slab after it has been lifted. The important change is progression: a crack opening, developing offset, or repeatedly changing at the same time as a documented elevation change carries more diagnostic value than an unchanged crack.
If edge lift is the main concern rather than a broad drop, see Concrete Curling vs Settlement: Quick Checks to Diagnose Edge Lift for screening clues. It should not replace site-specific assessment where the movement pattern is serious or unclear.
Safety-and-scope gate: stop the inspection and obtain qualified assessment when the pattern is not a routine slab-leveling problem
Stop the homeowner-level inspection and obtain qualified assessment if the moving slab supports a building or structural element, or if movement is adjacent to a foundation, footing, load-bearing wall, column, or similar component. Surface evidence can show that further assessment is needed, but it cannot diagnose expansive soil, a sinkhole, structural failure, or a concealed leak.
- Escalate rapid or continuing movement, substantial differential settlement, wide or offset cracks, exposed reinforcement, undermined footings, or an unstable walking or driving surface.
- Do not probe, drill, inject, or cover up evidence where a plumbing or utility leak is suspected. Arrange the appropriate utility check or qualified leak investigation. Treat gas odors and electrical hazards as urgent safety issues.
- Keep people, vehicles, and stored loads away from an unstable edge, opening, voided area, or trip hazard until it is controlled.
- Preserve the photos, measurements, repair paperwork, and timeline. They are more useful to an evaluator than an unsupported conclusion about the injection material.
Step 2: Map the support pattern—localized void, broad settlement, or movement at an edge or joint
Once you have at least an initial record, walk the full perimeter. Look for widening edge gaps, lost backfill, separated edging, open joints, soil loss, or a place where adjacent ground no longer meets the slab. A slab can be level in the middle while losing support along an edge.
Pay attention to how it behaves under ordinary use. A corner that rocks when stepped on suggests a localized support question. A broad slope that can be measured across the slab, or similar movement across several slabs, suggests a larger area of concern. Neither pattern identifies one cause by itself, but the distinction helps prevent a broad site problem from being treated as one small void.
Compare the suspect slab with nearby slabs, steps, walls, and thresholds. Concrete elements connected visually are not necessarily one moving unit. Isolation joints allow independent vertical and horizontal movement, and moisture and temperature can change concrete dimensions. The National Ready Mixed Concrete Association explains the role of slab joints in its CIP 6 guidance.
Find the paperwork from the original lift if it is available. Record the date, areas treated, injection locations, stated elevation change, noted voids, and any recommendations concerning water, joints, backfill, or site conditions. That documentation can direct a follow-up inspection. It cannot, however, prove an inadequate injection pattern from surface symptoms alone.
Example: A driveway panel with a recurring gap along one outer edge after storms may justify close attention to runoff and edge loss. Several patio panels that change across a larger area, including near the house, point toward a broader moisture, soil, or site-condition investigation instead of an assumption that one corner simply needs more material.
Step 3: Trace the water path and support loss since the repair
Water is not always the cause of renewed movement, but its timing and path are among the most useful things to document. Inspect once in dry weather and again after rainfall or irrigation when it is safe to do so. Look for ponding, the direction of surface runoff, downspout discharge, splash patterns, irrigation overspray, and water entering open joints or slab-edge gaps.
At the perimeter, look for displaced soil, small channels, sediment deposits, softened ground, recurring wet spots, erosion at edges, and water emerging from beneath or beside the slab. Those are washout clues, not proof of a particular source. A wet area could come from roof runoff, irrigation, surface grading, groundwater, or a concealed plumbing or utility issue.
Compare the timing in your log. Did rocking begin after a storm? Did a gap enlarge after a landscape bed was changed? Did drainage become worse after the slab was lifted, perhaps because the corrected elevation exposed an existing grading problem? Raising a slab may restore a preferred slope, but it does not by itself eliminate erosion, flooding, soil shrinkage, or poor support conditions. ACI’s RAP Bulletin 11 describes this central limitation of slabjacking.
Do not assume that a surface sealer fixes missing support. Sealing a crack or joint can be part of water management and surface maintenance when appropriate, but it does not replace soil, restore washed-out edge support, or establish the source of water.
Step 4: Check slab and use clues that injection cannot erase
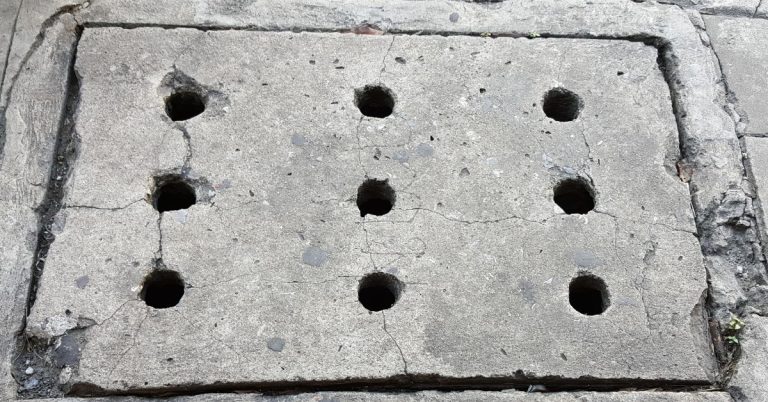
A lift may improve elevation without making a severely distressed slab sound again. Inspect cracks for location, width, direction, offset, and change over time. A crack that remains stable may be nonprogressive, but its significance still depends on the slab condition and surrounding movement. A crack that opens, offsets, or accompanies movement should remain part of the repair assessment.
Inspect interfaces: steps, walls, driveways, thresholds, and neighboring slabs. Consider whether a joint is doing its intended job of accommodating independent movement. Moisture and temperature changes can affect slab dimensions, while curing-related shrinkage and curling can influence edge behavior. ACI discussion of curling and drying shrinkage supports caution against treating every changed edge as renewed soil settlement.
Weather-sensitive edge or corner behavior can be a clue for curling or environmental movement, particularly when the larger elevation pattern does not show consistent settlement. Do not diagnose curling from one observation. Repeat readings in different conditions, and compare them to the behavior of cracks, edges, and drainage.
Also review what the slab carries now. New vehicle use, repeated wheel paths near an edge, heavy stored items, or a changed access route can expose an unsupported section or aggravate cracking. Slabs with extensive cracking, broken sections, deteriorated concrete, recurring movement from an unresolved site condition, or geometry that cannot move freely as intended may not be good candidates for a simple repeat lift.
For a separate repair-selection discussion after the cause is understood, see Fix Uneven Concrete Slabs: When to Grind, When to Overlay, When to Replace. Grinding or resurfacing may address a surface condition, but it does not correct an active support problem.
Step 5: Match the documented pattern to the next repair scope—not merely another injection
Your record should narrow the next action without pretending to produce a definitive subsurface diagnosis. The repair scope should match the documented pattern and the condition causing support loss, if that condition can be identified.
- No documented continuing elevation change: If repeated readings do not show continued movement and cracks do not develop progressive offset, use a monitoring plan. A visible crack or joint after lifting does not, by itself, establish repair failure.
- Localized support loss with an identified water or edge condition: Seek an assessment that addresses the localized support area and the corrected runoff, discharge, joint, backfill, or erosion condition before considering re-injection.
- Recurring runoff, discharge, open joints, or edge washout: Prioritize the applicable drainage, discharge, joint-maintenance, edge-support, or erosion-control scope. Treat sealing as a water-management measure, not as proof that support is restored.
- Broad, repeated movement: If the change crosses several slabs or structural interfaces, retain the log and seek site-specific evaluation rather than