
Introduction
Concrete slab curling is when the edges or sides of a slab lift and form a curved shape. It often results from uneven drying, moisture shifts, or temperature changes in the mix and surrounding soils. Understanding its causes and how to measure it helps you decide on mitigation steps on a DIY project.
To find out if curling is happening, check for a consistent gap or edge lift across the slab and use a straightedge or level in a few spots. Temperature and moisture conditions, soil support, and finish methods can influence curling, so look for signs of movement after changes in weather. To reduce curling, plan for even drying, proper joints, adequate subgrade support, and follow manufacturer instructions and local rules for curing and dewatering.
Key takeaways
- Check soil conditions and drainage before pours to reduce curling risk.
- Measure slab camber at multiple edges with a straightedge and level.
- Control concrete temperature and moisture during curing with shade and cover; wear PPE.
- Use proper jointing and edge forms to limit curl propagation.
- Consider thicker slabs or reinforcement strategies in high curl risk areas.
- Document field observations and compare measurements over time to guide repairs.
Table of Contents
- Introduction
- Key takeaways
- What Is Slab Curling and How It Differs from Other Deformations
- Primary Causes and Contributing Factors
- How Temperature and Moisture Change Concrete Properties
- Field Inspection and Measurement Techniques
- Models, Standards, and Authoritative Guidance
- Design and Construction Strategies to Reduce Curling
- Repair Options, Cost Considerations, and Decision Guide
- Safety, Common Mistakes, and Practical Checklists for Contractors and Diyers
- Conclusion
- FAQ
What Is Slab Curling and How It Differs from Other Deformations
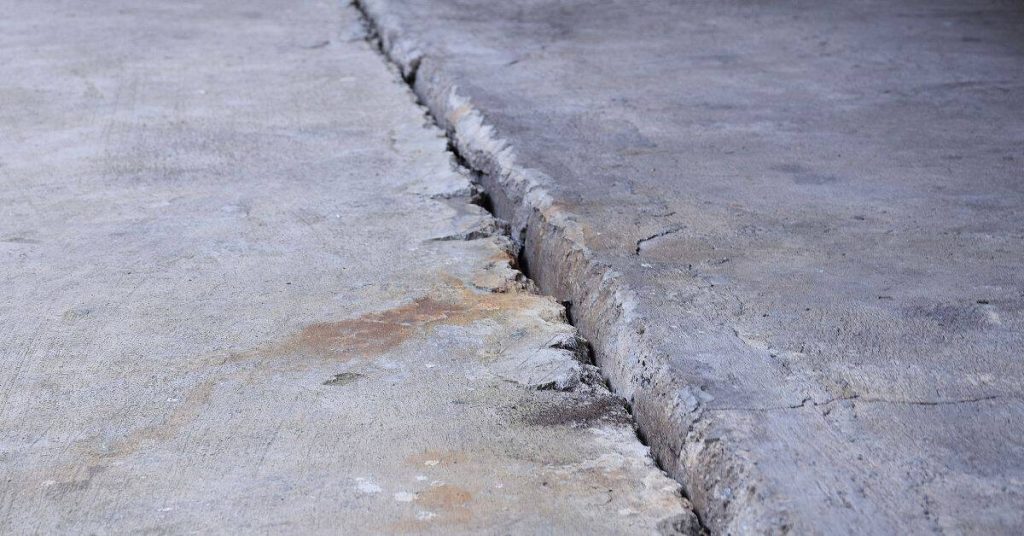
Slab curling is a two dimensional deformation where edges or portions of a concrete slab lift or dip relative to neighboring areas, creating a curved profile along the plane of the slab. It is typically reversible to some degree and not a uniform bowing of the whole slab. Readers should not confuse curling with global warping, which is usually driven by temperature or moisture changes across the entire width of the slab.
Visual cues help distinguish curling from related issues. Curling often shows elevated edges with a hollow center or uneven joint openings that cause trips and misfit around doors. Cracking implies a loss of integrity, while settlement shows differential heights from subgrade movement. Causes range from restrained shrinkage and temperature gradients to thickness variations and edge restraint, and practical verification helps separate curling from other anomalies before planning repairs.
Thermal versus moisture-driven curling
Concrete slabs can curl due to both temperature and moisture gradients. Understanding the difference helps identify the cause and address it effectively.
Temperature-driven curling occurs when there’s a significant temperature difference between the top and bottom of the slab during curing. This is common in large, thick slabs or those poured in cold weather. The result is often a convex curl, with edges lifting up.
Moisture-driven curling, on the other hand, happens when there’s a moisture gradient within the slab. This can occur due to differential drying, restrained shrinkage, or uneven curing. Moisture-driven curls can be either concave (center dipping) or convex, depending on the specific conditions.
How curling affects pavement performance and safety
Concrete slab curling can significantly impact both the performance and safety of your pavement. Here’s how:
Firstly, curls reduce load transfer between adjacent slabs. This means less weight is distributed evenly across the base, leading to increased stress on the subgrade and potential settlement.
Secondly, curls create ride and traction issues. A curled slab can cause a bumpy or uneven surface, making it uncomfortable for vehicles and potentially causing damage. It also reduces tire contact with the pavement, affecting traction and safety, especially in wet conditions.
Lastly, curls accelerate edge deterioration and joint distress. The lifting edges of a curled slab are more susceptible to chipping and spalling due to increased stress. Joints can open unevenly, allowing water intrusion and further damaging the pavement.
Primary Causes and Contributing Factors
A systematic look at curling starts with the environment, material choices, and how the slab was placed. Environmental and climatic factors such as temperature cycles, moisture exposure, and frost risk influence curl over time. Subgrade and base quality, including drainage and compaction, determine how moisture and loads translate into differential movement.
Material and design decisions also drive curling. Mix design, cement content, aggregate characteristics, and curing practices affect dimensional stability. Construction practices, including slab thickness, joint layout, formwork, reinforcement, and sequencing, interact with environmental exposure. The combined effect of these factors under varying conditions explains why curling develops and how different projects may respond to the same influences.
Environmental drivers: temperature and moisture cycles
Concrete slabs expand and contract with temperature changes. Daily swings and seasonal shifts create these gradients through the slab, leading to differential volume changes.
High temperatures cause the top layer of the slab to expand more than the cooler bottom layer, creating upward curl. Conversely, low temperatures make the bottom layer contract more, causing downward curl.
Moisture exposure also plays a significant role. When the top dries faster than the bottom, it shrinks more, leading to upward curl. Inadequate curing can exacerbate this effect.
Material and mix influences
Choosing the right materials is crucial for minimizing curling. The cement type, aggregate, water content, admixtures, and finishing practices all impact shrinkage, stiffness, and drying rates.
- Cement type: Use Type I or II cement for most slabs. Type III sets faster but can lead to increased curling due to rapid drying.
- Aggregate: Coarse aggregates with uniform particle size distribution reduce curling. Avoid fine, angular aggregates that can increase shrinkage.
- Water-cement ratio: Lower ratios (around 0.45-0.55) produce stronger, less porous concrete with reduced curling potential.
- Air-entraining admixtures: These improve freeze-thaw resistance but can increase curling if not properly balanced with other mix components.
- Finishing practices: Proper finishing and curing help minimize curling. Avoid over-troweling, which can lead to excessive water loss and increased shrinkage.
Construction, jointing, and support problems
Proper construction practices are vital for controlling curling. Improper joint spacing, timing of saw-cutting, inadequate curing, poor subbase compaction, and uneven support can all magnify curling.
Joint spacing: Properly spaced joints (around 24-30 feet apart) allow the slab to contract and expand freely, reducing curling. Too few or too many joints can increase stress and curling.
Timing of saw-cutting: Saw-cutting should be done when the concrete is at the right stage of hydration (around 12-18 hours after pouring). Early cutting can lead to increased curling due to rapid drying, while late cutting may not control cracking effectively.
Inadequate curing: Insufficient curing allows the slab’s surface to dry too quickly, causing excessive shrinkage and increased curling. Ensure proper curing methods are used to maintain a consistent moisture content throughout the slab’s depth.
How Temperature and Moisture Change Concrete Properties
Concrete expands and contracts with temperature, which can produce bending tendencies and curl when edges are restrained. Thermal expansion differences between the surface and subgrade layers contribute to localized movement and joint openings. Temperature swings also influence how the slab responds to loads and moisture conditions at rest.
Stiffness and shrinkage change with temperature and moisture. As temperature rises, concrete generally becomes less stiff, affecting deflection and curl under its own weight or imposed loads. Drying shrinkage from curing and subsequent drying drives differential movement, especially when edges are restrained by subgrade or formwork, and moisture movement within the slab accentuates these effects in gradients that promote curling.
Thermal expansion, stiffness, and gradient effects
Concrete expands when it’s hot and contracts when it’s cold. This is thermal expansion/contraction. It happens throughout the slab, but not evenly.
The top layer of your slab feels daily temp swings more than the bottom. So, it expands and contracts more too. This causes length changes across the slab’s thickness.
Now, concrete gets stiffer when it’s cold and softer when it’s hot. That’s temperature-dependent stiffness or modulus of elasticity. When the top layer softens in heat, it can’t support the stiffer bottom layer as well. This makes the slab bend and curl.
Drying shrinkage, evaporation, and internal moisture gradients
Concrete loses moisture during curing and drying. This is drying shrinkage. It happens faster on the surface than inside. That’s because water evaporates quicker where it meets air.
Now, if your slab can’t shrink freely – maybe it’s restrained by a strong subgrade or edges – those tensile strains build up. They pull the surface down and make the slab curl.
Internal moisture movement can make things worse. Pore pressure from capillary rise and evaporation at the surface create moisture gradients. These drive differential movement, contributing to curling.
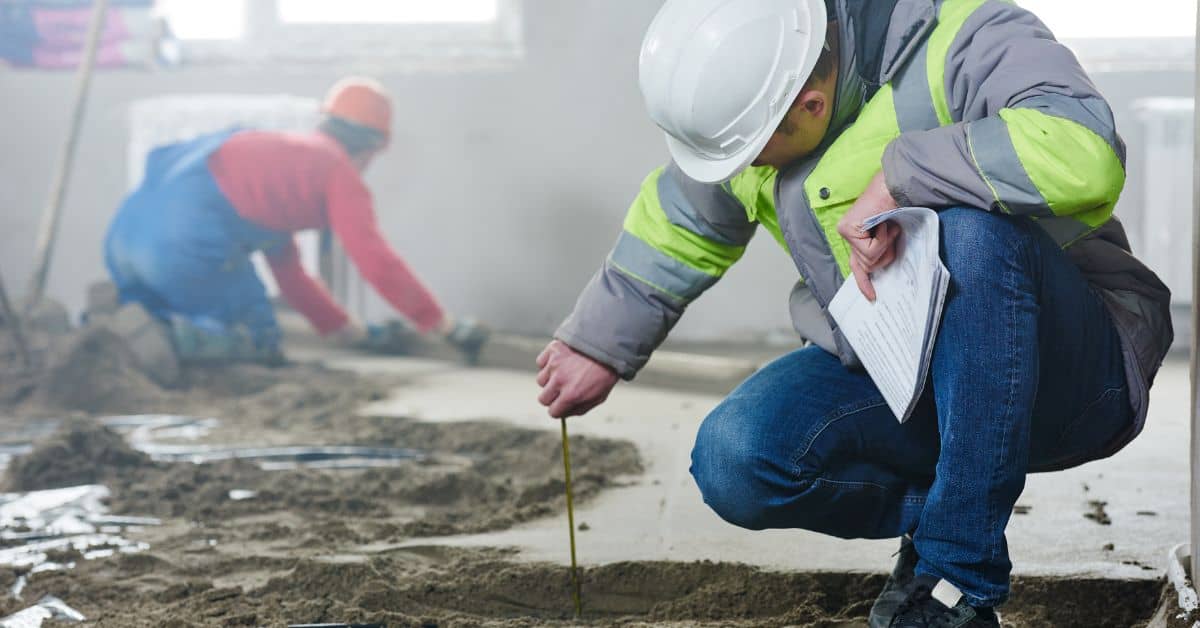
Field Inspection and Measurement Techniques
Begin with a visual survey on a repeatable grid across the slab to map the curling direction and locate hotspots. Note accompanying cracks, delamination, or edge spalling that often accompany curling. A systematic approach helps you distinguish true curl from surface irregularities.
Practical measurement tools include a straightedge, a laser level or water level, chalk lines, and rulers. Capture three dimensional curl by comparing edge elevations to the center at multiple grid points. Record elevations consistently and document conditions like weather and curing history to support interpretation.
Visual checkpoints and simple field tests
Before breaking out the tools, use your eyes to spot curling. This quick visual check helps pinpoint problem areas.
- Cracks: Look for hairline or wider cracks that run diagonally across the slab. These often indicate curling.
- Delamination: Check for any spots where the concrete has separated from its base, usually around edges or corners.
- Edge spalling: Inspect edges for chipping or flaking, which can be signs of curling.
- Wavy surface: Walk across the slab. If it feels wavy or uneven, there might be curling.
- Straightedge test: Place a straight edge (like a level) on the slab. A gap between the edge and the slab indicates uplift.
- Feeler gauge check: Use a feeler gauge to measure gaps under the straightedge. Wider gaps mean more severe curling.
- Edge elevation: Compare the height of the edges with the center. If edges are higher, there’s curling.
- Crack width measurement: Use a feeler gauge or calipers to measure crack widths. Wider cracks need closer attention.
Quick rule: Don’t skip visual checks. They’re fast, simple, and often spot problems others miss.
Instrumented and professional measurement methods
For more precise measurements, use these tools and techniques.
- Laser level: Use a laser level to measure elevations accurately. Compare edge heights with the center.
- Elevation survey: Take elevation readings at grid points (corners, midpoints) using a laser or water level.
- Deflection testing: Use a deflectometer to measure slab deflections under load. This gives you curl severity and direction.
- Moisture probes: Check moisture content at different depths to understand internal moisture gradients driving curling.
- Temperature probes: Measure temperatures at various points to identify thermal gradients causing curling.
- Core sampling: Take cores from the slab for lab testing. This can reveal hidden issues like poor aggregate quality or excessive drying shrinkage.
- Rebound hammer: Test concrete strength at various points to ensure consistency and identify weak areas.
- Ultrasonic/GPR testing: Use these non-destructive methods to map out curling patterns and detect delaminations.
Quick rule: For complex issues, consult standards or an engineer. They can guide you towards advanced tests that give the most insight.
Interpreting measurements and documenting findings
Once you’ve collected data, use it to understand curling progression and make informed decisions.
- Compare readings: Plot your elevation data on a sketch or map. This shows curl patterns and hotspots.
- Track changes over time: Re-measure at regular intervals to see if curling is getting better or worse.
- Record weather conditions: Note temperatures, humidity, and other relevant weather data. This helps understand environmental drivers of curling.
- Document curing conditions: Record how the slab was cured (moisture retention, temperature control). Poor curing can cause curling.
- Note recent pours: If there were recent pours nearby, they might be causing local curling due to moisture migration or thermal effects.
- Date stamp findings: Keep records organized by dating each measurement and observation.
- Use a simple report template: Create a DIY-contractor readable report with columns for date, location, measurements, observations, and recommendations.
Quick rule: Good record-keeping helps you track progress, identify trends, and make better decisions about repairs or preventative measures.
Models, Standards, and Authoritative Guidance
Identify relevant standards and guidance for slabs on grade and temperature and moisture effects without citing numeric thresholds. Note edition, jurisdiction, and applicability to residential or commercial projects. This frames what is considered acceptable practice and when deviations require professional input.
Modeling approaches commonly used include analytical strip methods, deflection concepts, and numerical methods such as FEM or FDM. These tools help predict curling tendencies for planning, design decisions, or later verification. Access to primary sources from standards bodies and agencies should be verified through official online formats or library resources.
Key standards and test methods to check
The American Society for Testing and Materials (ASTM) and the American Association of State Highway and Transportation Officials (AASHTO) provide crucial standards and test methods for concrete slab curling. For DIY homeowners, here are some key references:
ASTM C1581: This standard outlines procedures for measuring curling of concrete slabs-on-grade. It’s applicable to residential projects and helps ensure your measurements are accurate.
AASHTO T 307: This test method covers the determination of the length change due to drying shrinkage of concrete. It’s useful in understanding how moisture loss contributes to curling, helping you make informed decisions about jointing and sealing.
Local agency specifications may also apply. Always check with your local building department for any additional standards or requirements.
Practical literature and predictive models
Several published models can help DIY homeowners predict and analyze concrete slab curling. Here are some useful resources:
ACI 207R-16: Guide for the Design of Slabs-on-Grade: This guide from the American Concrete Institute provides a climate-adjusted curling prediction model. It’s essential to use local climate data and material properties when applying this model.
FWD Temperature Corrections (e.g., AASHTO TP 62): These methods help account for temperature effects on slab deflections, including curling. They’re particularly useful in regions with significant temperature fluctuations.
Remember, these models are tools to aid decision-making. Always verify their applicability to your specific project and consult with a professional if you’re unsure.
Design and Construction Strategies to Reduce Curling
Prevention starts with early planning that accounts for climate, drainage, solar exposure, and load patterns. Set targets for thickness, joint layout, and edge conditions to minimize restraint and temperature gradients. These choices create a foundation that limits curling potential before pouring begins.
From there, craft the mix design and placement plan to control shrinkage and movement. Consider shrinkage reducing or air entraining admixtures within workable limits, and ensure consistent thickness and proper vibration. Plan curing and moisture management alongside jointing strategies and edge support to minimize restraint and differential movement.
Mix, Curing, and Finishing Best Practices
To minimize curling, focus on reducing early-age drying and differential stiffness. This starts with the mix design:
Use a balanced mix: Specify cement content, aggregate size, slump, and use shrinkage-reducing admixtures or air entrainment to balance workability with reduced drying shrinkage and cracking potential.
Proper curing is crucial. Plan your curing method – moist curing, membrane-forming seals, or proprietary compounds – with duration aligned to ambient conditions. Manage relative humidity and surface moisture to slow shrinkage rates:
Moist cure: Keep the slab consistently damp for at least 7 days, then gradually reduce moisture over time.
Jointing, Reinforcement, and Slab Layout Choices
Correct joint spacing, dowels, and reinforcement strategies help reduce stress concentration and improve load transfer to limit curling effects:
Control joints: Determine their spacing, timing, and beveling. They should be spaced based on slab size and thickness, typically every 2-3 times the slab’s thickness.
Isolation joints or mechanical dowels at critical transitions relieve restraint:
Reinforcement: Use steel reinforcement to control cracking and distribute loads evenly. Place it near the top of the slab for maximum effectiveness in controlling curling.
Subbase Preparation and Support Uniformity
A well-compacted, uniform subbase and edge support are vital to avoid differential deflection that worsens curling:
Compacted subgrade: Ensure the subgrade is properly compacted before placing forms. This provides a stable base for your slab.
Proper formwork alignment and edge support prevent differential movement at edges:
Edge insulation or windbreaks: Consider using these to reduce differential temperature effects at edges, which can cause curling due to uneven expansion and contraction.
Repair Options, Cost Considerations, and Decision Guide
Remedial actions range from quick, temporary fixes to longer term solutions. For curling that is localized and mild, leveling or patches may be appropriate, while more extensive movement may require deeper repairs or slab replacement. Decide based on severity, pattern, and underlying causes identified during inspection.
Use a decision framework that weighs safety, structural risk, disruption, and budget. Consider moisture management, curing, bonding, and surface prep as part of any repair plan. Avoid band-aid methods that fail under freeze-thaw or load, and plan for maintenance to minimize recurrence.
Surface remedies and localized repairs
For minor curling issues, quick fixes can buy time until a more permanent solution is planned. Here are your options:
Concrete Grinding: For slight edge lifting, grinding can level the surface temporarily. It’s cheap but won’t address underlying causes.
Patching and Spall Repair: For localized damage like small cracks or spalls, patching can restore the surface. Use a matching concrete mix for best results. This method is affordable but may not last under heavy traffic or freeze-thaw cycles.
Structural and long-term repairs
When curling is severe, quick fixes won’t cut it. Consider these more involved solutions:
Dowel/Retrofit Load Transfer: If the slab has lifted due to subgrade instability, dowels can redistribute loads and prevent further movement. This method requires professional installation but provides long-term benefits.
Slab Replacement: When curling is extensive and other methods won’t work, replacement might be necessary. It’s costly but ensures a solid foundation for your structure.
Full-Depth Repairs: For localized severe curling, full-depth repairs can address the problem at its source. This involves removing damaged concrete and replacing it with new, properly prepared material. It’s labor-intensive but effective.
Cost versus service-life tradeoffs and planning
When deciding on a repair method, consider both upfront cost and expected lifespan:
Short-term fixes (e.g., grinding, patching): These are cheap but may need frequent reapplication. They’re best for minor issues or when you can’t afford major repairs right away.
Long-term solutions (e.g., dowels, replacement): These cost more upfront but provide lasting results. They’re worth considering if you plan to stay in your home long-term or want to avoid repeated repairs.
Before proceeding with any major repair, get multiple estimates from licensed professionals. This ensures you’re getting a fair price and the right solution for your needs.
Safety, Common Mistakes, and Practical Checklists for Contractors and Diyers
On-site safety covers PPE, site access, and hazard awareness related to mixing, formwork, and lifting. A concise safety checklist helps keep everyone focused during pours and early curing. Clear procedures protect workers and the project.
Common curling mistakes include improper mix proportions, insufficient joints or reinforcement, and inadequate curing. A structured pre-pour walkaround, substrate checks, and formwork alignment reduce risk. Practical checklists for tools, materials, and visuals support consistent quality and safer outcomes.
Safety and Site-Control Considerations
Use this checklist before, during, and after inspection or repair work to ensure a safe jobsite.
- Personal Protective Equipment (PPE): Wear appropriate PPE including hard hat, safety glasses, gloves, and steel-toed boots. Without PPE, you’re at risk of injuries from falling objects, cuts, or trips.
- Traffic Control: Implement traffic control measures to prevent unauthorized access and ensure worker safety. Uncontrolled site access can lead to accidents or damage to equipment and materials.
- Hazard Awareness: Identify and mitigate potential hazards such as uneven surfaces, electrical hazards, or chemical spills. Ignoring hazards puts you and others at risk of serious injuries.
- Equipment Safety: Ensure equipment is in good working order before use. Faulty equipment can cause accidents or damage materials.
- Slips/Trips/Hazards: Keep walkways clear and free of debris. Use warning signs for wet surfaces or other hazards. Falls are a common cause of injuries on jobsites.
- Respirators: Wear a respirator when working with concrete dust or other harmful substances. Exposure to these can lead to serious health issues.
- Emergency Procedures: Establish and communicate emergency procedures in case of accidents or incidents. Quick response is crucial in emergencies.
- Training: Ensure all workers are trained and competent in their tasks. Untrained workers can cause accidents or damage materials.
Quick rule: Always prioritize safety over speed. A safe jobsite is a productive jobsite.
Common Mistakes to Avoid
Use this checklist to prevent common errors that can exacerbate concrete slab curling.
- Improper Mix Proportions: Ensure cement, aggregate, and water are mixed in the correct proportions. Incorrect proportions can lead to weak concrete prone to curling.
- Inadequate Reinforcement/Control Joints: Use proper reinforcement and place control joints at regular intervals. Without them, slabs can crack or curl due to shrinkage or temperature changes.
- Insufficient Curing: Keep concrete moist during the first few weeks after pouring. Inadequate curing can lead to weak, brittle concrete prone to curling and cracking.
- Poor Surface Prep: Ensure the subgrade is clean, dry, and compacted before pouring. A poor subbase can cause slabs to move or settle, leading to curling.
- Weather-Related Timing: Pour concrete when temperatures are within recommended ranges (typically 50-90°F). Pouring in extreme temperatures can lead to weak, curling slabs.
- Premature Saw-Cutting: Allow concrete to reach its initial set before cutting control joints. Cutting too early can cause joints to close up and not control cracking effectively.
- Uneven Subbase Compaction: Ensure the subgrade is evenly compacted before pouring. Uneven compaction can cause slabs to settle or move, leading to curling.
- Late or Improper Curing: Apply curing compounds as directed and keep concrete moist during the first few weeks. Improper curing can lead to weak, brittle concrete prone to curling and cracking.
Quick rule: Always follow recommended practices for mixing, placing, and curing concrete to minimize curling risks.
Tools and Materials Checklist Plus Material-Specs Explained
Use this checklist to ensure you have the right tools and materials for your concrete project. Always check project specifications or supplier data sheets for exact material requirements.
- Concrete Mixer: Ensure it’s in good working order and suitable for the job size. A faulty mixer can lead to inconsistent concrete mixes.
- Gauge Bars: Use them to ensure consistent slab thickness. Inconsistent thickness can cause slabs to curl or crack.
- Trowels: Have a variety of trowel sizes for finishing and edging work. The right trowel ensures a smooth, even surface finish.
- Slack Liners: Use them to protect formwork from concrete adhesion. Without slack liners, forms can be difficult or impossible to remove.
- Curing Compounds: Choose the right compound for your climate and project needs. The wrong curing compound may not provide adequate protection against moisture loss.
- Concrete Additives: Consider using additives to improve concrete properties like strength, workability, or durability. Additives can help minimize curling risks but should be used according to manufacturer’s instructions.
- Cement: Ensure it meets required standards and is within its shelf life. Using old or low-quality cement can lead to weak concrete prone to curling.
- Aggregate: Check aggregate size, type, and quality. Incorrect aggregate can affect concrete strength and durability.
- Reinforcement: Ensure it’s the right type, size, and spacing for your project needs. Inadequate reinforcement can lead to curling or cracking slabs.
- Formwork Materials: Check formwork materials are in good condition and suitable for the job. Faulty formwork can cause slab defects like curling or warping.
Quick rule: Always check project specifications and supplier data sheets to ensure you’re using the right tools and materials for your concrete project.
Conclusion
Slab curling matters because it affects safety, durability, and how cleanly your space looks. Start with the basics: know what curling is, why it happens, and how temperature and moisture steer the outcome so you can act with informed purpose.
Now, check and act in this order: inspect the slab edge and surface for twist and edge lift, note bearing conditions and control joints, verify moisture and temperature history, measure with a straightedge or string line and compare to acceptable tolerances, review any design guidance and repair options, and plan curing, joints, and grading before making any structural changes.
Common mistakes to avoid are pushing a quick fix without testing a small area first or ignoring moisture and curing needs, overloading the slab during cure, and assuming repair options will be cheap or simple. Always follow safety rules: wear PPE, secure the work zone, and stop if you see signs of unexpected movement or cracking that could worsen with improper handling.
If you’re unsure after a careful check, or if you see wide or ongoing deflection, cracked joints, or unusual movement during rain or heat, call a professional. Don’t let a bad decision compound cost or damage—test, plan, and proceed with confidence, keeping safety and proper procedures at the forefront.
FAQ
What are the common causes of concrete slab curling I should look for?
Curling usually starts at the edges where moisture and temperature differ from the center. Poor joint design, uneven subgrade, or shrinkage can push the edges upward or the center downward. Check for too-thin edges, inconsistent thickness, or recent changes to drainage that might trap moisture.
How can I measure or detect slab curling accurately?
Use a straight edge or long level along the slab’s edge and compare it to the center. Look for visible gaps at the edge or a crown along the surface. Document any changes over time by taking notes or photos from the same angles.
What practical steps help reduce curling during new concrete pours?
Plan proper joint placement and ensure a solid, well-drained subgrade. Control moisture and curing conditions and keep formwork tight to avoid edge lift. Follow manufacturer guidance for mix, finishing, and curing because those steps impact how the slab settles.
How do environmental factors influence curling and pavement behavior?
Temperature swings and moisture changes drive expansion and contraction. Sun exposure, wind, and rain can unevenly dry or wet the slab, which pushes edges up or centers down. If you’re in a climate with big swings, you’ll need extra attention to curing and moisture management.