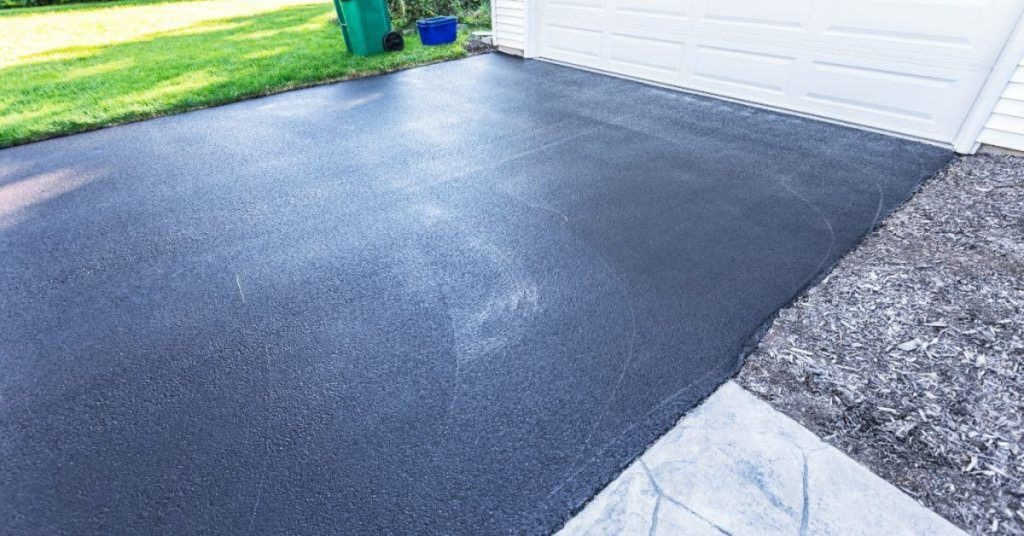
Newly paved asphalt driveway in front of garage door

Concrete Projects for Absolute Beginners: Five Builds Before You Try a Driveway

Introduction

Begin your concrete projects journey with these five introductory tasks. They focus on fundamental skills such as mix handling, form setup, and curing to build confidence before tackling larger projects like driveways.

Emphasize careful planning and steady, low-risk steps in each task. When encountering unfamiliar materials or processes, consult product labels and follow manufacturer instructions for a practical and manageable first-timers project line.

Key takeaways

  • Start with small projects to learn formwork, mixing, and finishing basics safely.
  • Prepare site, measure controls, and plan drainage before any concrete pour.
  • Use eye protection, gloves, and breathable clothing; never work alone on pours.
  • Follow manufacturer guidance for mixes, setting times, and curing to avoid cracks.
  • Keep tools rinsed, cleaned, and free of hardened concrete to extend life.
  • When unsure, pause, consult local rules, or hire a pro before driveway work.
Table of Contents

Why Start with Small Concrete Projects

Starting with small pours helps you build core skills without overwhelming the project. It allows you to learn measurements, timing, and tool handling in a controlled setting. You can practice proper surface preparation and finish quality on manageable tasks.

Progressive learning sets realistic expectations for time and effort. It also helps you gauge how materials behave in your environment. When in doubt, check the product label or manufacturer instructions for any site-specific guidance.

Learning objectives for beginners

Starting with small concrete projects allows you to master essential skills in a low-risk environment. Each project teaches specific techniques that apply to larger works.

Mixing: You’ll learn to calculate and mix concrete accurately, ensuring the right consistency for your project’s needs.

Forming: Small projects help you understand how to create and maintain forms, a crucial step in shaping your concrete.

Finishing: Practicing on small-scale pours lets you experiment with different finishing techniques, such as troweling or brooming, to achieve the desired texture and appearance.

Basic reinforcement: Incorporating rebar or wire mesh into your small projects helps you understand how to strengthen concrete structures, a vital skill for larger projects.

How small projects lower the stakes compared to a driveway

Before tackling a large project like a driveway, it’s wise to gain experience with smaller pours. These projects offer reduced risk and complexity, allowing you to learn and make mistakes in a controlled environment.

Scale: Small projects let you practice managing the scale of your work. A small path or stepping stones is much easier to handle than a large driveway.

Load expectations: Smaller projects have lighter load expectations, helping you understand how concrete behaves under different pressures before attempting larger pours with heavier loads.

Drainage complexity: Small projects often have simpler drainage requirements compared to driveways. This allows you to focus on learning core skills without the added complexity of managing extensive drainage systems.

Permit requirements: Many small projects may not require permits, unlike larger ones like a driveway. This lets you gain experience without dealing with bureaucracy initially.

Back to top ↑

Five Beginner Concrete Builds to Try First

The five starter projects are chosen for low risk and repeatable steps that build fundamentals. Each build reinforces working with forms, mixing, placing, and finishing techniques. They serve as practical exercises before attempting larger, more complex jobs.

Treat these projects as a structured path toward confidence and competence. Use them to compare different finishes, edge treatments, and workflow approaches. If you need specifications, refer to product data sheets and local rules for guidance.

Stepping stones

Start your concrete journey with a simple yet rewarding project: stepping stones. These low-risk, minimal investment pieces allow you to practice basic molds, surface texture, and coloring techniques.

Begin by creating or acquiring simple molds. For beginners, consider using flexible rubber molds or rigid plastic ones. Ensure the mold release agent is applied consistently for easy demolding.

Mix your concrete according to the manufacturer’s instructions, focusing on consistency in each batch. Experiment with different textures and colors by adding aggregates or pigments. Pour the mix into the molds, vibrate to remove air bubbles, and let it cure properly before demolding.

Quick check: Ensure consistent color and texture across all stepping stones for a cohesive look. Proper curing is crucial for strength; follow the manufacturer’s recommendations.

Garden planter or raised planter box

A garden planter is an excellent next step, teaching you forming techniques, drainage considerations, and light reinforcement. Plus, it’s a low-risk project with potential for repurposing or resale.

Design your planter shape, ensuring it’s manageable in size for your first attempt. Consider using simple wood or plastic forms. Incorporate drainage holes at the base to prevent waterlogging, which can harm plants and compromise the structure.

Mix your concrete, reinforcing it lightly with fiber mesh or rebar if desired. Pour the mix into the formwork, vibrating it to remove air bubbles. Allow it to cure properly before removing the forms.

Pro tip: Experiment with different finishes and coloring techniques on your planter. Consider using integral colors, stains, or sealants to achieve your desired look.

Small Patio or Slab Segment

Gain essential driveway skills with a small patio or slab segment project. This low-risk endeavor enables you to practice base preparation, leveling, and finishing without the complexity of a full driveway.

Thoroughly compact your subgrade according to local recommendations. Install formwork for your desired slab shape and size, ensuring it’s secure and level. Verify recommended thickness guidelines for your area; typically, it’s 4 inches for patios.

Mix your concrete and pour it into the forms, vibrating it to remove air bubbles and ensure a smooth surface. Level the top with a straight edge and allow it to cure properly before removing the forms.

Inspection: Examine your slab for consistent thickness, even finish, and proper curing. Address any subgrade issues or formwork gaps that may cause cracking.

Concrete bench or stool

A concrete bench or stool project introduces molds for load-bearing pieces, embed placement, and finishing details while remaining manageable in size.

  • Mold selection: Choose a sturdy, well-fitting mold that allows for easy demolding. Consider renting or borrowing to minimize costs.
  • Reinforcement: Incorporate rebar or wire mesh into your bench design for added strength and durability.
  • Embed placement: Practice embedding objects like tiles, glass, or metal into your bench for decorative effects. Ensure they’re secure and properly aligned.
  • Finishing details: Experiment with different textures, colors, and sealants to achieve your desired look. Consider using acid stains or stamped mats for unique patterns.
  • Curing: Allow your bench to cure properly before use to ensure its strength and longevity.

Modular pavers or repeatable paver units

Making multiple identical pavers helps you practice consistent mixing, tamping, finishing, and curing for uniform results across a series of pieces. This low-risk project is perfect for honing your skills before tackling larger projects.

Design your paver shape and size, keeping in mind that they should be manageable to handle and install. Create or acquire molds that will produce consistent, identical pavers. Reinforce them lightly with fiber mesh if desired.

Mix your concrete batch by batch, ensuring consistency in each mix. Pour the mix into the molds, vibrate to remove air bubbles, and tamping to ensure even distribution. Allow the pavers to cure properly before demolding and installation.

Pro tip: Practice consistent finishing techniques across all your pavers for a cohesive look. Consider using a power trowel or bullfloat for smooth surfaces.

Back to top ↑

Tools and Materials Checklist

Assemble a practical set of hand tools and basic power tools you will use across projects. Include items for measuring, mixing, and finishing, plus forms and safety gear. Plan for durable consumables and replacement parts to support multiple pours.

Decide which items are worth buying versus renting based on frequency of use and budget. For each tool, check the manufacturer instructions and local rental terms before committing. When unsure, ask a supplier or reference the product label for limits and safe operation.

Essential Tools and Rental Recommendations

Before you start your concrete project, ensure you have the right tools to get the job done efficiently and safely.

  • Shovel: For mixing and moving concrete. Key spec: 60-inch handle for easy use.
  • Wheelbarrow: To transport mixed concrete. Tip: Choose a wheelbarrow with large, air-filled tires for better maneuverability.
  • Floats: For smoothing and leveling concrete. Key spec: 48-inch length is standard; consider longer floats for larger projects.
  • Screeds: To strike off excess concrete and ensure a flat surface. Tip: Rent or borrow a screed with adjustable handles for better control.
  • Forms: To contain the concrete. Key spec: Choose forms made of durable materials like plywood or metal.
  • Concrete Mixer: For mixing concrete. Warning: Renting a mixer can be expensive; consider sharing costs with neighbors or friends for larger projects.
  • Power Trowel (optional): For finishing and smoothing large slabs. Tip: If renting, opt for a self-propelled model for easier use.

Materials, Bagged Mixes vs Ready-Mix, and Additives

Choosing the right materials ensures a strong, durable concrete project.

  • Bagged Concrete: Convenient for small projects. Check: Look for PSI ratings suitable for your project’s needs.
  • Ready-Mix Concrete: Delivered mixed and ready to pour. Tip: Order slightly more than needed to account for waste.
  • Fibers vs Wire Reinforcement: Fibers are easier to use but less durable; wires provide stronger reinforcement. Check: Ensure chosen reinforcement meets local building codes.
  • Admixtures: Additives to enhance concrete properties. Warning: Incorrect use can weaken concrete; always follow manufacturer instructions.
  • Sealer: To protect concrete from moisture and stains. Tip: Apply sealer after the initial cure, following manufacturer guidelines.

Safety Gear and Site Protection

Protecting yourself and your work area is crucial for a successful project.

  • Gloves: Protect hands from cuts and chemicals. Key spec: Choose gloves with good grip and durability.
  • Eye Protection: Shields eyes from debris and concrete splash. Tip: Use safety glasses with side shields for better protection.
  • Dust Mask: Filters out harmful dust particles. Warning: Do not use a dust mask if you have respiratory issues; consider a respirator instead.
  • Knee Protection: Pads to protect knees from concrete and hard surfaces. Tip: Choose knee pads with adjustable straps for a secure fit.
  • Surface Protection: Tarps or drop cloths to protect nearby surfaces from concrete spills. Check: Ensure protection covers the entire work area before starting.

Back to top ↑

Site Preparation and Formwork Basics

Clear the work area and control dust, debris, and moisture that can affect the pour. Establish a stable subgrade and compact where needed to prevent settlement. Build sturdy forms that hold shape and resist movement during placement.

A smooth, well-supported form makes finishing easier and helps durability. Verify form dimensions and alignment with the project plan, and consult manufacturer guidelines for compatible form materials. For any uncertain detail, review local building rules or guidance from the form supplier.

Subgrade, compaction, and drainage fundamentals

The first step in any concrete project is preparing the site. Remove all organic soil from the area to prevent future settling.

Create a stable base by compacting the subgrade using a plate compactor or tamper. The goal is to achieve a solid, level surface that can support your structure.

Ensure positive drainage by sloping the subgrade slightly away from the structure. This prevents water from pooling and causing damage over time. Always verify local frost depth and drainage best practices for permanent work to ensure longevity and stability.

Building and bracing forms

Forms give your concrete its final shape. Common materials include plywood, OSB, or metal. For simple shapes like squares or rounds, these can be easily cut and assembled.

When building forms, ensure they are square and level to create a smooth, even surface. Use appropriate bracing techniques to prevent blowouts during the pour. This typically involves placing braces at regular intervals along the form’s height.

Adequate bracing is crucial to maintain the form’s integrity under pressure. If working with complex shapes or large forms, consider consulting a professional for advice on proper bracing techniques.

Reinforcement and setting inserts

Reinforcement is essential for strengthening your concrete structure. For small projects, wire mesh or bar reinforcement can be used. Larger projects may require engineered reinforcement designs.

Place reinforcement in the middle third of your slab or wall to maximize its effectiveness. Use chairs or other supports to keep it centered and prevent sagging. If using inserts like anchor bolts or sleeves, ensure they are properly placed and supported during the pour.

Proper placement and support of reinforcement is key to enhancing concrete’s strength, durability, and longevity. Always verify your reinforcement meets project requirements and is installed correctly. For large or complex projects, consult an engineer for reinforcement design advice.

Back to top ↑

Wooden formwork with braces and clamps for concrete pouring

Mixing, Placing, and Finishing Workflow

Start with a clear sequence from mixing to placing and finishing, then follow it in order. Emphasize timing and workability, and keep the job organized with a simple checklist. The workflow gives beginners a practical path from mixing to finishing while the material stays workable.

Feel the mix; it should be consistent and slightly damp, not wet or dry. If the mix is too dry, add water, remix, and check again; if it is too wet, add more aggregate, remix, and check again. A pro installer ensures all materials are dry, clean, and at the correct ratio before mixing to help prevent weak set, and skipping proper mixing can lead to failure.

Mixing methods and judging workability

Proper mixing ensures consistent concrete quality. Choose a method based on your project’s scale:

Hand-mixing is suitable for small projects. Mix in small batches to maintain workability, following the manufacturer’s instructions for ratios and times.

For larger projects, consider using a small mixer. Mix no more than 3 bags at a time, ensuring each batch is consistent. Always verify mixing ratios with the manufacturer.

Ready-mix delivery offers convenience but requires careful timing to prevent setting before placement. Check consistency by lifting a shovelful; it should hold together but not be too stiff or soupy.

Placing, consolidating, and screeding

Proper placement minimizes voids and ensures a strong, level surface. Place concrete in manageable sections to avoid cold joints. Use a straight edge or laser level to check for level before screeding.

For large amounts of concrete, use a concrete pump to avoid overworking the mix. For smaller quantities, use a vibrator or strike off with a shovel to remove air pockets and consolidate the concrete.

Screed and level the surface using a straight edge. If there are voids, use a vibrator or needle gun to consolidate. If the surface is not level, screed and re-level as needed.

Finishing textures and decorative options

Appropriate finishing techniques enhance the appearance and durability of the concrete. Inspect the surface for any imperfections before applying final finishes.

For a broom finish, broom at a consistent angle and pressure, avoiding overworking the surface. Timing is crucial; apply too early or late, and the finish may not set properly.

For stamps or oxides/pigments, apply according to the manufacturer’s instructions. Avoid overworking the surface to prevent damaging the finish. If the finish is not as desired, lightly rework and retry. If too much water was added, allow concrete to dry and sand lightly.

Back to top ↑

Curing, Sealing, and Maintenance Essentials

Curing and protection matter for concrete strength and long-term durability. Proper curing preserves moisture and temperature conditions, while sealing and routine maintenance help prevent surface damage and cracking.

Without adequate curing, concrete can become weaker and more prone to cracking. For DIY readers, climate and timing matter: if the surface still feels damp, curing is ongoing; if it dries, re-wetting may be needed. A pro checks moisture levels and temperature to ensure proper curing, and if cracking appears, a liquid membrane sealer can help mitigate further damage. If concrete feels dry but was cured for a short period in hot or dry weather, re-wet and continue curing.

Curing Best Practices

Proper curing is vital for concrete’s long-term strength and durability. It enables the concrete to achieve its full design strength by maintaining consistent moisture during initial setting.

Moist Curing: Keep concrete moist, typically for 7 days post-pouring, unless otherwise specified on product labels or locally recommended. Use protective coverings like plastic sheets or maintain surface wetness with sprinklers or misters.

Temperature Considerations: Concrete sets best within a range of 50°F to 90°F (10°C to 32°C). If temperatures drop below freezing, protect concrete with coverings or use accelerators as per manufacturer’s instructions. Always check product labels and local recommendations for specific timing and conditions.

Sealers, Stains, and Surface Protection

Appropriate sealers and stains enhance your concrete’s appearance, durability, and resistance to damage. They protect against moisture, chemicals, and UV rays while adding decorative touches.

Common Sealers: Types include acrylic, epoxy, polyurethane, and penetrating sealers. Choose based on climate conditions, usage, and manufacturer recommendations. Apply after the concrete has cured for at least 28 days, following product instructions.

Stains: Available in acid-based or water-based formulations, stains can create a wide range of colors and effects. Apply according to manufacturer guidelines, typically after sealing.

For heavy foot traffic or vehicle loads, consider durable, high-performance sealers that provide excellent wear resistance.

Routine maintenance and simple repairs

Regular upkeep extends your concrete project’s life and minimizes costly repairs. Inspect for signs of damage regularly, clean as needed to prevent buildup, and address issues promptly.

Cleaning: Use mild detergents or cleaning solutions suitable for concrete. Avoid harsh chemicals that can damage the surface. Rinse thoroughly after cleaning.

Hairline Cracks: Fill with appropriate fillers or sealants as soon as possible to prevent water intrusion and further cracking. For wider cracks, consider professional repair or replacement.

Surface Scaling: Remove loose material using a wire brush or chisel. Apply a new layer of sealer or patch as needed. If cleaning methods prove ineffective, consult product labels or manufacturer guidelines for additional assistance.

Back to top ↑

Common Mistakes, Troubleshooting, and Visual Checkpoints

Identify frequent beginner errors such as improper form setup, inconsistent mixing, and uneven finishing. Learn to spot issues by sight and touch early in the process. Plan corrective actions that are practical and safe.

Describe straightforward steps to salvage or prevent problems, and know when a repair is needed. For any anomaly, check the product label or manufacturer instructions for recommended remedies. Use local guidelines to inform your troubleshooting approach.

Frequent beginner mistakes and prevention

To ensure a successful concrete project, avoid these common pitfalls:

  • Too much water: Reduces strength. Check mix ratio and adjust accordingly.
  • Weak base: Causes settlement and cracking. Ensure proper subgrade preparation and compaction.
  • Poor form bracing: Leads to misaligned or deformed slabs. Properly brace forms before pouring.
  • Bad timing: Inclement weather can affect curing. Plan pours for fair, dry conditions.

Learn from mistakes, adjust methods, and seek expert advice if needed.

Troubleshooting defects (cracks, scaling, uneven finish)

Use this checklist to identify and address common concrete defects:

  • Cracks: Evaluate width and cause. Repair as needed.
  • Scaling: Assess surface quality. Apply appropriate sealer or repair method.
  • Uneven finish: Check screeding process. Re-screed if necessary.
  • Delamination: Inspect bond between layers. Repair if delaminating.

Quick rule: Address issues promptly to prevent further damage or deterioration.

Visual checkpoints before, during, and after the pour

Regular visual inspections help maintain project quality and timeline:

  • Before pouring: Check form alignment. Adjust if needed.
  • During placement: Monitor mix consistency. Ensure workability.
  • After finishing: Inspect surface for defects. Repair if necessary.
  • During curing: Protect slab from rain and extreme temperatures.

Quick rule: Regular visual inspections help catch issues early, preventing costly repairs.

Back to top ↑

When to Call a Pro and Preparing for a Driveway Project

Understand the limits of DIY for structural or permit-driven work and recognize signs that professional help is advisable. Consider factors like load requirements, site access, and local codes. Use beginner projects to build a foundation for planning a larger driveway task.

Use your early builds to practice documenting scope, measurements, and sequencing before a driveway project. If unsure about requirements, consult the permit authority or a qualified contractor for clarity. Review any applicable guidelines or standards from local authorities before proceeding.

Red flags that require professional help

While many concrete projects can be tackled by beginners, there are situations where it’s crucial to hire a licensed contractor or engineer. These include:

Heavy vehicle loads: If your project involves heavy vehicles, such as trucks or construction equipment, consult with a professional to ensure the concrete structure can withstand the weight and stress.

Complex drainage patterns: If you’re dealing with complex drainage needs or water management issues, it’s best to consult with a professional. They can help prevent flooding and erosion by designing an effective drainage system.

Additionally, always check local building codes and zoning regulations to ensure your project is in compliance. If you’ve already started work and encounter issues, document them immediately and consult a professional.

Documenting your projects and next steps for a contractor

Keeping detailed records of your concrete projects is essential for efficient communication and informed decision-making in future projects, especially when working with contractors. Here’s what to document:

Photographs: Take photos of the project at different stages. This helps contractors understand the work done so far and plan their part of the project more effectively.

Dimensions and materials used: Record the dimensions of the concrete structures, as well as the type and quantity of materials used. This information is crucial for contractors to provide accurate quotes and plans.

Also, note any lessons learned during the project. This can help streamline future projects and improve communication with your contractor. If you’re moving on to a driveway project, share all this documentation with the contractor to streamline planning.

Back to top ↑

Conclusion

Starting with small, well-planned concrete projects builds safety, predictability, and a better looking finish for every step you take toward a driveway project.

Before you proceed, check your plan and then follow a simple sequence: confirm the site and any required permissions, prepare the area and forms, mix and place in manageable sections, cure properly, seal at the right time, and inspect each completed piece for tolerances and workmanship. Do this in small, tested increments and never skip the basics, like safety gear and a clean, level work surface.

Common mistakes to avoid include skipping a proper curing period, ignoring temperature or moisture requirements, and rushing finishing or form removal. Use PPE, keep work areas clear, test a small area first, and verify each step with the project’s instructions or manufacturer guidance. If you encounter conditions beyond the scope of a beginner project—heavy loads, large slabs, or complex forms—pause and reassess before proceeding.

If the project growth or conditions outpace your experience, consider calling a professional rather than pushing ahead. When you do continue, stay patient, follow the proven sequence, and use the small-build mindset to protect safety, durability, and appearance—you’ll be ready to tackle the driveway with confidence.

Back to top ↑

FAQ

How do I choose the right mix for a beginner project?

Look for a mix labeled for non-structural or small DIY projects and follow the manufacturer’s instructions on the bag. Check the label for suitability of indoor or outdoor use and the intended finishing method. If in doubt, consult the product sheet or ask a professional at a hardware store.

When is my concrete ready for finishing or sealing?

Finish or seal only after the concrete has gained initial firmness as advised by the product instructions. Environmental factors like temperature and humidity can affect timing, so rely on the manufacturer’s guidance for your specific mix. If you’re unsure, delay finishing and consult the product label or a knowledgeable supplier.

How can I fix small surface imperfections after pouring?

Use a suitable finishing tool to re-smooth the surface once the concrete has begun to set but before it becomes too firm. For minor breaks or dips, apply patch material that matches the project type and follow the manufacturer’s mixing and application directions. Avoid aggressive sanding or grinding on fresh concrete.

What safety steps should I follow before starting a project?

Wear appropriate PPE such as eye protection, gloves, and sturdy footwear. Work in a well-ventilated area and keep materials organized to reduce trips or spills. Check the product labels and local guidelines for any specific safety or storage requirements.

Back to top ↑

More about this topic