
Introduction
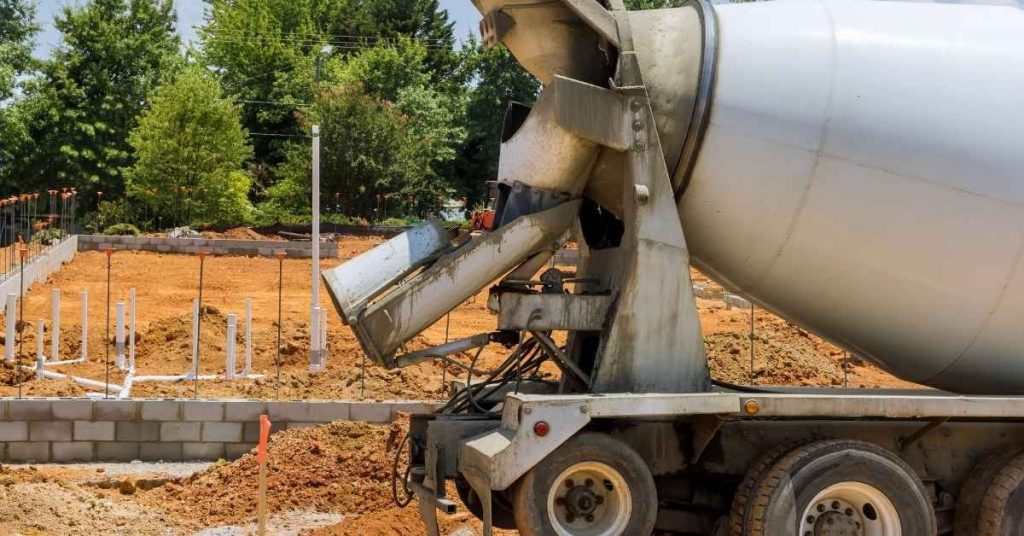
A subbase is the layer beneath a concrete pavement that provides support and a leveled, dry foundation. It helps distribute loads, control settlement, and keep the surface from shifting as soils move. For expansive soils, choosing the right subbase means considering drainage, compaction, and how moisture affects soil volume.
Think of subbase choices as the first line of defense against seasonal heave, and aim for a uniform, well-compacted base. Check soil type, water content, and local guidance or manufacturer instructions to pick a practical option that fits your site and climate.
Key takeaways
- Understanding expansive soils and causes of seasonal heave helps plan proper subbase.
- Define subbase and its role in concrete pavements for uniform support.
- Choose subbase materials based on drainage, moisture, and soil type to reduce heave.
- Ensure moisture control with drainage, capillary breaks, and underdrains to stabilize foundation.
- Prioritize uniform support and proper compaction to minimize differential settlement.
- Field checks for consistent subbase thickness and compaction before concrete placement.
- Safety: wear PPE and follow earthwork safety during subbase handling and grading.
Table of Contents
- Introduction
- Key takeaways
- What Are Expansive Soils and How They Cause Seasonal Heave
- Why Subgrade Preparation and Subbase Selection Are Critical for Concrete on Expansive Soils
- Subbase Material Options and Selection Criteria
- Managing Moisture: Drainage, Capillary Breaks, and Underdrains
- Design Strategies to Reduce Heave-Related Stresses in Concrete
- Construction Best Practices and Quality Control
- Maintenance, Monitoring, and Common Mistakes to Avoid
- Cost, Lifecycle Trade-Offs, and a Decision Framework
- Conclusion
- FAQ
What Are Expansive Soils and How They Cause Seasonal Heave
Expansive soils are soils that swell when they take in water and shrink when they dry. This swelling comes mainly from swelling clays and related minerals that absorb water and create osmotic suction, with plasticity and grain size shaping how much they move. When moisture swings with seasons, concrete can lift, crack, or push joints apart.
Moisture cycles come from rainfall, irrigation, groundwater changes, drainage, and vegetation transpiration, all of which climate and site conditions affect. Knowing this helps you plan subbase and drainage choices to reduce heave and protect edges; watch for signs like uneven settlement, cracking, or open joints and adjust your moisture control and layering accordingly. If unsure about local behavior, check the soil label or talk to a local supplier for guidance.
Soil types and indicators of expansion potential
Expansive soils are typically high in clay content, with certain mineral types driving moisture-driven volume changes. These include swelling clays like montmorillonite and smectite.
In the field, look for signs like cracks in foundations or pavements, or heaving of trees and fences. In the lab, tests measure clay content, plasticity index, and swell potential to quantify expansion risk.
Always get a geotechnical report before starting any concrete work on expansive soils. It’s your best bet for understanding the true expansion potential.
How seasonal heave manifests in concrete pavements and slabs
Seasonal heave causes a range of distress patterns in concrete. You might see:
- Corner pops: Concrete at corners or edges lifts up, causing cracks.
- Joint pumping: Joints open and close with the seasons, pushing out material like toothpaste.
- Differential heave: Uneven lifting of slabs, leading to nonuniform settlement and tilting.
Uniform support is key to preventing these issues. If one part of your slab lifts more than another, it puts stress on the whole structure.
Why Subgrade Preparation and Subbase Selection Are Critical for Concrete on Expansive Soils
The subgrade (native soil) and the engineered subbase work together to spread and distribute loads from the slab so you get uniform support across the entire area. A proper subbase reduces pumping and moisture migration, which helps the slab stay flat over time on expansive soils. Remember: concrete can spread loads, but without uniform support you’ll see localized failures and long-term cracking.
This matters because choosing the right materials and maintaining continuity of the subbase minimizes moisture-driven movement and heave risks, especially under wet and dry seasons. Use appropriate permeability and drainage considerations, plan for frost cycling, and follow moisture conditioning and compaction guidance; check labels or manufacturer instructions for practical thickness ranges. Keep testing and quality control in mind, and ensure there are no gaps in the subbase that can become trouble spots later.
Uniform support vs. high strength — what matters most
The subbase’s job is to spread the slab’s load evenly across the subgrade, not just bear weight.
High strength alone doesn’t cut it. You need consistent stiffness and uniform support to avoid localized failures.
Compaction and material continuity are key here. Inconsistencies lead to weak spots where slabs can crack or fail over time.
Construction-stage loading and working platform needs
The subbase must protect the subgrade during construction. It’s your working platform.
Without a strong, stable subbase, heavy equipment can rut the subgrade, ruining its uniformity and leading to slab issues later on.
Think of it like this: the stronger and more uniform the subbase, the better it’ll protect the subgrade from construction traffic.
Subbase Material Options and Selection Criteria
This section compares common engineered subbases—granular aggregates, cementitious or lime-stabilized layers, geosynthetics, and select borrow—and lays out how drainage, stiffness, soil compatibility, durability, and maintenance drive selection. Use a simple decision framework to match each option to drainage needs, bearing capacity, moisture behavior, and frost resistance, then check the label or datasheet for limits.
For DIY folks, know that drainage performance and compatibility with your soil affect pavement life and future repairs. Think about how each option interfaces with subgrade and drainage, and plan field tests and maintenance steps before you pave.
Granular aggregates (types, pros, cons)
Granular aggregates are a common choice for subbases on expansive soils. They’re typically washed crushed stone or processed aggregate bases. These materials provide good drainage and stiffness.
Their particle size distribution allows water to drain quickly, reducing the risk of frost heave. Installation involves compacting layers to achieve desired stiffness and bearing capacity.
Pros include ready availability, low cost, and ease of installation. Cons are potential settlement issues if not properly compacted and possible loss of fines into the subgrade if not well-graded.
Stabilized subbases and chemical treatments
Cement or lime stabilization, along with geotechnical binders, can improve expansive soil performance. These treatments reduce plasticity and improve uniform support.
They work by altering the soil’s properties, making it less susceptible to swell-shrink cycles. However, suitability must be verified via lab testing before application.
Pros include improved soil strength and reduced seasonal movement. Cons are increased cost due to materials and testing, and potential environmental impacts if not managed properly.
Geosynthetics and separation layers
Geotextiles and geogrids can enhance subbase performance on expansive soils. They limit fines migration, preventing contamination of the subbase and maintaining its drainage properties.
Geotextiles act as filters, allowing water to pass while retaining soil particles. Geogrids provide additional reinforcement, improving stiffness and stability.
They’re typically used in combination with granular aggregates or stabilized layers. Consider them when fines migration is a concern, but they add cost and complexity to construction.
Managing Moisture: Drainage, Capillary Breaks, and Underdrains
Controlling moisture beneath and around the pavement is the best defense against seasonal heave on expansive soils. Focus on positive surface drainage, capillary barriers, and underdrains as the core strategies to keep the subbase dry. These steps work together to limit upward and lateral water movement that can push and crack concrete.
For DIY homeowners, think of a layered approach: grade and swales to move water away, a capillary break to stop wicking, and underdrains to remove subsurface moisture. The payoff is a drier subgrade, steadier joint performance, and easier maintenance. Check local guidance on drainage grades, backfill compatibility, and when to call a licensed pro for complex installs or drainage work.
Surface grading and perimeter drainage design
Controlling surface water is the first line of defense against seasonal heave. Here’s how to do it:
Grade your site so water runs away from the slab edges. Aim for a 1-2% slope, starting at the highest point near the center and sloping down towards the perimeter.
Install gutters or swales around the perimeter to catch runoff and direct it away from the slab. Make sure they’re deep enough to handle heavy rains but not so deep that they collect standing water.
Landscape with berms or raised beds to further divert water away from the slab edges and joints.
Underdrains, geotextile wrappers, and reservoir layers
Underdrains and reservoir stone are crucial when you’ve got high water tables or clay soils. Here’s how to use them:
Underdrains collect subsurface water and direct it away from the subgrade. Install them at the bottom of your subbase, sloping them towards a discharge point. Use perforated pipe wrapped in geotextile for filtration.
Reservoir stone layers act as temporary storage for excess water. Place them below the underdrains and above the native soil. They should be at least 6 inches thick, made of clean, angular gravel or crushed stone.
Size your underdrains based on site-specific rainfall data and geotechnical recommendations. Regularly inspect and maintain them to prevent clogging and ensure they’re working properly.
Design Strategies to Reduce Heave-Related Stresses in Concrete
Key design ideas here focus on making the slab handle soil movement without overstressing. Plan for adequate thickness, smart joint layout, solid edge support, and a cooperative subbase, with reinforcing and connections that move with the base rather than the slab alone.
So why this matters for you? It translates to fewer cracks and less heave-related distress if you sequence the work right, use the right subbase, and detail joints and edges for movement. Check labels and manufacturer instructions for materials, and pay attention to drainage, moisture control, curing, and field checks of the slab–subbase interaction during and after construction.
Jointing, reinforcement, and slab detailing best practices
Proper joint spacing, dowels, and reinforcement are crucial to reduce stress concentrations and accommodate expected movements in expansive soils. Here’s how:
Joint Spacing: Space joints 12-18 feet apart for typical residential slabs on grade. This allows the slab to move with soil expansion without excessive cracking.
Dowels: Use dowels at joint intersections to transfer loads and prevent joint opening. Ensure they’re properly anchored to both sides of the joint.
Reinforcement: Place reinforcement near the top and bottom of the slab to resist tensile stresses from soil expansion. For typical residential slabs, use #4 or #5 rebar with a spacing of 12-18 inches on center.
Isolation and transition details at intersections and utilities
Abrupt support changes can amplify heave effects. Here are some isolation and transition details to consider:
Intersections: Use expansion joints at intersections to allow independent movement of adjacent slabs. Ensure they’re properly detailed with proper joint fill materials.
Utility Cuts: When cutting for utilities, ensure the cut is properly supported and reinforced to prevent settlement or excessive movement during soil expansion.
Repairs: When repairing damaged areas, ensure the repair material bonds well with the existing slab and that proper reinforcement is used to accommodate expected movements.
Construction Best Practices and Quality Control
We’ll run a clear protocol for subgrade proof-rolling to spot soft spots before laying the subbase, then stay on top of compaction targets for each lift, trimming tolerances for a smooth, drainable surface, and moisture control during placement. Expect a documented process with simple acceptance criteria, and defined remediation steps when areas fail or pump.
This matters because uneven base work leads to settlement, cracking, or standing water later on, which smart DIY folks want to avoid. You’ll learn how to verify density in place, manage moisture within sensible ranges, and keep trims and joints clean and at the right height so you don’t chase problems after the fact. Check labels or manufacturer instructions when you need exact numbers, and keep a straightforward QC checklist and records for traceability.
Proof-rolling, compaction testing, and trimming tolerances
Before laying your subbase, you need to ensure your subgrade is stable. This is where proof-rolling comes in. It’s like giving the ground a quick test drive before committing.
Here’s how: Use a roller that’s heavy enough to mimic the weight of your concrete slab. Make several passes over the area, checking for any soft spots or ‘pumping’ – where the soil pushes up instead of compressing. If you find any, fix them before proceeding.
Once your subgrade is solid, it’s time for compaction testing. This ensures each lift of subbase material is properly compacted. Use a nuclear gauge or sand cone to check density relative to spec. Keep moisture within limits and recalibrate equipment as needed.
Finally, trim tolerances ensure a uniform base thickness. Follow your grade control procedures – maintain surface cross-slopes, keep high/low points in check, bevel joints, and transition edges smoothly.
Preventing contamination and preserving drainage layers
Keeping your drainage layers clean is crucial. They’re like the veins in your subbase, carrying moisture away from your slab.
Here’s how to protect them: Use geotextiles as separators between layers. This stops smaller particles clogging up your reservoir layers. Keep aggregate handling clean too – no mixing different types or adding contaminants.
Sequencing is key here. Lay down your drainage layer first, then cover it with a protective geotextile before placing the subbase. This way, you’re not exposing the drainage layer to potential contamination until it’s ready for use.
Maintenance, Monitoring, and Common Mistakes to Avoid
Regular maintenance keeps drainage paths clear, joints intact, and subbase compact to slow seasonal heave. Set simple routines for cleaning outlets, resealing joints before issues appear, and regrading if you notice water pooling or edge movement. Use clear pass/fail criteria for slope, outlets, and drainage layers so you can act early.
Regular monitoring after wet seasons and freeze events helps catch problems early. If you spot drainage issues, cracking progression, or rough surfaces, follow a straightforward corrective workflow: restore drainage, regrade as needed, and patch or reinforce joints. Avoid common mistakes like blocking drains, sloppy joint sealing, inadequate subbase compaction, or rushing repairs.
Visual checkpoints and monitoring schedule
Use this checklist regularly to spot signs of heave before they become big problems.
- Joint pumping: Check joints for excessive water or debris. If present, it could indicate blocked drains or inadequate drainage paths.
- Standing water: Look for any standing water on the slab surface. This is a clear sign of drainage issues that can lead to heave.
- Slab displacement: Inspect the slab edges and corners for signs of lifting or settling. Even minor movements could indicate progressive failure.
- Crack progression: Monitor existing cracks for lengthening or widening. This can signal ongoing stress due to heave.
- Surface roughness: Feel the surface with your hands. Any sudden bumps or dips could indicate localized heave.
- Drainage obstruction: Check all drainage outlets and subbase layers for blockages. Clear any obstructions to maintain proper drainage.
- Edge restraints: Ensure edge restraints are secure and not showing signs of displacement. They help prevent heave at the slab edges.
- Slope integrity: Verify that the slab maintains its designed slope for water runoff. Loss of slope can indicate heave or settling.
Quick rule: If you spot any of these issues, don’t wait – address them promptly to prevent further damage and costly repairs.
Typical installation mistakes and how to prevent them
Avoid these common pitfalls during construction to minimize heave risks.
- Poor compaction: Inadequate subbase compaction leads to voids that can fill with water, causing heave. Always follow the specified compaction standards and perform proof-rolling.
- Blocked drains: Neglecting to protect drainage outlets during construction can lead to blockages. Use proper site management practices to prevent debris from entering drains.
- Variable subgrade: Uneven or poorly prepared subgrades can cause differential heave. Ensure the subgrade is properly prepared and graded before starting work.
- Inappropriate materials: Using wrong materials for the subbase, drainage layers, or slab can lead to heave issues. Always follow the design specifications when selecting materials.
- Rushed repairs: Hasty repairs can introduce new problems and exacerbate existing ones. Take your time with repairs to ensure they’re done right.
Preventing these mistakes starts with thorough planning, careful execution, and regular inspections throughout the construction process.
Cost, Lifecycle Trade-Offs, and a Decision Framework
We’re weighing the upfront subbase cost against the long-term risk of heave on expansive soils, plus potential repair costs and downtime, so you can pick a solution that won’t break your budget after the first winter. Look at the main subbase options—granular, stabilized or cement-treated, lime-treated, geosynthetic-reinforced, and permeable—and how each helps with seasonal movement and drainage. Build a simple decision matrix with criteria like cost, risk reduction, reliability, and longevity, and note that you need project-specific estimates and life-cycle modeling to back it up.
This matters because soil type, moisture swings, climate, and movement potential drive how often repairs show up and how severe they’ll be. For a DIYer, focus on the data inputs you can gather—soil tests, drainage plans, and maintenance scenarios—and check product labels and manufacturer instructions for guidance, then lean on local rules or a pro if you’re unsure.
When higher upfront subbase investment is justified
Spending more on your subbase and drainage might seem like a big hit to your budget, but it can save you in the long run. Here’s when it pays off:
High traffic areas: More vehicles mean more stress on the concrete. A better subbase helps distribute this load evenly and reduces heave.
Sensitive structures: If your concrete is supporting important buildings or infrastructure, you can’t afford to have it cracking due to soil movement. Investing in a robust subbase ensures stability.
Difficult soils: Some soils are just more prone to heave than others. In these cases, spending extra on a subbase that mitigates this movement is crucial to prevent costly repairs down the line.
Tools and materials checklist for contractors and owners
Before you start any work, use this checklist to ensure everything is in order. It’s your DIY-friendly guide to keep projects on track.
- Geotechnical borings: Check soil conditions before starting. Skipping this can lead to unexpected issues later.
- Aggregate gradation test: Ensure the subbase material meets specs. Wrong aggregates can cause drainage problems and heave.
- Geotextiles: Verify they’re fit for purpose. Poor quality geotextiles can clog or tear, leading to drainage failure.
- Underdrains: Confirm they’re correctly sized and installed. Incorrect underdrains won’t prevent water buildup and heave.
- Compaction equipment: Check it’s in good working order. Poor compaction leads to weak subbase and increased heave risk.
- Moisture meters: Ensure they’re calibrated. Incorrect readings can lead to improper drainage solutions.
- Concrete mix design: Verify it’s suitable for your site conditions. The wrong mix can crack or heave under stress.
- Local standards and engineer approval: Always confirm with the project engineer and local codes. Skipping this can result in costly rework.
Quick rule: Always double-check your tools, materials, and specs before starting work to avoid costly mistakes.
Conclusion
Dealing with expansive soils is about predictable steps, not luck. Build a solid subbase, control moisture, and verify every layer before concrete goes down to keep cracks and heave at bay, protect your investment, and keep the job looking right for years.
Check the site and work in order: confirm soil behavior with simple tests or local guidance, prepare the subgrade and install an appropriate subbase, set drainage and moisture breaks, then place and cure concrete with proper joints and curing methods. Inspect drainage paths, verify capillary breaks are in place, and double-check compaction and consistency of materials before you pour. Keep the plan simple, document what you did, and test a small area first to see how it behaves.
Avoid common missteps like skipping moisture management, skimping on subbase quality, or pouring on inadequate or uneven surfaces. Don’t mix materials in a way that prevents drainage or creates hidden voids, and never ignore curing or jointing needs. Safety rules: don’t work on unsafe ground, test materials in a small trial first, and wear eye and skin protection when handling amendments or forms, keeping work area clear of trip hazards and falling objects.
If the project would push into complex drainage, large loads, or uncertain subsoil behavior, call in a qualified contractor or engineer before you pour. When in doubt, slow down and test, then proceed with a clear plan. Stay disciplined, document every step, and you’ll finish with a durable slab that resists seasonal heave and stays safe and solid for the long run.
FAQ
What is a subbase and why does it matter for concrete on expansive soils?
A subbase is the layer under the concrete slab that provides support and spacing from the soil. It helps spread loads evenly and reduces the chance of uneven settlement or movement. Check product labels and local guidance to make sure your subbase is compatible with your concrete and soil conditions.
What causes seasonal heave and how does soil moisture influence it?
Expansive soils swell when they take on water and shrink when they dry out. High moisture near the foundation and poor drainage amplify this movement. Look to manufacturer instructions and local rules for moisture limits and drainage practices that fit your site.
How can I ensure uniform support and prevent pumping under a new slab?
Uniform support means the subbase should be consistent in depth and compaction across the whole area. Pumping happens when wet subbase shifts under load; keep the subbase dry and compacted and use proper edging and joints. If unsure, verify compaction specs with the subbase material’s label or manufacturer instructions.
What subbase materials work best and how do I choose them?
Engineered gravel, clean sand, and geotextiles are common options. The choice depends on your soil type, water plan, and project size. Always follow product labels and local guidance for installation depth, compaction, and compatibility with your concrete mix.