
Introduction
Concrete fountain leaks happen when tiny holes or seams let water escape. Common causes are pinholes and cold joints that form gaps as concrete cures and settles. If you notice damp spots, dripping, or a steady seep near joints, that signals a leak to investigate.
To fix it, you’ll seal pinholes and address cold joints with appropriate patching or sealing products. Identify suitable sealants or waterproofing options by reading the product label and the manufacturer’s instructions, and follow local rules for outdoor use. If you’re unsure, check with the supplier or a local building authority for guidance and safety notes.
Key takeaways
- Pinholes and cold joints commonly cause fountain leaks, inspect for hairline gaps.
- Look for dripping, damp spots, mineral deposits, and low water level changes as signs.
- Plan repairs by evaluating accessibility, compatibility of sealants, and wear eye protection.
- Use compatible sealants or waterproof coatings suited for fountain immersion zones.
- Temporary fixes can hold water briefly but still need proper sealing later.
- For best longevity, address joints, pinholes, and test after cure per label.
Table of Contents
- Introduction
- Key takeaways
- Why Concrete Fountains Leak: Pinholes, Cold Joints, and Other Causes
- Signs and Methods to Locate Leaks
- Planning the Repair: Assessment, Scope, and Safety
- Tools, Materials, and Material Specs Explained
- Temporary (Short-Term) Fixes That Hold Water for Now
- Permanent Repair Options and Application Methods
- Common Mistakes, Troubleshooting, and Quality Checkpoints
- Cost Considerations, Longevity, and When to Call a Professional
- Conclusion
- FAQ
Why Concrete Fountains Leak: Pinholes, Cold Joints, and Other Causes
Concrete fountains can leak for several practical reasons, and pinholes are a common trouble spot. These tiny voids form from air pockets, improper finishing, or inadequate curing, and they provide routes for steady moisture intrusion. Shrinkage and microcracking can also open up pathways that water can follow when the system is pressurized or heated by sun and flow.
Cold joints and structural flaws arise when pours are non-bonded or poured at different times, creating seams that don’t seal well. Movement, settling, or shifting of the basin can stress seals and widen gaps around joints. Surface wear from constant water flow, mineral buildup, and ballast loading can widen microcracks and degrade the liner’s edge over time, inviting leaks. Hidden plumbing faults and misaligned penetrations further bypass the fountain liner and expose the concrete to water loss. Environmental and maintenance factors like root intrusion, freeze–thaw cycles, UV exposure, chemical attack, and neglect also contribute to hairline cracks. A concise diagnostic plan should start with visual signs, moisture checks, dye tests, and targeted probing of suspected cold joints to prioritize repairs.
Pinholes and surface porosity
Pinholes are tiny holes on your concrete fountain’s surface, allowing water to seep through. They form due to:
Entrapped air: Air pockets left during mixing or pouring can create pinholes when the concrete sets.
Poor consolidation: Inadequate vibration or compaction leaves voids that turn into pinholes.
Surface porosity: A porous surface absorbs water, leading to seepage and eventual pinhole formation.
Cold joints and construction defects
Cold joints are weak points in your fountain’s concrete where new pours meet old ones. They leak due to:
Improper timing: Pouring new concrete onto unset or ‘cold’ concrete creates a weak bond.
Bonding issues: Inadequate surface preparation, like not removing laitance (the weak top layer of set concrete), leads to poor bonding and cold joints.
Under hydrostatic pressure, these weak planes allow water to seep through, causing leaks.
Structural movement, freeze-thaw, and plumbing failures
Leaks can also result from:
Movement and settling: Concrete expands and contracts with temperature changes. Over time, this movement can create microcracks that leak.
Freeze-thaw cycles: Water trapped in concrete freezes and thaws, causing cracks to widen and allowing more water intrusion.
Plumbing failures: Cracks or leaks in supply lines, faulty fittings, or gaskets can bypass your fountain’s liner integrity, leading to leaks.
Signs and Methods to Locate Leaks
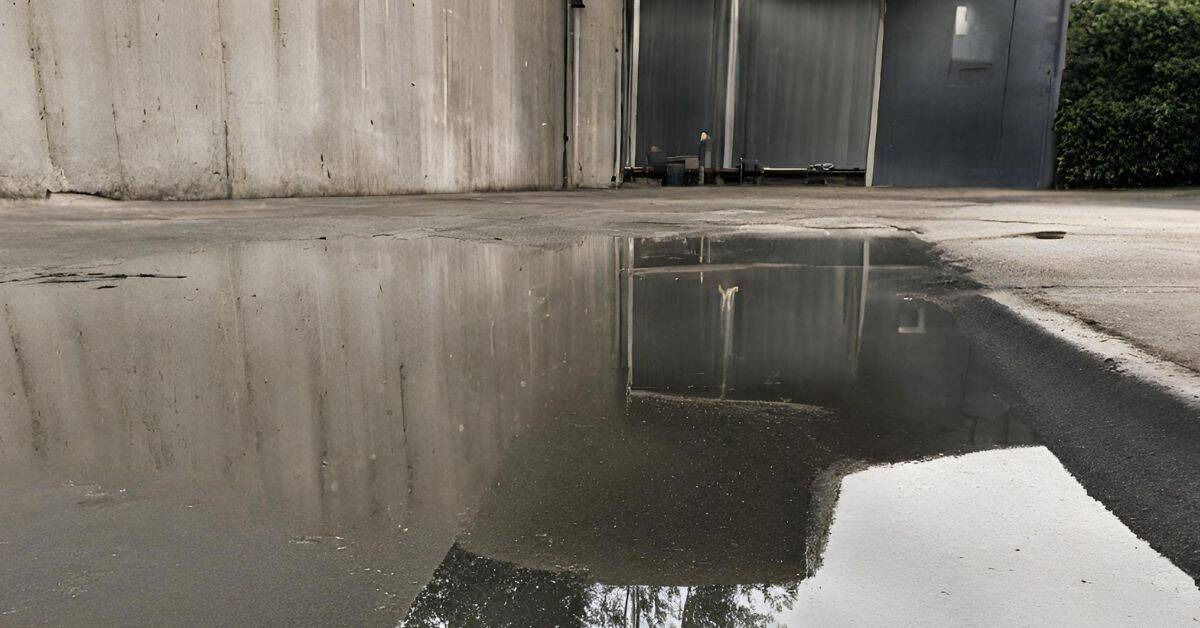
Active leaks show up as damp patches, ongoing staining, or soft, waterlogged concrete, while latent leaks may lurk behind a dry surface until testing reveals moisture movement. Efflorescence and mineral deposits can indicate water movement through the shell or joints, even when the area looks dry. Distinguishing weather-related moisture from persistent leaks is essential for sane repair planning.
Use staged detection: start with a calm visual scan, then drain and dry areas to observe new moisture, and apply non-staining dye or safe food coloring in the reservoir to trace water paths. Non-destructive locating tools like infrared cameras or moisture meters help spot hidden intrusion especially around joints, seals, and pump housings. Common leak sources include basin seams, cold joints near settled sections, pump fittings and gaskets, plumbing lines, and spillway connections. Build a simple toolbox on site and document findings with notes and photos to guide the repair approach.
Visual clues and water-level indicators
Start by checking for visible signs of leakage. Wet spots, staining, or mineral deposits on the concrete surface can indicate a leak. Keep an eye out for steady water loss from the fountain, too.
Monitor your fountain’s water level regularly. Persistent drops in water level could signal a leak, even if you don’t see any visible signs yet.
Remember, some moisture might be due to weather or evaporation. But if you notice consistent dampness or water loss, it’s time to investigate further.
Dye testing and isolation checks
Use food-grade dye or safe colored tracer in your fountain reservoir. This helps you trace the path of leaking water. Add the dye, then observe where it appears outside the fountain.
To isolate leaks, temporarily plug or cap sections of plumbing lines and fittings. Then, check for changes in water level or dye appearance. This can help pinpoint the exact leak location.
Be patient with this process. It might take time to find the right spot, but isolating sections helps narrow down your search.
Listening, pressure testing, and probe methods
Use a stethoscope or listening device to hear water movement. Press it against suspected leak areas. You might hear water rushing or bubbling, indicating a leak.
Perform low-pressure tests by reducing the fountain’s water pressure. This can help reveal hidden leaks that aren’t apparent at normal operating pressure.
For subsurface leaks, use a tactile probe. Gently press it against the concrete surface to feel for soft spots or movement, which could indicate a leak below.
Planning the Repair: Assessment, Scope, and Safety
Start with a thorough damage check by visually inspecting for cracks, pinholes, and cold joints, and map damp areas with dye tests or moisture meters. Note signs of intrusion around seams, outlets, and fittings to decide how far water has compromised the structure. This initial survey informs whether the fix is local or part of a larger resurfacing plan.
Decide the repair scope and material strategy by weighing spot patching against relining, and evaluate options like epoxy putty versus cementitious repair for durability. Plan for waterproofing compatibility with the fountain shell and any sealants used. Safety steps include shutting off the pump, draining the basin, and wearing PPE while securing the work area and ensuring proper ventilation and slip protection for the crew.
Inspecting, documenting, and determining scope
Start by giving your fountain a thorough visual inspection. Look for cracks, pinholes, cold joints – anything that might be letting water escape.
Take photos as you go. These will help you keep track of what needs fixing and serve as a record in case you need to make an insurance claim later on.
Use moisture meters or dye tests to map out damp areas. This helps pinpoint the exact location of leaks. Remember those signs of water intrusion around seams, outlets, and fittings we talked about earlier?
Now, decide on your repair strategy. If damage is minor – a few pinholes here and there – spot patching might be enough. But if you’re seeing extensive cracks or cold joints, it’s probably time for full relining.
Safety, site prep, and environmental controls
Before you start any work, ensure your safety. Shut off power to the pump. You don’t want it kicking on while you’re working.
Wear PPE: gloves for handling materials, eye protection against debris, and a mask if you’re using chemicals. Also, secure the working area to prevent slips or trips.
Drain the basin completely. You don’t want water sloshing around while you’re trying to work. And speaking of water, contain any runoff. We don’t want it damaging surrounding finishes or causing more leaks elsewhere.
Proper ventilation is crucial too, especially if you’re using sealants or other chemicals. Make sure there’s enough airflow in the working area.
Plumbing shutoff and system isolation
First things first: isolate your fountain’s plumbing supply lines. You don’t want water gushing out while you’re working.
Check all valves – both on the fountain itself and upstream at the main water supply. Make sure they’re closed tight. If any are leaking, replace them before proceeding.
Once everything is shut off, double-check that there’s no water pressure in the lines. You can do this by opening a faucet or valve downstream from where you’ve isolated the system. If water comes out, you know there’s still pressure, and you need to find and fix the leak.
Now, with everything safely isolated, you’re ready to start your repairs knowing that no unexpected water surprises are lurking in the plumbing subsystem.
Tools, Materials, and Material Specs Explained
Assemble a practical tool list that covers the basics: trowels, mixing bowls, caulking guns, measuring tools, PPE, and a clean workspace. Include non-contact temperature checks if you have them, but rely on basic temperature sensitivity of materials you’ll actually use on site. Having the right setup keeps patching clean and predictable.
Understand core repair materials and when to choose them: cementitious repair mortars, epoxies, polyurethane sealants, hydraulic cement, and epoxy putty each have their place depending on water exposure and expected movement. Verify material specifications for water resistance, cure time, compatibility with potable water, pH tolerance, and freeze–thaw resistance, and read the product data sheets to confirm substrate compatibility with your fountain finish and liner.
Essential Tools and Setup Checklist
Before you start your repair, ensure you have the right tools and a clean working area. This will save you time and frustration.
- Scrapers: To remove old material and prepare surfaces. Skip this and repairs won’t stick.
- Grinders: For smoothing and shaping. Without it, surfaces may remain rough.
- Mixing tools: Like mixing bowls and paddles. Inadequate mixing leads to weak repairs.
- Trowels: For applying materials evenly. Uneven application causes weak spots.
- Injection equipment: For filling cracks and holes. Without it, leaks won’t be sealed properly.
- Drop cloths: To protect surrounding areas from spills. Skip this and you’ll have a mess to clean up.
- Eye protection: Essential for safety when using power tools or handling chemicals.
- Gloves: Protect your hands from harsh materials and chemicals.
Quick rule: Always double-check you have everything before starting. Missing a tool can halt progress.
Repair Materials: Epoxy Putty, Hydraulic Cement, Sealants, and Grouts
Choosing the right material is crucial for a lasting repair. Here’s what each does best.
- Epoxy Putty: Great for filling large holes and cracks. It’s strong but shrinks slightly as it cures, so it’s not ideal for fine details.
- Hydraulic Cement: Perfect for underwater repairs and stopping leaks fast. But it’s weak in tension, so it’s not suitable for structural repairs.
- Sealants: Ideal for sealing joints and preventing water ingress. They’re flexible but can’t fill large gaps or cracks.
- Grouts: Used to fill voids and anchor materials together. But they’re not waterproof on their own, so use with a sealant.
Material Selection Checklist and What to Verify
Before you buy, check these specs to ensure the material will do the job right.
- Adhesion: Make sure it sticks well to your fountain’s surface. Poor adhesion leads to delamination.
- Cure Time: Check if it cures fast enough for your schedule, but not so fast you can’t work with it.
- Waterproof Rating: Ensure it can withstand water exposure without breaking down. Low ratings cause leaks to reappear.
- Potable Water Compatibility: If the repair is for a drinking fountain, ensure the material is safe for contact with potable water.
- pH Tolerance: Check if it’s compatible with your fountain’s finish. Incompatible materials can cause discoloration or damage.
- Freeze-Thaw Resistance: Essential for outdoor fountains to prevent cracking in cold weather.
- VOC Content: Lower VOCs mean less harmful fumes and faster cure times. High VOCs can be harmful and slow curing.
Quick rule: Always check manufacturer datasheets for the most accurate information.
Temporary (Short-Term) Fixes That Hold Water for Now
Choose a temporary method that matches the leak type and the operating season, prioritizing containment without claiming long-term reliability. Temporary fixes should buy you time to plan a proper repair while minimizing disruption to the fountain’s use. Verify that the chosen approach won’t introduce safety or chemical concerns for plants or fish nearby.
Common quick options include epoxy putty, hydraulic cement, and water-stop caulks, with flexible sealants used where movement or vibration is expected. Prepare the area by slowing water flow, drying surfaces as much as possible, and protecting nearby components to avoid creating a false seal. Understand the application limits, including cure times and the anticipated duration of effectiveness, and watch for signs that the patch has failed so you can schedule the permanent repair during the next maintenance window.
Epoxy Putty and Quick-Setting Hydraulic Compounds
For pinholes and small cracks, epoxy putty or fast-setting hydraulic cement can provide a quick fix. These materials are ideal for temporary repairs as they set quickly and create a strong bond with concrete.
Epoxy Putty: Mix the two-part compound according to package instructions. Apply it directly into the crack or hole, ensuring full contact with the surface. It sets in about 30 minutes, allowing you to apply pressure immediately.
Hydraulic Cement: This powdered material is mixed with water and applied like mortar. It sets underwater and can be used for leaks in submerged areas. However, it’s not as strong as epoxy putty and may not last as long.
Rubberized Sealants, Tapes, and Caulking
For surface leaks or areas with movement, rubberized membranes, specialty tapes, or silicone-based caulks can create a temporary barrier. These materials are flexible, allowing them to accommodate minor shifts in the concrete.
Rubberized Membranes: Apply these as a liquid that cures into a flexible, waterproof layer. They’re great for sealing around joints and edges where leaks may occur due to movement or vibration.
Specialty Tapes: These are pre-formed, adhesive-backed strips designed to seal cracks and gaps. They’re easy to apply but may not last as long as other methods.
Silicone-Based Caulks: Apply these with a caulking gun around edges or into small cracks. They create a flexible, waterproof seal that can accommodate minor movement.
Pros, Cons, and Expected Serviceability Checks
Advantages: Temporary fixes are quick, easy to apply, and can prevent immediate water damage. They allow you to keep your fountain running until a permanent repair can be made.
Limitations: These repairs are not designed to last long-term. They may degrade over time due to weathering, UV exposure, or water pressure. Expect them to last anywhere from a few weeks to several months, depending on the material and leak severity.
To monitor serviceability, recheck your repairs periodically for signs of failure such as new leaks, cracks in the patch, or peeling sealant. If you notice any issues, it’s time to reapply the temporary fix or plan for a permanent repair.
Permanent Repair Options and Application Methods
Define when to use each option—bonded patches, injection grouting, or full resurfacing—based on damage type, location, and expected movement. The goal is a durable seal that survives water exposure and seasonal changes without reopening.
Bonded patch methods require proper surface prep, primer or sealer, and chosen patch material with correct curing. Injection grouting involves substrate assessment, selecting epoxy or polyurethane grout, and a controlled sequence of injections with appropriate ports and packers, followed by curing and neutralization steps. Full resurfacing should be considered when extensive surface damage or movement warrants a new protective layer, with careful attention to surface prep, overlay options, and long-term protection planning. After any repair, run hydrostatic or dye tests to verify integrity and observe the area during a couple of cycles before returning the fountain to service.
Patching pinholes and small cracks (surface repair)
First things first, inspect the area. Pinholes and small cracks are usually surface issues. If you see signs of deeper damage, you might need to go with a different repair method.
Before you start patching, clean the area. Use a wire brush or a shop vacuum to remove any loose material, dirt, or debris. You want a clean surface for your patch to stick to.
Now, grab your bonded patch material. Follow the manufacturer’s instructions on how to mix it. Once mixed, apply it quickly. Use a trowel or a putty knife to fill the pinholes and cracks. Make sure you push the material into the crack to ensure a solid bond.
After application, cure properly. Follow the manufacturer’s instructions for curing time. Keep in mind that curing times can vary depending on temperature and humidity. Once cured, your patch should be ready for painting or sealing.
Injected grouts and crack epoxy for subsurface leaks
When you’ve got cold joints or hairline cracks causing leaks from the inside, don’t mess around with surface patches. You need to go deep with injected grouts or crack epoxy.
First, check your local building codes and manufacturer instructions for the specific product you’re using. Safety first, always wear appropriate PPE.
Next, clean and prep the area. Vacuum cracks to remove any debris, then use a brush or compressed air to ensure they’re clear. Check base compaction – if it’s poor, fix it before proceeding.
Now, mix your grout or epoxy according to the manufacturer’s instructions. Use a low-pressure injection system to push the material into the crack. Start from the lowest point and work your way up. Keep an eye on the pressure gauge – you don’t want to blow out the crack.
Resurfacing, relining, and full waterproof systems
When surface repairs aren’t enough, it’s time to consider bigger solutions. Here are your options:
Resurfacing: This is like giving your concrete a facelift. You’re applying a new layer of cement-based material over the existing slab. It’s great for hiding minor imperfections and adding a fresh look. But remember, it won’t fix structural issues or stop leaks.
Relining: This is similar to resurfacing but with an added waterproofing membrane. It’s ideal when you’ve fixed the underlying problems (like bad compaction check base compaction) and want to prevent future moisture issues. It’s a bit more involved than resurfacing, so be ready for that.
Full Waterproof Systems: These are your heavy hitters. They involve applying multiple layers of waterproofing materials (like liquid membranes or sheet membranes) over the entire surface. They’re designed to stop water from getting in anywhere. They’re more expensive and time-consuming, but they provide the best protection.
Before you decide, check local rules, consult manufacturer instructions, and make sure you’ve got the right tools and skills for the job. It’s a big project, so don’t rush into it.
Common Mistakes, Troubleshooting, and Quality Checkpoints
Frequent errors include insufficient surface prep, inadequate sealing, and rushing cures, which all undermine long-term performance. Understand how improper joint treatment and patch adhesion can lead to recurring leaks or delamination. Avoid shortcuts that skip verification steps or skip safety measures around electrical components.
Follow a troubleshooting flow that links symptoms to likely causes, using tests like visual inspection, water tests, and dye tracing to map problems. Prioritize repair options by reliability and impact, from surface sealers to epoxy patches and then joint waterproofing, escalating to professional help for complex cracks. A standardized workflow helps prevent rework, and quality checkpoints such as a dry surface, good patch bonding, and leakage-free performance during test cycles signal a successful repair.
Mistakes to avoid during prep and application
Before you start any repair work, ensure your fountain is clean, dry, and properly prepared. Here’s a checklist to help you:
- Surface cleaning: Remove all dirt, debris, and old sealants. A wire brush or power washer can help.
- Dry surface: Ensure the concrete is completely dry before applying any repairs. Moisture undermines bonding.
- Proper mixing: Follow manufacturer’s instructions for mixing epoxy, hydraulic cement, and sealants to avoid weak patches.
- Bonding agent: Apply a bonding agent to improve adhesion of repair materials to the existing concrete.
- Avoid repairing in extreme temperatures: Both hot and cold weather can affect curing and bonding.
- No rush with curing: Allow proper cure time for materials to develop full strength. Rushing this step weakens repairs.
- Prime before sealing: Apply a primer to improve sealant adhesion and enhance waterproofing.
- Avoid over-application: Too much material can lead to drips, runs, or excess buildup that traps moisture.
Quick rule: Prep work is half the battle. Skipping steps here guarantees a failed repair down the line.
How to test repairs and what to do if leaks persist
After applying your repairs, it’s crucial to test them thoroughly. Here’s a step-by-step guide:
- Visual inspection: Check for any visible signs of leakage or cracks.
- Water test: Fill the fountain and observe for leaks over 24 hours. Drain and inspect again after drying.
- Dye tracer test: Use a waterproofing dye to trace hidden leaks. Apply around suspected areas, then fill and observe.
- Pressure check: If possible, use an air compressor to simulate water pressure and check for leaks.
- Repatch if necessary: If minor leaks persist, repatch using the same materials and methods.
- Injection for severe cracks: For larger cracks, consider injecting epoxy or grout under pressure.
- Consult a pro if leaks continue: Persistent leaks may require professional intervention. Don’t hesitate to call in an expert.
- Retest after each repair: Always retest after applying additional repairs to ensure the problem is fixed.
Quick rule: Thorough testing saves time and money in the long run. Don’t assume a repair is successful until it’s proven.
Visual checkpoints and signs of a good repair
After testing your repairs, perform a final visual inspection to ensure everything looks good. Here are the key acceptance criteria:
- No active leaks: Check for any seepage or dampness around repaired areas.
- Uniform surface texture: The repair should blend seamlessly with the existing concrete, with no visible dips, bumps, or discoloration.
- Proper bonding of patches: Patches should adhere firmly to the surrounding concrete. No lifting or peeling.
- No trapped moisture: Look for any signs of moisture buildup under the repair, which could indicate a weak seal.
- Cure time verification: Allow the recommended cure time before subjecting the repair to full water pressure. This ensures materials have reached their full strength.
- Seasonal temperature cycling: Observe your repairs over different seasons and temperatures to ensure they maintain their integrity.
Quick rule: A good repair should look as good as it performs. If something looks off, dig deeper to find the problem.
Cost Considerations, Longevity, and When to Call a Professional
Consider the main cost drivers on a fountain: material choices, basin size, liner material, pump capacity, and any custom features. A clear sense of scope helps you estimate labor and material expenses without surprises during the project. Weigh the upfront investment against expected longevity and maintenance needs.
Longevity depends on water chemistry, freeze–thaw exposure, UV exposure, and how well joints and drainage are managed. Plan a maintenance schedule that includes preventive resealing intervals and replacement part availability. Identify clear triggers for professional help, such as widening cracks, persistent leaks after simple repairs, inaccessible leak sources, or concerns about code compliance and warranty coverage.
What influences cost and how to get estimates
Costs vary based on materials, access, and labor complexity. High-quality epoxy, sealants, or grout will increase costs. Custom features like intricate designs or complex basin shapes also drive up prices.
For DIY repairs, consider material margins at your local hardware store. Contractors may have better pricing due to bulk purchases but charge hourly labor rates.
Opportunity cost is another factor. Time spent on repairs could be spent elsewhere. Plus, hidden fixes might pop up during work, adding unexpected costs.
Get multiple product quotes and contractor bids. Be clear about what’s included in each estimate to compare apples to apples.
Expected durability factors and maintenance planning
Durability depends on material quality, prep work, and climate exposure. Properly prepared surfaces with high-quality materials last longer.
Water chemistry matters too. High mineral content or pH can degrade repairs over time. Freeze-thaw cycles and UV exposure also wear down fountain components.
Plan routine inspections every 3-6 months to catch issues early. Preventive resealing every 2-5 years keeps water out. Keep replacement parts on hand for quick fixes.
Estimate long-term repair costs. Regular maintenance can prevent major repairs down the line.
When to call a professional or structural engineer
DIY repairs are great for small leaks and simple fixes. But complex cold-joint failures, widening cracks, or shifting basins need pro attention.
Major plumbing replacement or aesthetic restoration also warrant a professional. They have specialized tools and knowledge to tackle these jobs safely and effectively.
If leaks persist after simple repairs, or you can’t find the source, call a pro. They can diagnose issues and ensure code compliance.
Don’t hesitate to consult an engineer if structural integrity is at stake. They provide expert advice and peace of mind.
Conclusion
Fixing a leaking concrete fountain is doable if you stay focused on safety, plan the repair, and follow practical steps without rushing. The goal is durable water tightness that looks right and lasts, so don’t skip prep, testing, or cure times.
First, move through a simple, quiet sequence: shut off water and power, inspect signs of leakage, locate the openings, and decide whether a temporary fix is enough for now or you need a full repair. Then gather the right tools and materials, test a small area first, apply the repair in the correct order, and finally re-test the system at low pressure before restoring full operation. Keep it methodical and document what you did so you can repeat or adjust if needed.
Common mistakes to avoid are rushing the surface prep, using the wrong patch or sealant for your concrete mix, and skipping verification after each step. Do not overfill joints, skip curing times, or pressurize a temporary fix beyond its rating. Always wear PPE, work in a ventilated area, and keep a clear plan for the sequence of steps. If you sense hidden structural issues, or the leak remains after a staged repair, pause and reevaluate.
When to call a professional is clear: if you uncover large cracks, structural movement, persistent leaks after multiple repair attempts, or you’re unsure about the safety of the fountain basin. In those cases, stop pushing ahead and get an expert on site. Stay steady, follow the checks, and you’ll protect the fountain, your time, and your wallet. Safety first and test in a small area are your guiding rules. You’ve got this—apply the plan and you’ll restore a watertight, good-looking fountain.
FAQ
What are the common ways pinholes and cold joints cause leaks in a concrete fountain?
Pinhole leaks are tiny voids that form during concrete placement or finishing. Cold joints happen when fresh concrete meets earlier concrete that hasn’t cured fully, creating a weak seam. Both allow water to seep through and around the fountain shell if not sealed.
How can I tell if a fountain leak is from a pinhole or a cold joint?
Look for small pinpoint drips or damp spots on the exterior near where panels join. If you see a seam line inside the basin or along joints that stays moist, that often indicates a cold joint. A water test with the fountain off can help you pinpoint persistent seepage areas.
What repair methods work best for sealing pinholes and cold joints?
Pinholes are typically filled with an appropriate non-shrink grout or epoxy patch, then finished flush. Cold joints usually require cleaning the joint, applying a compatible sealant or repair mortar, and re-sealing the entire seam. Always verify compatibility with your fountain material and follow the product label.
Which sealants or waterproofing products should I consider, and what should I check on the label?
Choose a product labeled for concrete fountains or exterior water features and compatible with your substrate. Check cure time, water compatibility, and the warranty. If in doubt, consult the manufacturer instructions or a local supplier for a product that matches your setup.