
Introduction
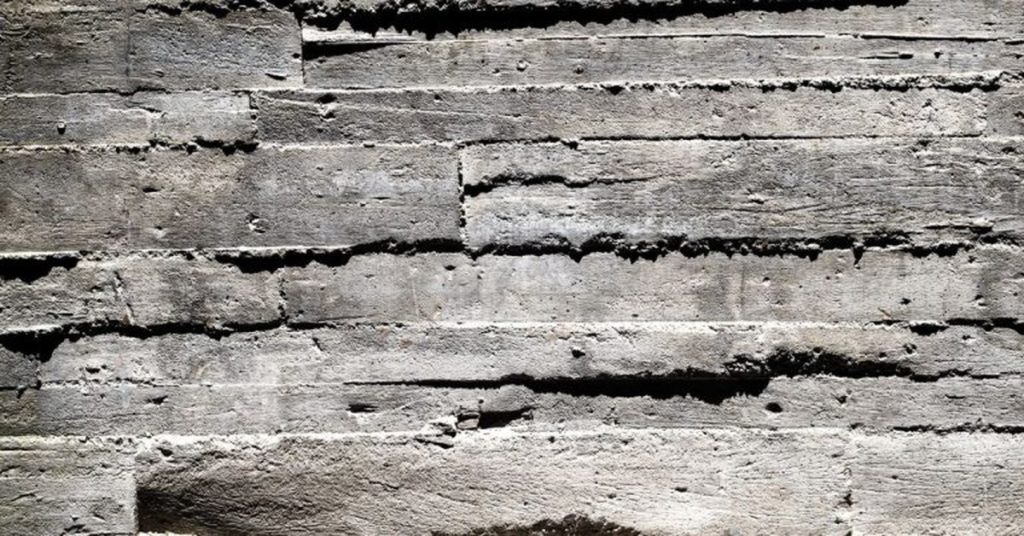
A concrete float comparison explains how magnesium, wood, and resin floats affect the surface finish. This article frames what each float type does as you work a concrete slab or patch, with plain, hands-on guidance. You’ll see what to expect in real-world use and how to judge the finish as you go.
Magnesium floats are light and quick to move but may wear more quickly and require mindful handling. Wood floats give a traditional feel and a palpable control, yet they can scorch or imprint if pressed too hard and may require upkeep. Resin floats offer a durable option with stable feedback and a smoother result, though texture and removal of marks can vary; test on a small area and follow manufacturer instructions for care.
Key takeaways
- Magnesium floats offer light weight and balanced feel, improving control and fatigue reduction.
- Wood floats provide a softer finish and natural feel but absorb moisture and warp risks.
- Resin floats resist water damage and chipping, yet heavier balance and less tactile feedback exist.
- Finish quality varies by material: magnesium for smoothness, wood for open-grain sheen, resin for consistency.
- Weight, balance, and handling affect fatigue and control during long smoothing sessions.
- Safety and maintenance: wear eye protection, clean and dry after use; inspect for cracks.
Table of Contents
- Introduction
- Key takeaways
- Quick Overview: When and Why Float Material Matters
- Material Features and Construction
- How Float Material Changes the Finish
- Performance: Weight, Balance, and Handling
- Durability, Maintenance, and Care
- Safety, Ergonomics, and Attachments
- Cost-Effectiveness and Lifecycle Considerations
- Choosing the Right Float for Your Project + Common Mistakes and Visual Checkpoints
- Conclusion
- FAQ
Quick Overview: When and Why Float Material Matters
Magnesium, wood, and resin floats each serve a different role in early finishing: magnesium is often chosen for a smoother, faster pass after screeding and bull-floating; wood floats introduce more texture and can help manage bleed water on weaker mixes; resin floats offer a controlled texture with less gouging potential on delicate surfaces. Each material interacts with laitance and set rate in distinct ways, shaping texture and density and influencing the risk of tearing or gouging the surface. Timing after initial float passes matters to avoid trapping moisture or drawing out laitance too aggressively.
For DIY readers, the choice affects finish texture, durability, and how you proceed toward troweling or sealing. If a slick finish is the goal and the concrete is strong with minimal bleed water, a magnesium float is often favored; if skid resistance or working with weaker mixes is required, a wood float can produce a more open, textured surface. Be mindful of common mistakes—overworking with the wrong material or cross-contaminating tools—and use a light re-trowel with the appropriate tool if imperfections appear after the initial float. A walk-on test helps confirm the surface can support foot traffic before finishing proceeds, and a quick pro check of the mix, weather, and project goals can inform the best float choice.
What a Float Does During Finishing
A concrete float’s primary role in the finishing process is threefold:
Leveling: The float smooths out any remaining high or low spots left by the bull float, creating an even surface.
Consolidating Paste: It presses down on the concrete to consolidate the paste and force it into voids created by aggregate, improving the final density of the slab.
Closing the Surface: By bringing the cement paste to the surface, the float helps create a smooth, durable wearing surface that’s ready for troweling or other follow-up processes.
Summary Comparison: Mag vs Wood vs Resin
When choosing between magnesium (mag), wood, and resin floats, consider the following:
Magnesium Floats: These provide a smooth, dense finish with minimal texture. They’re ideal for jobs requiring a slick surface, like polished concrete or epoxy overlays.
Wooden Floats: Wood offers a more textured look due to its open grain. It’s durable and suitable for surfaces needing some skid resistance, such as walkways or driveways.
Resin Floats: Resin is versatile but requires careful timing. It can provide a smooth finish like magnesium or a textured one like wood, depending on the float’s condition and application technique. It’s often used in open-graded textures or when a consistent, mid-range texture is desired.
Material Features and Construction
Magnesium, wood, and resin floats differ in core properties and construction, which drives how they abrade the concrete and how long a crisp edge lasts. Magnesium is dense and hard, wood blocks vary with seasoning or lamination, and resin bodies are precision molded for consistent shape. These differences influence flatness, weight, and maneuverability during finish work.
Choosing the right float matters for how cream, laitance, and trowel marks are resolved and how the finish evolves from rough to smooth. For DIY projects, consider handling feel, edge retention, and maintenance needs, then balance cost and project scale. Quick checks on-site—feel the weight and texture, observe edge behavior, and follow manufacturer guidance for care and storage to extend longevity.
Magnesium Floats — Key Properties
Magnesium floats are known for their hardness and ability to close the surface of concrete, producing a dense, smooth finish. They are typically made from magnesium alloys like AZ31 or ZK60.
Corrosion resistance is an important factor with magnesium floats. Inspect your float regularly for signs of corrosion or pitting. Regular cleaning and drying can help minimize this risk.
Magnesium floats often feature blades designed for sharpness and durability. Check blade condition and sharpness before each use to ensure optimal performance.
Wood Floats — Key Properties
Wood floats, typically made from seasoned hardwoods like beech or maple, offer a more open or textured finish due to their porosity and absorbency. This makes them ideal for certain decorative concrete applications.
Wood floats have a unique edge behavior. They can leave a slightly rougher surface compared to magnesium or resin floats. Inspect your float for cracks, warping, or excessive wear before use.
Proper storage is crucial for wood floats to prevent warping and maintain edge quality. Keep them in a cool, dry place away from direct sunlight.
Resin/Plastic Floats — Key Properties
Modern resin composites used in concrete floats are non-porous and resistant to staining and water. This makes them highly durable and low-maintenance. The stiffness and wear resistance of these floats can vary depending on the specific formulation.
Resin floats are known for their forgiving edges, which can help prevent gouging or scratching the concrete surface. Inspect your float regularly for signs of wear or damage that could affect performance.
To maintain longevity, clean resin floats after each use to remove any concrete residue. This helps prevent staining and keeps the float in optimal condition.
How Float Material Changes the Finish
Each float type affects smoothness, burnishing tendency, and sheen, producing characteristic surface textures. Magnesium tends toward a tight, uniform finish, wood can leave subtle texture, and resin often yields a cleaner edge profile. These tendencies influence how the surface looks after troweling.
Describe visual and tactile outcomes: gloss level, uniformity, micro-scratches, and how aggregate exposure shifts with each material. Discuss burn potential and control strategies, including when to knock down high spots and how to avoid over-polishing. Practical indicators like drag feel, light reflections, and finger roughness help differentiate results on site. Project suitability and joint considerations guide use cases, while noting maintenance steps to prevent warping or inconsistent sheen.
Surface Texture and Openness
The float material significantly influences the surface texture of concrete. Understanding these differences helps in selecting appropriate sealers, overlays, or polishing treatments.
Magnesium and wood floats tend to leave open textures due to their ability to penetrate deeper into the concrete surface, exposing more aggregate and creating a rougher finish. This openness allows better sealer penetration but may require additional preparation for overlays or polishing.
Resin/plastic floats produce closed, smoother textures by compressing the concrete surface and leaving fewer micro-scratches. This makes them suitable for overlays and polished surfaces, but they may not allow as much sealer penetration without additional preparation.
Timing in the Finishing Sequence
The timing of float application is crucial for achieving desired results. Each float type serves a specific purpose in the finishing sequence, depending on bleed water, set time, and weather conditions.
Magnesium and wood floats are typically used initially to remove large imperfections and excess water. They should be applied when bleed water is present but before the surface becomes too hard or dry. Consulting the concrete mix design can help determine the optimal time for their use.
Resin/plastic floats are best used later in the sequence for intermediate smoothing and final finish work. They should be applied after the initial set has occurred but before the surface becomes too hard or dry. Weather conditions, such as high humidity or temperature fluctuations, may affect the timing of float application.
Performance: Weight, Balance, and Handling
Base weight affects user fatigue and finishing endurance, with different ranges understood by experienced operators. Heavy floats can level rough textures faster, while lighter ones may offer finer control. Balance and weight distribution influence float flatness during long sessions.
Analyze how center of gravity, handle length, and grip type impact control and edge quality on large slabs versus tight edges. Compare rigidity versus give, vibration transfer, and the feel of contact with the concrete surface. Practical guidelines help select a float by user factors like height and strength, plus job specifics such as area size and curing time considerations.
Weight Impact on Control and Fatigue
Heavier floats offer more leveling power for concrete paste but may increase user fatigue during prolonged finishing sessions.
Float weights generally range from 1 to 2 pounds (0.45 to 0.9 kg).
Before purchasing, try the float with gloves to ensure comfort for your hands and arms. Also, check manufacturer weight specifications to understand its mass.
If a float is significantly heavier than the typical range, expect increased user fatigue during extended use. For long sessions, consider lighter options or adjust your grip strategy, stance, and motion to optimize surface detail and reduce strain.
Edge retention, flatness, and blade stability
The material of the float influences how well it holds straight edges and resists warping, impacting long-term flatness and repeatable finishes.
Inspect the float’s straightness before use, checking for any initial warping or flexing. Also, evaluate the material’s resistance to warping and its edge retention capabilities.
Floats made from materials with high rigidity can provide better edge retention and flatness but may also transfer more vibration to the user. Regularly inspect your float’s condition and maintain blade sharpness to preserve stability and consistent finish quality across large slabs and tight edges.
Durability, Maintenance, and Care
Durability, maintenance, and care focus on how mag, wood, and resin floats wear at edges, corners, and surfaces, and how cleaning and storage affect finish quality.
Expect edge rounding and corner rounding, surface gouges, resin fatigue, and wood swelling or warping under varying humidity.
After each job, remove debris and inspect for rust on metal parts; use the appropriate cleaner for each material and check labels for solvent guidance to preserve edging.
Store dry and off the ground, protect from direct sun and extreme temperatures, and follow a maintenance cadence with monthly checks; Stake: skipping regular maintenance shortens life; Quick check: look for cracks, chips, or edge wear; Pro check: after each use and monthly inspection; Common mistake and fix: avoid over-cleaning with harsh chemicals and follow manufacturer guidance.
Cleaning and Daily Care Per Material
Maintaining your concrete float involves regular cleaning and care tailored to the material. Proper cleaning extends float life and preserves finish quality.
- Magnesium Float: Remove cement residue with a soft brush and mild detergent, rinse, and dry thoroughly. Avoid abrasive materials or harsh chemicals that can damage the finish.
- Wood Float: Dry immediately after use to prevent rot. Apply a thin coat of mineral oil or beeswax occasionally to maintain moisture balance. Never use water-based cleaners as they can cause swelling or warping.
- Resin/PLASTIC Float: Wipe off excess dirt and debris with a damp cloth. Avoid solvents that can degrade certain plastics, such as acetone or lacquer thinner.
Repair, Refurbishment, and When to Replace
Maintaining your concrete float’s performance requires timely repairs and replacements. Regular inspections help identify signs of wear or damage.
Edges: Check for dullness or rounding. If edges are rounded but not dulled, consider re-sharpening or replacing the edge. Using a damaged float can lead to accidents or further damage.
Blade: Inspect for warping. If slightly warped, attempt to re-seat the blade. If persistent, consider replacement. Warping can affect the float’s performance and cause finish issues.
Surface: Look for deep gouges that cannot be sanded out. If present, consider replacing the float as these can affect the final finish of your concrete surface.
Safety, Ergonomics, and Attachments
Safety considerations by float type include identifying sharp edges or burrs, potential slivers, and weight-related fatigue, with appropriate PPE such as gloves and eye protection. Quick checks on site should examine the surface and handle integrity, and a pro check helps confirm edge condition before use. If sharp edges, burrs, or slivers are present, smooth them out using a file or sandpaper to prevent injury.
Ergonomic practices to reduce strain involve proper stance, neutral wrist alignment, regular pauses, and grip adjustments to minimize back and shoulder stress during long sessions. Attachments such as edge guards, extension handles, or tamping plates can change control and surface texture, so assess how each option affects feel before use. Maintenance and safety checks, including cleaning routines, rust or wear inspection, securing fasteners, and proper storage, help preserve edge integrity and extend tool life, while considering working conditions like dust, moisture, and temperature.
PPE and Safe Handling Tips
Protecting yourself while using concrete floats is crucial. Start by inspecting your float before each use to remove any burrs, rough spots, or loose parts that could cause injury.
Magnesium floats: Wear cut-resistant gloves to protect from sharp edges and safety glasses with side shields to shield from debris. Ensure you’re using appropriate PPE as specified by the manufacturer.
Wood floats: Use work gloves to prevent splinters and safety glasses for eye protection. Again, follow the manufacturer’s guidelines for suitable PPE.
Ergonomic Choices and Performance-Enhancing Attachments
Choosing the right handle type, extension poles, or aftermarket attachments can significantly improve your comfort and finish quality. Always follow manufacturer specifications for these accessories.
Handle types: Select a handle based on your grip preference – straight, pistol-grip, or ergonomic. Ensure it’s compatible with your float material and provides a secure grip to prevent slips.
Extension poles and vibration units: For long-floating sessions, consider extension poles to reduce strain. If you’re sensitive to vibrations, use vibration units to improve control and minimize fatigue. Always follow the manufacturer’s guidelines for these attachments.
Cost-Effectiveness and Lifecycle Considerations
Choosing the right float material affects upfront cost, lifespan, and finish speed. Compare mag, wood, and resin by initial price, replacement parts (handles, blades), and what drives cost spikes. Expect differences in durability and maintenance that change value over time.
DIY readers should weigh how often the float will be used and the finish required; resin or mag tend to last longer with heavy use, while wood suits low-frequency projects. Quick checks—weight, rigidity, and handle comfort—help screen options before purchase; consult product labels or datasheets for wear guidance. A simple decision heuristic: high-frequency commercial work favors durability and longer life, while occasional projects prioritize upfront cost and maintenance needs.
Calculating long-term value
The total cost of ownership is a crucial factor when choosing concrete floats. Consider the following:
Initial Price: Upfront costs vary by material. Mag floats are generally cheaper, while resin and wood can be more expensive.
Maintenance Needs: Some materials require less maintenance than others. For instance, mag floats may need more frequent cleaning to prevent rusting.
Replacement Frequency: Floats wear out over time. Wooden floats may last longer but can degrade faster in harsh conditions, while resin and mag floats have varying lifespans depending on use.
Finish Quality Impact: A better finish can reduce rework and improve sealer performance. Higher-quality floats often produce smoother results but come at a higher cost.
When higher-cost materials make sense
Investing in premium floats can yield measurable savings or quality gains in certain project scenarios. Consider the following:
- High-Spec Finishes (e.g., Polished Concrete): Invest in higher-quality resin or wood floats for better finish consistency and reduced rework.
- High-Volume Production: Durable, long-lasting resin or mag floats can minimize downtime and maintenance despite the initial cost.
- Exposure to Harsh Conditions: Resin and wood floats can withstand harsh conditions better than mag floats, reducing the risk of cracking or staining.
- Long-Term Use: For projects that require long-term use, investing in higher-quality floats can reduce replacement costs over time.
- Avoiding Weak Bond: In repair work, using lower-quality floats may result in a weak bond. Investing in better floats ensures a stronger, more durable repair.
Choosing the Right Float for Your Project + Common Mistakes and Visual Checkpoints
Choose the right float by matching project type (floors, countertops, overlays) and concrete slump to the float material (magnesium, wood, resin) with practical rules of thumb. Each float type has advantages and limits, such as skim coat versus smooth finish, burnish potential, surface texture, and typical working speeds. For guidance, magnesium suits smooth, dense finishes on larger areas; wood helps for restrained work on thin or low-slump applications; resin offers controlled texture in overlays.
Common operator mistakes by material include pressure patterns, overworking, edge handling, and premature troweling, with quick fixes like light re-float and edge touch-up. Visual checkpoints before curing or polishing include uniform sheen, absence of gouges or nibs, proper edge and corner finish, and awareness of humidity or temperature that influence cure time. Stake: skipping visual checkpoints may result in curing or polishing an imperfect surface; Pro check: an experienced installer ensures uniform sheen, smooth edges, and absence of defects before proceeding to cure or polish. If Project requires a smooth, durable finish (e.g., floors, overlays), then Choose a magnesium float for its ability to create a smooth, dense surface; If Project involves countertops or thin applications with minimal slump, then Opt for a wood float to maintain a consistent, even finish and prevent overworking. Common mistake + fix: If pressure patterns or gouges appear, lightly sand the surface with fine-grit paper before re-floating and curing.
Project checklist and tools/materials to have on hand
Before starting your concrete floating project, ensure you have the right tools and materials for a smooth execution and desired finish quality.
- Concrete float: Match the float material (magnesium, wood, resin) to your project type and concrete slump. Stake: Ensuring the right tool for the job.
- Float handle: Choose a sturdy handle that fits comfortably in hand. For large slabs or heavy concrete, use an extended handle. If Large slabs or heavy concrete, then Use sturdy handles and edgers.
- Edger: A flexible edger helps create clean edges and corners. Consider renting one if needed. Rent/borrow for occasional use to save costs.
- Brooms: Soft-bristle brooms are ideal for final cleaning, especially for delicate finishes. If Delicate finish required, then Prepare soft-bristle brooms for final cleaning.
- Cleaning supplies: Have a bucket, water, and a suitable cleaner for your float material. Regularly clean tools to maintain performance. Common mistake + fix: Regularly inspect tools, replace worn-out parts, and maintain them as per manufacturer’s instructions.
- Replacement blades: Keep extra float blades on hand to avoid downtime due to wear or damage. Pro check: Verify you have enough replacement blades for the project’s duration.
- Trowel and polish equipment: Have these ready for the next stage after floating. Quick check/cue: Cross-check tools and materials against the project’s specific needs.
Common mistakes and how to avoid them
To minimize rework and ensure consistent finish quality, be aware of these common mistakes and their solutions.
- Using the wrong float too early: Using a magnesium float too early can cause overworking and improper curing. Use wood or resin floats for initial passes instead. If Magnesium float used too early, then Revert to a wood or resin float for initial passes.
- Overworking the surface: Applying excessive pressure or making repetitive passes can lead to an uneven finish. Reduce pressure and increase working speed to avoid overworking. If Overworking the surface with any float type, then Reduce pressure and increase working speed; avoid repetitive passes.
- Incorrect cleaning: Not cleaning tools properly between uses can lead to inconsistent results. Follow manufacturer’s guidelines for cleaning each float material. Pro check: Train operators on correct cleaning, handling, and storage practices.
- Premature troweling or polishing: Starting the next stage too early can result in a poor finish. Allow sufficient drying time before troweling or polishing. Quick rule: Always allow the recommended drying time before moving to the next stage.
Familiarize operators with float types and their appropriate usage stages to avoid common mistakes.
Visual checkpoints for acceptable finish
Before curing or polishing, use this checklist to confirm that the float choice produced the intended result.
- Uniform sheen: Inspect the surface for consistent sheen across the entire area. If Uneven sheen or visible trowel marks, then Re-evaluate float choice, pressure, and working speed; consider additional passes with a different float type.
- Absence of gouges or nibs: Check for any deep scratches or indentations left by the float. If Present, then Rework the surface with an appropriate float to remove defects.
- Correct aggregate exposure: Ensure that the desired level of aggregate is exposed on the surface. If Incorrect aggregate exposure, then Adjust float selection based on desired finish (e.g., switch to a magnesium float for more aggregate exposure).
- Proper edge and corner finish: Inspect edges and corners for clean lines and consistent finish. Quick check/cue: Perform simple tests such as drying time observations and light-angle inspection to assess the finish’s quality and consistency.
- Absence of voids or drag marks: Look for any hollow spots or marks left by the float. If Present, then Rework the surface with an appropriate float to remove defects.
- Humidity and temperature considerations: Check local conditions to ensure they are suitable for curing. Pro check: Consult local guidelines or manufacturer’s instructions for optimal curing conditions.
Quick rule: If any issues are present, address them promptly by reworking the surface with an appropriate float or consulting experienced professionals.
Conclusion
Choosing the right float and applying it with care matters for the long-term safety, durability, and appearance of the concrete finish. Use the float that matches your project needs, test any new approach in a small area, and protect the surrounding work to prevent damage.
Choose your approach by confirming the finish you want and then verify the steps in order: assess the surface, confirm the float type and attachment, smooth and recheck as you proceed, maintain body position and control to avoid gouging, and perform a final area-wide check for uniformity and edge quality before you cure or seal. Always follow manufacturer instructions and local rules if you are unsure, and keep work surfaces clean to prevent texture inconsistencies.
Common mistakes to avoid include rushing the pass, using the wrong float for the surface, and neglecting protection for adjacent areas. Practice safe operation, keep hands and wrists aligned with the tool, and pause if you notice excessive resistance or chatter. If the project requires unusual corners, embedded objects, or large-area finishing, consider proper tool selection and, when in doubt, pause to consult a professional rather than forcing the finish.
If conditions are outside typical values—tight tolerances, high vibration, or unusual concrete mixes—calling a pro can prevent costly mistakes. Finish with patience, document the results, and you’ll achieve a consistent, durable surface that stands up to use. You can tackle the next project with confidence.
FAQ
What are the key differences between magnesium, wood, and resin floats?
Magnesium floats are generally lighter and can produce a very smooth finish when used correctly. Wood floats are forgiving for beginners and can slightly seal the surface, but they may wear faster in tough conditions. Resin floats resist cracking and maintain a consistent edge, but may not feel as smooth as magnesium for some tasks.
What are the advantages and disadvantages of wood floats?
Wood floats are typically easy to handle and can be gentle on the surface, helping reduce gouging. They can require more maintenance and may wear or leave fibers behind if not cleaned properly. Temperature sensitivity and moisture can affect wood, so inspect for splits or warped sections before use.
What should I know about magnesium and resin floats in terms of finish quality and durability?
Magnesium floats can deliver rapid material removal with a fine finish when used with proper technique, but they can be brittle if dropped and may dull quickly with aggressive use. Resin floats resist chipping and are durable for repeated use, yet they may not achieve the same ultra-smooth result as magnesium in some applications. Always match the float to the project and check manufacturer instructions for care.
How do I maintain and extend the life of a float?
Keep floats clean after use and store them dry to prevent corrosion or surface damage. Inspect edges for chips or cracks and replace or repair as needed. Follow the label and manufacturer guidance for cleaning products and storage conditions.