

Introduction
A concrete block retaining wall is a simple, built-up wall made from durable blocks that holds back soil. For DIY installations, drainage rock behind the wall and landscape fabric help water escape and keep pressure in check. Always read product labels and manufacturer instructions, and follow local rules for materials and installation where applicable.
Watch for signs of trouble like bulging, leaning, cracks, or soil pulling away at the base. If you notice any of these, stop work on the wall and recheck alignment, backfill, and drainage setup with the proper guidance. When in doubt, consult the block manufacturer’s guidance, and consider getting a professional opinion before continuing.
Key takeaways
- Verify wall height and setback align with local codes and manufacturer guidance.
- Use drainage rock with fabric to prevent soil clogging and standing water.
- Separate backfill from soil with fabric and ensure proper compaction steps.
- Inspect for movement or bulging blocks; stop if you notice gaps.
- Keep construction area stable with temporary bracing during stacking and alignment checks.
- Plan maintenance early; drain block walls and inspect for cracks regularly.
Table of Contents
- Introduction
- Key takeaways
- Overview and When to DIY a Concrete Block Retaining Wall
- Planning and Design Basics
- Tools and Materials Checklist
- Material Specs and Standards Explained
- Step-by-Step Construction Process
- Drainage Rock and Fabric Best Practices
- Common Failure Modes and Warning Signs
- Maintenance, Repair, and When to Call a Pro
- Conclusion
- FAQ
Overview and When to DIY a Concrete Block Retaining Wall
A typical DIY project covers site prep, layout, laying blocks, and basic backfill with attention to level and alignment. You’ll need steady hands, basic masonry know-how, and time to work through the planning and curing stages. Consider a pro if the wall sits on a slope with heavy loads or close to utilities, or if local rules require professional installation.
Check local permit requirements, setback rules, and any site-condition limitations before you start. Verify whether any approvals or inspections are needed and what documentation to submit. If in doubt, label the issue for review with the building department or a qualified contractor before work begins.
Benefits and limitations of DIY
DIY concrete block retaining walls can save you a pretty penny. You’re in control of the schedule, too.
But, it’s not all sunshine. Structural complexity might be beyond your skillset. And time? Well, that’s a big one. It’ll take longer than you think.
Let’s face it, pros have the tools and experience to get ‘er done faster. So, weigh those pros and cons before you dive in.
Permits, codes, and site assessments to check
Before you grab your hard hat, check these boxes:
Local building codes: They vary by location. Some places require permits for walls over a certain height.
Height limits: Check if there are any restrictions on how tall your wall can be.
Utilities: Call 811 before you dig. It’s the law, and it’ll save you from hitting underground lines.
Lastly, assess your site. Is the ground stable? Are there any slopes or obstacles to consider?
Planning and Design Basics
Define what the wall is supposed to do, whether it holds back soil, supports a terrace, or acts as a decorative feature. Consider the expected loads and the site slope to guide the wall height and batter. Use a buildable plan that matches your capabilities and local conditions.
Think about soil behavior, drainage needs, and insertion of filtration and drainage layers as you sketch the design. Review any design guidelines or manufacturer instructions you will rely on for blocks and aggregate material. When in doubt, consult the product label or a design resource approved by the supplier.
Assessing wall function, height, and loads
The first step in planning your concrete block retaining wall is understanding its purpose. Are you containing soil for a garden, supporting a driveway, or preventing erosion?
Height matters: Taller walls need stronger design. DIY walls should max out at 4 feet without engineered plans.
Loads are crucial: Consider what’s pushing against your wall – soil, vehicles, or buildings. Heavy loads may require an engineer’s input.
Soil type, slope, and site drainage mapping
Before you start digging, understand your soil. It dictates how stable your wall will be.
Check soil type: Grab a handful, squeeze it when wet – clay holds shape, sand crumbles. Clay soils need extra care.
Map site slope: Use a level or string line to find the steepest angle. Steeper slopes may need additional support.
Locate water paths: Look for natural drainage patterns – where water flows after rain. Avoid blocking these paths.
Visual checkpoints for layout and setbacks
Before laying out your wall, walk the site with this checklist to avoid surprises later.
- Setback from property lines: Check local codes. Typically, it’s 2-5 feet away from neighbors’ land.
- Nearby structures: Ensure your wall won’t interfere with foundations or cause damage during construction.
- Utilities: Call 811 before digging to mark underground lines.
- Trees and roots: Check for root systems that could disrupt your wall’s stability.
- Elevation changes: Look for natural high or low spots that might affect your wall’s design.
- Water flow paths: Ensure your wall won’t block natural drainage, causing water to pool.
- Access points: Plan how you’ll get materials and equipment onto the site.
- Future expansion: Consider if your wall might need to be extended in the future.
Quick rule: Always measure twice, dig once. Mark out your wall’s footprint before breaking ground.
Tools and Materials Checklist
Core tools include a level, string line, masonry hammer, trowel, jointing tool, and a suitable tamper for compacting backfill. You’ll also want a masonry square, canvas or plastic sheeting, and a rubber mallet for precise block seating. Have gloves and eye protection within reach for every step.
Stock common materials such as blocks, setting mortar or adhesive if required, filter fabric, drainage rock, and landscape fabric. Keep a toolbox of fasteners, spacers, and a wheelbarrow or cart for material transport. Optional speed-ups include a powered mixer, a plate compactor, and a skid-steer attachment if your space allows and you are experienced.
Core masonry and earthwork tools
Before you start your DIY concrete block retaining wall project, make sure you have all the essential tools on hand. This checklist covers excavation, leveling, cutting/handling blocks, and compacting backfill.
- Shovel: For digging and moving earth. Skip this, and you’ll struggle with excavation.
- Garden rake: To level and smooth the base. Without it, your wall won’t be stable.
- Level: To ensure your wall is plumb and level. A crooked wall will lean and fail over time.
- Tape measure: For accurate measurements. Inaccurate measuring leads to poor fitting blocks.
- Brick trowel: To apply mortar or adhesive evenly. Skipping this can cause weak bonds between blocks.
- Masonry saw (wet or dry): To cut concrete blocks accurately. Without it, you’ll waste materials and time.
- Bull float: For leveling and compacting mortar. Skip this, and your wall won’t be strong.
- Plate compactor: To compress backfill soil. Without proper compaction, the wall can lean or topple.
Quick rule: Always double-check your tools before starting to avoid delays and mistakes.
Materials: blocks, mortar/adhesive, pipe, rock, and fabric
Here’s a comprehensive list of materials you’ll need for your DIY concrete block retaining wall project. This checklist covers everything from blocks to drainage essentials.
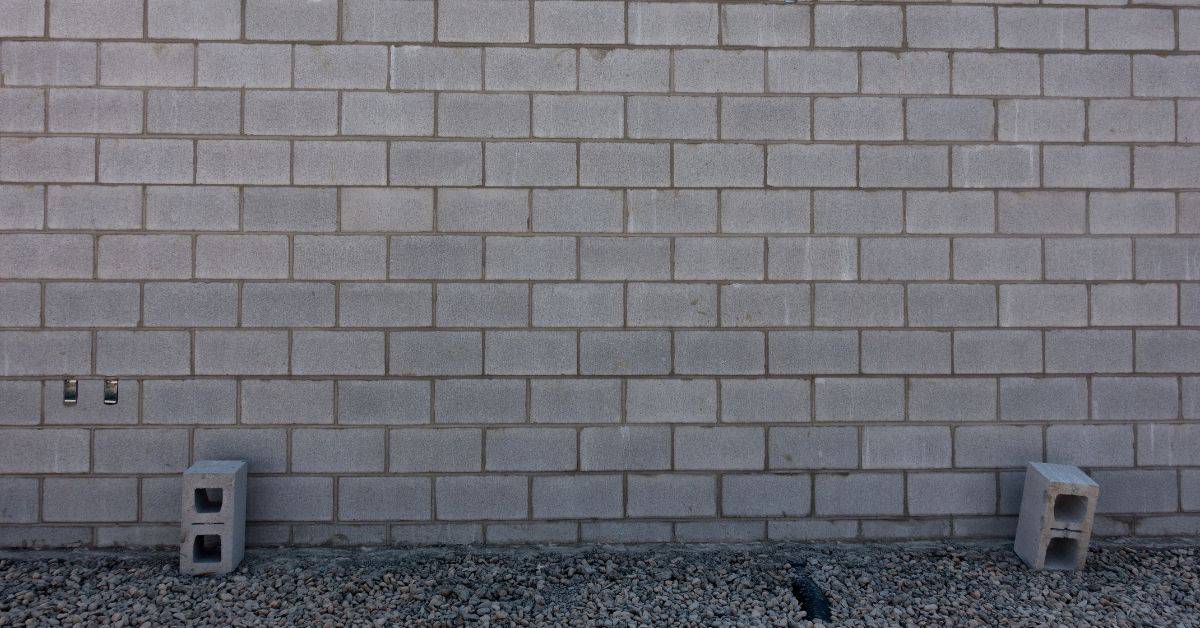
- Concrete blocks: Choose from various styles (e.g., solid, hollow, or interlocking). The wrong choice can compromise your wall’s strength and appearance.
- Mortar/adhesive: Select the right mix for your climate. Using the wrong one can cause cracking or weak bonds.
- Drainage pipe (4″ perforated PVC): Essential for preventing water buildup behind the wall. Without it, you risk wall failure due to hydrostatic pressure.
- Coarse rock (1-2″ in size): For backfill and drainage behind the wall. Using finer materials can clog drains and cause instability.
- Geotextile fabric: To separate backfill from native soil, preventing contamination and maintaining drainage. Skipping this can lead to poor drainage and wall failure.
- Reinforcement (optional): Geogrid or rebar can add strength to your wall. Omitting it may result in a weaker structure.
- Wall cap (optional): Protects the top course from weathering and adds a finished look. Without it, your wall may deteriorate over time.
- Weep holes (optional): Allows water to escape at the base. Omitting this can cause water buildup and hydrostatic pressure.
Quick rule: Always choose materials from reputable suppliers to ensure quality and longevity of your wall.
Material Specs and Standards Explained
Look at product labels and datasheets for block size, face texture, and allowable joint widths. Verify that the material is rated for exterior use and for your wall height and load. Confirm any required performance standards or installation guidelines from the manufacturer.
Ask suppliers for current datasheets, installation videos, and warranty terms. Compare the recommended backfill type, drainage requirements, and any vibro-compaction or confinement needs. If information isn’t clear, request written instructions or consult a qualified professional before purchasing.
Block strength, frost resistance, and manufacturer ratings
When choosing concrete blocks for your retaining wall, check these key properties:
Compressive Strength: Look for blocks with a compressive strength of at least 2000 PSI. This ensures they can handle the loads your wall will bear.
Frost Resistance: In cold climates, choose blocks rated for freeze-thaw cycles. They’ll have an ‘F’ rating on the product label, indicating they’ve passed ASTM C140 tests.
Always check manufacturer’s technical sheets for these ratings and any specific recommendations for your wall’s intended use.
Geotextile and aggregate characteristics to look for
When selecting geotextile fabric and aggregate for your retaining wall drainage, consider these factors:
Geotextile Fabric: Choose between woven or non-woven fabrics. Woven is stronger but less permeable; non-woven is more permeable but less durable.
For most walls, a non-woven fabric with a permeability rating of at least 1 GM-1 (gallons per minute) is suitable.
Aggregate: For drainage zones behind your wall, use clean, free-draining aggregate like washed gravel or crushed stone. Avoid fines (small particles) that can clog pores and impede water flow.
Step-by-Step Construction Process
Start with site prep: clear debris, mark the wall line, and establish a stable, compact base. Set the first course true and level; verify alignment often as you build. Place blocks in prescribed patterns and maintain consistent joint spacing throughout the wall.
Backfill in stages, keeping soil damp and block faces clean. Install drainage and filtration layers as you progress, and maintain proper compaction around the wall without overloading it. Adhere to tolerances and order-of-operations documented by the block manufacturer.
Step-by-Step Process
This section guides you through the construction process, from preparation to cleanup, ensuring a solid and safe retaining wall.
- Preparation: Check safety, gather tools, and lay out your work area. Safety first: wear appropriate gear, including gloves and eye protection.
- Excavation: Dig out the base, removing any debris or vegetation. Tip: Keep the trench width 6 inches wider than your blocks on both sides.
- Base Preparation: Compact the soil, ensuring it’s firm and level. Check: Use a long level to ensure the base is flat.
- Main Work: Lay blocks, jointing, bonding, and installing drainage elements as you go up. Remember: Keep each course level and aligned.
- Final Checks & Cleanup: Inspect your work, backfill, and clean up the site. Pro tip: If something doesn’t look right, don’t hesitate to call a pro.
Excavation, Base Preparation, and Leveling
Prepare a stable, flat, and drained foundation for your first course of blocks to ensure a solid wall.
Start by excavating the base. The trench should be 6 inches wider than your blocks on both sides and deep enough to accommodate your blocks plus 4-6 inches of base material.
Next, compact the soil. Use a plate compactor or hand tamper to ensure the soil is firm. This prevents settling over time.
Finally, level the base. Use a long level to ensure it’s flat and true. This is crucial for straight courses of blocks.
Laying Blocks, Jointing, and Bonding Techniques
Proper block placement ensures a strong, stable wall. Start by laying the first course. Ensure it’s level and square.
For subsequent courses, use a staggered joint pattern. This strengthens the wall by offsetting vertical joints from one course to the next.
Use adhesive or mortar for bonding. Apply it sparingly but evenly on the bed and ends of blocks. This helps keep the wall together.
For straight courses and corners, use a level and string line. Keep checking your work to ensure everything stays square and level.
Installing Drainage Pipe, Rock, and Fabric
Proper drainage is crucial for preventing water buildup behind your wall. Start by installing perforated drainpipe. Place it on top of a bed of gravel at the base of the wall.
Next, add a layer of drainage rock. This allows water to flow freely through the pipe. Ensure the rock is clean and free of fines that could clog the pipe.
Finally, place a layer of geotextile fabric over the rock. This prevents soil from entering the drainage system while allowing water to pass through. Ensure the fabric covers the entire base area behind the wall.
Drainage Rock and Fabric Best Practices
Design drainage to move water away from the backside of the wall using a proper layer sequence of fabric, drainage rock, and clean backfill. Ensure fabric is positioned to prevent fines from clogging the rock while allowing water to pass. Check that the drainage path leads to an appropriate outlet or discharge area.
Avoid common mistakes such as fabric snagging, rock that is too fine, or insufficient backfill consolidation. Verify installation steps against the manufacturer instructions and local rule references. If unsure, refer to product data sheets or consult the supplier for recommended installation details.
How to select, place, and compact drainage rock
Select clean, angular drainage rock. It’s better at filtering water than round stones.
Place a 2-4 inch layer of rock in the trench before laying your first course of blocks. This provides a solid base for your wall.
Lightly compact the rock with a plate compactor to maintain permeability and prevent settling.
Proper use, overlap, and anchoring of geotextile
Lay the geotextile fabric behind your wall to separate backfill from the drainage rock. This prevents fines from clogging your drain.
Overlap each piece by at least 12 inches to ensure full coverage. Stagger joints like you would with blocks for added strength.
Anchor the fabric to the base of your wall and up the backside using staples or u-shaped pins. This keeps it in place during backfilling.
Common Failure Modes and Warning Signs
Look for bulging, cracking, or misalignment that indicates movement or improper backfill. Check for pooling water at the base or behind the wall, which can signal drainage issues. Noting wood or metal ties at the top that appear loose can also hint at weakness in the structure.
Understand potential causes such as poor compaction, inadequate drainage, or improper base preparation. Prioritize immediate attention for signs suggesting active movement, significant cracking, or water damage. Use manufacturer guidance or local codes to determine when a pro is needed.
Signs: leaning, bulging, settlement, and cracking
Leaning walls indicate instability. It could be due to poor foundation or soil settling.
Bulging suggests excessive pressure behind the wall, likely from water buildup or improper backfill.
Settlement shows as a dip in the middle of the wall. This is often caused by weak base material or inadequate compaction.
Cracks can range from minor to severe. Hairline cracks are usually harmless, but wider ones may signal serious issues like foundation problems or excessive loading.
Root causes: drainage failure, poor foundation, freeze-thaw, and tree roots
Poor drainage leads to water buildup behind the wall, causing pressure that can lead to bulging or leaning.
Weak foundations result in walls settling or leaning. This is often due to improper base preparation or inadequate compaction.
The freeze-thaw cycle can cause cracks and weaken blocks over time. Properly rated blocks and good drainage help mitigate this.
Tree roots can lift and displace the wall, causing settlement or cracking. Keep trees away from retaining walls whenever possible.
Maintenance, Repair, and When to Call a Pro
Set up a simple inspection routine: look for movement, signs of water stagnation, and soil condition around the wall after heavy rains. Keep joints clean and inspect fabric and drainage layers for blockages. Perform minor repairs like reseating blocks or re-tamping backfill as needed within your skill level.
For cracks widening, drainage failures, or structural movement, contact a professional promptly. Use clear criteria from product documentation or local building rules to decide when to escalate the repair. Document issues with notes or photos to share with a contractor.
Routine inspections and visual checkpoints
Use this checklist to inspect your retaining wall seasonally, after heavy rain, or following freeze/thaw cycles.
- Check for leaning: Use a level to ensure the wall is plumb. Leaning can indicate settlement or instability.
- Inspect joints: Check for open or cracked joints. These need to be repointed to maintain wall integrity.
- Look for bulging: Bulges suggest excessive pressure behind the wall, possibly due to poor drainage.
- Check for cracks: Hairline cracks are normal, but wider ones may indicate structural issues.
- Examine the base: Ensure the base is still level and hasn’t settled. Settlement can compromise the entire wall’s stability.
- Inspect drainage pipe: Check for clogs or damage. Proper drainage is crucial to prevent water buildup behind the wall.
- Check geotextile fabric: Ensure the fabric remains intact and hasn’t been compromised by rodents or roots.
- Look for signs of erosion: Erosion at the base can undermine the wall’s foundation, leading to failure.
Quick rule: If you notice any issues, address them promptly. Small problems can become big ones if left untreated.
Simple DIY fixes versus structural repairs
Here’s how to tell when you can handle a repair yourself and when it’s time to call in the pros.
DIY Repairs: You can safely tackle minor issues like clearing clogged drainage pipes, replacing damaged geotextile fabric patches, or repointing open joints. These tasks require minimal tools and know-how.
However, if you notice any signs of structural damage – such as leaning, bulging, or significant cracking – it’s time to call in a professional. Structural repairs often involve heavy equipment and specialized knowledge to ensure the wall’s integrity is maintained.
When to Call a Pro: If you’re unsure about any aspect of your retaining wall’s condition, err on the side of caution and consult with a professional engineer or contractor. They can provide expert advice and perform necessary repairs safely and effectively.
Conclusion
Safety first matters for every step. A durable, good-looking wall starts with solid planning, careful drainage, and careful material handling. When you respect these basics, you cut risk and avoid costly fixes later.
Now build with a simple check-and-do flow: verify the site and wall layout, confirm design requirements, choose the right blocks, drainage rock, and fabric, then lay out and compact in controlled lifts, checking level and alignment as you go, and backfill with proper material while keeping water moving away from the wall. Keep the work tight and test as you go, stopping to re-check alignment, drainage paths, and compaction before moving on.
Common mistakes to avoid include skipping drainage and fabric, which leads to pressure behind the wall; neglecting to verify level and straightness in multiple spots; and over- or under-compacting backfill, which invites settlement or tipping. Always keep drainage clear, use the recommended fabric, and stay within the design limits. Don’t take shortcuts near utilities or in unstable soil, and wear proper eye and hand protection during every stage.
If you run into signs of movement, significant cracking, or unstable ground, or if the wall height exceeds your comfort level, call a professional. For routine maintenance and minor adjustments, you can handle it, but know when to pull the trigger on expert help. Stay practical, stay patient, and the wall will perform for years to come.
FAQ
Should I DIY a concrete block retaining wall, and when is it a bad idea?
DIY is fine for small walls on stable soil with proper drainage. If the wall is tall, on a slope, or has poor soil, consider consulting a pro. If you’re unsure about footing, backfill compaction, or drainage, pause and check local guidelines.
What role does drainage rock and fabric play, and how should I place them?
Drainage rock and fabric keep water from building pressure behind the wall. Place a layer of fabric over the trench, add a bottom layer of clean rock, and keep rock free of soil by maintaining a clear, wide flow path to the outlet. Follow product instructions for minimum depths and layering order.
What are the obvious warning signs that a block wall is failing?
Look for bulging, unsquared blocks, fresh cracks widening over time, or soil spilling at the base. Signs of persistent water pooling or sinking backfill are red flags. If you see any of these, stop using the wall and assess the cause with a professional if needed.
What maintenance steps help extend the life of a block retaining wall?
Keep weep holes clear and ensure the drainage path isn’t blocked by debris. Check for loose or hollow-sounding blocks after heavy rain and reset as needed. Rebuild or reinforce if you notice continuing movement or misalignment.