
Introduction
Hole cleaning level refers to how clean the hole is before you install the anchor and that cleanliness can influence pullout strength. Different anchor types require different cleaning steps, and following the manufacturer’s instructions matters. In practice, I check for dust and debris, brush or air-blow the hole, and wipe it out until the opening looks free of loose material.
Installation techniques vary by anchor type, so you’ll want to follow the exact method for wedges, undercuts, or other restrictive anchors and verify what to clean and how dry the hole should be. If you’re unsure, look for product labels or instructions and confirm local rules or standards before proceeding. This approach helps you judge whether the components, accessories, or attachments you’re using are appropriate for your concrete, and it keeps the job honest and straightforward.
Key takeaways
- Proper hole cleaning is essential for ToughWire Devices and Attachments to reach rated pullout strength.
- Wedge Expansion Anchors require clean holes; debris compromises friction and expansion behavior.
- For ToughWire Components and Accessories, follow manufacturer instructions on cleaning level before installation.
- Use appropriate cleaning methods per anchor type and site-sourced materials; document QC checks.
- Include safety: wear eye protection and Respiratory protection when cleaning holes; debris hazards.
- Verify installation with on-site quality control comparing to standards and approved specs.
Table of Contents
- Introduction
- Key takeaways
- Why Hole Cleaning Controls Pullout Strength
- Anchor Types and How Cleaning Requirements Differ
- Hole Cleaning Methods That Actually Change Strength
- Tools and Materials Checklist
- Installation Procedures and on-Site Quality Control
- Key Specs and Numbers That Matter (Without a Datasheet)
- Cost, Common Pitfalls, and Safety Guidance
- Toughwire⢠Devices
- Conclusion
- FAQ
Why Hole Cleaning Controls Pullout Strength
Clean holes remove debris that would otherwise act like tiny wedges inside the bore. Debris-based friction reduces true embedment and can tilt the anchor off-axis, hurting load transfer. A clean hole helps the adhesive or grout seat evenly and keeps the anchor bed true for predictable strength.
Common debris types include drilling dust, concrete fines, standing moisture, and oils from tooling. Each can diminish bond, create weak seating, or trap moisture that slows curing. Cleaning level is often the deciding factor between the expected performance and what you actually achieve on site.
Bond versus mechanical interlock: how debris interferes
Concrete anchors rely on two main forces to stay put – bond and mechanical interlock. Debris in the hole can disrupt both.
Bond: Adhesives need a clean surface to stick. Dust or slurry creates a weak layer that can peel off under load, reducing pullout strength.
Mechanical interlock: Expansion anchors rely on friction between the anchor and concrete. Loose particles can prevent proper expansion, reducing the anchor’s grip and making it prone to tilting or fracture.
Types of contaminants and their effects
Drilling creates various contaminants that can degrade pullout performance:
– Dust/slurry: Reduces bond strength, prevents proper expansion.
– Water/vapor: Can weaken concrete, prevent adhesive curing, or cause corrosion in steel anchors.
– Oil/grease: Prevents adhesives from sticking, reduces friction for mechanical interlock.
Anchor Types and How Cleaning Requirements Differ
Here are the main anchor families you’ll encounter: mechanical wedges, undercut anchors, chemical anchors, and ToughWire devices. Each has different clean-hole needs based on how they transfer load or grip the substrate. Matching cleaning level to anchor type helps you avoid over-cleaning or under-cleaning.
Some anchors rely mainly on friction or adhesion, so cleaner holes yield bigger gains. Others have mechanical expansion that tolerate slight debris if seating is still true. Use the manufacturer instructions and local codes to guide how you clean for each family.
Mechanical anchors (wedge, sleeve, bolt & shield)
Mechanical expansion anchors rely on a clean bore for their wedges to bear properly against the concrete. A bit of dust or debris can reduce the anchor’s pullout strength significantly.
For these anchors, aim for light brushing with a stiff brush and compressed air. This removes most contaminants without damaging the bore.
The acceptable debris threshold is low – even small amounts can interfere with the wedge’s grip. Inspect the hole visually before setting the anchor to ensure it’s clean enough.
Adhesive and injection chemical anchors
Chemical anchors are highly sensitive to dust and moisture. Thorough cleaning and drying are critical for these systems to develop their full bond strength.
Use full dry-brushing with vacuum to remove all visible contaminants. This ensures the adhesive or resin can make direct contact with the concrete.
Glass capsules and injection adhesives have different cleaning requirements. Follow the manufacturer’s instructions for specific guidance on each product.
Specialty anchors (undercut, cast-in inserts, screw anchors, ToughWire-type devices)
Undercut anchors require a clean bore for their expansion sleeves to function properly. Use compressed-air-only cleaning to remove dust without damaging the undercut.
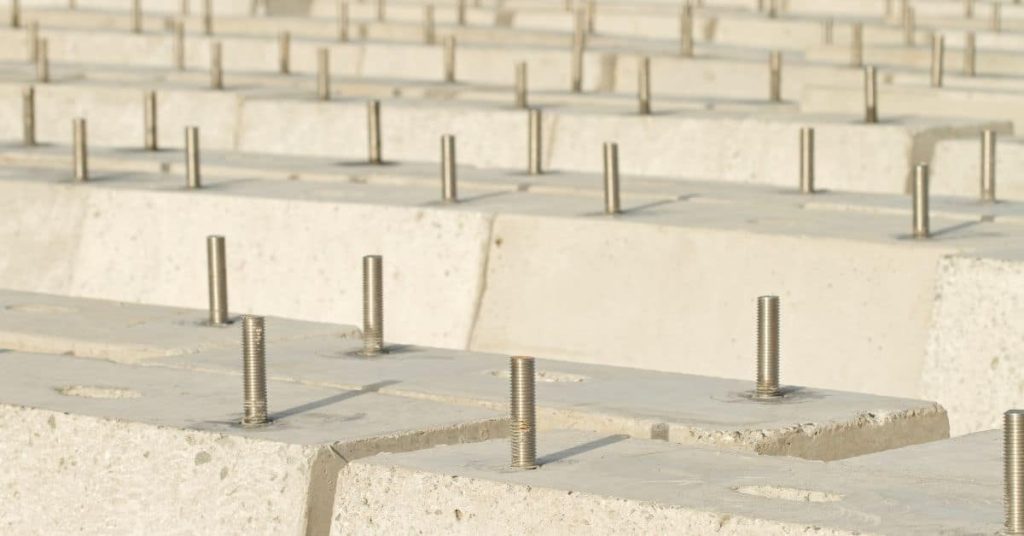
Cast-in inserts and threaded sleeves need no cleaning as they’re installed in fresh concrete. However, ensure the insert is properly positioned and aligned before pouring.
Screw anchors and ToughWire-type devices can tolerate some debris. A quick no-clean or light brushing may be sufficient, but always check the manufacturer’s recommendations for specific products.
Hole Cleaning Methods That Actually Change Strength
Set a cleanliness target based on bore condition and anchor type, then choose methods to hit that target. Dry-bore with minimal dust requires lighter cleaning, while damp or laitance-heavy bores need more thorough methods. Tie the method to mechanical wedges, undercuts, or chemical anchors to keep expectations realistic.
Debris removal options include brushing, vacuuming, air flushing, or solvent cleaners where allowed. Each method has residue considerations that can alter bond or seating if not followed with proper drying. Document the chosen method for QA and future reference.
Dry methods: brush, blow-out, and compressed air
Start by using a rotary brush to scrub the bore. Use a fiber brush for mechanical wedges and undercut anchors, or a steel brush for chemical anchors.
Brush for 10-15 seconds, then blow out the hole with compressed air or use a manual pump. This removes dust and loose debris.
This method is sufficient when bores are dry and clean, but it won’t remove moisture or laitance. It’s ideal for mechanical anchors where some residue is tolerable.
Wet methods: water flush, pressure washing, and vacuum-assisted rinsing
Water flushing or pressure washing can remove fine slurry and laitance. Use a garden hose with a nozzle for low-pressure flushing.
Keep the pressure below 50 psi to avoid damaging the bore walls. After flushing, allow the hole to dry completely before installing anchors.
Vacuum-assisted rinsing can help remove water and residue. This method is useful when dealing with damp bores or chemical anchors that require a clean, dry surface.
Combined and professional systems
For high-acceptance cleanliness levels, use pump-and-brush kits. These combine brushing with vacuum suction to remove debris effectively.
Specialized vacuums can also be used, especially for deep or narrow holes where compressed air may not reach. These tools ensure a thorough clean and are ideal for demanding installations like chemical anchors in damp conditions.
Always follow the manufacturer’s instructions and safety guidelines when using these systems.
Tools and Materials Checklist
Think in terms of tool categories: brushes, blow-out devices, vacuum, compressed air, and drying gear. Choose tools based on anchor system and the cleaning level you’re aiming for. This keeps you from mixing methods that don’t suit the bolt path or adhesive bed.
Set up a simple workflow: surface prep, hole cleaning, moisture removal, and final cleanliness check before seating the anchor. Safety notes: use appropriate PPE and dust control measures, and follow tool manufacturer guidance for operation and maintenance. Rental versus purchase decisions should hinge on job size and turnover.
Recommended brush types, pumps, and inspection tools
Before you start cleaning, make sure you’ve got the right tools for the job. Here’s a quick checklist to help you.
- Brush diameter: Match hole size. For instance, use 1/2″ brush for 1/2″ holes.
- Brush type: Stiff nylon for most jobs. Wire for tougher cleaning or larger holes.
- Pump style: Manual for smaller jobs. Powered for bigger tasks.
- Inspection tools: Mirrors and lights to see inside the hole. Gauges to check depth.
Quick rule: The right tool makes the job easier and ensures a clean hole.
Visual checkpoints and acceptance criteria
Once you’ve cleaned, it’s time to inspect. Here are some visual checks to ensure your hole is acceptably clean.
- Dust layer: No visible dust or residue on the surface.
- Aggregate exposure: You should see small stones (aggregate) in the concrete.
- Hole walls: Smooth and even. No cracks or crumbling.
- Manufacturer criteria: Some anchors have specific acceptance criteria. Check their guidelines.
Quick rule: If it looks clean, it probably is. But always double-check with the manufacturer’s guidelines.
Installation Procedures and on-Site Quality Control
Start with a clear scope that lists targeted anchor types and their hole-cleaning requirements. Establish sequencing for multi-anchor layouts to minimize rework and ensure consistent cleanliness across all holes. Clarity at the front saves re-drilling later.
Document in-process checks at each stage: hole condition, cleaning verification, seating, and torque or expansion verification. If a hole fails cleanliness criteria, re-clean or re-drill as needed. Safety and training keep everyone aligned on standardized procedures.
Step-by-step for mechanical anchors
This sequence will guide you through installing mechanical anchors in concrete, ensuring a secure and lasting hold.
- Drill the hole: Use a masonry drill bit that matches your anchor’s diameter. Drill at the marked location, keeping the bit perpendicular to the surface. The hole should be deep enough to accommodate the anchor’s length plus any additional embedment required.
- Clean the hole: Remove dust and debris from the drilled hole using compressed air or a brush. A clean hole ensures better bond strength. Check for any cracks or damage that might compromise the anchor’s hold.
- Verify hole size: Measure the hole’s diameter with a tape measure or caliper to ensure it matches your anchor’s size. An oversized or undersized hole can lead to a weak or failed installation.
- Insert the anchor: Apply a suitable adhesive (check manufacturer instructions) to the threads of the mechanical anchor. Insert it into the drilled hole, using a hammer to gently tap it in if necessary. The anchor should fit snugly without excessive force.
- Check insertion depth: Ensure the anchor is inserted to the correct depth, as marked on the anchor or according to manufacturer instructions. Too little embedment can cause the anchor to pull out under load, while too much can lead to stress concentrations and failure.
- Apply torque/setting check: Tighten the anchor using a wrench or socket, applying the specified torque (check the anchor’s label). The anchor should tighten smoothly without binding. If it binds or feels unusually resistant, stop and inspect for any obstructions or damage.
- Allow curing time: Before applying any load to the anchor, allow the adhesive to cure according to the manufacturer’s instructions. This could range from a few hours to several days, depending on the product used.
Pro tip: Always use anchors designed for your specific concrete mix and loading requirements. Cheap or incorrect anchors can lead to costly failures down the line.
Step-by-step for chemical anchors
This sequence will guide you through securely attaching items to concrete using chemical anchors. It’s a straightforward process, but precision is key.
- Clean the bore: Use compressed air or a wire brush to remove dust and debris from the drilled hole. This ensures maximum contact between the anchor and the concrete. Check: The hole should be clean and dry.
- Prepare the anchor: Follow the manufacturer’s instructions for mixing the resin and hardener. If using a static mixer, insert it into the cartridge and retract it slowly as you squeeze to ensure thorough mixing. Check: The mixture should be homogeneous and free of lumps.
- Inject the anchor: Insert the nozzle into the bore and inject the mixed chemical anchor. Fill the hole completely, allowing some excess to ooze out. This indicates proper filling. Check: You should see anchor material coming out of the hole.
- Insert the sleeve (if applicable): Immediately after injecting, insert the anchor’s sleeve or expansion body into the bore. Ensure it’s fully seated to prevent air pockets. Check: The sleeve should be flush with the surface.
- Install the bolt (if applicable): Thread the bolt into the sleeve, applying moderate torque as per the manufacturer’s guidelines. This helps distribute the anchor material evenly. Check: The bolt should turn smoothly and securely.
- Cure the anchor: Allow the chemical anchor to cure according to the manufacturer’s instructions. This typically ranges from 24 hours to a few days, depending on temperature and humidity. Wait time: Do not proceed until fully cured.
- Check for contamination or trapped air: Before installing any item onto the anchor, visually inspect it for signs of contamination (like dirt or debris) or trapped air (indicated by bubbles). If present, remove and reinstall. When to call a pro: If you consistently encounter contamination or trapped air, consider seeking professional help.
Pro tip: Always wear appropriate personal protective equipment (PPE), including gloves, safety glasses, and a dust mask, when handling chemical anchors. Safety first!
Key Specs and Numbers That Matter (Without a Datasheet)
Focus on practical performance indicators such as load direction tolerance and notable edge effects that affect real-world capacity. Look for marks and certifications that indicate standard compliance and listing scope. Tie these specs back to your site conditions rather than chasing every datasheet detail.
Understand how cleanliness and surface prep influence declared capacities, and use simple on-site checks to compare substrate and hole conditions to the test setups. A quick, conservative interpretation helps bracket what you can expect in the field. Use a decision flow to decide if an anchor is suitable for the project.
How to read technical data sheets and test reports
When you’re looking at a datasheet or test report, don’t get overwhelmed. Focus on these key bits:
Test Method: Look for ASTM or ISO standards. They ensure the anchor’s been tested right.
Concrete Strength: Make sure it matches your site’s concrete strength. Too weak, and you’re asking for trouble.
Hole Condition: Check if the hole was clean or dirty during testing. Debris cuts capacity.
Relevant approvals, certifications, and inspection protocols
Before you install, check these boxes to ensure your anchor’s up to snuff:
- UL or CE Listing: These marks mean the anchor’s been tested by a trusted third-party.
- Concrete Type Suitability: Check if it’s okay for your concrete type (normal, lightweight, etc.).
- Hollow-Core Approval: If you’re using hollow-core slabs, make sure it’s approved for that.
- Retrofit Conditions: If you’re installing in existing concrete, check if it’s okay for retrofit use.
- Building Inspector Check: Always get your local inspector to sign off on the plan before you start.
- Special Inspection: If loads are high or there’s a risk of failure, consider formal special inspection.
Quick rule: When in doubt, consult with an engineer. Better safe than sorry.
Cost, Common Pitfalls, and Safety Guidance
Proper hole cleaning pays off by reducing rework and potential failures, which saves time and money in the long run. Skipping cleaning often shows up as pullout or warranty concerns later on. Weigh the upfront effort against the risk of a failed installation and the cost of rework.
Watch for typical mistakes: debris left behind, using the wrong tool for the anchor type, or skipping recommended cleaning depths. Safety steps include PPE, dust control, and tool handling practices. Keep records of cleaning level to support audits and future maintenance.
Cost implications and project planning tips
Proper hole cleaning might seem like an extra cost, but it’s a small investment compared to the risks of rework or failure. Skipping this step can lead to anchors pulling out, causing damage and needing replacement.
Time invested: Cleaning takes around 5-10 minutes per anchor. That’s quick when you consider the time spent on reinstallation if an anchor fails.
Tool investment: Basic cleaning tools like brushes, compressed air, or water flush systems are affordable. They’ll pay for themselves in the long run by preventing failures.
Plan your workflow to include cleaning steps. Schedule time for it, and ensure your team is trained to do it right. It’s a small price to pay for peace of mind and consistent anchor performance.
Common installation errors and prevention
Here are some mistakes to avoid when installing anchors:
- Insufficient cleaning: Debris weakens the bond. Ensure holes are clean before installing.
- Inadequate drying for adhesives: Moisture can compromise adhesive performance. Let surfaces dry before applying.
- Wrong brush size: Using a brush that’s too small or too large can damage the hole or leave debris behind. Choose the right size for your anchor.
- Recontamination: Keep cleaned holes clean until installation. Cover them if necessary to prevent dirt from falling in.
Regular training and checks will help prevent these mistakes. Always follow manufacturer guidelines specific to your anchor type.
Safety, PPE, and environmental controls for cleaning operations
Safety is paramount when cleaning anchor holes. Here’s what you need to know:
PPE: Wear a dust mask or respirator for dry methods, safety glasses, and ear protection if using power tools. For wet methods, use waterproof gear.
Dust control: Use vacuum-assisted systems where possible. If not, wet down the area to control dust.
Waste handling: Collect and dispose of waste responsibly. Follow local regulations for waste management.
Compliance: Check site-specific rules and follow them. Always adhere to manufacturer guidelines and relevant codes to prevent liability issues.
Toughwire⢠Devices
ToughWire devices are a practical family of post-installed anchors that cover both injection and mechanical styles, including wedges and undercuts, with a clear decision path to pick the right variant for your concrete substrate, anchor size, and load path. You’ll see quick-reference guidance that helps you decide when to use injection versus mechanical types, and which wedge or undercut option fits your rebar pattern and service conditions. On the job, hole cleaning level directly affects pullout strength, so align your ToughWire choice with how clean you can get the hole and how you plan to seat and drive or inject the device.
For a DIY homeowner, this matters because picking the wrong attachment or skipping proper cleaning leads to weak joints and stubborn installs. You’ll get practical context on how hole cleaning interacts with performance, plus on-site indicators and flushing techniques tailored to ToughWire installations. A simple post-install checklist and a quick-reference table help you match material compatibility, recommended cleaning level, and typical pullout ranges, with straightforward verification steps to confirm you’ve achieved the targeted design strength in the field.
Choosing ToughWire Devices for Different Substrates (Concrete vs. Masonry)
ToughWire devices are versatile, but they’re not one-size-fits-all. The substrate – concrete or masonry – makes a difference.
Concrete: Go for the ToughWire Concrete series. These devices have high load ratings and are designed to grip well in dense, uniform concrete. They’re great for new constructions and solid slabs.
Masonry (Brick, Block): Opt for the ToughWire Masonry series. These devices have lower load ratings but excel in gripping into the voids between masonry units. They’re perfect for retrofits and historic buildings.
Remember, hollow-core substrates need special attention. Always check manufacturer guidelines or consult a pro before installing.
Step-by-Step: Installing ToughWire Devices in Clean Hole Scenarios
This step-by-step guide ensures your ToughWire device is installed correctly, maximizing pullout strength.
- Preparation: Use a suitable drill and bit to create a clean hole. Follow the manufacturer’s recommended hole diameter and depth.
- Cleaning: Remove dust using compressed air or a brush. A clean hole ensures better grip for your ToughWire device.
- Device Seating: Insert the ToughWire device into the hole. Ensure it’s fully seated with no gaps. Use a hammer tap if needed, but be gentle to avoid damaging the device.
- Anchor Insertion: Insert the anchor (expansion bolt or wedge) into the ToughWire device. Ensure it’s properly aligned and fully engaged.
- Torque/Drive: Apply the recommended torque using a wrench or impact driver. This sets the anchor and activates the ToughWire device’s grip. Check manufacturer guidelines for exact torque values.
- Verification: Perform a visual check to ensure everything is seated correctly. Gently pull on the anchor to confirm it’s secure before proceeding with your project.
Conclusion
The core idea is simple: clean the hole to the spec for your anchor and you protect strength, safety, and appearance. Skipping or skipping the right cleaning won’t just reduce pullout resistance; it can show up as cracks, loose fixtures, or a failing install in the first year.
To move forward, check the anchor type and its cleaning requirements, pick the proper cleaning method, clean the hole until it’s clear of dust and debris, blow or vacuum out the bore, inspect the walls, test-fit the anchor, and install per the procedure with the right cure or set time. Do a quick on-site quality check after installation and keep the area clean as you finish other work.
A few mistakes to avoid: never skip cleaning, never rush the bore after drilling, and never guess the cleaning level for a given anchor type. Safety rules are simple: wear eye protection and a dust mask, keep a clear work zone, measure and double-check hole size against the anchor, and test in a small area before full use. If you’re unsure about the required cleaning level or the right anchor for the load, pause and double-check the spec or ask a professional before proceeding.
If the job would require unusual load conditions, high-risk mounting, or uncertain hole conditions, it makes sense to bring in a pro rather than push on. Stay deliberate, follow the steps, and you’ll land a durable, safe installation that looks right and holds up under real use. Safety first and steady progress keep you from costly mistakes and rework.
FAQ
How do wedge expansion anchors differ from chemical injection anchors in terms of hole cleaning needs?
Wedge expansion anchors rely on clean, smooth holes for full seating. Chemical anchors need a clean, dust-free, and moisture-controlled bore to ensure adhesive bonds form correctly.
What installation steps are important to follow for different anchor types?
Follow the manufacturer’s instructions for each anchor type. Clean the hole to the specified level, choose the right drill bit and loss-in-dust control, and verify installation torque or cure times as directed.
What quality standards or approvals should I look for when choosing anchors?
Check for product labels, manufacturer documentation, and any local or project-approved guidelines. If unsure, ask for the latest datasheet or installation manual and compare to your project requirements.
Where can I find brochures or technical manuals for the anchor system and how to use them safely?
Ask the supplier for the official brochures and manuals, or download them from the manufacturer’s site. Use those documents to confirm hole cleaning levels, installation steps, and safety precautions before starting.