
Introduction
A cold joint in concrete is a weak seam where fresh concrete meets earlier poured concrete. It happens when there is a delay or poor bonding between pours. In small pours, clean edges and proper timing help prevent it.
Prepare the edge by cleaning and roughening the previous pour so the new concrete can grab hold. Work promptly and place the next batch before the first sets too stiff. If you use a bonding agent, check the label and local rules to confirm it’s suitable for your mix and climate.
Key takeaways
- Coordinate formwork, reinforcement, and timing to minimize cold joint formation.
- Keep concrete workable: place continuous lifts with proper consolidation to avoid gaps.
- Use clean transitions between pours; inspect substrate and forms for debris.
- Schedule material deliveries and placement to prevent extended surface exposure.
- Wear PPE and monitor dust, pour vibrations, and fall hazards on site.
- Perform visual checkpoints and simple tests to confirm cohesion before hardening.
Table of Contents
- Introduction
- Key takeaways
- What Cold Joints Are and Why They Matter for Small Pours
- Common Causes of Cold Joints Specific to Small Pours
- Planning Pours to Prevent Cold Joints
- On-Site Best Practices During Placement
- Tools and Materials Checklist for Small Pours
- Material Specs and Standards Explained
- Visual Checkpoints and Simple on-Site Tests to Detect Weak Seams
- Repairing and Remediating Cold Joints in Small Pours
- Conclusion
- FAQ
What Cold Joints Are and Why They Matter for Small Pours
Cold joints are seams where fresh concrete meets material that has already started to set. In plain terms, the new batch doesn’t fully fuse with the old, leaving a weak line. Small pours are especially at risk because there are more joints per job and less time for continuous placement.
These weak seams can transfer load unevenly and crack under stress. Understanding this helps you plan better and avoid durability issues in tight pours. For specifics, check your product labels, manufacturer instructions, and local code guidance.
Definition and visual indicators
A cold joint is a seam that forms when concrete placement is stopped and then restarted. It’s called ‘cold’ because the newly placed concrete isn’t warm from the hydration process of the previous pour.
You can spot a cold joint by its change in color or texture, and sometimes you’ll see a visible seam. Normal construction joints are planned and purposeful, while cold joints often indicate an issue with the pour sequence.
Problematic cold joints usually show signs of weak bonding, like crumbling or powdery surfaces along the seam.
Structural and durability risks
Cold joints pose several threats to your concrete’s strength and longevity. The poor bond between the two pours weakens the overall structure, reducing its ability to bear loads.
Water can seep into these weak points, leading to issues like efflorescence (white powder on the surface) or even more serious problems like spalling or delamination over time.
In cold climates, water trapped in the joint can freeze and thaw, further damaging the bond. This cycle can eventually cause the concrete to crumble or break apart at the seam.
Long-term, these issues can lead to reduced service life of your concrete, costly repairs, or even structural failure if left unaddressed.
Common Causes of Cold Joints Specific to Small Pours
Intermittent placement and batches that sit while you wait for the next lift are common culprits. Temperature swings and slow slump loss can also contribute. In shaded or windy sites, set time rules matter even more.
Operational habits, such as stopping to set forms or rebar, create a gap where concrete stops flowing. Confirm with the mix supplier and project specs what constitutes acceptable continuity for your job. Verify instructions and local rules as needed.
Improper batching and delayed successive pours
Batching concrete too slowly can lead to cold joints. Each batch has a specific working time before it starts to set. If you’re not ready for the next lift, you’ll end up with a lapse in continuity.
Inconsistent material arrival also causes problems. If your mixer is empty and you’re waiting for more concrete, that’s precious time lost. The first pour might be setting while the second one hasn’t even arrived yet.
Short working time mixes are another culprit. These mixes set quickly, giving you less time to place and finish each lift. If you can’t keep up, cold joints will form.
Poor coordination and manpower constraints
Small jobs often mean small crews. But if your team is spread thin, they might not be able to keep up with the pour schedule. This can lead to delays between lifts, creating cold joints.
Delayed finishing also plays a part. If you’re not ready to place the next lift on time, you’ll end up with a weak seam. Remember, concrete sets quickly, so timing is crucial.
Interrupted placement is another common issue. If you have to stop and start again later, that pause can cause a cold joint. Try to keep your pours continuous.
Environmental and temperature effects
Temperature plays a big role in concrete setting. High ambient temperatures speed up the process, reducing working time. If it’s hot out, you might find your concrete setting before you can place the next lift.
Wind dries out the surface of your concrete, creating a weak layer that’s prone to cold joints. Keep an eye on the weather forecast and protect your pours from wind if possible.
The sun also affects your pours. Direct sunlight can heat up the concrete’s surface, causing it to set too quickly. Try to schedule your pours for cooler parts of the day or use protective measures like wet burlap.
Planning Pours to Prevent Cold Joints
Start with a clear plan for batch sizes and placement windows that keep plastic concrete moving. Map out lifts so there is no long dry interval between pours. Build in time buffers for weather or access issues.
Communicate the plan to the crew and any subcontractors so everyone acts in sequence. If you need to adjust sequencing, consult the mix design sheets and manufacturer guidance. Always verify the plan against local requirements and site conditions.
Volume calculation and mix scheduling
First, calculate your pour volume. Measure length, width, and depth of the area to be poured.
Next, contact your ready-mix supplier or batch plant. Give them your volume and desired slump (workability). They’ll help schedule batches for delivery at optimal times.
Pro tip: Ask about set time too. You want concrete that stays plastic long enough to consolidate properly but sets quickly enough to avoid delays.
Sequencing and pour layout for continuous placement
Plan your pour in zones or strips. This lets you place concrete continuously, minimizing interruptions that can cause cold joints.
For example, if you’re pouring a slab, divide it into rectangular zones. Start at one corner and work across, then move to the next row.
Consult with your ready-mix supplier to ensure they can deliver batches in sync with your pour sequence. Keep them informed of any changes.
On-Site Best Practices During Placement
Prepare the surface and substrate before you start, removing laitance and loose material. Use continuous placement techniques where possible and avoid stopping mid-pour on a hard edge. Control joints should be added at the right stage according to instructions.
Consolidate properly with the right tools and methods to integrate new concrete with the old. Be mindful of vibration and screeding speed to minimize isolating layers. Check product labels and manufacturer guidance for consolidation guidelines and safety notes.
Layer placement, consolidation, and timing
When pouring small amounts of concrete, it’s crucial to place subsequent lifts while the previous ones are still plastic. This helps minimize cold joints.
Use a vibrating screed or poke the surface with a bullfloat to consolidate each layer. This removes air pockets and ensures proper bonding between layers.
Stop pouring when the concrete reaches its initial set, usually around 30-60 minutes after mixing. Restarting too early can lead to weak seams.
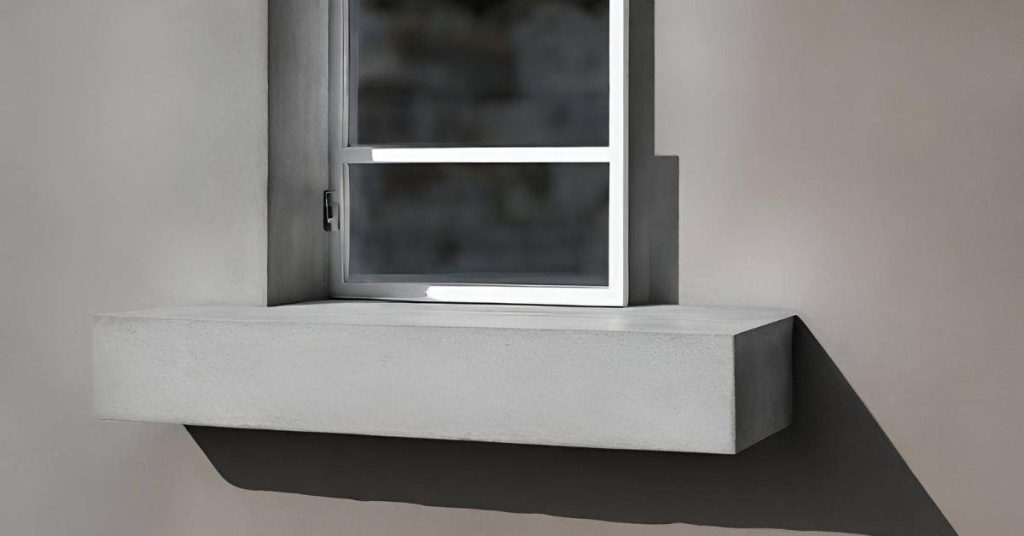
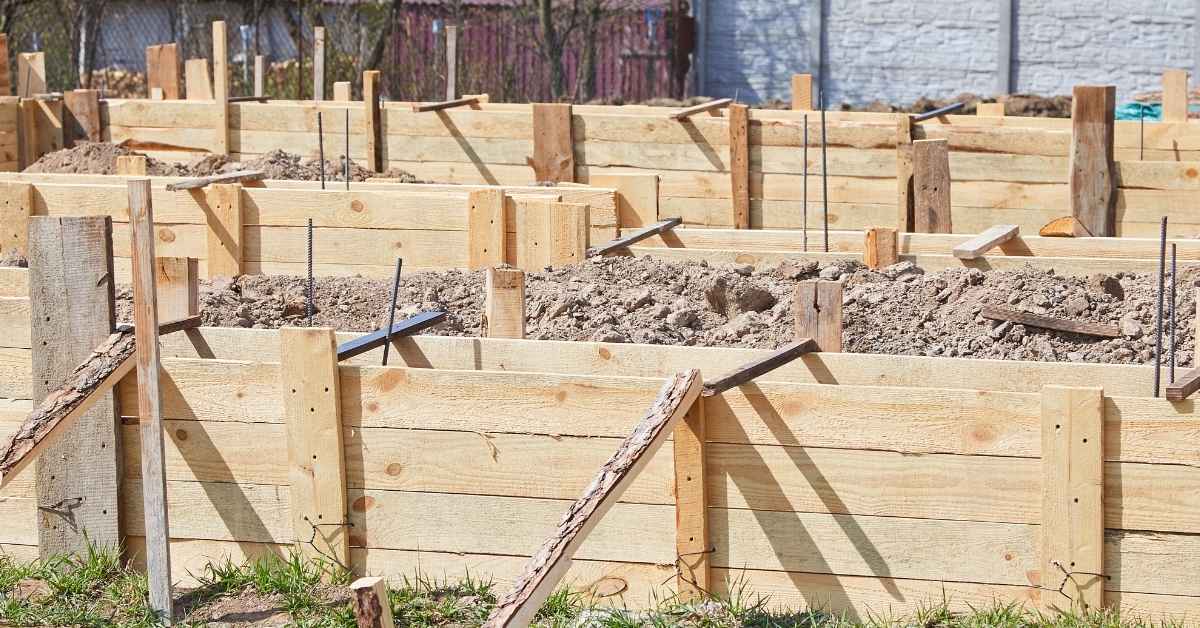
Formwork, edges, and keyed joints
Proper formwork is essential for preventing cold joints. Ensure your forms are clean, well-supported, and watertight.
For intended cold joints, consider keying the forms to create a mechanical bond between pours. This can significantly improve joint strength.
When a clean joint is necessary, prepare edges by scabbling or roughening them before the next pour. This increases surface area and helps with bonding.
Tools and Materials Checklist for Small Pours
Gather portable vibration tools, cleanouts, and a reliable mixer if you’re handling multiple small batches. Have a measured water supply and a means to maintain slump under varying conditions. Keep tampers, paddles, and a hand float ready for quick touchups.
Stock form release agents, curing compounds, and plastic sheets or blankets as needed. Check with the supplier for compatible products and follow local rules for curing. Use the label and data sheets to confirm suitability for your concrete mix.
Essential tools and portable equipment
Before you start your small pour, ensure you have the right tools to maintain quality and efficiency. Here’s a checklist of essentials.
- Portable vibrator: To consolidate concrete in forms without air entrapment. Skip this and you’ll get honeycombing.
- Wheelbarrow or small pump: For easy transport of concrete mix to the pour site. Without it, you’ll waste time and energy.
- Trowels (hand and straight): To strike off and finish surfaces. Inadequate finishing leads to weak spots.
- Finishing tools (bullfloat, darby): For consolidating and leveling concrete. Neglect this step and you’ll have an uneven surface.
- Shovel: To move materials around the site. Without it, you’ll struggle with simple tasks.
- Level and tape measure: To ensure proper formwork alignment and pour depth. Inaccurate measurements lead to structural issues.
- Gloves and safety glasses: For protecting hands and eyes during the pour. Safety first, always!
- Ear protection (optional): If using power tools like vibrators or pumps. Hearing damage is permanent.
Quick rule: Always inspect your tools before starting to avoid delays and ensure they’re in good working order.
Admixtures, bonding agents and their proper use
Admixtures and bonding agents can extend workability and improve bond. Here’s how to use them right.
- Water reducer: To increase slump without adding water. Too much reduces strength.
- Retarder: To slow setting time for larger pours. Overuse can cause delayed strength gain.
- Accelerator: To speed up setting time in cold weather. Excessive use may lead to cracking.
- Air entrainer: To introduce tiny air bubbles for durability. Too much reduces strength.
- Bonding agent (latex or acrylic): To improve bond between old and new concrete. Insufficient bonding leads to delamination.
- Fiber reinforcement: To enhance crack resistance. Incorrect dosage can cause clumping.
- Check manufacturer’s instructions: Always verify proper dosages and compatibility with your mix design.
Quick rule: Never guess the amount of admixtures or bonding agents to use. Always follow manufacturer guidelines.
Formwork and reinforcement accessories
Proper formwork and reinforcement ensure a strong, aligned pour. Here’s what you need.
- Form ties: To hold forms in place until concrete sets. Missing ties cause form movement and weak spots.
- Walers and bracing: For added support to prevent formwork from bulging or deflecting. Inadequate bracing leads to improper curing.
- Edge keys (dowel bars): To provide mechanical interlock between pours. Without them, you’ll get weak cold joints.
- Reinforcement chairs: To hold rebar in place and maintain proper cover. Inadequate cover leads to corrosion and reduced strength.
- Form release agent (spray or liquid): To prevent concrete from sticking to forms. No release agent means you’ll struggle to remove forms.
- Formwork alignment tools (laser level, plumb bob): To ensure forms are square and plumb. Misaligned forms lead to structural issues.
- Reinforcement inspection report: To verify proper placement of rebar before pouring. Inadequate reinforcement leads to cracking under load.
Quick rule: Always double-check your formwork and reinforcement before pouring. A few minutes can save hours of rework.
Material Specs and Standards Explained
Read the mix design sheets to understand workability, slump range, and target strength. Standards guidance helps you gauge what is acceptable for a cold-joint risk. If in doubt, compare notes with the spec and manufacturer documentation.
Look at aggregate sizes, cementitious content, and hydration timing to assess how fast the concrete will set. For any uncertain detail, verify with the supplier, manufacturer, or local building authority and keep records with the job files.
What to check on mix design and supplier documents
Before each pour, review these documents to ensure you’re using the right materials and have enough time for continuous placement.
- Cement type: Check it matches your project’s requirements. Wrong cement can cause weak joints.
- Admixtures: Confirm they’re listed and approved for use in your area to prevent cold joint issues.
- Expected working time: Ensure it fits your pour schedule. Too short, you’ll rush; too long, concrete may set before placement is complete.
- Water-cement ratio: Check it’s within acceptable limits (0.45-0.6) to maintain strength and durability.
- Aggregate size and type: Confirm they match your project needs. Wrong aggregate can cause weak, porous joints.
- Slump test results: Verify they’re within acceptable range (2-4 inches) for proper consolidation.
- Delivery time: Coordinate with the supplier to ensure concrete arrives when needed for continuous placement.
- Mix design notes: Read any special instructions or warnings regarding the mix’s behavior during placement and curing.
Quick rule: If unsure about anything, contact your supplier. Better safe than sorry with cold joints.
Local code and inspection points to verify
Before starting work, confirm these items with local inspectors or engineers to avoid rework and delays at joints.
- Joint spacing: Check it aligns with local codes (usually every 20-30 feet). Too wide, joints may crack; too narrow, they won’t have time to set properly.
- Joint type and details: Ensure they match approved plans. Wrong joint types can cause weak points.
- Concrete cover over reinforcement: Verify it meets code requirements (usually 2-4 inches) for proper protection against corrosion.
- Formwork alignment and plumb: Check forms are straight, level, and properly braced to prevent misaligned joints.
- Concrete placement rate: Confirm it’s within acceptable limits (usually 10-20 cubic yards per hour) for continuous pours.
- Temperature requirements: Ensure concrete temperature and curing conditions meet code standards to prevent cold joints due to rapid cooling or heating.
- Concrete strength requirements: Verify the mix design meets required strengths (usually 3000-4000 psi) for your project’s needs.
- Inspection schedule: Confirm when inspections will occur and who to contact for approvals.
Quick rule: Always follow local codes and get necessary approvals before starting work. It saves time and money in the long run.
Visual Checkpoints and Simple on-Site Tests to Detect Weak Seams
During placement, watch for visible gaps, color differences, or a rough surface where layers meet. After placing, inspect cured surfaces for irregular textures that indicate a seam. Use a simple tap test to listen for hollow sounds where joints may be weak.
Document any suspect areas and plan targeted repairs if needed. For curing and post-cure checks, follow the guidance on your product labels and local codes. When in doubt, verify procedures with the supplier or the code official.
What to look for during and after curing
Inspect your concrete pours regularly during the first few days of curing. This helps catch any issues early.
- Differential texture: Check for areas where the surface is rougher or smoother than others. This could indicate weak spots.
- Hairline cracking: Fine cracks appearing during curing can be a sign of excessive shrinkage or settling.
- Staining: Discoloration may hint at efflorescence, which indicates moisture movement and potential issues.
- Delamination: Peeling or flaking of the surface could mean the concrete is separating from itself or its base.
- Uneven curing: Areas that cure faster or slower than others might have inconsistent strength.
- Sinking or settling: Uneven settlement can cause weak points and stress on the structure.
- Cracking at joints: Cracks forming along control joints may indicate excessive shrinkage or improper jointing.
- Moisture loss: Concrete that dries out too quickly can lead to weak spots and cracking.
Quick rule: If you spot any of these signs, don’t wait – investigate further or consult with a pro immediately.
Non-destructive checks and quick probes
Before resorting to destructive testing, try these simple, safe methods to check your concrete’s integrity.
- Sounding with a hammer: Tap the surface with a hammer. A dull thud indicates solid concrete; a hollow sound may mean voids or weak spots.
- Localized probing: Gently probe suspect areas with a small, sharp tool to check for softness or hollowness.
- Adhesive pull tests: Use rated anchors and adhesive to test the concrete’s bond strength in critical areas.
- Rebound hammer test: This non-destructive method measures the surface hardness of concrete.
- Moisture content check: Use a moisture meter to ensure consistent curing and no excessive drying.
- Coordinating with an inspector: Before performing any destructive tests, consult with your local building inspector to ensure you’re following proper procedures.
Quick rule: If these checks reveal issues or you’re unsure about results, don’t hesitate to call in a pro for further evaluation.
Repairing and Remediating Cold Joints in Small Pours
For small projects, temporary fixes may involve cleaning and reworking the joint area while it is still workable. Permanent remediation often requires removing and replacing the affected section or injecting appropriate materials per guidance. Choose the option that preserves load transfer and finish quality.
Document the repair steps and ensure compatibility with the original mix. Check with the product instructions and local standards to select the right method. If needed, ask the supplier or a qualified professional to confirm the plan before proceeding.
Immediate corrective actions during placement
If you spot a cold joint forming while the adjacent concrete is still workable, act fast. Here’s what to do:
Clean the exposed surface with a wire brush or high-pressure air. Remove any laitance – that’s the weak, cement-rich layer on top.
Then, rework the concrete. Use a shovel or a small mixer to break up and remix the cold joint area with fresh concrete from your batch. This helps blend the two together.
If the lapse is significant, apply a bonding agent. These are liquid admixtures that improve adhesion between old and new concrete. Follow the manufacturer’s instructions for application.
Permanent repair methods and when to use them
Once your concrete has cured, you can’t just patch over cold joints. Here are some permanent solutions:
Mechanical keys/dowels are metal or plastic inserts that create a physical bond between the old and new concrete. They’re best used when you need to pour additional concrete onto an existing surface.
Bonded overlays are thin layers of new concrete applied over the cold joint. They require proper preparation – cleaning, priming, and sometimes sandblasting – to ensure good adhesion.
For epoxy injection, drill small holes into the cold joint, clean them out, then inject epoxy resin under pressure. This fills micro-cracks and strengthens the joint. It’s ideal for fixing cracks in slabs or walls.
Always follow product instructions to a tee. If you’re unsure about any repair, consult an engineer. Structural repairs should never be attempted without professional advice.
Conclusion
Cold joints aren’t just cosmetic flaws. They can weaken a pour and create hidden defects that bite you later, so stay deliberate about safety, durability, and how your finish looks.
Run through a simple, practical checklist as you approach your next small pour: confirm your plan and timing, inspect forms and joints, gather the right materials and tools, verify mix and curing requirements match your plan, pour in controlled stages with overlap and proper vibration, keep a steady pace, and do quick visual checks and simple on-site tests before curing begins. If something doesn’t add up, stop, reassess, and fix it now rather than hoping a seam will hold.
Common mistakes to avoid are rushing a pour or skipping surface preparation, trying to slip in a new batch without aligning it to the last seam, and ignoring curing and protection once the concrete is placed. Safety rules apply here: don’t work with wet or frozen materials, protect forms and edges from damage, and never skimp on curing or surface finishing. If you’re unsure about the structural load, joint alignment, or large-scale repairs, call a professional instead of pushing through.
When it makes sense to bring in help, do so early and describe the failure mode you’re dealing with, the pour size, and the loads involved. Stay methods- and materials-aware, test in a small area first, and finish with clear, deliberate steps. Stay practical, stay safe, and you’ll end up with a solid seam and a durable result you can be proud of.
FAQ
How do I know a cold joint will be weak after a small pour?
Look for a distinct line or change in finish between pours. If the surface shows a rough seam, uneven texture, or a visible difference in color, it can be a weak spot. Check the manufacturer instructions or label for guidance on joint strength and curing.
What steps can I take if I see a potential cold joint mid-pour?
Pause if possible and plan to tie the new concrete into the old with a proper joint treatment or bonding agent per product instructions. If you must proceed, ensure the surface is roughened, clean, and primed for bonding as directed by the product you’re using. Do not guess; follow the label and local guidance.
How should I finish edges and joints to reduce risk of cold joints?
Use a consistent pour cadence and work to minimize separation of lifts. Expose fresh concrete to the new pour by roughening or brushing as required, and use a suitable bonding agent where specified. Check product instructions for compatible methods and curing recommendations.
When is it better to start a new pour instead of trying to fix a questionable joint?
If the joint is already breaking the surface or you’re unsure about bond, consider postponing and starting clean with the correct setup. Always verify with the product label, datasheet, or manufacturer instructions and follow local rules for curing and protection.