
Table of Contents
- Introduction
- Understanding the Importance of Cleaning Mortar Off Bricks
- Preparing the Brick Surface and Surrounding Area
- Choosing the Right Cleaning Solutions
- Techniques for Scrubbing or Scraping Mortar
- Addressing Efflorescence on Brick Surfaces
- Rinsing and Disposing of Cleaning Materials
- Common Mistakes to Avoid During the Cleaning Process
- Professional Services for Brick Cleaning
- Conclusion
- FAQ
Introduction
To clean mortar smears off brick without causing damage, use a gentle acid solution like diluted vinegar or a specialized masonry cleaner, and scrub carefully with a soft-bristle brush. In this article, you’ll discover step-by-step instructions and expert tips to ensure your brick surfaces remain pristine and undamaged during the cleaning process.
Understanding the Importance of Cleaning Mortar Off Bricks
Cleaning mortar off bricks is essential to maintain the visual appeal and structural integrity of any brickwork. Mortar smears can detract from the overall appearance of a building, making it look unkempt and unfinished. Additionally, leaving mortar on bricks can lead to moisture retention and eventual deterioration of the brick surface.
Proper cleaning techniques are crucial to avoid damaging the bricks, as improper methods can lead to costly repairs. By preserving the brick’s surface, you maintain the architectural or historical significance of the structure. Ensuring that bricks are free from mortar not only enhances their aesthetic but also prolongs their lifespan, making it a vital task for both DIY enthusiasts and professionals on the jobsite.
Impact on Aesthetics and Structural Integrity
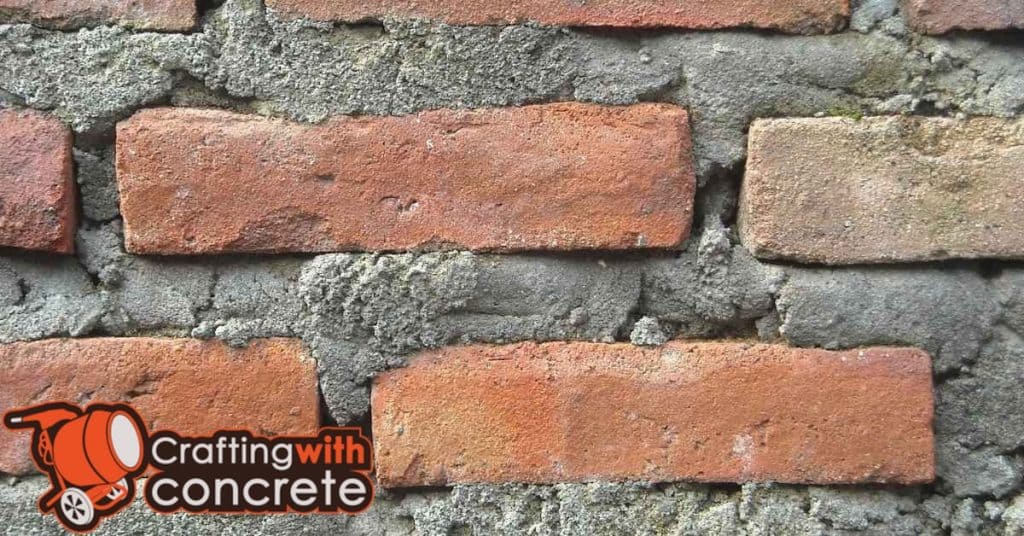
Mortar smears on bricks are more than just an eyesore. They can seriously mess up the look of your brickwork. You want clean, sharp lines, not a sloppy mess. If you leave mortar stains, your beautiful brick façade can look like a rushed job. It’s not just about looks, either. Over time, these smears can trap moisture, leading to potential damage. Moisture can seep in, causing bricks to weaken or crack. So, clean up those smears to keep your brickwork looking sharp and lasting longer.
Structural integrity is another big deal. When mortar is left on bricks, it can create weak spots. These areas can become vulnerable to weathering, especially in harsh climates. If water gets in and freezes, it expands, and that can lead to cracks or even breakage. You don’t want to deal with that kind of headache down the line. Make sure to remove excess mortar promptly to ensure your brickwork stays strong and durable.
Remember, a little effort now can save you from bigger problems later. Take the time to clean off any mortar smears as soon as possible. This small step can make a big difference in both the look and longevity of your brickwork. Don’t cut corners—your bricks will thank you for it.

Preparing the Brick Surface and Surrounding Area
Before cleaning brick surfaces, it’s crucial to prepare both the bricks and the surrounding areas to prevent damage. Start by assessing the extent of mortar smears and identifying areas that need protection. Gather tools like tarps, painter’s tape, and safety gear, and clear the area of furniture or obstacles for a safe working environment.
Proper preparation ensures that cleaning agents don’t harm nearby plants or surfaces. By covering these areas with tarps and using painter’s tape on edges and trim, you minimize the risk of accidental damage. This careful approach not only protects your surroundings but also ensures a more efficient and successful cleaning process.
Clearing and Protecting the Area
Before you start, make sure to clear the area around your brick surface. Remove any furniture, plants, or decorations that might get in the way. This isn’t just about making space; it’s about preventing damage. You don’t want to accidentally ruin something valuable while you’re working.
Once the area is clear, it’s time to protect it. Use tarps to cover surfaces that might catch stray splatters or dust. Lay them out flat and secure them with weights or stakes if you’re working outside. Indoors, make sure the tarps cover floors and any nearby walls. Don’t skimp on this step; a little prevention saves a lot of cleanup.
For edges and smaller areas, use masking tape. Tape off adjacent surfaces like window frames or trim. This ensures a clean line and keeps those areas free from debris or paint. Remember, proper protection saves you from headaches later.
Wetting the Brick Surface
Before you start cleaning, make sure to thoroughly dampen the brick surface. This step is crucial because wet bricks absorb less cleaning solution, making the cleaning process more effective and reducing the risk of damaging the bricks. Dry bricks can soak up too much cleaner, which might lead to discoloration or erosion over time.
Grab a hose or a bucket of water and evenly wet the entire area. You don’t want to flood it, just ensure it’s damp. This helps the cleaner to sit on the surface rather than being absorbed, allowing it to break down dirt and stains more efficiently. Remember, the goal is to make cleaning easier, not harder.
Keep an eye on the weather. If it’s a hot day, the bricks might dry out quickly, so you may need to re-wet them as you go. Consistent dampness is key to achieving the best results. Skipping this step or doing it half-heartedly can lead to more work later on, so take the time to do it right.
Choosing the Right Cleaning Solutions
Choosing the right cleaning solution is crucial for removing mortar without damaging the brick. Options range from acidic and alkaline to neutral pH solutions, each with its own advantages and drawbacks.
Testing a small area first can prevent costly mistakes, and selecting the right solution depends on the type of brick and mortar. Safety is paramount, so always use protective gear when handling these chemicals.
Commercial Acid Cleaners
Commercial acid cleaners are powerful solutions for tackling stubborn stains and mineral deposits. They’re particularly effective on surfaces like tile, grout, and concrete. However, before you dive in, always read the label to ensure the cleaner is suitable for your specific surface. Using the wrong product can cause damage, so double-check compatibility.
Safety should be your top priority when handling these cleaners. Always wear protective gear, including gloves and goggles. Ventilation is crucial, so keep windows open or use fans to disperse fumes. Never mix acid cleaners with other chemicals; this can create toxic gases. If you’re unsure, refer back to the general safety guidelines discussed earlier.
When using acid cleaners, apply them sparingly and follow the manufacturer’s instructions to the letter. Overuse can lead to surface damage or discoloration. After cleaning, rinse the area thoroughly with water to neutralize any remaining acid. This step is crucial to prevent any long-term damage to the surface.
DIY and Eco-friendly Alternatives
Forget those harsh commercial cleaners for a moment. You can whip up effective cleaning solutions right at home. Start with a mix of vinegar and water. It’s a powerhouse for cutting through grime and doesn’t harm the environment. Just remember, vinegar isn’t for everything. Avoid using it on natural stone surfaces like granite or marble.
Baking soda is another gem. It’s great for scrubbing and deodorizing. Sprinkle it on a damp sponge and tackle those stubborn spots. For an extra punch, combine it with vinegar. The fizzing action helps lift dirt without any toxic residue.
Consider using castile soap for a gentle yet effective clean. It’s versatile and can be used on almost any surface. Mix it with water and a few drops of essential oil for a pleasant scent. This way, you’re not just cleaning; you’re creating a healthier home environment.
Choosing the Right Cleaning Solution for Your Brickwork
Picking the right cleaning solution is crucial for getting rid of mortar smears without harming your brickwork. The wrong choice can cause discoloration or even damage the bricks. Here’s how to decide between using vinegar, commercial cleaners, or other options.
- Vinegar for Light Stains: Use vinegar for minor mortar smears or efflorescence. It’s a gentle, eco-friendly option that works well on older, more delicate bricks. Mix equal parts vinegar and water for a safe cleaning solution.
- Commercial Cleaners for Tough Jobs: For heavy mortar stains, opt for a commercial masonry cleaner. These are formulated to tackle stubborn residues. Always follow the manufacturer’s instructions and test on a small area first.
- Avoid Muriatic Acid: Steer clear of muriatic acid. It’s too harsh and can damage the brick surface. Stick to cleaners specifically designed for masonry.
- Test Before Full Application: Always test your chosen solution on a hidden area of the brick. This helps you see how the bricks react before committing to the entire surface.
- Consider the Brick Type: Different bricks react differently to cleaning solutions. Soft or porous bricks may require milder solutions, while harder bricks can handle stronger cleaners.
- Safety First: Regardless of the solution, wear protective gear like gloves and goggles. Ensure good ventilation if you’re working indoors to avoid inhaling fumes.
- Eco-Friendly Alternatives: If you’re environmentally conscious, consider using baking soda or castile soap. These options are less harsh and still effective for light cleaning tasks.
When to Call in the Pros
If you’re dealing with extensive stains or historical brickwork, it might be best to hire professionals. They have the expertise and equipment to clean without causing damage. Don’t risk it if you’re unsure—better safe than sorry.
Techniques for Scrubbing or Scraping Mortar
Removing mortar from bricks requires the right tools and techniques to prevent damage. Using a stiff-bristled brush and a plastic scraper are effective methods for safely cleaning brick surfaces.
Proper technique ensures the longevity and appearance of your brickwork. By applying the right amount of pressure and taking safety precautions, you can maintain the integrity of the bricks while achieving a clean finish.
Using a Fibre Brush
To gently scrub mortar off bricks, a fibre brush is your best friend. Start by wetting the bricks with water. This helps to loosen the mortar and prevents dust. Once the bricks are damp, use the fibre brush to scrub the mortar in a circular motion. The key here is to be gentle. Applying too much pressure can damage the bricks.
While scrubbing, keep an eye on the mortar. If it’s not coming off easily, don’t force it. Instead, consider using a mild cleaning solution to aid the process. Remember, the goal is to remove the mortar without harming the brick surface. If you notice any scratches, stop immediately and reassess your technique.
After scrubbing, rinse the area with clean water to wash away any residue. Check your work to ensure no mortar remains. If you spot any stubborn bits, repeat the process. A fibre brush is effective, but patience is crucial. Rushing can lead to mistakes, so take your time and do it right.
Avoiding Metal Tools
Metal tools can react with cleaning solutions, causing damage to your mortar or leaving unsightly stains. Stick to safer alternatives to keep your work clean and effective.
- Plastic Scrapers are gentle on mortar surfaces and won’t react with cleaning chemicals. Use them to remove loose debris without scratching.
- Wooden Tools offer a sturdy, non-reactive option for scraping. They’re great for prying without the risk of rust stains.
- Nylon Brushes are perfect for scrubbing away residue. They provide enough abrasion to clean without damaging the mortar.
- Rubber Mallets can be used to gently tap loose mortar without the risk of metal marks. Ideal for delicate work.
Pro tip: If you must use metal tools, ensure they’re stainless steel to minimize the risk of reaction and staining.

Addressing Efflorescence on Brick Surfaces
Efflorescence is a common issue that can mar the appearance of your brickwork. It appears as a white, powdery residue on the surface of bricks, caused by water-soluble salts migrating to the surface. Tackling efflorescence effectively requires understanding its causes and employing the right cleaning techniques to prevent recurrence.
- Identify the Source: Before cleaning, determine where moisture is entering your brickwork. Check for leaks, poor drainage, or inadequate sealing that might be causing the problem.
- Dry Bricks Thoroughly: Ensure the bricks are completely dry before attempting to clean. Moisture can exacerbate efflorescence, so wait for a dry spell or use fans to speed up the drying process.
- Use a Stiff Brush: Start by brushing the affected area with a stiff nylon brush. This can often remove the efflorescence without the need for chemicals. Avoid metal brushes to prevent scratching the brick surface.
- Apply a Vinegar Solution: For stubborn deposits, mix equal parts white vinegar and water. Apply the solution with a sponge and gently scrub the area. Vinegar helps dissolve the salts without damaging the brick.
- Rinse Thoroughly: After cleaning, rinse the area with clean water to remove any remaining vinegar solution. This prevents any residue from attracting more dirt or salts.
- Seal the Surface: Once the bricks are clean and dry, consider applying a breathable sealant. This helps prevent moisture from penetrating the bricks, reducing the likelihood of efflorescence returning.
- Monitor and Maintain: Regularly inspect your brickwork for signs of moisture intrusion. Promptly address any issues to keep efflorescence at bay and maintain the integrity of your brick surfaces.
Preventing Future Efflorescence
To keep efflorescence from coming back, focus on moisture control. Ensure proper drainage around your home and fix any leaks promptly. Regular maintenance and inspection can save you from dealing with this nuisance repeatedly. By staying vigilant, you can preserve the beauty and longevity of your brickwork.
Rinsing and Disposing of Cleaning Materials
Thoroughly rinsing bricks after cleaning is crucial to remove any residue and prevent potential damage. Using the right water pressure and techniques ensures that the brick surface remains intact while effectively eliminating leftover cleaning agents.
Proper disposal of cleaning materials is essential to avoid environmental harm. Understanding local regulations and using designated disposal facilities can help manage chemical waste safely. Wearing protective gear during rinsing and disposal processes further ensures personal safety on the jobsite.
Safe Disposal Practices
When it comes to disposing of cleaning solutions, don’t just pour them down the drain. Many cleaning products contain chemicals that can harm the environment. Instead, check the product label for disposal instructions. If you can’t find any, contact your local waste management facility for guidance. They often have specific protocols for hazardous waste disposal.
For solid cleaning materials like sponges or rags, make sure they’re thoroughly rinsed before disposal. If they’re soaked in harsh chemicals, treat them as hazardous waste. Don’t just toss them in the trash. Some areas offer special collection days for such materials. Take advantage of these services to ensure safe disposal.
Never burn or bury cleaning materials. This can release toxic substances into the air and soil. Always opt for the most environmentally friendly disposal method available. If you’re unsure, err on the side of caution and seek professional advice. Protecting the environment should be a top priority.
Common Mistakes to Avoid During the Cleaning Process
Cleaning brick surfaces can be tricky, and making mistakes can lead to costly damage. Choosing the wrong cleaning solution or using high-pressure washers can erode the brick, while aggressive scrubbing might scratch the surface. Testing your cleaning method on a small, hidden area first can prevent these issues, and wearing protective gear can safeguard against skin and eye irritation.
Understanding these common pitfalls is crucial for maintaining the integrity and appearance of your brickwork. By avoiding these errors, you ensure the longevity and aesthetic appeal of your bricks, saving time and money on repairs. Proper cleaning techniques not only protect the brick but also prevent mortar residue from becoming more ingrained, keeping your surfaces looking their best.
Overusing Cleaning Solutions
Using too much cleaning solution can do more harm than good. Excessive use can leave behind a sticky residue that attracts dirt, making surfaces look grimy faster. Instead of pouring on more solution, focus on using the right amount. A little goes a long way, and it’s often more effective to clean with a properly diluted solution.
Overuse can also lead to damage. Some surfaces, like wood or natural stone, are sensitive to harsh chemicals. Too much cleaner can strip away finishes or cause discoloration. Always check the manufacturer’s guidelines for the right type and amount of cleaner to use. When in doubt, test a small area first.
Remember, more isn’t always better. Stick to the recommended amounts, and you’ll avoid unnecessary wear and tear. If you’re unsure, it’s safer to clean twice with less solution than risk damaging your surfaces with one heavy-handed application.
Ignoring Safety Precautions
Ignoring safety precautions is a surefire way to turn a simple cleaning task into a dangerous situation. Always start by reading the labels on your cleaning products. They’re not just there for decoration; they contain crucial information about how to use the product safely. If a label says to wear gloves, then wear gloves. Don’t think you’re invincible. Those warnings are there for a reason.
Ventilation is another key factor. Many cleaning solutions release fumes that can be harmful if inhaled. Open windows or turn on fans to keep the air flowing. You don’t want to end up lightheaded or worse because you skipped this simple step. Remember, fresh air is your friend.
Lastly, don’t mix cleaning products unless you’re sure it’s safe. Combining certain chemicals can create toxic gases. If you’re unsure, stick to one product at a time. It’s better to be safe than sorry. Safety isn’t just a guideline; it’s a necessity. Follow it like your health depends on it—because it does.
Using Pressure Washers Safely on Brick Surfaces
Pressure washers can be a double-edged sword when it comes to cleaning brick surfaces. While they can remove stubborn mortar smears quickly, incorrect use can damage the brick and even cause moisture issues within the wall. Follow these guidelines to use a pressure washer effectively and safely on your brickwork.
- Use the Right Pressure: Keep the pressure setting between 500 to 1000 PSI. Higher pressure can erode the brick surface or force water into the wall, leading to moisture problems.
- Select the Proper Nozzle: Use a 25-degree nozzle to spread the water evenly. This helps prevent concentrated pressure points that can damage the brick.
- Maintain a Safe Distance: Hold the nozzle at least 12 inches away from the brick surface. Getting too close can strip away the brick’s protective outer layer.
- Test a Small Area First: Before tackling the entire wall, test the pressure washer on a small, inconspicuous area. This helps ensure the settings are safe for your specific brick type.
- Avoid Directing Water at Mortar Joints: Mortar is more susceptible to damage than brick. Angle the spray to avoid hitting the joints directly, which can weaken them over time.
- Check for Cracks and Gaps: Inspect the brickwork for any cracks or gaps before washing. Water can seep into these areas, causing internal moisture issues.
- Consider Weather Conditions: Avoid using a pressure washer in freezing temperatures. Water can freeze inside the brick, leading to cracks and structural damage.
When to Avoid Pressure Washing
If your brickwork is old or fragile, it’s best to skip the pressure washer altogether. The risk of damage is too high. In such cases, opt for gentler cleaning methods like using a soft-bristle brush and mild cleaning solutions. Always prioritize the long-term health of your brickwork over quick fixes.
Professional Services for Brick Cleaning
When dealing with extensive mortar smears or delicate brick surfaces, DIY cleaning might not suffice, making professional services a wise choice. Professionals bring expertise, specialized equipment, and risk mitigation to ensure your bricks are cleaned effectively and safely. They assess the condition of the bricks and select appropriate cleaning methods to avoid any potential damage.
Hiring professionals can save you time and prevent costly mistakes that might arise from improper cleaning techniques. By checking credentials and reading customer reviews, you can select a reputable brick cleaning service that fits your needs. While professional services may involve higher costs compared to DIY efforts, the benefits often outweigh the expenses. Common techniques like chemical cleaning or pressure washing are used by experts to achieve optimal results.
Benefits of Hiring Professionals
When tackling complex or large-scale brick cleaning projects, hiring professionals can save you a lot of headaches. They have the expertise and tools to handle any situation, ensuring your bricks are cleaned effectively without causing damage. Professionals know how to deal with various types of stains and residues, which means you get a cleaner result without the risk of harming the brickwork.
Time is another big factor. Large projects can take weeks if you’re doing it yourself, especially if you’re learning as you go. Professionals can complete the job much faster because they have the right equipment and experience. This means less disruption to your schedule and quicker results.
Safety is also a major concern. Brick cleaning can involve hazardous chemicals and high-pressure equipment. Professionals are trained to use these safely, reducing the risk of injury or accidental damage. Don’t underestimate the importance of proper safety measures; it’s not worth risking your health or your property to save a few bucks.
Selecting a Reliable Service Provider
Finding a trustworthy brick cleaning service is crucial for maintaining the integrity and appearance of your brickwork. Start by asking for recommendations from friends or neighbors who have recently hired similar services. Word of mouth is often the best way to find reliable professionals. Also, check online reviews and ratings to get a sense of the company’s reputation.
Once you have a few options, verify their credentials. Ensure they have the necessary licenses and insurance to protect against any potential damages or accidents. Don’t hesitate to ask for proof of these documents. A reputable service provider will have no issue providing them. It’s also wise to inquire about their experience specifically in brick cleaning, as this is a specialized service.
Lastly, get a detailed quote before making your decision. A reliable provider will offer a comprehensive estimate that includes all potential costs. Be wary of any service that gives vague pricing or refuses to provide a written quote. Remember, the cheapest option isn’t always the best. Prioritize quality and reliability to avoid future headaches.

Conclusion
Cleaning mortar smears off brick isn’t just about making your home look good. It’s about preserving the brick and avoiding future problems. You’ve got to be careful with the tools and solutions you use. The wrong choice can damage the brick surface, and that’s a costly mistake.
Preparation is key. Make sure the area is set up right before you start. Choose the right cleaning solution and apply the right technique. Scrub gently and rinse thoroughly. Don’t rush this part. If you cut corners, you’ll regret it later.
Remember, some jobs are best left to professionals. If you’re unsure or the stains are stubborn, call in the experts. They have the experience and tools to do it safely and effectively. Don’t let pride get in the way of getting the job done right.
FAQ
Can I use muriatic acid to clean mortar off brick?
Avoid muriatic acid. It’s too harsh and can damage the brick. Use a gentler cleaner specifically made for masonry.
What’s the best tool for scrubbing mortar smears?
A stiff nylon brush works best. Metal brushes can scratch the brick surface, so steer clear of those.
Should I soak the bricks before cleaning?
Yes, always wet the bricks first. This prevents the cleaner from soaking in and causing damage.
Can I use a pressure washer on brick?
Be careful with pressure washers. Too much pressure can erode the brick. If you must use one, keep it on a low setting.
How do I prevent mortar smears in the first place?
Clean up as you go. Wipe off excess mortar before it dries, and you’ll save yourself a lot of hassle later.