

Introduction
Clay plaster over plywood is a breathable, clay-based wall finish bonded to a plywood base.
If you’re DIYing, expect a more flexible layer that can absorb minor movement without cracking. Plan for movement joints and appropriate reinforcement to guide cracks where you want them.
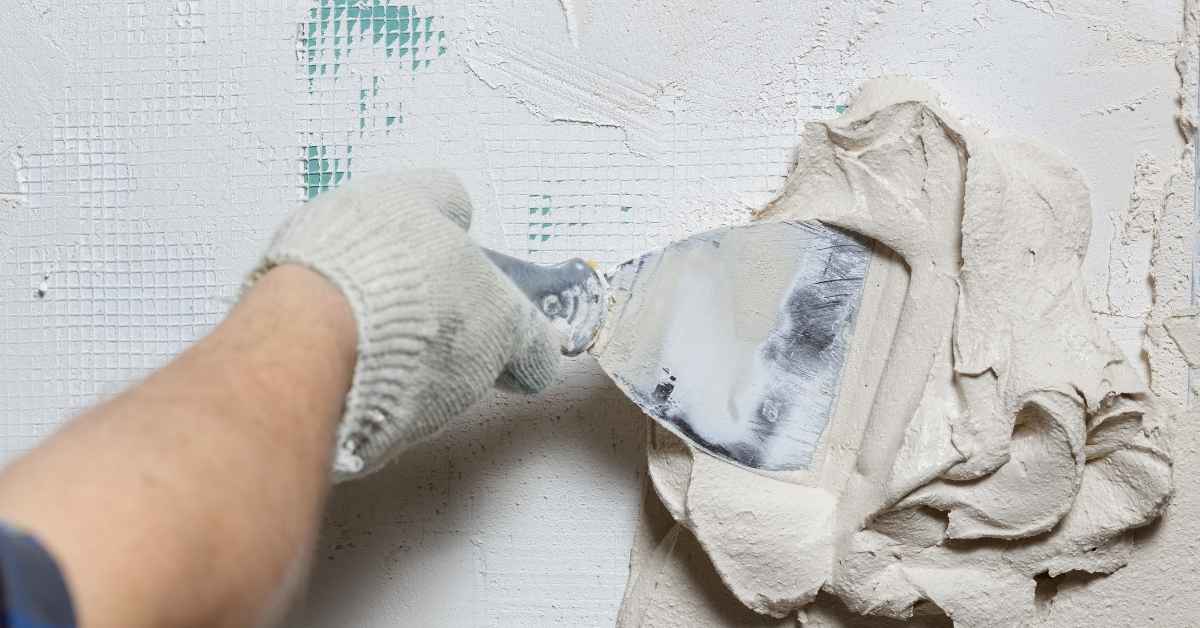
Placement of joints and the right mesh help the plaster flex with the wall rather than crack. Choose mesh that is compatible with clay and your adhesive, and follow manufacturer or product label guidance. Keep a clean scratch coat, dampen the plywood properly, and press plaster in thin, even layers, checking local rules.
Key takeaways
- Plan movement joints at framing changes and edge breaks to reduce cracking.
- Choose reinforced meshes with proper stitch size and load distribution for durability.
- Apply mesh with appropriate overlap over joints and embed thoroughly before plaster.
- Clay plaster mixes vary; follow manufacturer guidance and test quick in small area.
- Inspect for potential cracks and repair promptly to prevent moisture intrusion.
- Safety: wear respirator and eye protection when sanding or mixing plaster.
Table of Contents
- Introduction
- Key takeaways
- Overview: Why Choose Clay Plaster over Plywood — Benefits and Limitations
- Planning and Substrate Preparation
- Movement Joints: Types, Placement, and Detailing
- Mesh Choices and Reinforcement Strategies
- Clay Plaster Mixes and Additives for Plywood Applications
- Application Methods and Best Practices
- Common Cracking Causes, Troubleshooting, and Repairs
- Cost, Safety, and Real-Life Case Studies
- Conclusion
- FAQ
Overview: Why Choose Clay Plaster over Plywood — Benefits and Limitations
Clay plaster on interior plywood can improve indoor air quality through low-odor, low-VOC characteristics while offering a breathable, moisture-buffering surface that contributes to a comfortable room feel. It also provides a textured aesthetic and the potential for rich color and finish options that respond well to natural light and space. At the same time, you should expect movement sensitivity and moisture considerations to limit performance if the system isn’t prepared for substrate movement and proper detailing.
This section frames why homeowners choose clay plaster over plywood, balancing the advantages with practical downsides. You’ll learn how health, thermal mass, and aesthetics relate to real-world performance in a typical interior environment. It also previews how movement joints and mesh strategies address the limits described, setting clear reader expectations for the upcoming steps.
Benefits of clay plaster
Clay plaster offers a range of benefits when applied over interior plywood. It’s a natural, breathable material that promotes healthy indoor air quality.
Low-odor and low-VOC: Unlike some synthetic finishes, clay plaster doesn’t release harmful chemicals into the air. This makes it an ideal choice for those with allergies or sensitivities.
Thermal mass and aesthetics: Clay plaster contributes to a room’s thermal inertia, helping to regulate temperature. It also offers a wide range of textures and colors, allowing you to create unique, beautiful finishes on your plywood surfaces.
Limitations and suitability
While clay plaster has many benefits, it’s not suitable for every situation. Understanding its limitations is key to successful application.
Movement sensitivity: Clay plaster is sensitive to substrate movement. Cracks can occur if the plywood expands or contracts due to changes in temperature or humidity. Proper joints and mesh strategies are crucial to mitigate this risk.
Moisture concerns: Plywood is sensitive to moisture. It’s important to ensure the plywood is dry before applying clay plaster, and to seal it properly to prevent future moisture issues. Clay plaster performs best in low-humidity environments.
Substrate criteria: The quality of your plywood matters. Thicker plywood (at least 1/2 inch) provides a more stable surface. Ensure the plywood is flat, dry, and free from defects before applying clay plaster. If not, you may need to prep the surface or choose a different finish.
Planning and Substrate Preparation
Begin with a thorough assessment of the plywood surface: stiffness, flatness, and any defects that could telegraph through the plaster. Plan planing or sanding to bring the surface within a workable tolerance, and note any edge gaps or voids that will need attention. Clean the surface of dust, oil, or wax to maximize plaster grip before any bonding treatment.
Moisture conditioning is critical, so test substrate moisture and surrounding framing to ensure conditions align with plaster compatibility. Acclimation steps, whether temporary or staged, help reduce movement after application. Finally, confirm fastener types, potential backer integration, and surface sealer choices before moving to bonding and mesh decisions.
Assessing Plywood Condition and Framing
First, check your plywood’s grade. Use at least CDX for interior walls. Inspect each sheet for defects – knots, cracks, or delamination.
Feel the stiffness of the sheets. Soft spots need reinforcing or replacement. Check fasteners – they should be secure and evenly spaced. If not, tighten or add more.
Inspect framing too. Deflection should be minimal. If it’s excessive, reinforce before plastering. Look for any exposed voids, raised staples, or edge joint gaps and fix them.
Moisture Control and Back-Ventilation
Before plastering, test your plywood’s moisture content. It should be below 12%. If not, let it dry or acclimate properly.
Manage vapor with a suitable barrier – usually a Class II or III vapor retarder. Ensure back-ventilation behind the plywood to prevent trapped moisture. Substrate drying is crucial; use temporary heaters if needed.
Remember, clay plaster is sensitive to moisture. Proper control prevents movement and cracking.
Layout Planning for Movement Joints
Plan your joint layout before you start. Align them with substrate breaks, doorways, or changes in plane to isolate movement. This helps prevent cracks from spreading.
Space joints appropriately – usually 6 to 8 feet apart for walls and 4 to 6 feet for ceilings. Use wider joints (1/2 inch) over long spans or where movement is expected.
Plan edge reliefs around openings and corners. These help absorb movement and reduce cracking. Integrate mesh reinforcement details at joint locations.
Movement Joints: Types, Placement, and Detailing
This section defines control joints, expansion joints, isolation joints, and bridging joints, explaining how each type accommodates plywood movement and plaster creep to prevent cracking. You’ll see how spacing decisions fit interior walls while staying respectful of aesthetics and practical access needs. The goal is to interrupt crack pathways without creating conspicuous interruptions.
We cover practical detailing at joints, including recommended widths, backer materials, mesh integration, and edge reinforcement to tie joints into the plaster system. You’ll also learn how substrate factors such as plywood grade and moisture conditions influence joint placement. Finally, expect installation tips that help avoid common missteps like under-sizing joints or poor edge detailing.
Movement joint types and materials
Choosing the right materials for your movement joints is crucial to ensure durability, appearance, and longevity. Here are common types of movement joints and compatible materials with clay plaster.
- Control Joints (Saw Cuts): Used for planned cracking in concrete slabs. Look for a depth of at least 1/4 the slab thickness. Tip: Cut when the slab is still green (freshly poured) to control where it cracks.
- Flexible Joint Strips: Made from rubber or plastic, they allow movement while preventing water ingress. Choose strips rated for your specific joint width and movement range. Tip: Ensure they’re compatible with clay plaster and can be securely embedded in the concrete.
- Expansion Joints (Grout Cuts): Filled with a compressible material, they accommodate significant movement. Use backer rods to prevent grout from flowing out during installation. Tip: Ensure the backer rod is compatible with your chosen grout and can withstand site conditions.
- Type N Mortar: A general-purpose mortar used for most jointing needs. Look for a strength class of at least M7.5. Tip: It’s cheap but may not be suitable for high movement areas or harsh environments.
- Epoxy Grouts: High-strength, chemical-resistant grouts ideal for industrial and heavy-duty applications. Choose a two-part epoxy with a compressive strength of at least 30 MPa. Tip: They’re more expensive but offer superior performance in demanding conditions.
- Polymer-Modified Grouts: Grouts enhanced with polymers for improved adhesion, flexibility, and durability. Look for grouts compatible with clay plaster and your specific joint type. Tip: They’re pricier but can significantly improve joint performance.
Pro tip: Always check the product label or manufacturer’s instructions to ensure compatibility with clay plaster and your specific application. Store materials properly to maintain their quality, and follow mixing instructions carefully for optimal results.
Spacing guidelines and considerations
When planning your movement joints, spacing is crucial. Here are some safe ranges to consider:
For slabs on grade (e.g., driveways, patios): Space joints around 20-30 feet apart. Check local codes and product labels for exact recommendations.
For elevated slabs (e.g., roofs, balconies): Space joints about 15-25 feet apart. Again, consult local rules and manufacturer guidelines.
Remember, these are just starting points. Always check base compaction, slab thickness, and loading conditions. Don’t be afraid to adjust spacing if needed. And for heaven’s sake, don’t space joints too far apart – that’s asking for trouble!
Joint detailing steps and sealant compatibility
Now that you’ve planned your movement joints, let’s get into the nitty-gritty of detail work. First things first, check base compaction. You don’t want any surprises when you start pouring.
Next up, install joint formers. These are your guides for a clean, straight line. Make sure they’re level and properly spaced – refer back to our earlier chat on spacing guidelines if you need a refresher.
Once the concrete’s poured and cured, it’s time to remove the joint formers. Do this carefully to avoid damaging your fresh joints. Now, here’s where things get interesting: sealants or flexible infills?
If you’re using a clay-based finish, stick with compatible sealants. Silicone is usually a good bet, but always check the manufacturer’s instructions. You don’t want to mess up your fancy new finish because you used the wrong stuff.
Mesh Choices and Reinforcement Strategies
Compare options like fiberglass, polymer, and stainless meshes, along with wood or metal lath, focusing on crack resistance, ease of installation, and compatibility with plywood substrates. The right choice depends on movement transfer expectations and the environment you’re in. Consider how each option interacts with plaster and substrate flexibility.
Placement and tensioning of mesh over plywood matter for performance, including overlaps, embedding depth, and how to prevent sagging. We cover fastening methods, spacing, and edge details to secure corners and joints, plus how to align reinforcement with movement joints to minimize crack propagation. Substrate prep, adhesive or mortar selection, and thickness guidelines are discussed to ensure a stable bond without overly restricting plywood movement.
Mesh types: pros and cons
The choice of mesh type is crucial for effective crack control. Here’s a quick rundown:
Pros
- Fiberglass Mesh: Lightweight, easy to install, good flexibility.
- Metal Lath: Strong, durable, provides excellent keying for plaster.
- Natural Fiber Scrims: Breathable, eco-friendly, can help regulate moisture.
- Proprietary Reinforcement Products: Customized solutions for specific needs.
Cons
- Fiberglass Mesh: Can sag or tear if not properly tensioned. Not suitable for heavy-duty applications.
- Metal Lath: Heavier, more difficult to install, can rust over time.
- Natural Fiber Scrims: Limited strength compared to other options, may degrade over time.
- Proprietary Reinforcement Products: Often pricier, may require specific application techniques.
The best choice depends on your project’s demands and budget. Weigh the pros and cons before deciding.
Mesh placement and laps
Proper mesh placement is key to preventing cracks. Here’s how:
Embed mesh between coats of plaster, not on the plywood surface. This ensures better adhesion and crack resistance.
Lap mesh at joints by at least 2 inches. Overlapping creates a continuous reinforcement plane that resists cracking.
Avoid sagging or tearing by tensioning mesh properly during installation. Keep it taut but not overly tight to allow for minor substrate movement.
When to use multi-layer or targeted reinforcement
Reinforcement strategy varies based on your project’s needs:
Full-surface reinforcement is ideal for large areas with no significant transitions. It provides even strength distribution but can be more expensive.
Targeted reinforcement focuses on openings, corners, and transitions where cracking is most likely. This approach balances performance and cost by reinforcing critical areas only.
For example, reinforce around windows and doors, at corners, and along joints to prevent cracks from propagating into the main wall area.
Clay Plaster Mixes and Additives for Plywood Applications
Discuss workable plaster formulations for plywood, such as lean mixes, lime-putty–clay blends, or cement-stabilized clay, and how each affects adhesion, flexibility, and shrinkage on wood. Explore additive options that enhance performance, including binders, natural pozzolans, and selected fibers for reinforcement. These choices influence open time, tack, and the ability of the mix to tolerate movement without cracking.
We cover adhesion goals and how to balance workability with elasticity, while avoiding overly stiff mixes that resist substrate movement. Mesh types and placement over plywood, embedding depth, and alignment with movement joints are outlined to reduce cracking, with notes on surface fibers or wire lath where added resistance is desired. Surface prep and curing considerations are included to keep bond integrity across seams and edges.
Clay mix basics and aggregate choices
When mixing clay plaster for plywood, you’re aiming to balance shrinkage control with adhesion. Start by understanding the clay-to-aggregate ratio concept.
The lean mix uses less aggregate (sand or grog) than the sand-clay mix. Lean mixes have better adhesion but can shrink more. Sand-clay mixes offer improved shrinkage control at the cost of some tackiness.
Fiber aggregates like wood or lightweight glass fiber improve flexibility and crack resistance without significantly affecting shrinkage. Grog, on the other hand, increases cohesion and reduces shrinkage but may make the mix stiffer.
Remember, there’s no one-size-fits-all recipe. Test different ratios to find what works best for your project and substrate conditions.
Additives and binder options
Additives can enhance clay plaster performance, but compatibility is key. Here are some common ones:
Lime-putty boosts adhesion and flexibility. Combined with natural pozzolans like rice husk ash or silica fume, it improves strength and reduces shrinkage.
Acrylic or lime-silicate emulsions act as plasticizers, extending work time without sacrificing strength. However, they can affect mesh bonding, so test compatibility first.
Cellulose, wood fiber, or lightweight glass fibers reinforce the mix, improving crack resistance and flexibility. But beware, excessive fibers can hinder application and increase drying time.
Always test additives with your chosen clay type, aggregate, and mesh to ensure they play nice together.
Batch testing and curing considerations
Before applying clay plaster on a large scale, conduct small-sample batch tests. This helps you understand adhesion, shrinkage, and drying behavior under your specific conditions.
For adhesion testing, apply the mix to plywood and let it cure. Check for any signs of delamination or poor bonding. For shrinkage testing, cast small samples and measure their dimensions as they dry.
Proper curing is crucial to reduce cracking risk. Keep the applied plaster consistently moist during the initial curing phase (usually 7-14 days). Use damp cloths or plastic sheeting if necessary, but avoid over-wetting which can cause efflorescence.
Monitor humidity levels in the room and maintain a consistent temperature. Ideal conditions are around 50% relative humidity and 70°F (21°C). Early crack detection can be done by visual inspection or using non-destructive testing methods like infrared thermography.
Application Methods and Best Practices
Start with substrate readiness, moisture control, and a clear plan for a moisture barrier to limit both plywood movement and plaster shrinkage. Describe how to choose mesh or lath, embedment, and interface details that minimize stress transfer during drying and use. A careful approach reduces curl and edge lifts that commonly lead to cracking.
Outline the layer sequence, timing, and cure management to maintain consistent thickness and texture. Movement detailing at edges and penetrations, plus a practical workflow for trowel technique, will help you avoid stress build-up. This section also covers common pitfalls and checks to perform during installation to keep the system responding as intended.
Key coat sequence: scratch, brown, finish
The typical multi-coat approach for concrete involves three main coats. Each has a specific function to ensure durability and longevity.
Scratch coat: This is the first layer applied over prepared base. It’s thicker (around 1/4″ – 3/8″) to fill large voids, control suction, and provide a bonding surface for the next coat. Check product labels or manufacturer instructions for recommended thickness.
Brown coat: Applied after the scratch coat has cured (usually 2-7 days), this intermediate layer is thinner (around 3/8″ – 1/2″). It’s designed to control shrinkage cracking and provide a smooth surface for the final coat. Keep it thin to minimize drying time and crack risk.
Finish coat: The top layer, around 1/4″ thick, provides the desired texture, color, and durability. It should be applied when the brown coat is partially set (usually 3-6 hours) for proper bonding. Controlling drying time is crucial here; too fast can cause cracks, so check local weather conditions and adjust water content accordingly.
Tools and materials checklist
Before you start mixing or pouring concrete, use this checklist to ensure you have everything needed for a successful job. Check each item off as you verify it.
- Concrete Mix: Verify the mix design (check product label) matches your project’s requirements (strength, finish).
- Water: Ensure water is clean and free from contaminants. Check pH if unsure.
- Admixtures: If using, confirm they’re compatible with your mix design (check manufacturer instructions).
- Concrete Mixer: Inspect mixer for proper working order. Ensure it’s large enough for your batch size.
- Wheelbarrow: Check wheelbarrow condition. Ensure it’s sturdy and has good wheels for easy maneuvering.
- Shovel & Hoe: Inspect tools for wear. Replace if needed to prevent damage to concrete.
- Concrete Finishing Tools (Float, Bull Float, Edger): Check condition and ensure they’re suitable for your finish type.
- Mesh/Lath & Tie Wire: Verify quantity and size match project needs. Check for damage before installation.
- Formwork Materials (Plywood, OSB, Stakes, Screws): Ensure materials are in good condition and suitable for your form design.
- Level & Tape Measure: Inspect tools for accuracy. Calibrate if needed.
- Concrete Testing Kit (Slump Cone, Air Entrainment Meter): If required by local rules or project specs, ensure you have the necessary testing equipment.
Quick rule: Always check your tools and materials before starting. Skipping this can lead to delays, rework, or even project failure.
Troweling, thickness control, and drying control
Once you’ve laid your concrete, it’s time to smooth it out and ensure a consistent finish. Here’s how:
Troweling: Start troweling as soon as the concrete has set enough to support foot traffic. Use a bullfloat first to remove excess water and bring cement to the surface. Then, switch to a steel trowel for final finishing. Work in overlapping strokes, keeping your trowel flat on the surface.
Thickness control: Aim for a consistent thickness per layer, usually around 3-4 inches (75-100mm). Check this with a straight edge or screed. Too thick and it’ll take too long to dry; too thin and it won’t be strong enough.
Drying control: Keep the concrete moist for at least three days after pouring, unless it rains. This helps prevent rapid shrinkage and cracking. You can use wet burlap or plastic sheets, but don’t let water puddle on top of the concrete. Check local rules for specific drying times.
Common Cracking Causes, Troubleshooting, and Repairs
Identify typical crack patterns seen with clay plaster over plywood, including where they frequently occur near joints, corners, or flexing panels. Understand how movement, moisture swings, and misaligned mesh contribute to these patterns. A clear map of crack locations guides both prevention and repair work.
Provide a diagnostic path to distinguish movement-induced cracking from mixing or curing issues, and outline patching strategies when cracks occur. Learn when to re-embed mesh, feather repair edges, and how to monitor crack activity after repairs. This groundwork helps decide if substrate adjustments, such as spacers or joints, are warranted for long-term performance.
Identifying crack types and likely causes
Cracks in your clay plaster over plywood can tell a story about what went wrong. Here’s how to read them:
Hairline cracks are thin, usually less than 1mm wide. They often appear randomly across the surface and may indicate minor substrate movement or slight variations in mix consistency.
Edge cracks happen along the perimeter of your plastered area. These can be due to insufficient support at the edges or improper trowel technique during application.
Map cracking, with its distinctive spider-web pattern, typically signals excessive substrate movement or inadequate mesh reinforcement. It often occurs near joints, corners, or over flexing plywood.
Repair methods for hairline vs structural cracks
Not all cracks require the same fix. Here’s how to tackle them:
Hairline cracks: For cosmetic hairline cracks, use a compatible patching compound. Apply with a small trowel or putty knife, feathering the edges to blend with the surrounding surface. Allow it to cure according to manufacturer’s instructions before sanding and sealing.
Structural cracks: Wider cracks (over 1mm) may need reinforcement. Remove any loose material, clean the area, then re-embed mesh if necessary. Apply patching compound, ensuring it bonds well with the existing plaster. Allow curing time between repairs to prevent further cracking.
If cracks recur or worsen, consider removing and redoing sections of your work. It’s better to address underlying issues than repeatedly patch over them.
Preventive maintenance and monitoring
Regular inspection and simple maintenance can prevent cracks from becoming bigger problems:
Inspect your plastered surfaces every few months, looking for new cracks or changes in existing ones. Check around joints, corners, and areas where plywood may flex.
Maintain proper humidity levels in your home to minimize moisture swings that could cause cracking. If you notice recurring issues, consider re-sealing joints or reinforcing problem areas with additional mesh or bridge products.
If cracks widen or multiply despite your efforts, it might be time to retrofit or adjust the substrate. This could involve adding thin plywood spacers, adjusting fasteners, or installing a subfloor movement joint to better accommodate natural expansion and contraction.
Cost, Safety, and Real-Life Case Studies
Break down the budgeting essentials for DIY plaster over plywood, including materials, tools, and the realistic contingency needed for surprises. Keep safety in view with PPE, dust control, handling procedures, and scaffold use considerations aligned to local codes. Case-centered budgeting helps you plan with fewer surprises.
Expect two to three concise real-life cases illustrating successful and failed approaches, with context on climate, substrate prep, and outcomes. Each case highlights turning points and practical lessons that connect planning, prep, and execution to cracking resistance. A reader-friendly planning toolbox follows, with checklists and prompts to reflect on what worked and what didn’t.
Cost-effective approaches and budgeting tips
First off, let’s talk about reducing costs. You can’t skimp on safety or quality, but there are smart ways to save:
Selective reinforcement: Reinforce where needed, not everywhere. Check your design for critical areas and reinforce those. Don’t waste money on unnecessary rebar.
Next up, staged work. Break down your project into stages – footings, slab, walls, etc. This way you can spread out costs over time and avoid cash flow issues.
And don’t forget about tool reuse. Buy or rent tools that can be used throughout the project. No need to buy a new tool for every little task. Just make sure they’re in good condition and safe to use.
Now, budgeting. Here’s what you should factor in:
Materials: Concrete, rebar, forms, etc. Get quotes from suppliers, check prices online, but always consider delivery costs too.
Labor: If you’re hiring help, get multiple quotes. Check their licenses and insurance. Don’t go for the cheapest if they’re not reputable.
Contingency fund: Always set aside a bit extra (10-15%) for unexpected costs. Trust me, something will come up.
Safety precautions and PPE during installation
Listen up, DIYer. Safety’s not just a buzzword here. It’s the real deal.
Dust control: Concrete dust is nasty stuff. Wear a respirator with a P100 filter. Don’t skimp on this. Check your respirator before use, and replace it if it’s damaged or worn out.
Respiratory protection: That’s right, we’re talking about it again. Concrete dust can cause serious lung issues. A P100 respirator will protect you from the fine particles. Make sure it fits properly too.
Handling additives: Additives like accelerators and retarders are chemicals. Treat them as such. Wear gloves, avoid contact with skin and eyes, and wash up afterwards. Always check the product label for specific safety instructions.
Working on scaffolding: Scaffolding’s a lifesaver when you’re working high. But it can be deadly if not used right. Make sure your scaffold is level, stable, and secure. Use guardrails and toe boards. Don’t take shortcuts here.
Case studies: successes and failures (what to learn)
Let’s look at some real-life examples. First, the good stuff:
Success story: Joe checked his base compaction with a nuclear gauge. He used a mix design suitable for his area’s weather. Result? A perfect slab that’s still flat after five years.
Lesson: Don’t skimp on base prep and use the right mix for your climate.
Now, the not-so-good: Bob rushed his job, didn’t check compaction, and used a one-size-fits-all mix. Guess what? Cracks appeared within months.
Failure lesson: Take your time, check base compaction, and use a mix designed for your area’s weather.
Conclusion
Clay plaster over plywood pays off with a durable, breathable finish when you lock in movement joints and solid mesh reinforcement, and when you respect proper mixing and application timing. Do it right and you get a smooth look that stands up to use without cracking or delamination.
First, check the substrate for flatness and cleanliness, then map out movement joints and choose a mesh and reinforcement plan that fits your joints. Next, select a clay plaster mix and any additives recommended for plywood, mix and apply in controlled passes, and cure with steady conditions while watching for early cracks and doing prompt repairs. Finally, test the surface after cure and document any cracks or high spots to guide future maintenance or tweaks to the jointing plan.
Common mistakes to avoid include skipping movement joints or insisting on a single-coat finish, using the wrong mesh or over-reinforcing, and rushing the cure or overworking the plaster. Safety rules are simple: test a small area first, work in good ventilation, wear PPE, and never force coatings into stressed areas or on damp plywood. If you see unpredictable movement, persistent dampness, or large cracks that keep reappearing, stop and reassess rather than trying to cover it up.
If the framing shows ongoing movement, or you’re unsure about substrate integrity, call a professional rather than pushing ahead. A targeted assessment can save time, prevent costly repairs, and keep the project on track. Stay disciplined, follow the plan, and you’ll finish with a solid, lasting surface you can be proud of.
FAQ
What are the practical benefits of clay plaster over plywood for DIY projects?
Clay plaster on plywood breathes and can flex with a bit of movement, which helps reduce some types of cracking. It’s repairable and doesn’t rely on heavy coatings that peel away from wood. You’ll want to weigh this against the finish you expect and the room conditions.
Where should movement joints go, and what material options help control cracks?
Place joints at natural points of movement and transitions in the wall. Use a combination of clay plaster with mesh reinforcement and, where needed, a flexible sealant or backer material at joints. Always check manufacturer guidance or local rules for recommended joint spacing and compatible products.
What types of mesh are suitable for reinforcing clay plaster over plywood?
Common options include alkali-resistant fiberglass mesh and woven scrim. Some projects also use metal lath or netting in specific situations. Verify compatibility with your plaster mix and follow product labeling for maximum performance.
What basic tools should I have on hand to apply clay plaster over plywood?
You’ll want a hawk and trowel setup, a plaster mixer or drill attachment, a sharp utility knife for mesh, and a straight edge or level. A spray bottle, mixing bucket, and sanding screens help with finish work. Keep a sharp knife and clean rags for cleanup ready at all times.