
Introduction
Clay plaster in kitchens is a natural, breathable wall finish that you can apply to walls and ceilings. Grease will require gentle cleaning and the right sealing approach to keep the plaster from staining. Check product labels and manufacturer guidance for cleaning methods and compatible sealers.
Protective topcoats help resist grease and moisture, but you must choose a coating compatible with clay plaster. Always follow label directions and test on a small area before full coverage; consider sheen, breathability, and recoat intervals.
Key takeaways
- Assess clay plaster’s breathability and compatibility with kitchen grease cleaners and topcoats.
- Grease behavior: oil-based splatter can stain; use cleaners compatible with clay.
- Prepare plaster: clean surfaces, recompact joints, and prime before finishing.
- Application methods: consistent thin coats, keep workspace ventilation, and avoid overworking.
- Testing and maintenance: perform water wipe tests after curing and schedule touch-ups.
- Health and safety: use protective gear; avoid food contact surfaces until sealed.
- Troubleshooting: common grease lift, topcoat incompatibility, or patching issues need proper reapplication.
Table of Contents
- Introduction
- Key takeaways
- Why Choose Clay Plaster for Kitchens
- How Kitchen Grease Behaves and Impacts Clay Plaster
- Preparing Clay Plaster for Grease Cleanup and Topcoats
- Application Methods and Tools
- Testing, Performance Checks, and Maintenance Schedule
- Health, Safety, and Food-Surface Considerations
- Troubleshooting and Real-World Examples
- Conclusion
- FAQ
Why Choose Clay Plaster for Kitchens
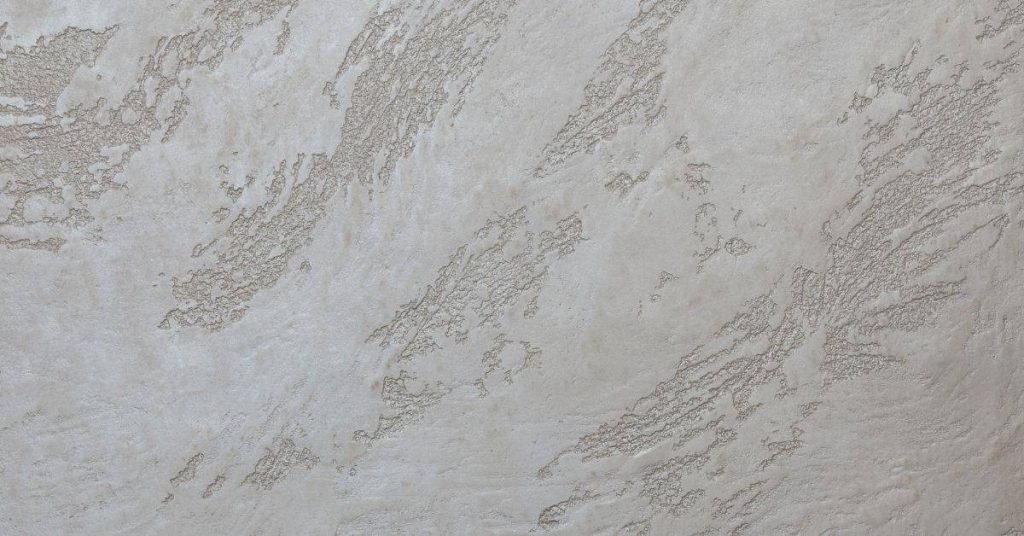
Clay plaster brings a warm, natural look to kitchen walls that many homeowners love. It can help create a breathable surface that feels comfortable in busy spaces. At the same time, clay has limits and usually benefits from a protective topcoat in cooking areas.
Its appearance and tactile quality are strong points for design, but you should plan for maintenance and protection. Read labels and manufacturer instructions to confirm how it performs with cleaners and finishes. Consider how ventilation and humidity in your kitchen may affect long-term results.
Benefits for kitchen walls
Clay plaster brings a natural, earthy finish to your kitchen walls. It’s not just about looks though – it also helps regulate odors and humidity.
Breathability is key here. Clay plasters absorb and release moisture, preventing mold growth and keeping your kitchen fresh.
Plus, they’re non-toxic. No nasty chemicals leaching into your indoor air while you’re cooking up a storm.
Limitations and risk areas
While clay plaster has its perks, it’s not all sunshine. It can stain if not properly sealed, so keep that in mind when choosing colors.
Grease is another issue. Kitchens get greasy, and while clay plasters can handle some, heavy grease buildup will need regular cleaning.
Durability’s another thing to consider. Clay plaster isn’t as tough as paint or some other finishes. High-traffic areas like behind the stove might need extra protection.
How Kitchen Grease Behaves and Impacts Clay Plaster
Kitchen fats and oils are sticky and can penetrate porous surfaces. Fresh splatter tends to sit on the surface, while older stains can sink in and become harder to remove. This behavior matters when choosing cleaners and coatings.
Clay surfaces respond differently to various cleaners than hard surfaces do, so test patches before committing. Distinguish between just smudges and deeper staining, and plan coatings that resist future buildup. Always verify product guidance for stain resistance and compatible sealers on clay.
Grease chemistry and adhesion
Kitchen grease is mostly fats and oils, which are organic compounds made up of carbon, hydrogen, and oxygen. They’re liquid at room temperature but can solidify when cool or harden with age.
Fats are saturated, meaning their molecules have no double bonds between carbon atoms. This makes them more rigid and prone to sticking to surfaces. Oils, on the other hand, are unsaturated and spread easily due to their flexible molecular structure.
Clay plaster is porous, with tiny openings that can trap grease molecules. When heat is involved (like from cooking), these molecules expand and penetrate deeper into the pores, making them harder to remove.
Typical grease deposition patterns
Grease doesn’t just splatter randomly. It follows predictable patterns based on heat and airflow in your kitchen.
Behind stoves is a high-risk zone. Heat causes grease to vaporize, then it condenses and sticks to cooler surfaces behind the stove. This can lead to heavy staining over time.
The backsplash area also sees significant grease deposition. It’s directly in line with cooking surfaces, so splatter is inevitable. Grease here tends to be fresh but can age quickly if not cleaned regularly.
Grease also accumulates on cabinet tops, especially above the stove. Here, it’s often a mix of fresh splatter and aged grease that’s been there long enough to darken and harden.
Preparing Clay Plaster for Grease Cleanup and Topcoats
Start with small test patches to check how cleaners interact with your plaster. Follow a logical cleaning sequence that lifts grease without abrading the surface. Make any needed repairs before you apply a sealer or topcoat.
Document what you test and the results so you can compare options later. Compatibility testing is essential; verify that the cleaner, primer, and topcoat work together on clay. If in doubt, consult product labels or manufacturer instructions for guidance.
Cleaning protocol for removing grease
Before applying any topcoat, you need to clean the clay plaster surface thoroughly. Start by testing a small, hidden area with your chosen degreaser to ensure it doesn’t damage the finish.
Apply the degreaser using a soft-bristled brush or cloth, working in small sections. Let it sit for 10-15 minutes before gently scrubbing and rinsing with clean water. Always use warm water, not hot, as sudden temperature changes can crack the plaster.
Never use harsh chemicals like bleach or abrasive materials that could damage the surface. After rinsing, dry the area completely to prevent moisture-related issues.
Surface repair and pre-coating checks
Inspect your clay plaster walls for any cracks, holes, or other defects. Use a suitable patching compound to fill these areas, following the manufacturer’s instructions. Feather the edges of the repairs to ensure a smooth transition between patched and unpatched areas.
Lightly sand the repaired areas once dry to ensure they’re flush with the rest of the surface. Vacuum or wipe away any dust. Before applying any sealer or topcoat, check for:
Adhesion: Gently scratch the surface with a coin or nail. If the plaster flakes off, it’s not ready for sealing.
Moisture content: Use a moisture meter to ensure the plaster is dry enough (below 16%).
Efflorescence: Look for white salt deposits, which indicate excess moisture. If present, treat with an efflorescence remover and allow the area to dry.
Application Methods and Tools
Choose tools and methods that suit the coating you plan to apply over clay plaster. Plan the sequence and let each coat dry or cure as directed by the product instructions. Multiple thin coats often yield better protection than a single heavy application.
Follow manufacturer directions for spray, brush, or roller use and cleaning. Prepare the area, mask off adjacent surfaces, and work in manageable sections. Keep notes on the process so you can replicate or adjust in future projects.
Tools and materials checklist
Before you start, make sure you have everything you need. This list will help you stay organized and safe.
- Safety gear: Gloves, goggles, and a respirator to protect from dust and fumes.
- Cleaning supplies: Mild detergent, soft cloths or sponges for prepping the surface.
- Application tools: Sprayer (airless or high-volume low-pressure), brushes, rollers, and trays.
- Test materials: Small amount of topcoat to test on a hidden area first.
- Quality check: Ensure all tools are clean and in good condition. Dirty or damaged tools can ruin the finish.
- Protective gear for surfaces: Drop cloths, tape, and plastic sheets to prevent damage from overspray or drips.
- Ladders or scaffolding: For reaching high areas safely.
- Sandpaper (fine grit): To lightly sand between coats for better adhesion.
Quick rule: Always check your tools and materials before starting. A few minutes of preparation can save hours of rework.
Application technique and common pitfalls
Knowing how to apply topcoats correctly will give you a smooth, even finish. Here are some techniques and common mistakes to avoid.
- Even coverage: Use a ‘W’ or ‘M’ pattern for walls and ‘X’ pattern for ceilings to ensure full coverage without lap marks.
- Avoiding edges: Start at the top of the wall, working your way down. This helps prevent drips and ensures an even edge.
- Drying time: Allow each coat to dry according to manufacturer’s instructions. Skipping drying time can cause poor adhesion and bubbling.
- Over-application: Too much topcoat at once can lead to drips, runs, and poor penetration into the plaster.
- Under-application: Not enough topcoat can leave areas unprotected, allowing grease to penetrate and damage the plaster.
Remember, patience is key. Taking your time to apply thin, even coats will give you the best results.

Testing, Performance Checks, and Maintenance Schedule
Perform simple in-home tests to gauge grease repellency and adhesion of the topcoat. Look for uniform film, absence of peeling, and easy cleaning behavior after a test wipe. Record the results and compare against your expectations over time.
Monitor performance as rooms heat and humidity change, and plan for recoat or touch-ups when needed. Keep a log of product names, batch numbers, and test outcomes to aid future maintenance. Use this information to schedule maintenance intervals that fit your kitchen routine.
Simple grease-repellency tests
Before applying a protective topcoat, test your clay plaster’s grease resistance. Here are two simple methods:
Splatter Test: Heat some oil in a pan, then flick a small amount onto a hidden test patch. Let it sit for 15 minutes, then wipe off with a damp cloth. If the oil comes off easily, your plaster is grease-resistant.
Blot Test: Dab a bit of oil onto a paper towel, then blot it onto the test patch. After 15 minutes, lift the towel. If there’s no oily residue, your plaster passes the test.
Long-term maintenance and recoating triggers
Regularly inspect your clay plaster for signs of wear. Here’s what to look out for:
Staining: If you start seeing dark spots or streaks, it’s time for a clean-up or reapplication of the topcoat.
Loss of Sheen: A dull surface indicates that the protective layer is wearing off. Reapply when this happens.
Flaking: If you notice any flakes or chips, repair immediately to prevent further damage and reapply the topcoat.
Health, Safety, and Food-Surface Considerations
Check VOC information and food-safety labeling on coatings intended for kitchens. Read certifications and safety data to understand any limits around food contact and ventilation. Use products as directed and avoid shortcuts that bypass curing requirements.
Ensure good ventilation during application and curing times before food prep resumes. Verify labels for drying times and any recommendations related to kitchen use. When in doubt, contact the manufacturer for clarification on safe use around food surfaces.
VOCs, certifications, and label checks
Before you start, understand what’s in your clay plaster. Volatile Organic Compounds (VOCs) can be harmful. Look for low or zero VOC content on the label.
Check for certifications like GREENGUARD or ECOSPECIFICATIONS. These ensure products meet strict standards for low emissions and chemical safety.
If you’re using clay plaster in a kitchen, make sure it’s food-safe. Look for NSF/ANSI 51 certification, which ensures a product won’t contaminate food or utensils.
Don’t rely solely on labels. If food-surface contact is a concern, ask manufacturers for test data proving their product’s safety.
Safe cleaning and day-to-day maintenance
Clay plaster topcoats need gentle care. Avoid harsh chemicals like bleach, ammonia, or abrasive cleaners. They can damage the finish.
Use warm water with a mild dish soap for daily cleaning. For tough grease, try a mixture of water, white vinegar, and a few drops of mild dish soap. Apply with a soft cloth or sponge, then wipe off with clean water.
Avoid using steel wool or scouring pads. They can scratch the surface.
Dry the area thoroughly after cleaning to prevent moisture from damaging the plaster. Regular maintenance will keep your kitchen looking great and performing well.
Troubleshooting and Real-World Examples
When staining or ghosting appears, identify whether it is surface residue or deeper penetration and choose a remediation path accordingly. Peeling often points to compatibility issues or improper preparation; address the root cause before re-coating. Learn from each scenario to improve future results.
Use brief case-like notes to guide decisions, test results, and lessons learned. Document the outcomes and what proved effective so you can repeat successful repairs in other areas. Testing and documentation help readers make informed choices on similar kitchens.
Common problems and fixes
Clay plaster, while durable, can face issues. Here are common ones:
Staining: Grease or water stains can occur. Strip the affected area, clean, and reapply topcoat.
Tackiness: This happens if not fully cured. Let it cure longer before applying topcoat. If still tacky, strip and start over.
Loss of breathability: Too many coats or improper curing can cause this. Strip affected area, clean, and let it breathe before recoating.
Short project examples and lessons
Here are two quick examples:
Backsplash near range: Used a clear, grease-resistant topcoat. Worked great, but needed touch-ups after initial testing.
Island end-wall: Went with a semi-gloss topcoat for easy cleaning. It worked well, but required more frequent cleaning to maintain look.
Lesson: Always test first in an inconspicuous area. Document results and adjust strategy as needed.
Conclusion
Clay plaster in kitchens can stay durable and looking good when you tackle grease cleanup and topcoats with care, proper testing, and steady maintenance. The key is predictable prep, cautious testing, and following a solid plan so you don’t damage the wall or ruin the finish.
Check the substrate and ventilation, test a small area for grease reaction, prepare the plaster and tools as directed, apply in the recommended method, let it cure, perform a grease cleanup test, apply the protective topcoat, and set up a simple maintenance schedule. Do this in clear order, keep testing as you go, and stop if anything looks off or you see staining or softening.
Avoid common pitfalls: don’t skip the grease test or rush cure times, don’t use cleaners or solvents that aren’t approved for clay finishes, and don’t coat over damp plaster or damaged surfaces. Use a conservative cleaning approach and follow safety rules—ventilate well, wear gloves and eye protection, and never work with unfamiliar chemicals inside a kitchen. If you’re unsure about adhesion, cracking, or long-term durability, pause and reassess before moving forward.
If you notice persistent stains, peeling, or moisture intrusion, or you’re unsure about the topcoat compatibility with your kitchen surfaces, call a professional rather than pushing on alone. When you finish this carefully, you’ll have a cooking-friendly finish that lasts and gives you a solid, safe, and good-looking kitchen wall.
FAQ
Can I use any grease cleaner before applying a protective topcoat over clay plaster?
Stick to cleaners recommended by the plaster and topcoat manufacturers. Check the product label or datasheet for suitability with clay plaster and the specific topcoat you plan to use. If in doubt, test a small area first and follow local rules or guidance from the product maker.
What’s the best way to prep a grease-stained kitchen wall before sealing it?
Wipe down with a mild degreasing cleaner or soap and water, then rinse thoroughly. Allow the surface to dry completely before applying any topcoat. If stubborn grease resists, repeat once and consider a light scuff with fine sandpaper only after checking the topcoat instructions.
How do I test adhesion after cleaning and before sealing?
Apply a small amount of the topcoat to a hidden corner or test patch and let it cure per the product instructions. Check for lifting, peeling, or flaking after it dries. If adhesion is poor, re-clean the area and consult the manufacturer guidance before proceeding.
What maintenance steps help the topcoat stay effective on clay plaster long-term?
Keep grease to a minimum with prompt cleanup and using compatible cleaners. Touch up damaged spots after cleaning or remodeling, using the same topcoat and following its curing times. For any signs of wear, check the product label for maintenance recommendations or reapplication guidance.