
Introduction
Cement shelf-life is the window during which stored cement stays workable and can reach intended strength when mixed. Storage conditions like moisture, temperature, and how long it sits affect how fast it sets and how strong the final pour will be. In practice, poor storage tends to shorten set time and reduce final strength.
Factors such as moisture exposure, heat, and exposure to the elements drive that change. Aim for a dry, stable space, keep bags closed, and follow any bag or manufacturer guidance for storage and use-by hints. Always check the product label, instructions, and local rules if you’re unsure about what’s safe for your project.
Key takeaways
- Properly sealed, moisture-free cement stays workable longer; reseal after each use.
- Store cement off the floor on pallets; keep dry and shaded to slow degradation.
- Temperature swings affect set time and early strength; avoid rapid heating/cooling.
- Moisture intrusion remains the primary killer of stored cement quality; test before use.
- For large stocks, implement first-in, first-out and regular inspections for shelf life.
- If doubtful, consult manufacturer labels and local codes before mixing or extending use.
Table of Contents
- Introduction
- Key takeaways
- Why Cement Shelf-Life Matters for Projects and Costs
- What “Shelf-Life” Really Means for Cement
- How Storage Conditions Change Set Time and Strength
- Visual Checkpoints and Quick Field Tests for Old Cement
- Best-Practice Storage Procedures (Short- and Long-Term)
- Safety and Regulatory Considerations for Long-Term Storage
- Inventory Control and Cost-Saving Strategies for Large Cement Stocks
- Alternatives and Innovations: When to Use Epoxies, Admixtures, or Newer Concretes
- Conclusion
- FAQ
Why Cement Shelf-Life Matters for Projects and Costs
Cement that sits too long or is stored poorly can throw project schedules off and raise costs. You may see delays as you wait for concrete to set or cure, or you might face failures that require rework. Understanding shelf-life helps you plan with fewer surprises on site.
Look for signs of degradation like erratic set, poor workability, lumps, or discoloration, and know what these mean for performance. Proper storage and handling—keeping bags sealed, controlling moisture, and avoiding heat or cold swings—preserve usefulness. This awareness helps you decide when to salvage material or discard it and where to budget contingencies for delays or extra material.
Global production and construction demand context
The global cement industry produces billions of tonnes of cement annually. With rising construction demands, especially in emerging markets, the pressure on storage and logistics is immense.
According to the International Energy Agency (IEA), global cement production reached 4.1 billion tonnes in 2019. The U.S. Geological Survey (USGS) reports that the United States alone produced about 86 million metric tons of cement in 2020.
As a DIY homeowner, understanding this context helps you appreciate the scale and importance of proper cement storage for both your project’s success and the industry as a whole.
Financial and schedule risks of using aged cement
Using improperly stored, aged cement can lead to costly setbacks in your project. The variability in set time and weakened early strength development can cause delays, rework, and even structural issues.
Delays: If the cement sets too quickly or erratically, you may struggle to place it properly, leading to delays as you wait for new batches to arrive. Conversely, if it sets too slowly, your project timeline could slip due to extended curing times.
Rework and waste: Aged cement may not bond well with fresh concrete, leading to rework and wasted material. Weakened early strength can result in structural or bond failures, triggering warranty concerns or safety issues that require costly repairs.
To mitigate these risks, always check the condition of your cement before use, and consider budgeting for contingencies in your project plan.
What “Shelf-Life” Really Means for Cement
Chemical stability means cement components resist premature hydration and moisture reactions. Practical usability is about workability, set times, and early strength in real conditions. The two don’t always move together on the jobsite.
Manufacturer shelf-life and packaging are tested for certain storage conditions, but on-site realities differ. Open bags, moisture, and temperature changes can shorten usable life. Check bag integrity, seals, and labels regularly to decide when to retest or replace material.
Manufacturer labels, batch codes, and expiry guidance
The first step to understanding cement shelf-life is reading the bag label. Manufacturers provide crucial information here:
Batch Date: This tells you when the cement was produced. Fresh cement has better performance.
Expiry/Best-Before Date: Follow this closely. Using cement past its expiry date can lead to weak concrete.
The Technical Data Sheet (TDS) is also vital. It outlines storage, handling, and usage guidelines specific to that batch. Always keep it on-site and follow the recommendations.
Standards and quality benchmarks to reference
Understanding cement standards helps ensure you’re using good-quality, safe material. Here are some key references:
ASTM C150/C150M: This standard covers Portland cement. It specifies requirements for chemical and physical properties, sampling, and testing.
EN 197-1: In Europe, this standard defines the composition, specifications, and conformity criteria for common types of cement.
If you’re unsure about a batch’s quality, consult its Product Data Sheet. If it still doesn’t pass muster, consider lab testing. Better safe than sorry with your concrete!
How Storage Conditions Change Set Time and Strength
Initial set, final set, and long-term strength respond to how you store cement. Different storage conditions shift these stages and affect workability windows. Understanding the progression helps you plan pours with confidence.
Moisture and humidity drive uptake and hydration, while temperature alters reaction rates. Carbonation exposure can alter surface chemistry over time. Follow practical guidelines for humidity, sealing, and container choices to manage expectations for set and strength.
Moisture and humidity effects
Exposure to moisture before mixing can cause cement to pre-hydrate, forming lumps that are hard to mix. This shortens the workable time and reduces eventual strength.
High humidity in storage accelerates this process. Keep bags dry and away from damp areas.
Concrete’s porosity also plays a role. More porous mixes absorb moisture faster, speeding up hydration.
Temperature effects (hot and cold)
High temperatures speed up setting time, reducing workability. In hot weather, mix and pour early in the day or use retarding admixtures.
Low temperatures slow down hydration. Below 50°F (10°C), concrete may not gain strength as expected. Check product guidance for safe temperature ranges.
Extreme cold can cause freeze-related damage, so protect bags and mixed concrete from freezing.
Air exposure, CO2 and carbonation
Exposure to air causes a thin layer of cement on the bag’s surface to react with CO2, forming a crust. This reduces the reactivity of the powder inside.
Carbonation also occurs in mixed concrete, reducing alkalinity and potentially affecting long-term durability.
To minimize these effects, store bags in a cool, dry place away from direct air exposure. Use up cement within its shelf-life to ensure optimal performance.
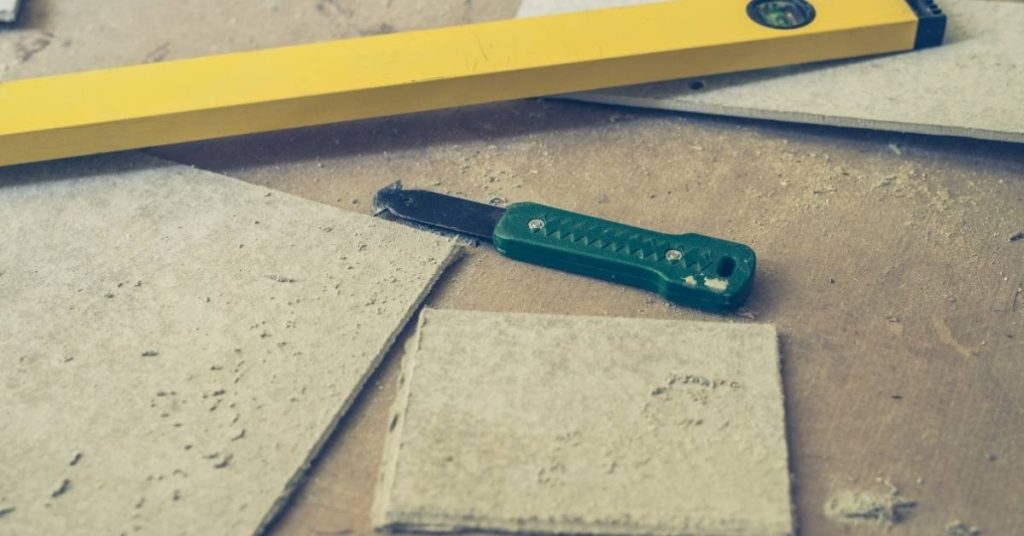
Visual Checkpoints and Quick Field Tests for Old Cement
Begin with packaging integrity and storage history to gauge risk. Look for moisture exposure, pest damage, date codes, and whether bags stayed off the ground. A quick visual is often the first telltale sign.
Use a simple flow test by pouring or shaking a small sample to see if it flows freely or clumps. A basic paste test with the recommended water ratio helps assess early workability and setting signs. Note any rapid stiffening or heat as red flags.
Visual and Tactile Inspection Checklist
Before using old cement, follow this checklist to visually inspect the bags or bulk form. It’s quick and helps you spot potential issues early.
- Check for leaks: Any holes or tears in the packaging can let moisture in, ruining the cement.
- Inspect for moisture exposure: Moisture-stained bags indicate water has gotten inside, compromising the cement’s quality.
- Look for pest damage:</> Rat or insect damage can introduce contaminants and compromise the cement.
- Check date codes: Ensure the cement is within its usable lifespan as per the manufacturer’s guidelines.
- Inspect storage history: Cement should have been stored off the ground and off pallets to prevent moisture absorption.
- Assess color uniformity: Uneven color can indicate inconsistent quality or contamination.
- Check for hard lumps: Lumps suggest caking, which can lead to poor workability and strength loss.
- Look for bloom or crust: A white, powdery layer (bloom) or a hard outer layer (crust) indicates cement has been exposed to air and moisture.
- Check for caking: Caked cement won’t mix well and can lead to weak concrete.
- Inspect for moisture stains on bags: These indicate water exposure, which can degrade the cement’s quality.
- Sniff for unusual odors: A stale or musty smell suggests the cement has been exposed to moisture and may have degraded.
Quick rule: If you spot any of these issues, consider lab testing or replacing the cement.
Simple Set and Workability Checks (DIY)
Before mixing old cement, perform these simple tests to check its setting behavior and basic workability. It’s a quick way to ensure the cement is still usable.
- Flow/clump test: Pour or shake a small sample. If it clumps stubbornly, crush the lumps. If they don’t powder cleanly, the cement may be degraded.
- Paste test: Mix a small batch with water at the recommended ratio. Observe its workability and setting time over 10-30 minutes.
- Check for rapid stiffening: If the paste sets too quickly, it suggests the cement has degraded.
- Observe heat generation: Excessive heat can indicate a reaction with moisture or other contaminants.
- Look for even hydration: If the paste refuses to hydrate evenly, it suggests the cement is no longer usable.
Quick rule: If any of these tests suggest the cement has degraded, send samples for compressive-strength testing or replace the cement. Don’t rely solely on DIY checks; lab testing provides definitive results.

Best-Practice Storage Procedures (Short- and Long-Term)
Differentiate short-term and long-term storage for bagged versus bulk cement and follow practical shelf-life expectations. Moisture and heat accelerate degradation, so plan accordingly. Clear storage rules help you keep performance intact.
Maintain moisture control with proper sealing, desiccants, and off-ground pallets. Avoid temperature swings by storing in shaded or climate-controlled areas. Rotate stock, label containers, and inspect for caking or moisture staining to preserve set time and strength.
Packaging, palletization, and site placement
Protect your cement from moisture and heat by keeping it off the ground. Use pallets to raise bags or bulk containers above damp surfaces.
Never store against walls that can trap moisture and create damp microclimates. Waterproof covers are a good idea for long-term storage, but ensure they don’t trap heat.
Keep cement away from direct sunlight to avoid temperature swings. Shade it with tarps or other materials if necessary.
Climate-controlled and covered storage options
Indoor storage is ideal for long-term cement preservation, but not always practical. If you can, store in a dry, cool room away from heat sources.
Covered sheds or containers can also work, as long as they’re well-ventilated to prevent heat buildup. Make sure the cover doesn’t trap moisture either.
Consider investing in a climate-controlled storage unit for high-value projects where cement quality is critical.
Managing opened bags and partial use
Once you open a bag, moisture can quickly degrade the cement. Reseal it tightly with tape or a plastic bag to keep out air and moisture.
For small quantities, use an airtight container. Label all opened bags with dates to track their age.
Follow First-In-First-Out (FIFO) principles to ensure you’re using the oldest cement first and minimizing waste due to aging.
Safety and Regulatory Considerations for Long-Term Storage
Key hazards include respirable cement dust, skin and eye contact from alkalinity, and bulk bag stability issues. Mitigate these risks with appropriate containment and handling. On-site conditions should prioritize worker safety without compromising material quality.
Follow PPE guidelines, ventilation, and training requirements to reduce exposure. Adhere to labeling, SDS access, and storage practices that support compliance with regulations. Regular audits and documentation help keep your site safe and orderly.
Personal Protective Equipment and Handling Precautions
Safety comes first when dealing with cement. Here’s what you need to protect yourself.
- Respirator: Protects from respirable dust (silica). Use a half-face or full-face respirator with P100 filters.
- Gloves: Prevent skin contact. Use long, heavy-duty gloves to protect hands and wrists.
- Eye Protection: Goggles or safety glasses with side shields keep cement out of your eyes.
- Clothing: Wear long sleeves, a long-sleeved shirt, and sturdy footwear to minimize skin contact.
- Optional: Dust Extraction Tool ($50-$100): Reduces dust when opening bags. A small investment for better safety.
When to Involve Inspectors or Labs
For large batches, structural uses, or disputed quality, get professional help. Here’s when and how.
Large Batches: If you’re using more than 50 bags at once, consider getting a strength test to ensure consistency.
Structural Uses: For foundations, slabs, or other load-bearing structures, always get a lab test. The risk is too high for guesswork.
Disputed Quality: If you suspect your cement isn’t up to par, send samples to a lab for testing. Better safe than sorry.
Inventory Control and Cost-Saving Strategies for Large Cement Stocks
Implement inventory rotation like FIFO or LIFO to minimize waste from set-time variance and moisture exposure. Align stock levels with project pace to avoid overstock and obsolescence. Clear planning reduces last-minute buys and disposal costs.
Adopt practical procurement and sizing strategies that balance lead times with reliability. Monitor environmental risk and use early indicators to adjust orders before material quality suffers. Track savings and waste with simple metrics to guide future purchasing.
FIFO, Batch Tracking, and Stock Rotation
To keep your cement fresh and reduce waste, follow the FIFO (First In, First Out) rule. This means using the oldest stock first.
Here’s how to do it:
Label bags with the date of arrival. When taking a bag, grab the one with the earliest date. Rotate your stock by moving older bags to the front.
Bulk Purchase vs Frequent Orders
Buying cement in bulk can save you money, but it’s not always the best option. Here’s when to consider each:
Bulk purchase is good if you have plenty of storage space and a high turnover rate. It reduces packaging waste and transport costs.
However, frequent orders might be better if you lack storage capacity or climate control. This way, you only buy what you need immediately, reducing the risk of cement going bad.
Alternatives and Innovations: When to Use Epoxies, Admixtures, or Newer Concretes
Decide when aged cement should be replaced versus when alternatives are appropriate, considering crack width, bond issues, and durability concerns. Alternatives can bridge performance gaps when cement quality is questionable. Use professional judgment for critical structures.
Explore typical use cases for epoxies, mortars, and admixtures, and choose based on substrate, exposure, and load. Stay informed about new binders and advanced products, but weigh cost, availability, and compatibility with existing patches. Always verify safety and preparation requirements before switching materials.
Epoxies and repair materials for aged concrete or cement-related repairs
Choosing the right material is crucial when repairing aged concrete. Epoxies can bond well but need careful selection.
- Crack Repair: Use 100% solids epoxies like G/flex for hairline to wide cracks. Look for high tensile strength and elongation ratings. Avoid low-viscosity epoxies that may seep into porous concrete, causing staining.
- Bonding to Existing Concrete: Use two-part, high-strength epoxies. Check the pull-off strength rating to ensure it’s suitable for your load needs. Avoid using epoxies with low bond strengths to prevent delamination.
- Structural Repairs: Choose high-modulus, high-strength epoxies for structural repairs. Look for high flexural and compressive strength ratings. Avoid using low-modulus epoxies that may not support the required loads.
- Surface Repair: Use low-viscosity, fast-setting epoxies for small surface repairs. Check the pot life to ensure it’s suitable for your working time. Avoid using high-viscosity epoxies that may be difficult to apply.
- Substrate Compatibility: Ensure the epoxy is compatible with the existing concrete substrate. Consult product datasheets and consider conducting simple adhesion tests before application. Incompatible materials can lead to weak bonds and repair failure.
Admixtures and modern mixes that mitigate poor cement performance
When aged cement shows signs of deterioration, admixtures and modern mix designs can help improve performance.
Plasticizers: These water-reducing agents improve workability without increasing water-cement ratio. Consult a mix designer to ensure the right dosage for your needs. Overuse can lead to strength loss.
Accelerators: Accelerators speed up setting time, useful when working with aged cement that may have slower set times. Be cautious of heat-generating accelerators that could cause cracking in thick sections.
Blended Cements: Blending aged cement with new cement or using supplementary cementitious materials like fly ash or slag can improve strength and durability. Consult the manufacturer for recommended blends to avoid compromising performance.
Conclusion
Poised to save time, money, and headaches, the core takeaway is that proper storage and timely testing keep cement performance predictable, safe, and visually solid on every project. When you respect shelf-life realities, you protect strength, appearance, and safety from the first mix to the last use.
Keep a simple, concrete check in mind: check the bag dates and lot numbers, inspect bags for moisture damage or crusting, confirm the storage area is dry and unmoved, verify seals and humidity control, do a small field test on a tiny batch if you suspect any delay, and then follow the short- or long-term storage procedures you set up, while updating your inventory and plans as conditions change. safety first and test small area first are your anchors; treat any doubt as a reason to slow down rather than push ahead, and document results before committing to a full project.
Common mistakes to avoid are ignoring moisture ingress, using cement past its visual or test-limit life, and skimping on ventilation or temperature control; keep storage dry, rotate stock by oldest first, and never mix old and new cement in the same batch without re-balancing water and admixtures, because these oversights silently undermine strength and set time. Always use appropriate PPE, read labels, and never rely on feel or memory for critical mixes.
If you’re unsure after testing, or if you’re managing large stock, don’t push risky work—call a professional for a quick check or batch design review. With disciplined storage, honest testing, and conservative use, you’ll finish projects with consistent strength and fewer costly surprises.
FAQ
What factors affect cement shelf-life?
Moisture exposure, humidity, and how well the bags are sealed matter a lot. Packaging damage, contamination from other materials, and storage temperature also play a role. Always check the bag label or manufacturer instructions for specifics.
What are ideal storage conditions for cement?
Store cement in a dry, shaded area off the ground and on pallets or shelves. Keep bags stacked neatly and avoid moisture sources or temperature swings. Follow the label for any site-specific storage guidance.
How does temperature affect set time and strength?
Warmer air can speed up set time; cooler conditions slow it down. Extreme temperatures can harm how the cement develops strength. Use manufacturer guidance for mixing water and stored cement to stay in the right range.
What are signs of deteriorated cement?
Look for damp or moldy bags, powdery or hard, clumped material, or obvious moisture damage. If you notice changes from the bag’s normal feel or odor, treat it as questionable and verify with the label or instructions.