
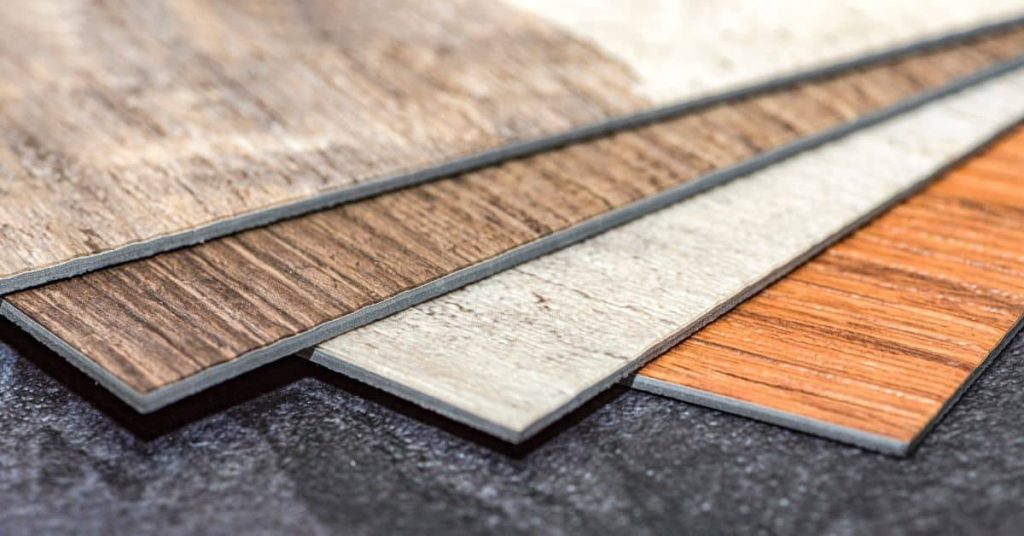
Introduction
Calcium chloride tests measure surface moisture and relative humidity (RH) tests measure internal moisture — use the one that fits your floor type and the manufacturer’s instructions. For DIYers, a calcium chloride kit can show if the surface is shedding moisture but it won’t tell you slab RH or moisture vapor drive, so check the flooring maker’s moisture limits and test method requirements before you proceed. Keep in mind that acceptable moisture levels vary by product and region, so confirm the exact criteria with the flooring manufacturer or local rules.
Testing methods include surface-based kits and in-slab RH probes like ASTM F2170, and each has pros and cons for accuracy and practicality on a small job. Factors such as slab thickness, curing time, sub-slab conditions, and site humidity affect how moisture moves and how long a slab takes to dry, so plan tests after concrete has had reasonable drying time and follow the test method’s prep steps for reliable results.
Key takeaways
- Accurate moisture levels determine flooring adhesion and long-term performance in slabs.
- Calcium chloride tests are quick but sensitive to environmental conditions and sealer.
- RH testing using ASTM F2170 offers a more representative, jobsite-reliable moisture profile.
- Follow manufacturer guidance and local rules when selecting and interpreting tests.
- Environmental conditions affect drying; plan testing with proper temperature, humidity, and ventilation.
- If readings exceed limits, pause flooring work and consult local code and pro.
Table of Contents
- Introduction
- Key takeaways
- Why Accurate Moisture Testing Matters for Flooring Projects
- How Moisture Behaves in Concrete Slabs
- Accepted Moisture Limits and Standards (ASTM and Manufacturer Guidance)
- The Calcium Chloride (Moisture-Vapor Emission) Test: Method and Limitations
- Concrete Relative Humidity (RH) Testing (ASTM F2170) and Why It’s Preferred
- Side-by-Side Comparison: Calcium Chloride Vs RH Vs Other Methods
- Preparing for Accurate Testing: Logistics, Tools, and Safety
- Interpreting Results and Next Steps When Readings Exceed Limits
- Conclusion
- FAQ
Why Accurate Moisture Testing Matters for Flooring Projects
Accurate moisture testing links the slab condition to long-term flooring performance, installer warranties, and occupant health, so treating testing as optional invites costly consequences. If you’re unsure about a product limit or test method, check the flooring manufacturer’s technical data sheet or product label before proceeding.
Wrong or incomplete moisture data can cause installation failures like cupping, delamination, or adhesive failure, create mold and VOC risks, and lead to warranty disputes and early replacement costs. Owners, general contractors, and installers should require reliable, documented testing and third-party verification when needed to protect the project and reduce downstream liability.
Flooring failures, liability, and cost implications
Incorrect moisture assessment can lead to costly flooring installation failures. Curl, tenting, or delamination can occur, ruining your new floor.
Liability-wise, if the installer or GC didn’t insist on proper testing, they might be held responsible for replacement costs and potential legal claims.
The direct cost of rework is high. Plus, there’s indirect damage to your reputation as a reliable contractor or homeowner.
Long-term effects on indoor air quality and building performance
Moisture trapped in slabs promotes mold growth, which can spread throughout the building. This poses health risks to occupants.
Adhesive degradation occurs over time due to moisture, leading to material delamination. This compromises the structural integrity of your flooring system and reduces its lifespan.
In the long run, you’ll face premature replacement or remediation costs, plus potential health issues for those living or working in the building.
How Moisture Behaves in Concrete Slabs
Concrete holds moisture from several sources—ground moisture, curing water, chemical reactions, and building HVAC—and that moisture moves through the slab via capillary action and vapor transport. For exact guidance on how your slab mix or finish affects movement, consult the product data sheet or mix design documentation.
Surface dryness can be misleading because deeper layers may still be wet while the top feels dry; equilibrium is reached between the slab and its environment rather than absolute dryness. Proper testing locations and timing matter: measure at depth for in-situ conditions, allow the slab to equilibrate to jobsite HVAC, and plan tests where they represent actual flooring conditions.
Sources and pathways of moisture in new and existing slabs
Concrete slabs can hold moisture from various sources. New slabs get water from the mix itself, plus additional water added during curing. Existing slabs might absorb moisture from groundwater, leaks, or even humidity from HVAC systems.
Capillary action is how this moisture moves through tiny interconnected pores in concrete. It’s like a chain of tiny waterfalls, driven by surface tension and gravity.
Porosity and pore structure affect the rate of capillary movement. Dense, well-cured concrete with smaller pores will move moisture slower than porous, poorly cured concrete.
Moisture can linger in slabs for years, especially in damp environments or when vapor barriers trap it inside.
Drying rates and the myth of “30 days per inch”
The old rule of thumb, “30 days per inch”, is just that – a rough estimate. Drying time depends on many factors: slab thickness, concrete mix design, ambient temperature and humidity, even the presence or absence of a vapor retarder.
Thicker slabs dry slower because there’s more mass to evaporate through. Warmer, drier air speeds up drying, while cooler, wetter air slows it down.
Manufacturers’ recommendations are your best guide for safe drying times. They test their products under various conditions and provide ranges based on those tests.
Always check with the manufacturer of your flooring material to ensure you’re within their recommended drying time range before installation.
Accepted Moisture Limits and Standards (ASTM and Manufacturer Guidance)
ASTM F2170 measures in-situ relative humidity at specified depths and provides a standardized way to assess slab moisture, but manufacturer limits for finished flooring can differ. Always verify the exact maximum RH or moisture-vapor emission limit in the flooring product’s technical data sheet before install.
Device calibration, documented test locations, and environmental conditions are essential to avoid misreading results and triggering unnecessary disputes. If readings exceed the product limits, options include extended drying, mitigation measures, switching to an approved system, or coordinating retests after remediation while keeping a clear testing plan and records.
What ASTM F2170 requires and why it’s the industry standard
The ASTM F2170 test measures in-situ relative humidity (RH) at the slab surface, 40% and 60% depths. This tells us about moisture conditions where your flooring will live.
It’s the industry standard because it predicts post-installation equilibrium better than surface tests. It shows how your slab will behave once your flooring is down.
Target depths are critical – they give a clear picture of what’s happening where it matters. Don’t settle for shallow or surface-only readings.
Interpreting manufacturer limits and product specifications
Before you install, get written manufacturer installation limits. These tell you the acceptable RH or moisture vapor emission rate (MVEM) for your chosen flooring.
Some products accept higher RHs. Others are strict. Always verify exact numbers in the flooring tech data sheet. Don’t assume – check!
Remember, these limits keep your flooring safe and looking good long-term. Stick to them, and you’ll avoid costly mistakes.
The Calcium Chloride (Moisture-Vapor Emission) Test: Method and Limitations
The calcium chloride test measures moisture vapor emission rate (MVER) by collecting vapor under a sealed patch and reporting a mass-per-area-per-time result—check the test kit instructions or manufacturer guidance for exact setup steps. The result reports a rate of moisture emitted from the slab surface, which some flooring systems reference in their installation criteria.
Calcium chloride is sensitive to surface conditions, temperature, and sealing quality and does not directly measure subsurface equilibrium, so it can misrepresent long-term slab behavior under finished flooring. For a full picture on critical jobs, combine methods or use ASTM F2170 RH testing, and consult product installation instructions to determine which test the manufacturer accepts.
Typical test setup, timeframe, and result units
The calcium chloride test is typically conducted using a sealed chamber placed on the slab. Inside this chamber, calcium chloride powder is spread out to absorb moisture from the slab.
The test kit also includes a desiccant to control humidity within the chamber. The entire setup is left in a temperature-controlled environment for a specific duration.
Results are usually reported as moisture vapor emission rate (MVER) values, typically in pounds per 1,000 square feet per 24 hours (lb/1000 ft2/24 hr) or grams per square meter per 24 hours (g/m2/24 hr).
Key limitations and common misinterpretations
The calcium chloride test is a surface-level, short-term measurement. It’s influenced by how well the slab was prepared and ambient conditions like temperature and humidity.
It may underestimate moisture risk if the slab has deep-seated moisture or if it’s not fully dried out yet. Conversely, it might overestimate if the slab is wet on the surface but drying quickly from within.
Surface coatings can also affect results, leading to misinterpretations of in-situ moisture risk. Always consider these factors when interpreting calcium chloride test results.

Concrete Relative Humidity (RH) Testing (ASTM F2170) and Why It’s Preferred
ASTM F2170 uses in-situ probes to measure RH at depth and is designed to reflect the subsurface equilibrium that affects adhesive bond and flooring stability. Follow the ASTM protocol and the probe manufacturer’s instructions for placement depth, calibration, and data-logging duration to get dependable results.
Because RH probes measure conditions inside the slab rather than just at the surface, they are generally more reliable for flooring decisions and warranty compliance. Ensure multiple test points, proper sealing of boreholes, and documented environmental conditions to avoid interpretation errors and to support any warranty claims.
Step-by-step in-situ probe procedure essentials
Follow these steps to accurately measure subsurface RH using the in-situ probe method (ASTM F2170). This sequence ensures you capture reliable data for informed flooring decisions.
- Drill holes to specified depth: Drill 1.5″ diameter holes at least 40% into slab thickness, keeping them vertical and clean. Why? Depth matters; too shallow won’t reflect slab’s moisture conditions.
- Condition holes: Clean and dry holes thoroughly to remove dust and debris. Why? Contaminants can skew RH readings.
- Install probes: Insert calibrated probes into holes, ensuring they’re level and secure. Why? Proper installation ensures accurate moisture migration measurement.
- Seal holes: Temporarily seal around probes with caulk or tape to prevent external moisture interference. Why? Sealing maintains steady-state conditions within the slab.
- Wait equilibration period: Allow 72 hours for moisture to stabilize around probes. Why? This allows time for moisture migration to reach a steady state.
- Record RH/temperature readings: Log RH and temperature data every 24 hours until readings stabilize or for at least 1 week. Why? Multiple readings account for fluctuations and ensure reliable averages.
Probe selection: reusable vs disposable
Choosing the right probe type depends on project volume, budget, and accuracy needs. Here’s a comparison to help you decide:
Reusable probes offer high accuracy but require regular calibration ($50-$100 per probe). They’re ideal for frequent testing or large projects with tight budgets.
Disposable probes provide convenience and consistent performance, though they’re more expensive ($200-$300 each). They’re suited to smaller projects or when accuracy is paramount over cost.
Consider your project’s scale and moisture testing requirements. Reusable probes save money in the long run, while disposables offer ease of use and consistent results.
Side-by-Side Comparison: Calcium Chloride Vs RH Vs Other Methods
Each moisture method measures something different: calcium chloride captures surface MVER, ASTM F2170 captures in-situ RH at depth, surface meters read near-surface moisture, and infrared/thermal tools screen for anomalies. Check the flooring manufacturer’s acceptable test method so you use the method they recognize for warranty and installation decisions.
For a dependable answer on readiness, use RH testing per ASTM F2170 for in-situ equilibrium assessment and reserve other methods for screening or supplemental information. Combine methods thoughtfully—use thermal or surface meters to identify hotspots, then confirm with RH probes—and document all findings and calibration data for clarity with stakeholders.
When a DIY Surface Test Might Be Acceptable — And When It Isn’t
Surface moisture tests can be quick and easy, but they’re not always reliable. They only measure the top inch or so of concrete. That’s fine for quick checks before painting or light installations. But for critical flooring jobs, you need to know what’s happening deeper in the slab.
Surface tests can be misleading. Moisture at the surface doesn’t always mean there’s moisture below. And if it’s dry on top, that doesn’t guarantee a dry subgrade. So, while they might give you a first pass, they should never replace ASTM F2170 for critical installations.
Think of surface tests like a quick health check. They can tell you if something’s obviously wrong. But for a thorough diagnosis, you need to go deeper with ASTM F2170.
Combining Methods for Risk-Reduction
Sometimes, one test isn’t enough. That’s when you combine methods to reduce risk. Here’s a practical sequence:
1. Visual Inspection + Surface Screening: Start with a visual check and a quick surface moisture scan. This can help you spot obvious issues or confirm that the slab looks dry.
2. ASTM F2170 RH Test: If the initial checks pass, then go deeper with an in-situ RH test. This gives you a confident reading at 40% relative humidity, which is what most flooring manufacturers require.
Combining methods like this balances cost and confidence. It’s more thorough than just surface checks, but it’s still less expensive than calcium chloride tests. Plus, it gives you a clear picture of your slab’s moisture situation.
Preparing for Accurate Testing: Logistics, Tools, and Safety
Plan tests around the pour schedule and HVAC conditions so the slab has had time to condition toward the project environment; check equipment manuals and local rules on when to test relative to pour and HVAC operation. Prepare the slab by cleaning test locations, coordinating access, and marking a grid of test points that avoids edges and irregulars.
Confirm you have the right tools—RH probes or test kits, drill bits or core equipment, sealants, and calibration references—and follow the device manufacturer’s instructions for calibration and use. Use appropriate PPE, control dust during drilling, lockout HVAC if required, and coordinate shut-downs or restricted areas so testing proceeds safely and yields defensible data.
On-site checklist and material/specs to bring
Use this checklist before starting any concrete testing. It’ll help you gather the right tools and materials, ensuring accurate results and preventing costly mistakes.
- Verified manufacturer limits: Check the concrete mix design and ensure it’s within the manufacturer’s specified range for your project’s requirements.
- Hygrometer/probes: Inspect moisture meters or probes to confirm they’re in working order. Calibrate if necessary, following the manufacturer’s instructions.
- Drill and bits: Ensure you have a suitable drill (electric or cordless) with bits designed for concrete. Check bit lengths match your required test depths.
- Sealing materials: Verify you have enough sealant to protect tested areas from moisture loss, ensuring accurate readings.
- Documentation forms: Prepare forms to record test data, including date, time, location, and readings. Use a waterproof clipboard if necessary.
- Calibrated instruments: Confirm all testing equipment is calibrated properly. If unsure, check with the manufacturer or use a certified calibration service.
- Safety gear: Ensure you have hard hats, safety glasses, gloves, and steel-toed boots to protect against falling debris or other hazards.
- Marking paint/tape: Have marking tools ready to clearly identify test locations on the concrete surface.
Quick rule: Always double-check your tools and materials before starting any testing. A few minutes of preparation can save hours of rework later.
Safety, access, and environmental considerations
Before you start testing your concrete, safety’s gotta be your top priority. Here’s what you need to consider:
PPE and Safety Drilling Precautions: Wear a hard hat, safety glasses, gloves, and steel-toe boots. When drilling into slabs, check for embedded utilities. Use a hammer drill with a carbide-tipped bit, and go slow to avoid kickback.
Access: Make sure you can safely reach all test areas. If you’re testing high up or in tight spaces, use appropriate ladders, platforms, or scaffolding. Always have someone spotting you.
Environmental Considerations and Test Timing: Concrete tests are sensitive to temperature and humidity. Ideally, test when the slab’s at a stable 73°F (23°C) with 50% relative humidity. If it’s too hot or cold, adjust your testing schedule accordingly.
Interpreting Results and Next Steps When Readings Exceed Limits
Compare RH and MVER results directly to the exact limits in the flooring product’s technical data sheet and record device IDs, calibration status, locations, and environmental conditions alongside the readings. If you don’t know a product’s limit, contact the manufacturer or check the product literature before making installation decisions.
When readings exceed limits, options include pausing installation, applying accepted mitigation (extended drying, dehumidification, coatings, or drainage), selecting a compatible flooring system, and then retesting after mitigation per the original method. Keep thorough documentation of tests, mitigation steps, and retest results to support warranty claims and clear communication with the owner, GC, and installer.
Common remediation and mitigation options
If test results exceed manufacturer limits, don’t panic. There are ways to address high moisture levels.
Drying time extension: Sometimes, concrete just needs more time to cure. Consider extending the drying period before installing flooring.
Moisture mitigation systems: Toppings, sealers, and moisture control membranes can help reduce moisture vapor transmission. These systems create a barrier between the concrete and your flooring.
HVAC conditioning: If humidity is high due to seasonal changes, consider using HVAC systems to condition the slab before installation.
Documentation, QA, and contractor selection tips
Thorough documentation is key for supporting warranty claims. Here’s what to do:
Reporting results: Keep detailed records of all test results, including RH and MVER values, dates, device IDs, and site conditions.
Retaining test records: Store these records safely. You’ll need them if you ever make a warranty claim.
Selecting qualified contractors: Choose testers and flooring contractors with proven moisture-management processes. Ask about their experience, certifications, and past projects.
Conclusion
Getting moisture right matters for safety, durability, and a smooth, lasting floor finish. Use the testing approach that fits your project and respect the limits set by ASTM guidance and your flooring supplier.
In practice, proceed by confirming acceptable limits, choose a small test area first, collect the right samples or readings in a calm, dry environment, compare results to the specified thresholds, and then plan your full-floor work only if everything is within range. If readings are near or above limits, address moisture carefully and methodically before laying any finish or adhesive, and document the steps you take for future reference.
Common mistakes to avoid are rushing tests, neglecting proper surface preparation, and ignoring safety rules like proper ventilation and personal protective equipment when handling chemicals or drilling for samples. Always double-check that you’re using the correct test method for your slab (Calcium Chloride or RH testing) and that you’re following the exact procedure and timing recommended by the manufacturer. When in doubt, slow down, reassess, and keep testing in stages to prevent costly damage.
If readings stay high despite careful re-testing, or if you don’t have the right tools or space to test safely, call in a professional. A qualified flooring installer or testing technician can interpret results accurately and suggest a plan that protects the floor and your investment. Stay deliberate, stay safe, and move forward with confidence.
FAQ
What are acceptable moisture levels for a concrete slab before installing flooring?
There isn’t one universal number. Check the flooring manufacturer’s moisture limits and your slab type. If in doubt, verify with the product label or instructions from the adhesive or flooring supplier.
What are the main methods to test moisture in concrete, and which is easiest for DIY?
Two common methods are surface tests and in-situ tests. Surface tests are quick but less precise for sub-slab moisture. In-situ tests, like RH testing, give a clearer picture of actual moisture movement.
What factors affect moisture movement through concrete?
Moisture moves with temperature, humidity, and concrete porosity. Factors like slab age, curing conditions, and venting around the area also change drying rates. Rushed or blocked drying can trap moisture longer than you expect.
How do environmental conditions impact drying time and measurement accuracy?
Temperature, humidity, and air flow change how fast concrete dries. Cold or stagnant air slows evaporation and can skew readings. Keep testing conditions consistent and follow manufacturer guidance for any tools used.