
Introduction
A broom-finished concrete driveway is a surface texture created by brushing a broom over freshly poured concrete to leave short, even lines. This finish adds a non-slip surface and a utilitarian look that hides minor imperfections as it wears. Keep the work simple and consistent, moving at a steady pace and planning your crossings to avoid random marks.
Timing, direction, and the broom technique determine the final look and safety. Broom the surface when the concrete can hold the pattern without gouging, and keep a steady, even pass in the chosen direction. Watch for tear-out by avoiding aggressive passes at the same spot, and check product labels, manufacturer guidance, and local rules for any requirements.
Key takeaways
- Broom finish creates textured surface suitable for traction and aesthetics on driveways.
- Wait until surface skin forms; test by firm touch without indentation.
- Sweep in consistent direction with a uniform stroke pattern for even texture.
- Wear eye protection and gloves; maintain safe, controlled broom strokes.
- Avoid tearing the surface by finishing after set begins; protect from traffic.
- Consider how broom finish affects future coatings or repairs and plan accordingly.
Table of Contents
- Introduction
- Key takeaways
- What Is a Broom Finish and When Is It Appropriate?
- Surface Readiness and Timing — How to Know When to Broom
- Direction, Broom Selection, and Stroke Technique
- Preventing Tear-Out and Surface Damage During Finishing
- Common Mistakes and How to Avoid Them
- Implications for Future Coatings, Overlays, and Repairs
- Tools, Materials, and Visual Checkpoints Checklist
- Maintenance, Safety, and Long-Term Performance for Driveways
- Conclusion
- FAQ
What Is a Broom Finish and When Is It Appropriate?
A broom finish is a textured surface created by dragging a broom across a freshly placed concrete slab to leave visible marks and exposed aggregate. The texture results from the broom’s bristles sweeping the surface and catching varying depths of concrete as it stiffens. The timing of the finish, along with trowel work and set, determines how pronounced the texture will be.
In practice, the broom texture depends on broom type and stiffness, drag direction, pressure, and how close to finishing the surface the broom is used. Weather, humidity, and ambient temperature also influence the result. This finish suits driveways with moderate traffic and where slip resistance and curb appeal are priorities, but it may not be ideal for very high-traffic or steep sections due to wear concerns.
Visual characteristics to recognize
A broom finish leaves a distinctive texture on your concrete driveway. Look for:
- Parallel fine ridges, running the length of the driveway.
- A matte surface, unlike smooth or polished finishes.
To inspect uniformity, walk along the driveway. The ridges should be consistent in width and spacing. Check for any bare spots or areas where the finish is too heavy or light.
Pros and common driveway applications
Added traction: Broom finishes provide better grip, making them ideal for driveways with inclines or in areas prone to ice.
Low initial cost: It’s one of the most affordable finishing options. No additional materials needed after the broom itself.
Common applications include:
- Residential driveways, especially for homeowners with multiple vehicles or heavy traffic.
- Commercial properties with high foot traffic, like retail stores or offices.
Surface Readiness and Timing — How to Know When to Broom
The readiness window is defined by surface moisture, set stiffness, and any bleedwater left on the surface. Temperature and slab thickness shift this window, so expect differences as conditions change. Do not rush, as timing affects texture and durability.
Look for indicators like a duller sheen, a slight firming underfoot, and a faint drag pattern emerging. The surface should stop being tacky and feel dry to the touch before sweeping begins. A small test patch helps confirm texture depth and readiness against your planned finish.
Readiness signs (bleed water, sheen, thumbprint test)
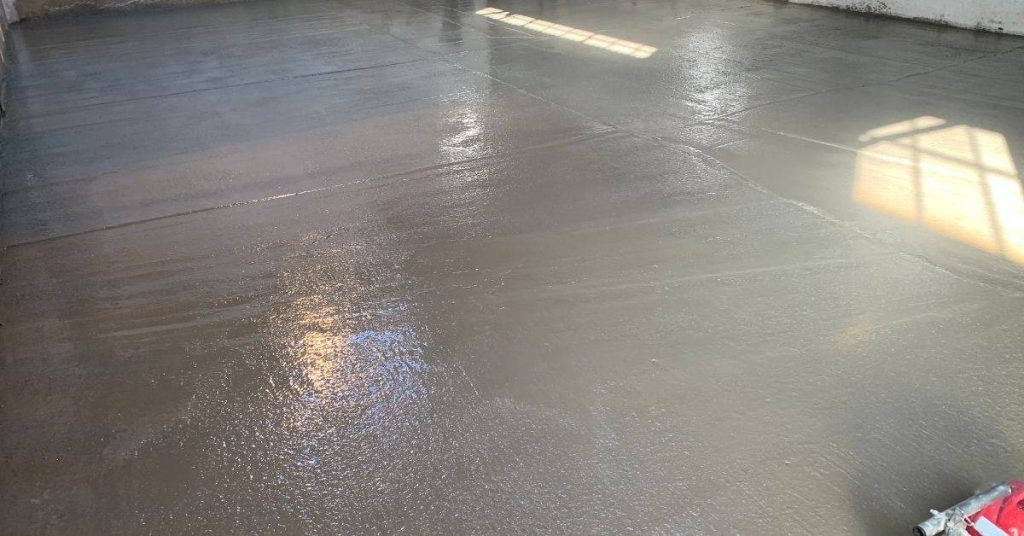
The surface is ready when bleed water has disappeared. Standing water means the concrete hasn’t started to set yet.
Loss of surface sheen indicates the start of setting. The slab will look matte instead of glossy.
Perform a simple thumbprint test: Press your thumb lightly onto the surface. If it leaves an imprint but doesn’t stick, you’re good to go. Too early and it’ll stick; too late and there’s no mark.
Weather and environmental impacts on timing
Temperature affects set time: warmer means faster, colder means slower. Ideal is 50–80°F. Too cold or hot? Wait.
Humidity slows down setting. Wind speeds it up by evaporating moisture. Adjust your timing accordingly.
Sunlight can accelerate setting, especially on thin slabs. Keep an eye out and broom before it’s too late.
Mix and placement factors that change timing
The mix design affects set time. Ask your supplier for their recommendations based on the mix you’re using.
Admixtures can speed up or slow down setting. Check if any are in your mix and adjust your schedule as needed.
Thicker slabs take longer to set. Plan accordingly, especially with large pours.
Placement rate matters too. Fast placement means faster bleeding and earlier brooming. Slow placement? Wait a bit longer.
Direction, Broom Selection, and Stroke Technique
Choose stroke direction that flows with the slope and anticipated traffic to minimize stopping and tearing out high spots. In some cases, alternate directions to avoid a uniform grain that could worsen along joints or wheel paths. Plan edges and transitions to maintain consistency.
Compare broom types by stiffness and density; the texture depth and traction will vary with each option. Consider how the texture holds up under freeze–thaw and wet conditions, and match the broom to the concrete mix and expected use. Practice passes before the pour to refine your technique.
Direction: slope and traffic considerations
The direction of your broom strokes is crucial for a smooth, durable finish. Here’s why:
Strokes should be perpendicular to the travel direction. This helps water drain off efficiently and prevents puddles that could damage the surface.
When dealing with slopes, adjust your stroke layout accordingly:
– If the slope is downstream, broom in that direction. This minimizes stopping and tearing out high spots.
– For upstream slopes, broom against the slope to prevent water from running back onto the fresh concrete.
Consider wheel paths and vehicle entry points when planning your strokes. Alternate directions occasionally to avoid consistent grain alignment.
Choosing the right broom and stiffness
The type of broom you use greatly affects your finish’s texture and durability.
Brooms come in two main materials: synthetic (plastic) and natural (bamboo or coconut). Synthetic brooms are stiffer, creating deeper grooves, while natural ones are softer, producing a lighter, more subtle texture.
Consider your desired groove depth and substrate condition when selecting a broom. For heavy vehicle traffic, a stiffer broom might be needed to create deeper grooves for better traction. However, too aggressive a broom can expose aggregate prematurely.
Bristle length and density also play a role. Longer bristles with higher density create deeper textures.
Stroke rhythm, pressure, and overlap for uniform finish
A consistent stroke technique is key to a uniform broom finish. Here’s how:
Use straight, consistent strokes. Keep your wrist firm and follow through with each pass.
Apply even pressure throughout the stroke. Too much pressure can gouge the surface; too little won’t create a texture.
Overlap passes by about half the broom width to ensure full coverage without leaving lines or gaps. Start at one end of your driveway and work your way across, then move down slightly for the next pass.
For the final pass, broom in the opposite direction to seal the texture. This helps lock in the grooves and prevents them from filling in with water or debris.
Preventing Tear-Out and Surface Damage During Finishing
Common tear-out causes include a surface that’s too soft, overworked areas, finishing at the wrong time, or using excessive broom pressure. Workability issues with the mix can also contribute to surface damage. Identify these signs early to adjust your plan.
Preemptive steps include verifying substrate moisture, controlling the slump and aggregate ratio, and placing joints correctly. Use compatible broom and plan the timing so you avoid reworking already-set patches. Protective measures during cure help prevent additional damage.
Primary causes of tear-out
Tear-out happens when the surface layer of concrete is weakened and gets pulled away. Here are the main culprits:
Brooming too wet or too dry. If you broom before the bleed water has disappeared, you’ll pull out the cement paste. Brooming too late, after the surface has started to set, can also cause tear-out.
Overworking the concrete. Too much handling, especially with power trowels, can bring up the fine particles and weaken the surface.
Using an improper broom type or applying too much pressure can also lead to tear-out. A stiff broom on a soft mix is a recipe for disaster.
Immediate corrective actions if tearing begins
If you notice tear-out happening, act fast to minimize damage:
Stop brooming immediately. Continuing will only make it worse. Re-evaluate your timing and conditions before proceeding.
If possible, re-float or re-level the affected areas with a magnesium float or a small rake to redistribute the concrete and smooth out the surface again.
Protect any damaged edges temporarily with cardboard or plywood to prevent further tear-out. If the tear-out is severe, you may need to wait for a firmer set before attempting any repairs.
Edge, joint, and formwork techniques to reduce failures
Proper preparation and technique at edges, joints, and forms can prevent localized tear-out:
Solid formwork. Ensure your forms are secure and rigid. Sagging or shifting forms can cause weak spots that tear out easily.
Properly struck edges. Use a straightedge to strike off the concrete at the top of the forms, creating a clean, level edge. This helps prevent tear-out where the edge meets the form.
Timely joint tooling. Cut control joints before the concrete sets too hard. This helps direct and control where the concrete will crack, preventing random tear-out along these lines of weakness.

Common Mistakes and How to Avoid Them
Frequent errors in broom finishing include timing the finish too early or too late, inconsistent broom pressure, and drifting directions without a clear plan. Substrate prep and curing are often overlooked, leading to dusting or cracking. Watch for changes in slump and surface sheen as indicators.
Prevention steps include sticking to a tested timing window, selecting an appropriate broom, standardizing passes, and keeping the surface clean and dry. Establish a clear direction sequence and cure plan to minimize delamination or tearing. Use quick checks on edges and joints to stay on track.
Overworking and premature broom strokes
T