
Introduction
Brick veneer is a non-structural facing that sits on a wall with an intentional air gap to vent moisture. Understanding why air gaps and weep holes matter helps you spot issues before they show up. This setup is what keeps brick veneer performing without relying on the wall itself for support.
Stuck-on brick systems can fail because they lack a proper drainage plane and ventilation. Check that your install uses a gap, flashing, and breathable backing as per manufacturer instructions and local rules. If you’re unsure, inspect for signs of moisture, loose mortar, or peeling veneer and refer to product labels or local guidelines for the next steps.
Key takeaways
- Proper air gap and drainage plane prevent moisture intrusion behind brick veneer.
- Weeps and flashing provide the critical path for water to escape.
- Choose ties/anchors that maintain drainage while transferring load properly without compromising drainage efficiency.
- Adhered veneer often fails due to bond limitations and movement.
- Installers should verify flashing, weeps, and air gaps per manufacturer guidance; wear PPE.
- Regular inspection and proactive maintenance prevent costly veneer repairs.
Table of Contents
- Introduction
- Key takeaways
- What Is Brick Veneer and How It Differs from Full Masonry and Adhered Systems
- How the Air Gap and Drainage Plane Control Moisture
- Weeps and Flashing: the Critical Drainage Path
- Ties and Anchors: Transferring Loads Without Compromising Drainage
- Why Adhered (“Stuck-On”) Veneer Systems Often Fail
- Installation Best Practices to Prevent Veneer Failure
- Inspection, Maintenance, and Troubleshooting for Homeowners and Pros
- Tools, Materials Checklist, and Specs to Verify Before Work
- Conclusion
- FAQ
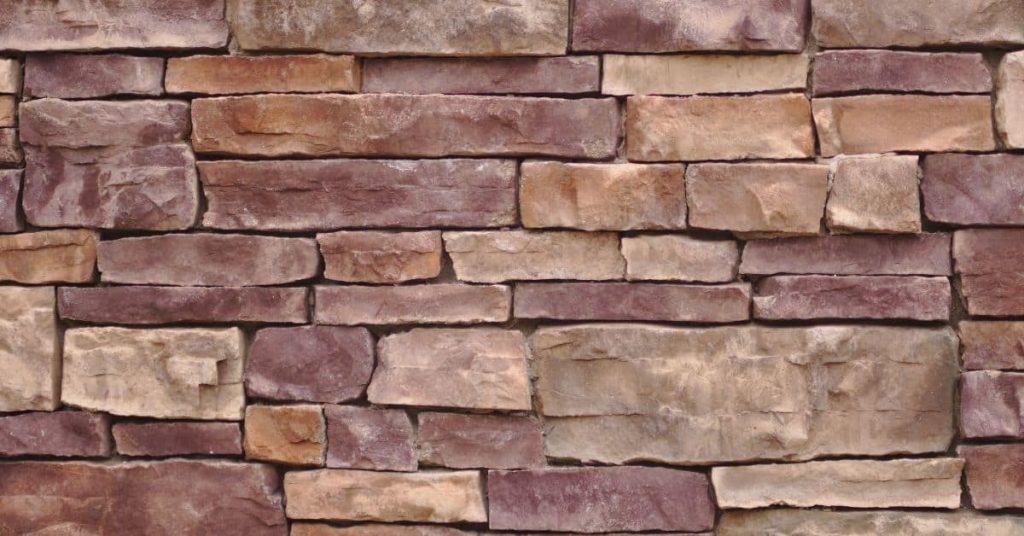
What Is Brick Veneer and How It Differs from Full Masonry and Adhered Systems
Brick veneer is a facing layer that attaches to a backing wall rather than forming part of the structural frame. It functions as an exterior cladding that provides appearance and protection. The system can be drained cavity, adhered veneer, or solid masonry, and each works differently in load transfer and moisture handling.
Drained cavity veneer creates a space for drainage and drying behind the veneer. Adhered (stuck-on) veneer bonds directly to the backing surface and relies on the back to manage moisture and movement. Solid loadbearing masonry carries its own weight and transfers loads through the masonry itself, separate from a veneer finish.
Types of brick cladding: cavity, adhered, and solid masonry
Brick cladding comes in three main types. Each has its own way of handling moisture and durability.
Cavity (Drained Cavity) Veneer: This is the most common type. It’s a non-loadbearing wall tied to the backup wall with an air gap in between. Water can drain out, preventing damage.
Adhered (Stuck-On) Veneer: This system applies bricks directly onto the backup wall using mortar or adhesive. No air gap means no drainage. Moisture can get trapped and cause issues.
Solid Masonry: These are loadbearing walls with bricks laid all the way through. They’re strong but can be prone to moisture problems if not designed properly.
Components of a cavity veneer assembly
A well-built cavity veneer has several key components working together to keep water out and allow it to drain when it gets in.
Backup Wall: This is the structural wall that supports the brick cladding. It’s usually made of wood studs or concrete blocks.
Water-Resistive Barrier (WRB): This is a layer like housewrap or felt paper that goes on the backup wall to block liquid water but let vapor out.
Air Gap: A small space between the WRB and the brick ties. It lets any water that gets through the WRB drain out instead of getting trapped.
Ties, Flashing, and Weeps: Ties hold the bricks to the backup wall. Flashing goes at windows and doors to direct water out. Weeps are holes or slots in the mortar joints at the bottom that let any water that gets behind the bricks drain out.
How the Air Gap and Drainage Plane Control Moisture
The air gap provides a space for air movement and helps moisture that penetrates the veneer to dry before it reaches the backup wall. The drainage plane, or WRB, directs any water that penetrates the veneer down and out of the cavity. Both features work together to protect the interior and improve durability.
Verify that the chosen materials and installation follow the manufacturer guidelines and local code requirements. Look for proper detailing at laps, penetrations, and edges to maintain the continuous gap. Check labels or data sheets for recommended clearances and compatible components.
Air gap width: what to check and safe ranges
Before you start, ensure your air gaps are correctly sized. Here’s a quick checklist:
- Manufacturer instructions: Check the manufacturer’s guidelines for their specific brick veneer system.
- Local codes: Verify with local building codes to ensure compliance.
- Air gap size: Common safe ranges are 1/4″ to 3/8″. Too small risks clogging, too large reduces insulation.
- Gap consistency: Ensure the air gap is uniform across the entire wall. Inconsistencies can trap moisture.
- No obstructions: Check for any nails, screws, or other objects that could clog the gap.
- Weep holes: Ensure weep holes at the bottom of the veneer are unobstructed to allow water drainage.
- Flashing: Verify proper flashing installation to prevent water entry behind the veneer.
- Drainage plane: Confirm the drainage plane (WRB) is intact and properly installed.
Quick rule: Always follow manufacturer instructions and local codes for air gap width. Regular inspection helps prevent moisture issues.
How ventilation and capillary break work together
The air gap’s primary function is to allow airflow, preventing water from wicking up the wall. Here’s how it works:
Ventilation: Airflow through the gap dries any moisture that gets behind the veneer. This prevents water from sitting and causing damage.
The drainage plane (WRB) acts as a capillary break, stopping water from wicking up the wall by air pressure differences. Here’s how it helps:
Capillary break: The WRB creates a barrier that prevents liquid water from moving upwards through tiny pores in the masonry. This stops moisture from reaching the backup wall.
Together, ventilation and capillary break keep the backup wall dry by preventing water entry and promoting evaporation.
Weeps and Flashing: the Critical Drainage Path
Weep openings provide a controlled path for moisture within the cavity to exit. Flashing directs water away from joints and penetrations to prevent accumulation behind the veneer. Proper placement ensures the system stays dry and reduces staining or structural concerns.
Ensure weeps are unobstructed and spaced as specified by the installation guide. Flashing materials and placement should align with the backing wall and WRB details. Consult product instructions or local requirements for exact configurations.
Weep types, placement, and spacing guidance
Weeps are crucial for draining water from your brick veneer. Here’s what you need to know:
Types of Weeps: Open head joints, manufactured weep vents, or wicks can be used. Each has its pros and cons, so choose based on your needs.
Placement: Install weeps at the bottom of each course, starting from the first course above the foundation. This ensures water is directed outwards as it moves down.
Spacing: Check manufacturer guidelines for spacing, but typically, you’ll want to place weeps every 24-36 inches along the wall. Maintain them regularly to keep debris from clogging the weep holes.
Flashing location and compatibility
Flashing is your first line of defense against water intrusion. Here’s where it should go:
Sills: Install flashing at the bottom of each window and door opening to prevent water from seeping in.
Lintels: Place flashing above windows and doors to direct water outwards and away from the opening.
Transitions: Use flashing at roof-to-wall, wall-to-grade, and other transitions where different materials meet. Always ensure compatibility with adjacent components and adhesives to prevent leaks.
Ties and Anchors: Transferring Loads Without Compromising Drainage
Brick ties and anchors transfer lateral and gravity loads from the veneer to the backing wall. They also help maintain alignment and prevent bowing or bulging. Correct materials and spacing are essential for long-term performance and moisture control.
Check that ties are compatible with both the veneer and the backing substrate. Follow manufacturer instructions for embedment depth, corrosion resistance, and placement near openings. Verify any local code references or standards cited on the product data sheet.
Tie material choices and corrosion protection
Choosing the right tie materials is crucial for durability, appearance, and drainage. Here are your options:
- Galvanized ties: Cheap but rusts quickly in harsh conditions. Use where exposure is low.
- Stainless steel ties: Premium price, excellent corrosion resistance. Ideal for exposed areas and coastal regions.
- Plastic ties: Inexpensive, non-corrosive, but weak in high heat or UV exposure. Use indoors only.
- Epoxy-coated ties: Mid-range price, good corrosion resistance. Suitable for moderate exposure areas.
- Type N mortar: Used to bed and grout ties. Look for ASTM C270 compliance. Avoid if tie material isn’t compatible.
- Expansion anchors: For concrete-to-concrete or masonry ties. Check manufacturer’s load capacity and expansion range.
Pro tip: Always check the product label for compatibility with your chosen tie material and exposure conditions. Store materials properly to maintain their quality and shelf life.
Common tie placement errors and consequences
Here are some common mistakes to avoid when placing ties. These errors can lead to movement, cracking, or even collapse.
- Omitting ties: Skipping ties weakens the structure. Always space ties as recommended by the manufacturer or local building codes.
- Incorrect embedment: Ties that are too short or not properly embedded can’t transfer loads effectively. Drill holes deep enough to allow for full tie embedment.
- Oversized gaps: Gaps between ties wider than recommended allow the structure to move, leading to cracking and other issues. Keep gaps within specified limits.
Double-check these points before you start tying. A few minutes of extra planning can save you a lot of trouble later on.

Why Adhered (“Stuck-On”) Veneer Systems Often Fail
Stuck-on veneer relies on a bond to the backing surface without an open drainage path. Moisture trapped behind the veneer can lead to failures over time. The lack of a continuous drainage plane and air gap makes movement and moisture management harder.
Common causes include inadequate bonding, movement mismatch, and insufficient moisture management. Look for signs of trapped moisture, debonding, or grout and veneer separation and review the installation instructions or local guidance for fixes.
Moisture trapping, rot, and efflorescence risks
Adhered veneer systems can trap water against the backup wall if they don’t allow for proper drainage. This happens because the adhesive bond seals off the face of the masonry, preventing water from escaping.
Rot and mold can start to grow on the trapped moisture, leading to structural damage and health issues. You might also see efflorescence, a white, powdery deposit that forms when salt in the mortar or bricks is carried by water to the surface.
The risk is highest with ‘stuck-on’ systems that lack a proper air gap and drainage plane, like those using full-bed mortar bonding. Remember, moisture control is key to veneer longevity – keep it moving out, not trapped in!
Thermal and movement-related failures
Brick veneers expand and contract with temperature changes. An adhered system can’t move freely, leading to stress buildup over time.
This restricted movement can cause several problems. Cracks may appear in the mortar or bricks as they try to relieve the stress. The adhesive bond might also fail, leading to debonding and pieces of veneer falling off – a serious safety hazard!
The weatherproofing seal around windows and doors can also be compromised by this movement, allowing water to enter and cause further damage. To avoid these issues, always opt for systems that allow some degree of movement, like cavity or anchored veneers.
Installation Best Practices to Prevent Veneer Failure
Start with a proper weather-resistive barrier and compatible flashing details. Maintain an uninterrupted air gap behind the veneer to support drainage. Ensure weep openings and their path to the exterior are kept clear during and after installation.
Use correct ties and spacing, and follow the manufacturer’s installation steps. Always verify the product labels, data sheets, or local codes to confirm acceptable configurations before work begins.
High-level sequence and quality checkpoints
Use this checklist during installation to ensure top-notch workmanship.
- Install drainage plane: Check for proper overlap, seams sealed with tape or mastic.
- Flashing at openings: Ensure it’s continuous and laps are staggered.
- Air gap width: Measure to ensure it’s within safe range (usually 3/4″ – 1″).
- Tie placement: Verify they’re evenly spaced, not too close to edges or corners.
- Weep installation: Check they’re at the bottom of each course, unobstructed.
- Flashing at base: Make sure it’s lapped properly, extends beyond veneer.
- Tie corrosion protection: Confirm ties are coated or galvanized to prevent rusting.
- Expansion joint location: Ensure they’re placed where needed to accommodate movement.
Quick rule: Regular inspections at these critical points keep your veneer job solid and long-lasting.
Expansion joints, control joints, and detailing
Properly locating and sealing movement joints prevents cracking and water intrusion.
Expansion joints should be placed where the veneer meets other materials (like walls or floors) and at regular intervals (every 20-30 feet). They allow for thermal expansion and contraction. Seal them with a flexible sealant to keep water out.
Control joints are vertical cuts made in the mortar every 16-24 inches to control where cracking occurs due to minor movement. Keep them clean during installation, fill with a flexible material after curing.
Detailing is crucial at corners and openings. Use L-shaped flashing at corners to prevent water intrusion. At openings, ensure flashing extends beyond the face of the veneer and laps are staggered.
Inspection, Maintenance, and Troubleshooting for Homeowners and Pros
Regularly inspect for signs of water intrusion, staining, efflorescence, or loose or bulging veneer. Check around windows, doors, and transitions for proper flashing and sealants. Address issues promptly to prevent escalation.
Develop a simple troubleshooting flow: observe symptoms, verify drainage components, and consult the installation guide or manufacturer instructions for recommended remedies. Document findings and actions for future reference.
Visual checkpoints and simple field checks
Use this checklist annually to spot signs of trouble early. Here’s what to look for:
- Bulging or cracked veneer: Check for any bulges, cracks, or separations from the wall. These could indicate moisture intrusion.
- Water stains: Look for discoloration on walls, ceilings, or floors. Stains can signal leaks.
- Efflorescence: White, powdery deposits on the veneer may mean water is trapped behind it.
- Missing weeps: Ensure all weep holes are present and unobstructed to allow water drainage.
- Mold or mildew: Smell for musty odors and check for visible growth, which can indicate moisture problems.
- Cracking at corners: Check where walls meet the floor or ceiling. Cracks here could lead to bigger issues.
- Expansion joint gaps: Ensure expansion joints are intact and not filled with debris, allowing for movement.
- Flashing condition: Inspect flashing at roof-wall intersections, windows, and doors to ensure it’s intact and properly installed.
Quick rule: If you find any of these issues, don’t wait. Address them promptly to prevent further damage.
When to call a professional and what to ask
If your inspection turns up serious issues or you’re unsure, it’s time to call in the pros. Here’s how to prepare:
- Leaks or significant cracks: If water is actively leaking or cracks are extensive, consult a pro immediately.
- Efflorescence or mold: Persistent efflorescence or signs of mold growth warrant professional evaluation.
- Missing or damaged ties: Inspect your ties and anchors. If many are missing or damaged, call a pro.
- Uneven walls or bulging veneer: Serious structural issues may require immediate attention from a professional.
- Manufacturer instructions: Ask for copies of the original installation instructions used on your home.
- Flashing evidence: Request details about the flashing system installed, including materials and locations.
- Tie schedules: Inquire about the tie schedule used during construction to ensure proper spacing and placement.
- Warranty information: Gather any remaining warranty documents for your veneer system.
Quick rule: Don’t hesitate to call a professional if you’re unsure. It’s better to be safe than risk further damage or costly repairs.
Tools, Materials Checklist, and Specs to Verify Before Work
Prepare a practical tools list and ensure you have the right components for WRB, flashing, and drainage. Confirm that the veneer system is compatible with the backing wall and climate conditions. Double-check that all items meet the project’s standards.
Review key material specs and codes on product labels or datasheets before starting. If in doubt, verify requirements with the manufacturer instructions or local building codes to avoid mismatches.
Tools and safety equipment for inspection and minor repairs
Before you start any work, make sure you have the right tools to ensure your safety and the job’s success.
- Hard hat: Protects against falling debris during inspections or minor repairs.
- Safety glasses: Essential for eye protection from dust, debris, or small particles.
- Gloves: Prevents cuts and improves grip when handling materials.
- Tape measure: Accurate measurements are crucial for proper installation and repair.
- Level: Ensures walls and structures are plumb, level, and square.
- Chalk line: Helps mark out lines for cutting bricks or indicating expansion joints.
- Trowel: Used for applying mortar during minor repairs or repointing.
- Hammer: For tapping ties into place, removing old mortar, or breaking up damaged areas.
- Safety harness: Required when working at heights to prevent falls. Structural repairs should be performed by qualified contractors.
Quick rule: Always prioritize safety first. Use appropriate PPE and follow manufacturer guidelines for tool usage.
Material specs, standards, and documentation to check
Before purchasing materials or starting work, verify the following specifications and standards to ensure compliance with building codes and manufacturer guidelines.
- Manufacturer installation guide: Follow the recommended steps for proper installation and maintenance.
- Building code provisions: Check local building codes for specific requirements related to veneer systems in your area.
- Relevant standards (e.g., ASTM C140, ACI 530): Familiarize yourself with masonry and flashing guidance from these standards.
- Corrosion class: Confirm the corrosion resistance of ties and anchors to prevent early failure. Class 3 is recommended for most applications.
- WRB compatibility: Ensure the water-resistive barrier (WRB) used is compatible with the veneer system and follows manufacturer guidelines.
- Approved adhesives/fasteners: Use only approved materials to avoid compromising the integrity of the system.
- Mortar type and mix ratio: Follow recommended mortar types (e.g., N, S, M7.5) and mix ratios for optimal performance.
- Brick size and dimensions: Verify bricks meet specified sizes to ensure proper fit and alignment during installation.
- Flashing details: Check that flashing materials and installation methods comply with relevant standards and building codes.
Quick rule: Always confirm material specifications, compatibility, and adherence to applicable standards before starting any work.
Conclusion
Brick veneer projects last when you respect the drainage path, air gap, and proper ties; these details protect against moisture damage and costly repairs, and they help your finish look right for years. Stay methodical, test small areas first, and don’t rush through critical steps that affect permanence and safety.
Apply this as a simple, practical routine: start by confirming you have the correct air gap and drainage plane, then verify flashing and weep paths are clear and continuous, next double-check ties and anchors for proper load transfer without pinching the drainage channel, and finally inspect after installation and periodically during maintenance. Do the work in a logical order, keep the surface clean, measure and recheck gaps before mortaring, and call out anything that looks damaged or off-spec before proceeding. If you’re unsure about the spec to verify, review the Tools and Materials Checklist and the Specs to Verify Before Work, then confirm with a pro before fastening anything permanently. Don’t skip the drainage path or the flashing, and always keep the work area safe and dry to avoid slips and tool damage.
Common mistakes to avoid include trying to bond veneer where there’s not a real air gap or drainage plane, over-tightening ties that crush the space for water to drain, and ignoring weep and flashing paths that cap moisture behind the veneer. Always maintain clean, dry surfaces, test the area with a small, reversible trial, and use proper protective gear to prevent injuries and accidental damage to existing structure. If you see stray mortar blocking weep holes, or any sign of moisture intrusion during testing, stop and address it before continuing.
If the job feels beyond your comfort level or you uncover hidden moisture or structural concerns, don’t push ahead solo—calling a qualified mason or exterior specialist can save you time, money, and damage. With careful steps, cautious testing, and clear checks, you’ll finish with a durable, safe veneer that looks good and lasts. You’ve got this—steady, deliberate work now pays off later.
FAQ
What are the telltale signs that the air gap and drainage plane aren’t doing their job?
Look for damp patches on the interior walls, efflorescence, or staining near the veneer. On the outside, you might see pooling water, staining, or the veneer feeling soft behind the joints after a rain. If you notice cracking or loose veneer, it can mean water isn’t draining away properly.
How can I check the weep holes and flashing during a DIY inspection?
Peek behind any accessible exterior joints or cleanouts for blocked weeps or debris. If water isn’t draining from the weeps when you poke them gently, they may be clogged. Make sure flashing runs continuously and properly directs water away from the substrate.
What simple steps can I take to prevent water from getting behind brick veneer?
Keep the drainage plane clear of dirt and vegetation. Ensure proper capillary break and that weep channels stay open. Use clean, appropriate flashing and verify there’s a clear path for water to exit the veneer system.
If I’m replacing damaged veneer or doing repairs, what should I verify before starting?
Check that the replacement veneer and anchors are compatible with your existing system and follow the manufacturer’s instructions. Verify that surface prep, backer materials, and caulking meet the product specs and local practice. If in doubt, ask for labels or datasheets and follow the guidance.