
Introduction
Brick repointing is the process of renewing the mortar between bricks to restore strength and look. This article focuses on doing it without leaving drool lines or smeared mortar, especially along vertical joints. We’ll talk through practical steps you can do on a DIY basis with common tools.
Control vertical joints by tooling and cleaning as you work, keeping a consistent depth and shoulder along each joint. Wipe vertical joints with a damp sponge or a clean rag after tooling to minimize smears, and work in short passes while the mortar is workable. Always check the mortar mix instructions and local rules for any requirements, and verify with the product label or manufacturer guidance before starting.
Key takeaways
- Identify drool line patterns on vertical joints to plan masking and timing.
- Prepare the wall and work area to minimize run-off and staining.
- Keep mortar mixed to workable consistency; adjust with lime or cement as directed.
- Use vertical joint templates or tight jointing to control drool margins.
- Wear eye protection and gloves; finish damp joints to prevent drips.
- Inspect after curing; clean drips promptly and seal any minor gaps.
Table of Contents
- Introduction
- Key takeaways
- What Are Drool Lines and Why Vertical Joints Behave Differently
- Preparing the Wall and Work Area to Minimize Run-Off
- Tools and Materials Checklist for Vertical Joint Control
- Mixing and Modifying Mortar Without Compromising Strength
- Step-by-Step Application Techniques to Prevent Drools
- Jointing and Finishing Tricks That Hide or Prevent Drips
- Cleaning, Curing, and Inspecting Without Leaving Marks
- Troubleshooting, Repairs, and Long-Term Maintenance
- Conclusion
- FAQ
What Are Drool Lines and Why Vertical Joints Behave Differently
Drool lines are the streaks that run along masonry joints when mortar flows or drips during tooling. They happen more on vertical joints because gravity pulls liquid mortar downward as it sets. Surface tension and tight joint geometry also guide how mortar settles, creating those telltale marks.
Think of it as a flow problem: liquid mortar wants to level, but the vertical face and the shape of the joint resist that flow in the same way every time. If you need exact specs, check the product data sheet or manufacturer instructions for your mortar type and joint profile.
Typical causes of drool lines
Drool lines, those unsightly drips and streaks on your freshly repointed brickwork, are often the result of a few common mistakes. Let’s identify them so you can spot and fix the root cause.
Too-wet mortar is one culprit. Mortar that’s too wet won’t hold its shape in vertical joints, leading to drool lines as it sags and drips.
Slow tooling, or not working quickly enough to strike the joint before the mortar sets, can also cause drool lines. The longer you wait, the more likely the mortar is to sag and drip.
Poor sequencing—trying to repoint too many joints at once—can lead to drool lines as well. When you’re working on a large area, it’s hard to keep up with tooling all the joints before the mortar sets. And finally, lack of temporary backing can cause drool lines. Without something to support the mortar in vertical joints, it’s more likely to drip and streak.
When drool lines are cosmetic vs. structural
Not all drool lines are created equal. Some are just a surface finish issue, while others can indicate deeper problems that need attention.
To tell the difference, judge by touch as well as sight. If a drool line feels soft or crumbles under light pressure, it’s likely a sign of poor compaction. The mortar didn’t set properly in the joint, leaving voids that can weaken the wall over time.
If a drool line is hard and doesn’t give when you press on it, but still looks unsightly, it’s probably just a cosmetic issue. The mortar was too wet or took too long to tool, but it set properly in the joint.
Remember, even if a drool line is just cosmetic, it’s still worth fixing. Cosmetic issues can become bigger problems over time, and they’ll make your hard work look sloppy. So, take the time to identify the cause and fix it right.
Preparing the Wall and Work Area to Minimize Run-Off
Start with a clean, dry surface and remove loose particles that can trap extra mortar. Protect adjacent surfaces with drop cloths or film so stray drips don’t become stains. Set up a staging area that keeps tools at hand and minimizes overtime handling of fresh mortar.
Pre-wet or re-saturate the wall only as needed to avoid rapid suction, and keep the work area organized so you’re not chasing drips across the surface. If you’re unsure about surface prep requirements, refer to the substrate specs, local rules, or manufacturer guidance before you begin.
Cleaning, raking, and wetting the joints
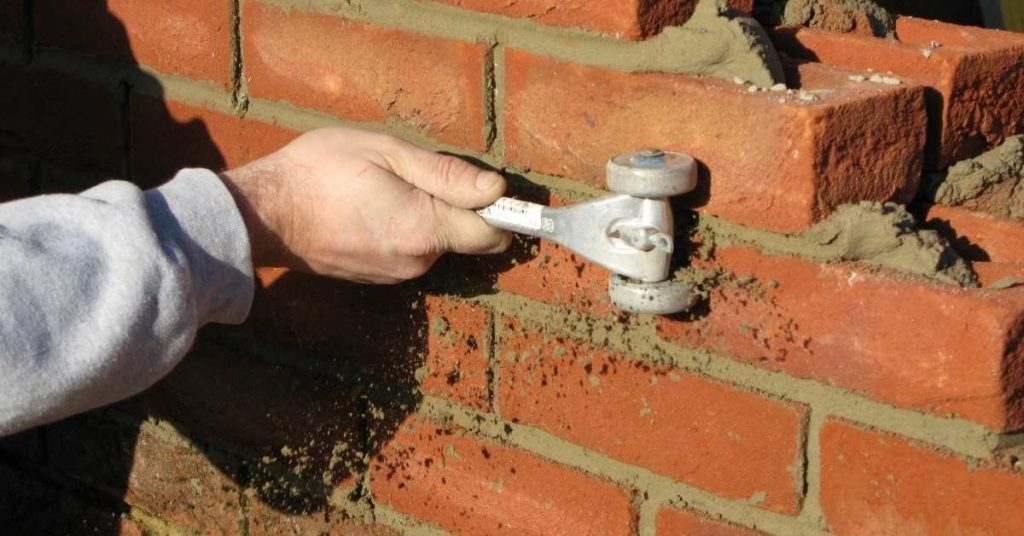
Before you start repointing, clean out those old mortar joints. Use a brick jointer or a flathead screwdriver to rake them out.
Be careful not to damage the surrounding bricks. Once cleaned, wet the joint lines lightly with a spray bottle. This helps improve mortar adhesion and prevents it from sucking moisture out of the new mortar.
But don’t overdo it – too much water can cause slumping. A light mist is all you need.
Temporary protection and masking strategies
Protect your walls and surrounding areas from mortar drips. Use painter’s tape to mask off windows, doors, and other openings.
Lay down drop cloths or plastic sheets at the base of the wall to catch any run-off. You can also use sacrificial strips – thin pieces of wood or cardboard – to protect corners and edges.
Set up your scaffolding properly. Make sure it’s stable, level, and tall enough to reach without overreaching.
Environmental controls to prevent sagging
Mortar can behave differently in different weather conditions. Keep an eye on the forecast and plan accordingly.
On windy days, try to work on the leeward side of the wall. If it’s too breezy, consider rescheduling. Sun exposure can also cause mortar to dry too quickly, leading to sagging or stringing. Work in shaded areas when possible.
Control evaporation. Keep your mixed mortar covered until you’re ready to use it. And if it’s a hot day, consider adding a bit more water to your mix to slow down drying time.
Tools and Materials Checklist for Vertical Joint Control
Have basic pointing tools, a grout bag or masonry trowel for verticals, and a straightedge to keep lines true. Bring a hawk or small tray, masking or painter’s tape for sharp edges, and a damp sponge for quick cleanup. Optional jigs or guides can help maintain consistent joint width and finish.
Include mortar for repointing, bonding agents if recommended, and a sealer or curing aid only if your project requires it. Always verify tool compatibility and material compatibility with the product label or manufacturer instructions before use.
Essential tools and profiles
Before you start, ensure you have the right tools for vertical joint control. Here’s a checklist to help.
- Jointers: Use narrow jointers (1/4″ – 3/8″) for tight joints. Wider ones (1/2″ – 3/4″) for wider joints.
- Narrow trowels: For applying mortar, use trowels with a blade width matching your joint size.
- Rakers: Use a raking tool to clean out old mortar. Ensure it’s sharp and fits your joint.
- Tuckpointing guns: Optional, but useful for applying mortar in narrow joints.
- Profiles: Choose profiles that match your joint width. Square or V-shaped profiles work best vertically.
Quick rule: The right tool makes vertical repointing a breeze. Don’t skimp on quality.
Material specs and consistency guidelines
Choosing the right materials is crucial for vertical joint control. Here’s what to check:
- Mortar type: Use a Type N or Type O mortar for repointing. They’re strong and durable.
- Aggregate size: Choose fine aggregate (1/8″ – 3/8″) for narrow joints, medium (3/8″ – 1/2″) for wider ones.
- Consistency: Aim for a stiff consistency. It should hold its shape but not crumble. Check manufacturer guidance for exact mixes.
Quick rule: Stiff mortar reduces sagging and drooling in vertical joints.
DIY templates, backings, and disposable guides
These simple tools help control vertical joint lines. Here’s how to use them:
- Foam strips: Cut foam insulation strips to fit your joint width. Stick them on the wall to create a temporary stop for mortar.
- Cardboard guides: Use thin cardboard cut to joint size. Tape it onto the wall before applying mortar.
- Removable tape dams: Apply painter’s tape along your joint lines. It acts as a dam, preventing drooling.
Quick rule: These simple guides help keep vertical joints clean and straight.
Mixing and Modifying Mortar Without Compromising Strength
Mix mortar to a workable consistency that stays on the joint without slumping. Avoid over-watering, which weakens set and increases run-off potential. If you need longer work time, consider approved additives and follow label directions closely.
Document how your chosen admixture affects set time and strength, and test a small batch if possible. When in doubt, check the product data sheet or manufacturer recommendations for vertical applications and local code requirements.
What the right consistency feels like
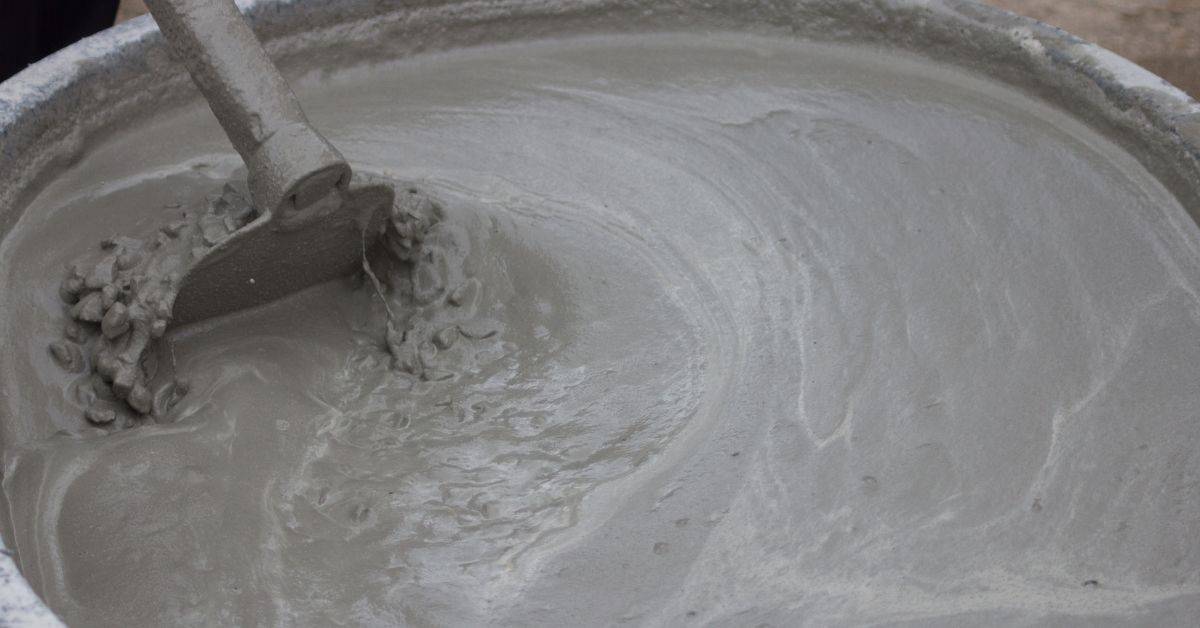
The perfect mortar for vertical joints should hold its shape on your trowel, not slump or drip. Here’s how to check:
Scoop a small amount onto your trowel. It should stay put, not run off. Now try shaping it with your finger. If it holds the new shape without sagging, you’re good to go.
Too wet? It’ll be too slippery and won’t hold its shape. Too dry? It’ll crumble. Find that sweet spot in between.
Safe use of retarders, plasticizers, and water reducers
These admixtures can help control set time and workability. But be careful:
Retarders slow down setting time. Use sparingly to avoid long-term strength issues.
Plasticizers make mortar more flexible, helping it stick better in vertical joints. Again, a little goes a long way.
Water reducers let you use less water for the same consistency. This can improve strength but too much can cause long-term problems. Always check product instructions.
Temperature and moisture considerations during mixing
Ambient temperature and brick moisture can affect your mortar’s set time:
In hot weather, everything sets faster. Mix smaller batches more often to keep it workable.
Wet bricks? Let them dry out first or the excess water will throw off your mix ratio. If they’re really damp, you might need to add some sand to maintain the right consistency.
Cold weather slows down setting time. You might need to use a faster-setting mortar or protect the area from freezing temperatures.
Step-by-Step Application Techniques to Prevent Drools
Begin with mounting and aligning your first courses so the vertical joints are clean and accessible. Fill the joint carefully from bottom to top, controlling the volume to minimize overflow. Tool the joint with steady motions to press mortar into the joint and remove excess material as you go.
Work in short, deliberate passes and wipe excess mortar promptly with a damp sponge. If you need a specific method for your mortar and joint, consult the manufacturer instructions or product label for recommended sequence and timing.
Step-by-Step Process
The following steps will guide you through applying concrete while minimizing drools, ensuring a smooth finish and preventing costly mistakes.
- Check weather: Ensure temperature is between 50°F-90°F (10°C-32°C) for best results. Check: Look up the current day’s forecast.
- Prepare surface: Ensure base is clean, dry, and stable. Check: Run a trowel over the surface to feel for any imperfections.
- Mix concrete: Follow manufacturer’s instructions for proper water-cement ratio (typically 4-5 parts cement to 1 part water). Check: Consistency should be like thick oatmeal, not too wet or dry.
- Pour and spread: Pour concrete into forms, then use a shovel and rake to spread evenly. Check: Surface should be level with forms.
- Vibrate and screed: Use a vibrator to remove air pockets, then screed off excess concrete. Check: Surface is smooth and even.
- Float and bullfloat: After 15-30 minutes (when bleed water has disappeared), use a float to bring cement to surface, then bullfloat for final smoothing. Check: Surface is smooth and free of imperfections.
- Cure properly: Keep concrete moist and covered for 7 days to allow proper curing. Check: Do not let it dry out too quickly.
Pro tip: Always wear appropriate safety gear, including gloves, goggles, and a dust mask when working with concrete.
Top-down sequencing and work increments
Listen up, DIYer. You wanna avoid those ugly drools on your fresh concrete? Here’s how you do it: work from top to bottom in short vertical runs.
Why? Well, if you try to pour the whole wall at once, that cured mortar on top is gonna pull on the fresh stuff below when it sets. That’s how you get those nasty drools and weak joints.
So here’s what you do: Divide your wall into manageable sections, about 4 to 6 feet high each. Start at the top and work your way down. This way, by the time you’re done with one section, the one above it is already set and won’t pull on the fresh concrete below.
Controlled packing, compressing, and tooling
Timing is key when it comes to packing your mortar. You want it to bond well with the base and leave a clean face without excess squeeze-out.
Check your mix design. It should be stiff enough to hold its shape but not so dry that it won’t bond properly.
Once you’ve mixed your mortar, let it sit for about 10-15 minutes. This gives the cement time to hydrate and makes packing easier. But don’t leave it too long or it’ll start to set.
Check base compaction. Before you start packing, make sure your base is well-compacted. You don’t want any voids that could cause your mortar to settle unevenly.
Now, pack your mortar in layers no more than 2-3 inches thick. Use a straight edge trowel or a darby to strike off the excess and ensure a smooth surface. Work quickly but carefully to avoid overworking the mortar.
Using dispensing guns, spatulas, and hand-packing tips
When working with narrow vertical gaps, you’ve got two main tools: tuckpointing guns for wider gaps, and hand-packing for tighter spots. Here’s how to use ’em right.
Tuckpointing Guns: These are great for gaps over 1/2″. They’re faster but need a steady hand. Check your gun’s nozzle size – it should match or be slightly smaller than your gap. Too big, and you’ll get drools. Too small, and you won’t fill the gap properly.
Hand-Packing: For gaps under 1/2″, hand-packing is your best bet. Use a pointed trowel or spatula to push mortar into the gap. Check base compaction first – if it’s not solid, pack more mortar in before tooling.
Consistency is key. Whether you’re using a gun or packing by hand, work in small increments from top to bottom. That way, you won’t get drools and your joints will look pro.
Jointing and Finishing Tricks That Hide or Prevent Drips
Use a consistent joint profile that hides minor imperfections, and finish with a light, even pressure to compress the mortar without forcing it out. A slight feathering motion at the edge helps blend any small drips into the surface texture. Keep a clean edge line by wiping along the joint after tooling.
Consider non-drip finishing techniques like pre-wet tooling surfaces or using a finishing tool designed for vertical joints. If you’re unsure about the finish approach, verify guidance from the mortar manufacturer or local building standards before applying.
Preferred joint profiles for vertical runs
The right joint profile can make a world of difference when it comes to preventing drool lines on your brickwork. Here are three profiles that shed water well and are easier to finish:
Concave joints – These have a curved, bowl-like shape. They’re great for vertical runs as they help water drain away from the face of the wall.
Vee joints – Vee joints have a ‘V’ shaped profile. They also encourage water to run off, rather than sitting in the joint and potentially dripping down.
Flush joints – Flush joints are level with the face of the brick. While they don’t shed water as well as concave or vee joints, they’re still a good option if you’re careful about your finishing techniques.
Tooling motions and timing to avoid streaks
Timing is crucial when it comes to tooling your mortar joints. Here’s a simple guide:
- Within 15-20 minutes of packing – This is the sweet spot for tooling. The mortar is still soft enough to shape, but not so soft that it smears.
- Use smooth, even strokes – Start at the top and work your way down. Keep your tool flat against the joint and use a consistent pressure.
- Angle your tool – For concave or vee joints, angle your tool to match the profile. This helps create a clean, uniform shape.
- Consider rentable tools – If you’re doing a lot of brickwork, consider renting a power jointer. They can save time and effort, but expect to pay around $50-$100 per day.
- Avoid tooling in direct sunlight – Heat can cause the mortar to set too quickly, making it hard to tool properly.
Sacrificial beads and controlled drip channels
Sometimes, no matter how careful you are, drool lines can still happen. Here are a couple of tricks to help manage them:
Raised beads – These are temporary beads that sit above the face of the brickwork. They catch any drips and prevent them from running down the face of the wall. Once the mortar has set, you can simply cut them off.
You can make your own raised beads using plastic or metal strips, or buy them pre-made. Expect to pay around $1-$2 per linear foot.
Controlled drip channels – These are intentional grooves or channels that direct water away from the face of the wall. They’re usually cut into the mortar after it’s been packed but before it sets.
You can use a special tool to cut these channels, or even a simple screwdriver. The key is to keep them consistent and straight.
Cleaning, Curing, and Inspecting Without Leaving Marks
Clean mortar residue promptly while the mortar is still workable to avoid hardened streaks. Use a damp sponge or cloth and work from the center of the joint outward to minimize new drips. Allow the wall to cure under proper conditions as recommended for your mortar type.
Inspect the joints for uniform height and edge sharpness, addressing any irregularities while the material is fresh. For cure and inspection requirements, refer to the product label or manufacturer instructions and follow local guidelines as needed.
Safe cleaning methods for fresh mortar
Cleaning fresh mortar requires a gentle touch to avoid disturbing uncured joints. Timing is key here.
First, wait 24-48 hours after repointing before you start cleaning. This gives the mortar time to set but not cure fully, making it less susceptible to damage.
Use a soft-bristled brush or damp sponge with clean water. Gently wipe away any excess mortar from the face of the bricks. Be careful not to scrub too hard as this can push mortar into the joints or dislodge uncured material.
Curing practices to avoid shrinkage and streaks
Proper curing is crucial for preventing shrinkage cracks and unsightly streaks. Here are some common mistakes to avoid.
- Avoid direct sunlight: Sunlight can cause rapid drying, leading to shrinkage cracks.
- Keep joints moist: Mist the repointed areas lightly with water for the first few days to maintain consistent moisture levels.
- Cover during rain: Protect the area from heavy rainfall until the mortar has fully cured. A tarp or plastic sheet can be used.
- Avoid extreme temperature changes: Sudden heat or cold can cause stress on the curing mortar, leading to cracks or streaks.
Remember, consistent moisture and protection from extremes are key for a successful cure.
Visual checkpoints and final touch-up checklist
Before declaring the job done, perform a visual inspection to ensure consistent joints. This should be done after the mortar has fully cured.
- Check for level lines: Ensure all joints are level with each other. Any droops or dips indicate areas that need touch-up.
- Look for voids: Inspect for any hollow spots in the joints, which could indicate improper packing or curing issues.
- Examine for cracks: Check for hairline cracks, which may have formed due to shrinkage or stress during curing.
- Inspect joint width: Ensure all joints are of consistent width. Narrow or wide spots need touch-up.
- Check for streaks: Look for any discoloration or streaking, which could indicate improper cleaning or curing.
- Verify tooling marks: Make sure tooling marks are even and consistent across all joints.
Quick rule: If you find issues, touch them up immediately. Fresh mortar blends in better with older repointing than dried-out repairs.
Troubleshooting, Repairs, and Long-Term Maintenance
For fresh drool lines, remove them promptly with the appropriate tool and rework the affected area before the mortar stiffens. For older lines, carefully rework and re-point to restore uniformity without damaging surrounding joints. Keep notes on what technique worked for future projects.
Establish a maintenance routine that includes periodic inspection and minor touch-ups as needed. If you face persistent issues, consult the mortar manufacturer guidance or local codes to determine acceptable repair methods and preventative steps.
Repairing fresh drool lines vs. cured streaks
Fresh drool lines are still tacky and can be easily repaired. Cured streaks, on the other hand, need a bit more work.
For fresh drool lines: Use a stiff-bristled brush to scrub away the excess mortar. Then, use a damp sponge to wipe clean. If needed, touch up with a small amount of new mortar.
For cured streaks: You’ll need to partially re-rake and patch these. First, score the streak with a trowel or chisel to create a ‘V’ shape. Remove any loose material. Then, apply fresh mortar, tooling it in as you would new work.
Preventative inspection schedule and common warning signs
Inspect your repointing work annually to catch any issues early.
- Cracking: Check for hairline cracks. These can widen over time, leading to bigger problems.
- Crumbing: Look for mortar that crumbles easily. This indicates weak mortar or water damage.
- Missing Mortar: If you see gaps where mortar should be, it’s a sign of deterioration.
- Efflorescence: White powdery deposits can indicate moisture issues.
- Discoloration: Changes in color could signal water damage or contamination.
- Structural Issues: Check for bulging, leaning, or other signs of structural problems.
- Plant Growth: If plants are growing in the joints, it’s a sign that moisture is getting in.
- Water Stains: These can indicate water penetration and potential damage.
Quick rule: If you notice any of these signs, don’t wait. Inspect further and address any issues promptly to prevent bigger problems down the line.
When to call a specialist
While DIY repointing can save you money, there are times when it’s best to leave it to the professionals.
Extensive decay: If more than 20% of your mortar needs replacing, it might be time to call in a specialist. They have the tools and experience to handle large-scale jobs efficiently.
Structural concerns: If you notice any signs of structural damage – like leaning walls or bulging bricks – stop work immediately and contact a professional. Structural issues can lead to serious problems if not addressed properly.
Repeated failures: If you’ve tried repointing before and the problem keeps coming back, it might be a sign that there’s an underlying issue you’re not addressing. A specialist can help diagnose and fix these persistent problems.
Conclusion
Finish with confidence by sticking to careful prep, controlled mortar work, and a steady inspection routine. The goal is durable joints and a clean look without creating new problems, so safety and deliberate steps come first.
Check your wall and area in sequence: verify moisture and surface condition, clear the area and protect any nearby finishes, gather and test your mortar mix on a small patch, set up your tools and containment for run-off, then apply in controlled passes, wipe, and cure with proper conditions while inspecting for drips and marks as you go.
Common mistakes to avoid are rushing the set, skimping on joint preparation, and using mixes that are too stiff or too loose. Keep to the rules: wear eye and skin protection, clean as you go to prevent buildup, and always test on a small area before proceeding to a full panel. If you see persistent drips, that’s a sign to slow down, rework the section, and recheck the mix and jointing technique.
If the project feels beyond your scope—large sections, deep cracks, or repeated failures—call a professional. There’s no shame in getting a second pair of eyes on it. With discipline and the right steps, you’ll finish with solid joints, a clean surface, and lasting results you can trust.
FAQ
How can I prevent drool lines when repointing vertical joints?
Keep the mortar out of sight of running water on the face. Work in small, controlled sections and wipe away excess before it skins. Use a steady, deliberate motion to minimize drips as you go.
What should I check on the wall before starting repointing?
Look for damaged or hollow joints and damp areas. Clean the wall and remove loose material. If you see moisture or cracks, address those first and follow manufacturer instructions for the mortar you’ll use.
How do I choose the right tool and motion for vertical joints?
Use a jointing tool that fits the joint size and style you want. Apply mortar with even pressure and pull or strike in a consistent direction to keep joints uniform. Avoid overworking the mortar, which can push excess material into or out of the joint.
What finishing steps help prevent new drips after tuckpointing?
Finish with a light, controlled pass to consolidate the joint without dragging excess material across the brick face. Wipe or trowel off high spots promptly and follow the mortar’s curing guidance from the label or manufacturer. Inspect for any missed areas once set and address promptly if needed.