
Introduction
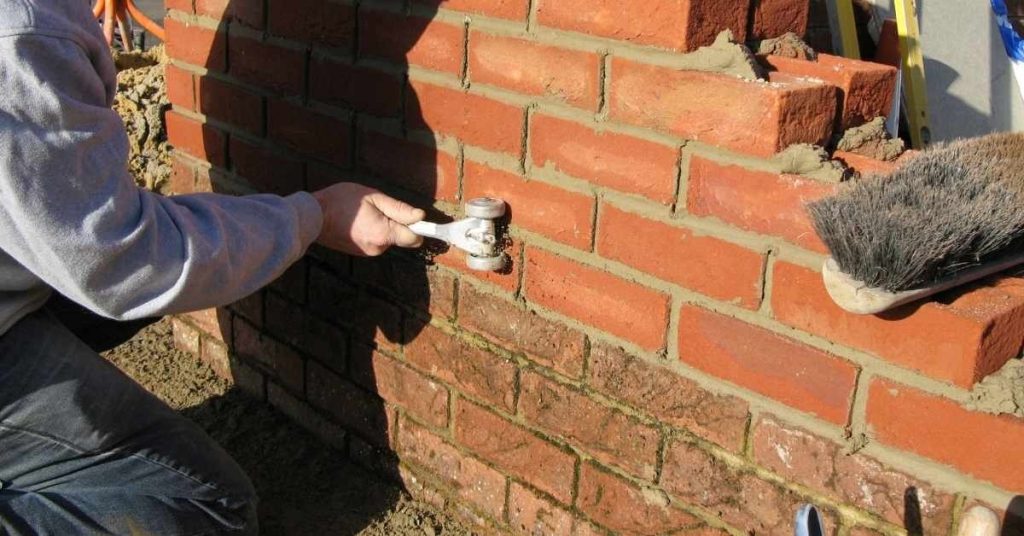
Brick tuckpointing is the process of repairing mortar joints to restore strength and appearance. This article gives a practical, hands-on approach you can use at home. You’ll learn basic prep, tooling, and curing ideas without fancy jargon.
Begin with a close inspection of the joints and determine whether you need to rake out damaged mortar. Follow general steps for cleaning, tooling, and curing, and always check manufacturer instructions and local rules for mortar type and curing time. Keep it practical: work in small sections, clean as you go, and verify you’re not over-replacing or wasting material.
Key takeaways
- Assess project scope and masonry condition before starting any DIY tuckpointing.
- Safety first: protect eyes, lungs, and footing; set up stable scaffolding.
- Choose compatible mortar and matching joint profiles to prevent cracking.
- Rake joints evenly and clean excess mortar for a neat finish.
- Mix mortar in small batches; test workability before full application.
- Cure under proper conditions; avoid direct sun, wind, and freezing.
Table of Contents
- Introduction
- Key takeaways
- Project Overview and Deciding When to DIY
- Safety and Site Preparation
- Tools and Materials Checklist
- Joint Assessment and Preparation
- Mortar Selection, Mixing, and Testing
- Tooling Techniques and Mortar Profiles
- Curing, Drying, and Weather Considerations
- Troubleshooting, Quality Checks, and Maintenance
- Conclusion
- FAQ
Project Overview and Deciding When to DIY
Tuckpointing focuses on renewing the mortar at the joints between bricks without removing the brick units themselves. It differs from a full repointing job, which typically involves deeper joint removal and brick work. You’ll want to weigh the scope, height, and access, plus your comfort with masonry work, before deciding to DIY or hire a pro.
Use a clear plan to determine if the project is within your skill set. Check local rules or HOA guidelines if applicable, and verify any required inspections or permits that might apply. When in doubt, consult the manufacturer instructions for materials and seek a professional opinion for safety and warranty considerations.
DIY vs Professional Scope Checklist
Before you grab your trowel, check these points to ensure a successful DIY tuckpointing job.
- Joint condition: Cracks should be less than 1/4 inch wide. Wider cracks may need full repointing or structural inspection.
- Brick condition: No missing, cracked, or loose bricks. If so, replace them first.
- Wall stability: Walls should be plumb and level. Any movement could indicate structural issues.
- Accessibility: You can reach all joints easily with your tools. Safety ladders may be needed.
- Time commitment: Tuckpointing takes time. Ensure you have enough to complete the job properly.
- Skill level: Previous masonry experience helps, but patience and careful work are key.
- Weather conditions: Temperatures should be above freezing and no rain is forecast for at least 24 hours after tuckpointing.
- Job size: Small to medium-sized jobs (up to a few hundred square feet) are best for DIY.
Quick rule: If you’re unsure about any of these points, consider hiring a professional.
Permits, Regulations, and Structural Concerns
Before starting, check if your local building department requires permits for tuckpointing. Some areas may need inspections or have restrictions on DIY work.
Structural concerns: If you notice any movement, leaning, or excessive cracking in the walls, stop and consult a structural engineer before proceeding. These signs could indicate serious issues that need professional attention.
Also, check for any hidden utilities (like gas lines) before digging out old mortar. You can call your local utility companies to have them marked.
Lastly, ensure you’re following any homeowner association (HOA) rules or neighborhood guidelines regarding tuckpointing and exterior modifications.
Safety and Site Preparation
Start with a safety mindset. Wear eye protection, gloves, and a dust mask or respirator as needed. Footing and a solid ladder setup are essential for any elevated work.
Protect the work area by setting up plastic or tarps to catch dust, and create a clear perimeter to keep children and pets away. Check weather conditions and plan for consistent moisture control to avoid freeze-thaw damage during curing.
Personal protective equipment and hazard controls
Safety comes first when working with masonry. Here’s what you’ll need to protect yourself and control hazards.
- Hard Hat: Protects against falling debris. Choose one that fits well and meets ANSI Z89.1 standards. Around $20-$50.
- Safety Glasses: Shields eyes from dust and small particles. Look for ones with side shields or wrap-around style. About $10-$30.
- Dust Mask or Respirator: Essential for protecting against mortar and silica dust. Use a NIOSH-certified N95 mask or respirator. Around $10-$20 each.
- Work Gloves: Protect hands from cuts, burns, and vibrations. Leather or synthetic gloves work well. Expect to pay $10-$30 per pair.
- Ear Protection: Reduces noise levels from tools. Disposable foam earplugs are cheap ($5-$10 for 200 pairs) or consider reusable earmuffs ($10-$30).
Worksite setup and scaffolding tips
Setting up a safe workspace is crucial for successful tuckpointing. Here’s how to do it right.
First, clear the area of any debris or obstacles. Then, lay down drop cloths or tarps to protect adjacent surfaces from mortar splatter and dust. You can rent these for around $10-$20 each.
Next, consider your access needs. If you’re working above ground level, you’ll need scaffolding. Renting a scaffold will cost around $50-$150 per day, depending on size and type. Always ensure it’s set up properly:
- Level: Make sure the scaffold is level and stable before climbing.
- Secure: Tie off the scaffold to a secure point every 10 feet or so using ropes or chains.
- Guardrails: Use guardrails to prevent falls. Rent them for around $5-$10 each.
Lastly, if there are any plants or vegetation near your work area, cover them with plastic sheeting to protect against mortar and dust. You can buy a roll for about $10-$20.
Tools and Materials Checklist
Gather basic hand tools such as chisels, trowels, joint rakes, and a stiff brush. You may also need a mixer or drill with a paddle for small batches of mortar.
Choose compatible mortar types for your brickwork and have a mortar bag or hawk for placement. Verify material bags and labels for suitability, and follow any manufacturer or local guidelines for storage and handling.
Essential hand and power tools
Before you start tuckpointing, make sure you have the right tools for the job. Here’s a checklist to help you.
- Masonry chisels: 1/2″ and 3/4″ widths for removing old mortar.
- Tuckpointing tool (or joint raker): For cleaning out joints.
- Grinder with diamond blade: For grinding out deep or hard-to-reach areas. Use it sparingly to avoid damaging bricks.
- Pointing irons: Various sizes for applying new mortar.
- Hammer: For tapping pointing irons and chisels.
- Trowel (hawk): For mixing and carrying mortar.
- Broom or stiff brush: For cleaning up after work.
- Safety glasses: Protect your eyes from debris. Don’t skip this!
Quick rule: Always have the right tool for the job to avoid damage and rework.
Mortars, additives, and colorants
Choosing the right mortar is crucial. Here’s what you need to know.
- Type of mortar: Use an N or M type for tuckpointing. N-type is stronger but harder to work with.
- Cement-to-sand ratio: Aim for 1:3 or 1:4 by volume. Too much cement makes the mortar strong but brittle.
- Additives (plasticizers, accelerators): These improve workability and set time. Follow package instructions.
- Pigment/colorant: Match the existing color as closely as possible. Start with a small batch to test.
Quick rule: The right mortar mix ensures strong, durable joints that match your wall’s appearance.
Mixing and storage equipment
Proper mixing and storage of mortar ensure a good final product. Here’s what you need.
- Mixing container: A large, flat-bottomed tub or wheelbarrow works best.
- Hoe or drill mixer: A hoe is manual; a drill mixer is faster but requires power and water.
- Water source: Clean water for mixing. Don’t use salty or contaminated water.
- Mortar hawk (trowel): For carrying mixed mortar to the wall.
- Plastic sheeting: Cover mixed mortar to keep it moist during storage.
- Sealed container: Store bagged products in a sealed container to keep them dry.
Quick rule: Proper mixing and storage ensure your mortar stays workable and strong.
Joint Assessment and Preparation
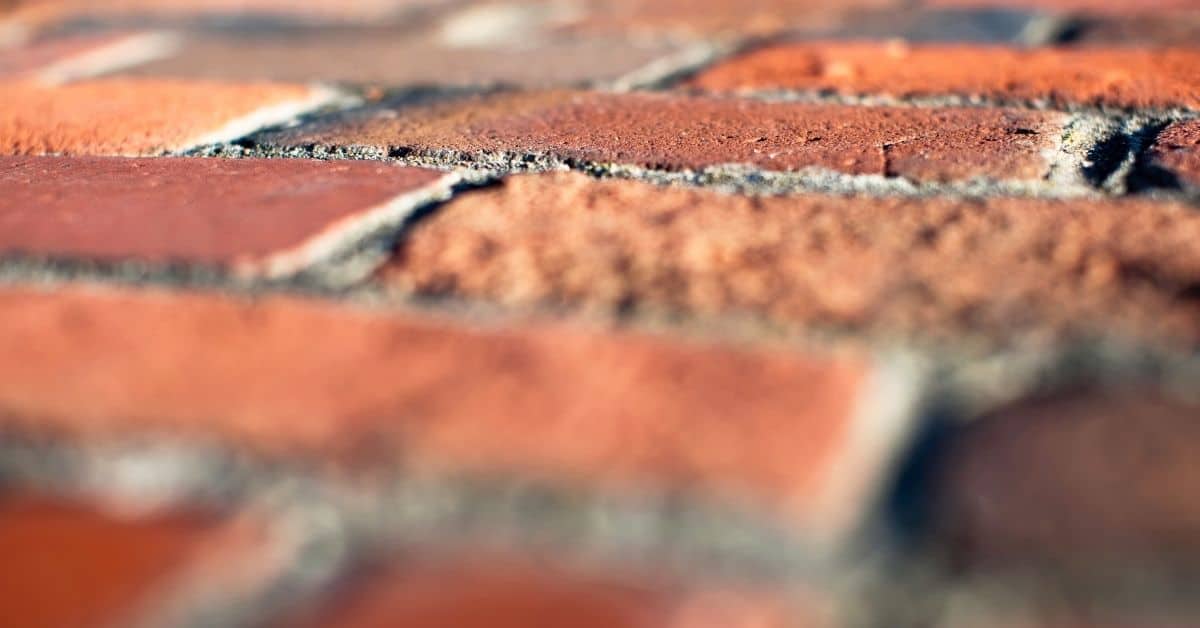
Inspect joints for cracking, softness, or missing mortar. Note any signs of moisture damage or gypsum patching that might affect adhesion.
Measure or estimate joint depth and width, and remove deteriorated mortar to a stable base. Ensure the joint walls are clean and dry before applying new mortar, and verify your approach with the product instructions.
How to inspect and measure joints
Start by visually checking your brickwork. Look for cracks, crumbling mortar, or missing pieces. These are signs that the joint needs repair.
Next, use a flat-bladed tool like a trowel or a wide chisel to gently tap along the joints. A hollow sound indicates empty spaces inside the wall, which could mean water damage or instability.
Now, measure the depth and width of the joint using a ruler or a combination square. You’ll need this info to decide how much old mortar to remove and what type of new mortar to use. Document these measurements for each section you plan to repair.
Mortar removal methods and best practices
For narrow joints, a cold chisel and hammer work well. Start at the outer edge of the joint, tapping gently to avoid damaging bricks.
For wider joints or large areas, consider using an angle grinder with a diamond blade. This method is faster but requires more control to prevent brick damage. Always wear safety glasses and a dust mask.
Some pros use vacuum-controlled grinders for dust-free removal. If you’re renting equipment, this could be an option. But remember, the more complex the tool, the more skill you need to operate it safely.
Cleaning, dust control, and pre-wetting
After removing old mortar, clean out the joint using a stiff-bristled brush or compressed air. This removes any remaining debris that could weaken your new mortar bond.
Dust control is crucial. If you’re not using a vacuum-controlled grinder, wear a dust mask and safety glasses. Consider wetting down the area slightly to keep dust to a minimum.
Before applying new mortar, consider dampening the bricks with a spray bottle or a wet sponge. This helps the new mortar bond better and reduces suction that could cause cracking. But be careful not to oversaturate the bricks, as this can also lead to problems.
Mortar Selection, Mixing, and Testing
Choose a mortar mix that matches the surrounding masonry in texture and color as closely as possible. If in doubt, check the brick type and bond pattern for guidance from the manufacturer or local codes.
Mix in small batches according to label directions and do a quick test on a scrap joint or inconspicuous area. Always document and follow the product data sheet or manufacturer instructions for mixing ratios and curing times.
Matching mortar strength and appearance
To match existing mortar, first inspect the joints. You’re looking for hardness, color, and texture.
Hardness: Gently scratch a joint with a screwdriver. If it’s hard, you’ll need a strong Type N or Type M mortar. Soft? Go for Type O.
Color: Match the old color as best you can using pigments. It won’t be perfect, but close is good enough.
Texture: Feel the joint. If it’s smooth, use a smooth mix. Rough? Add some sand or aggregates to your mortar.
Mixing techniques and workability checks
Mixing is key. Start with clean water, then add cement, lime, and sand in that order.
Control water. Too much makes a soupy mix. Too little? It’s crumbly. Aim for a consistency like stiff cookie dough.
Workability: Check it by squeezing a handful of mortar. It should hold together but not be too sticky or dry.
Adhesion: Test on a scrap brick. If it sticks, you’re good to go.
Storage, shelf life, and batch sizing
Plan your batches right. Mix only what you can use in a few hours. Leftover mortar hardens fast.
Store unused materials in airtight containers. Keep them cool and dry to extend their life.
Shelf life: Check for signs of deterioration – like lumps or discoloration. If you see any, toss it.
Batch size: Start small. You can always mix more. But once it’s mixed, use it or lose it.
Tooling Techniques and Mortar Profiles
Use consistent tooling to create a uniform joint profile, and time your tooling for a smooth finish. Begin tooling before mortar skins over to avoid tracking or rough edges.
Practice on a test joint to dial in pressure and angle, and adjust based on how the mortar tolerates tool contact. If you’re unsure about profiles, verify with the product instructions or local masonry guidelines.
Tuckpointing versus repointing finishes
Tuckpointing and repointing are both crucial masonry repair techniques, but they serve different purposes. Understanding the visual differences helps you choose the right one for your project.
Tuckpointing: This technique involves removing only a small amount of old mortar from the joint, then filling it with fresh mortar to create a fine fillet or line. It’s ideal for maintaining the appearance of new brickwork and enhancing the overall aesthetic of your structure.
Repointing: Unlike tuckpointing, repointing involves removing all old mortar from the joint before refilling it with fresh mortar. This method is necessary when there’s significant damage or deterioration in the joints, as it restores structural integrity and prevents further decay.
Hand-tooling techniques and sequence
Using hand tools for tuckpointing allows for precise control over the finished joint. Follow this sequence to achieve consistent results:
- Packing: Use a pointing trowel to force mortar into the joint, ensuring it’s well-filled. Keep the trowel at a 45-degree angle to the wall and work in short, smooth strokes.
- Striking: After the mortar has set slightly (around 10-15 minutes), use a striking tool or jointer to remove excess mortar from the face of the joint. Hold it at a 45-degree angle and work in a smooth, continuous motion.
- Finishing: Once the mortar has set further (around 30-45 minutes), use a finishing tool to create the final profile. For tuckpointing, use a fine-bristle brush or wire tool to remove excess mortar and create a clean, crisp line.
- Optional tools: Rentable power tools like mortar hawks and pointing machines can speed up the process, but they require practice to master. Expect to pay around $50-$100 per day for rentals.
Tool maintenance and edge control
Maintaining your tools ensures crisp joint lines, reduces rework, and extends the life of your equipment. Follow these care tips:
- Cleaning: After each use, clean your tools thoroughly to remove any dried mortar. Use a wire brush or scraper for stubborn residue.
- Sharpening: Dull tools result in ragged joint lines and increased effort. Sharpen striking tools using a sharpening stone or file, maintaining the tool’s original bevel angle.
- Storage: Store your tools properly to prevent damage from moisture and impact. Keep them dry, covered, and separated to maintain their edges.
- Edge control: To create clean joint lines, ensure your tools are in good condition and use them at the correct angle. For tuckpointing, a 45-degree angle is typically best for striking and finishing tools.
Curing, Drying, and Weather Considerations
Control moisture during curing by protecting the new joints from direct sun, wind, and rapid drying. Follow a steady curing approach that suits the climate and material type.
Weather can affect color and strength, so plan for protected curing if rain or extreme heat is expected. Always refer to the product data sheet for recommended curing practices and protective measures.
Moist Curing and Protection Methods
Curing is crucial for new mortar to reach its full strength. Here’s how to keep it damp without overwatering:
Wet the joints before applying new mortar. This pre-wetting helps the new mortar bond better with the old.
Use plastic sheeting or burlap to cover the work area, keeping moisture in and wind out. Secure it at the edges with weights or bricks.
Mist the joints lightly with water daily for the first week, then every other day for the next two weeks. Be careful not to overwater, as this can weaken the mortar.
Working in Cold, Hot, or Wet Conditions
Weather affects mortar performance. Here’s how to protect your work:
Cold temperatures can slow curing and weaken mortar. Keep the area warm using heat lamps or insulated blankets.
Hot, dry conditions can cause rapid drying, leading to cracking. Cover the area with plastic sheeting to retain moisture and provide some shade.
In wet conditions, protect the work from rain by covering it with a waterproof tarp or plastic sheeting. Allow the area to dry before applying mortar.
Final Cleaning and Surface Treatments
After curing, clean the joints gently using a soft brush or damp cloth:
Be careful not to remove any mortar. If necessary, use a mild detergent solution.
Once cleaned, allow the surface to dry completely before applying any sealers or consolidants. Always check product labels for specific application instructions and safety precautions.
Troubleshooting, Quality Checks, and Maintenance
Keep a running checklist for common issues like tool marks, hollow sounds, or missing mortar along joints. Address problems promptly to prevent deeper damage.
Perform a visual and tactile inspection after initial set and again after curing to ensure a lasting repair. When uncertain, recheck labels, manufacturer instructions, or local guidelines to confirm the proper remedy.
Common defects and repair fixes
Tuckpointing, while durable, can face issues over time. Here are common problems and quick fixes:
Shrinkage cracks: These appear when mortar dries too fast. Fix: Moisten the joint before tuckpointing to slow down drying.
Poor adhesion: This happens if the old mortar wasn’t removed properly or the surface was contaminated. Fix: Ensure thorough cleaning and proper bonding of new mortar.
Color mismatch: The new mortar might not match the existing color. Fix: Adjust your mortar mix to match the original color as closely as possible.
Visual checkpoints and adhesion tests
After tuckpointing, perform these checks to ensure a lasting repair:
- Check joint profile: Ensure it’s uniform. How to confirm: Run your finger along the joint. Irregularities mean rework is needed.
- Inspect mortar bond: Check for proper adhesion. How to confirm: Gently tap the joint with a trowel. Hollow sounds indicate poor bonding.
- Examine surface cleanliness: Ensure no debris remains. How to confirm: Wipe the surface with a damp cloth. Dirt or residue means cleaning is needed.
- Look for efflorescence: This white powder indicates moisture issues. How to confirm: Check for it after the mortar has cured. If present, address any underlying water problems.
- Check for proper curing: Ensure the mortar has dried correctly. How to confirm: Gently press the joint. It should feel firm and not crumble.
- Inspect for cracks: Check for hairline or larger cracks. How to confirm: Look closely at the joints, both from a distance and up close.
- Verify mortar strength: Ensure it’s as strong as the original. How to confirm: Gently press the joint with your thumb. It should feel solid.
- Check for proper tooling: Ensure a smooth, even finish. How to confirm: Run your finger along the joint. Any rough spots mean retooling is needed.
Quick rule: If any of these checks fail, address the issue promptly to prevent further damage.
Long-term maintenance and touch-up tips
Maintaining your tuckpointing work ensures longevity. Here’s a simple maintenance cadence:
Annual inspection: Check for cracks, efflorescence, or other signs of wear. How to: Use the visual checkpoints listed above.
Semi-annual cleaning: Keep your masonry clean. How to: Gently wash with a mild detergent and water. Avoid high-pressure washing, which can damage joints.
Touch-ups: Address minor issues promptly. How to: Repoint small damaged areas using the same mortar mix and techniques used originally. If in doubt, consult your original tuckpointing records or seek professional advice.
Conclusion
Protecting people and the brickwork matters. Prioritize safety first so you don’t create hidden leaks or costly waste, and aim for a durable, clean finish that looks right and lasts.
Proceed in a steady, methodical way: assess the joint condition, wear the right PPE, clean and prepare the joints, select and mix mortar properly, test a small area, tool the joints to the correct profile, protect curing, and keep an eye on weather and drainage as you go. This is a practical checklist you can follow in order, and treat each step as a fixture you can repeat until the job is done well.
Avoid common missteps: never over-wet the mortar or the joints, don’t leave joints too shallow or too deep, and don’t rush curing or skip clean-up and tool maintenance. Practice good safety: eye and skin protection, dust control, and working during appropriate weather or with shelter, and always test a small patch first to catch problems before they scale.
If you’re seeing structural damage, widespread deterioration, or persistent moisture behind the brick, or you’re unsure about mortar type and compatibility, it’s time to call a professional. Stay steady, stay careful, and you’ll finish with joints that look sharp and hold up well for years to come.
FAQ
What should I double-check before starting tuckpointing on joints that look cracked or damaged?
Inspect the mortar joints for hollow spots or loose mortar. Scrape a small area with a punch to test soundness, and remove any loose material before repointing. Always follow the product label and manufacturer instructions for mortar re-pointing, and check local rules if they apply.
Which tools and safety steps are essential for DIY tuckpointing, and how can I avoid common mistakes?
Use a pointing trowel, joint raker, and a grinder with a properly rated diamond wheel or burr for removing old mortar. Wear eye protection, gloves, and a dust mask; secure ladders and scaffold if you need height. Don’t skimp on PPE, and follow the tool manufacturer’s guidance for safe use.
How do I handle weather and curing to prevent cracks or weaken the new mortar?
Work during mild, dry conditions and avoid days with rain or extreme heat. Protect fresh joints from rapid drying or freezing by shading and damp-curing as recommended by the mortar product you choose. Check the product label for curing guidelines and follow local weather advisories.
What are the warning signs of a bad tuckpointing job, and how should I fix them quickly?
Look for mortar that peaks unevenly, cracks forming after tooling, or joints that crumble when touched. If you see gaps, loose material, or loose bricks, remove and redo those sections. Re-check manufacturer instructions and consider pausing if conditions aren’t right or you’re unsure about the mix and tooling.