
Introduction
Small-batch brick mortar mixing means keeping the same amount of water in each mix so the mortar behaves the same every time. That consistency helps you get uniform workability and a solid mortar bed. Work in clean buckets, keep tools handy, and adjust only as needed to maintain that consistent texture.
To keep batches consistent, add water gradually and mix to a uniform, workable texture. Record how you mix and use the same water source and mixing time for each batch. If something feels off, check the product label or manufacturer instructions for water guidance and curing recommendations, and follow any local rules that apply.
Key takeaways
- Using consistent water across small batches prevents cracking and weak joints.
- Pre-measure water and components to keep batches repeatable and safe on site.
- Use proper tools: mixing bucket, trowel, mixer attachment, and scraper for accuracy.
- Check mortar stiffness visually and by hand to avoid over-watering or under-watering.
- Label batches and clean equipment promptly to prevent contamination and waste.
- Wear eye protection and gloves; unexpected splashes can cause injuries.
Table of Contents
- Introduction
- Key takeaways
- Why Consistent Water Matters for Small-Batch Masonry
- Tools and Materials Checklist for Accurate Small-Batch Mixing
- Measuring Water Accurately: Methods for Repeatable Batches
- Step-by-Step Small-Batch Mixing Procedures
- Mix Selection and Quick Recipes (How to Choose and Scale Safely)
- Visual and Tactile Checkpoints for Consistent Mortar
- Troubleshooting Common Small-Batch Problems and Adjustments
- Storage, Transport, Safety, and Cleanup for Small Batches
- Conclusion
- FAQ
Why Consistent Water Matters for Small-Batch Masonry
Small batches magnify the effect of every splash of water. Minor changes can alter workability, bonding, and curing in noticeable ways. Consistency helps you predict how the mix will behave from batch to batch.
When water is kept steady, you reduce the risk of weak joints and cracking down the line. Rely on a repeatable process to keep your mortar performance in line with expectations. If in doubt, verify the water guidance on the product label or manufacturer instructions.
Effects on strength and adhesion
Too much water weakens mortar. It dilutes the cement, reducing its ability to bind with sand and bricks. This leads to lower early-age strength.
Check your product datasheet. It’ll tell you the expected 28-day compressive strength at a specific water-cement ratio. Stick to that for predictable results.
Too little water, on the other hand, makes mortar hard and crumbly. It doesn’t stick well to bricks, affecting bond strength.
Strike a balance. Use just enough water to make a smooth, workable mix without diluting the cement too much.
Workability, open time, and finishing
Water content controls mortar plasticity. Too little water makes it crumbly. Too much makes it soupy and hard to tool.
Ideal water content gives you a mix that’s easy to spread and sticks well to bricks. It’s not too wet or dry, giving you the best workability.
Water also affects open time – how long mortar stays usable before setting. Too much water extends open time, but it can lead to segregation if not used quickly enough.
Keep an eye on your mix. If it starts drying out or segregating, remix it or discard and make a fresh batch.
Long-term durability and shrinkage risks
Inconsistent water can cause segregation. This happens when the mix separates into different components, weakening the mortar’s structure.
It also increases shrinkage as the mortar dries. Shrinkage cracks can appear on the surface, leading to crazing.
Consistency in water content helps mitigate these issues. It ensures even hydration and drying, reducing the risk of segregation and excessive shrinkage.
Regular maintenance can help manage any minor cracking that may occur over time. But consistent mixing is your best defense against major durability problems.
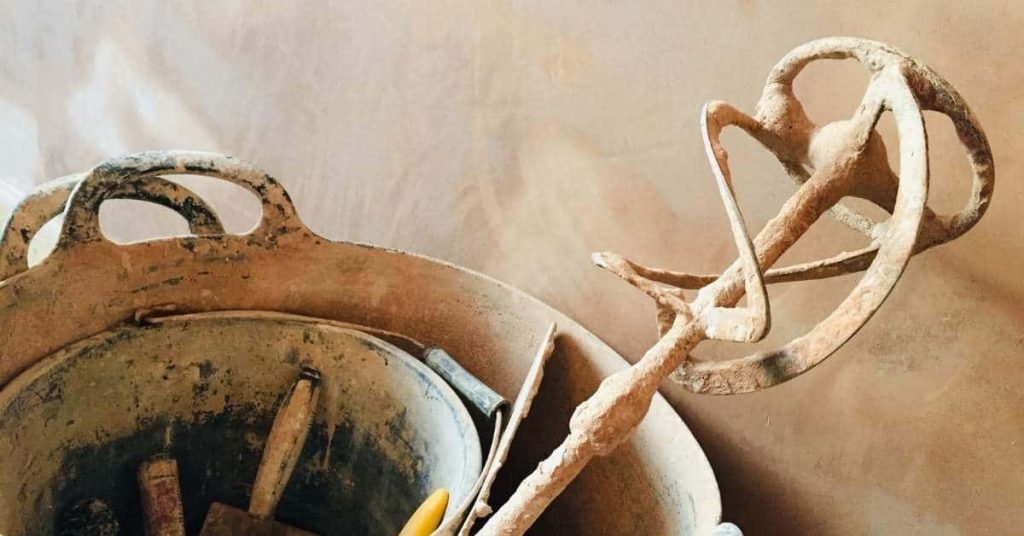
Tools and Materials Checklist for Accurate Small-Batch Mixing
Gather a compact set of tools that fit on a small job. A reliable scoop, a mixing container, and a sturdy paddle can make repeatable pours easier. Include a level of quality checks for the sand and cement you select.
Optional items like a drill mixer or small paddle mixer speed up consistency. Keep a note of how you store materials and inspect packaging labels for any mix-specific recommendations. Always cross-check product datasheets or local requirements before proceeding.
Essential tools (measuring, mixing, application)
Before you start mixing, make sure you have these essential tools to ensure consistent results.
- Calibrated buckets or containers: To accurately measure materials. Inconsistencies here lead to weak mortar.
- Mixing vessel: A large, flat-bottomed container for easy mixing and visibility of ingredients.
- Trowels: For applying and spreading mortar. Skipping this can cause poor adhesion.
- Reliable measuring device (scale): To weigh materials precisely, ensuring consistent water-to-cement ratio.
- Mason’s line level: To ensure your bricks are laid level and plumb.
- Brick jointer: For creating consistent joints between bricks.
- Gloves: To protect hands from cement burns and irritation.
- Safety glasses: Essential for eye protection during mixing and application.
Quick rule: Always use calibrated tools to maintain consistency in your mortar mix.
Material quality checks (sand, cement, lime)
Check your materials before mixing to ensure they’re up to par and won’t affect your mortar’s performance.
- Sand gradation: Check for consistent grain size. Too fine or coarse can weaken mortar.
- Sand moisture content: Dry sand is best. Wet sand increases water demand, affecting workability.
- Cement storage condition: Check for lumps and signs of moisture. Old or damp cement weakens mortar.
- Lime storage condition: Ensure lime is dry and free from lumps. Moisture can cause it to set prematurely.
- Cement type: Use Type N for most masonry work. Other types may not provide the right balance of strength and flexibility.
- Lime type: Hydrated lime is best for mortar. Quicklime can be dangerous to handle.
Quick rule: Always check your materials before mixing to avoid surprises later on.
Optional precision devices (scale, slump cone, moisture meter)
These tools can help you achieve even greater consistency in your small-batch mixing.
- Scale: For precise weighing of materials to maintain a consistent water-to-cement ratio.
- Slump cone: To test mortar workability. Too stiff or too fluid can cause application issues.
- Moisture meter: To check sand moisture content accurately, helping you adjust water demand as needed.
- Mortar mixer: For small batches, a hand-held mixer can ensure thorough mixing and reduce fatigue.
- Portland cement color chart: To help match the color of your mortar to your bricks or other masonry units.
Quick rule: While not essential, these tools can help you achieve professional results in your DIY projects.
Measuring Water Accurately: Methods for Repeatable Batches
Compare practical ways to measure water, such as volume-based containers and calibrated marks. Weighing water provides precision but may require scales and tare checks. Consider the pros and cons of each method for small-scale work.
Always verify that your chosen method aligns with the product instructions and site requirements. If you use volume markers, ensure they are clearly marked and clean. For any method, confirm the guidance on the label or data sheet before mixing.
Measuring by weight vs. by volume
Weighing your water and dry ingredients gives the most consistent results, but it’s not always practical on site.
Why weigh? Water weighs about 8 pounds per gallon. A small difference in volume can mean a big difference in weight, affecting your mix ratio.
Volume measurement is acceptable when you’re using standard-sized containers and mixing small batches. But remember, it’s less accurate than weighing.
Calibrating buckets and containers
Marking your containers ensures you add the same amount of water every time.
First, fill your container with water. Use a measuring cup or scale to find out how much it holds exactly.
Mark this measurement on the side of the container. Now, when you pour to that mark, you know you’re adding the right amount of water.
Checking sand moisture and adjusting water
Wet sand needs less water. Here’s how to check and adjust:
Visual/Tactile Check: Squeeze a handful of sand. If it sticks together, it’s wet. Add less water.
Or use a Moisture Meter. Insert the probe into the sand. A reading above 10% means your sand is wet. Adjust your water accordingly.
Step-by-Step Small-Batch Mixing Procedures
Start by preparing your materials and workspace. Add dry mix gradually, then introduce water in small increments. Mix until the consistency stays the same as you test with a hand squeeze.
Document each step so future batches replicate the same process. Whether hand mixing or using a drill, emphasize steady water addition and even mixing technique. When unsure, follow the manufacturer instructions or local standards for mixing order and times.
Step-by-Step Process
Follow these practical steps to achieve consistent small-batch mortar mixing.
- Preparation: Gather materials, check safety, and ensure a clean workspace. Safety first: wear gloves, goggles, and a dust mask.
- Dry Blend: Combine cement, sand, and lime in the correct ratio (1:3 or 1:4). Use a shovel or hoe to mix thoroughly.
- Measure Water: Accurately measure water using your preferred method from earlier sections. Keep it consistent for each batch.
- Main Mixing: Gradually add water while mixing. For hand-mixing, use a hoe; for drills, start slow and increase speed.
- Final Check: Test the mix’s consistency with a trowel or slump cone. Adjust water if needed before applying.
- Cleanup: Clean tools immediately to prevent mortar buildup. If it hardens, use a wire brush or chisel.
Hand-mixing technique for tight control
Master this technique to maintain consistent mortar batches without overwatering.
Start by dry blending the solids. Then, add water gradually while mixing with a hoe. Aim for a stiff but workable consistency.
Mix for about 2-3 minutes, ensuring all materials are fully incorporated and no dry spots remain. The mix should hold its shape slightly when squeezed in your gloved hand.
Resist the urge to add too much water; it weakens the mortar and shortens open time. If needed, add a little more sand or cement instead.
Using a drill with mixing paddle
Set up your drill with a mixing paddle attachment for efficient small-batch mixing.
Secure the paddle in the drill and ensure it’s tight. Start at low speed, gradually increasing as you add water. Maintain consistent speed to avoid overmixing or under-mixing.
Mix for about 1-2 minutes, stopping occasionally to check consistency. Use a trowel or slump cone for quick checks. If needed, adjust water and mix again briefly.
Be cautious not to let the drill’s cord get in the way of the mixing process. Keep it tidy and out of harm’s reach.
Mini mortar mixer workflow
Follow this workflow for consistent batches using a small powered mixer.
Charging order: Add dry materials first, then gradually add water while mixing at low speed. This helps maintain consistency and prevents clumping.
Mix for about 1-2 minutes, stopping briefly to check consistency. Make any necessary adjustments before applying the mortar.
Between batches, clean the mixer thoroughly to prevent contamination. Use a wire brush or scraper if needed.
Always follow the manufacturer’s guidelines for your specific mini mortar mixer. If you’re unsure about any aspect, consult the manual or contact their customer support.

Mix Selection and Quick Recipes (How to Choose and Scale Safely)
Know the common mortar types and what they are designed to do. Performance differences matter for bonding, workability, and cure characteristics. Always consult product datasheets and local rules before choosing a mix for small batches.
When scaling, keep the same ratios of cement to sand and follow safe guidelines to avoid oversizing. If you cannot locate a clear recommendation, contact the manufacturer or check the label for guidance on small-batch usage.
Selecting the right mortar type for the job
The choice of mortar depends on your wall’s needs. Structural walls need stronger, stiffer mortars. Substrate movement or exposure to harsh conditions call for more flexible ones.
Type N, a general-purpose mortar, is suitable for most residential work. It offers good bond strength and flexibility.
Type S, with higher cement content, is stronger but less flexible. Use it when extra strength is needed or where movement is minimal.
Check product datasheets and local building codes to ensure you’re using the right mortar for your project.
Practical batch-sizing and scaling rules
For small test batches, start with a 1:3 or 1:4 cement-to-sand ratio. Adjust water to get the desired consistency.
To scale up, maintain the same water-to-material ratio. If your test batch was 2 parts cement, 6 parts sand, and 3 parts water (1:3:1.5), keep this ratio when mixing larger quantities.
For on-site work, aim for batches that can be used within an hour. A good starting point is 8-10 bags of cement (each about 94 lbs).
Always do a test batch first to ensure your scaled-up mix performs as expected.
Additives and their impact on water demand
Admixtures can improve mortar properties but may also affect water requirements. Here are a few common ones:
Plasticizers make mortars more workable with less water, improving bond strength and reducing shrinkage.
Air entrainers introduce tiny air bubbles, making mortars more durable when exposed to freezing-thawing cycles. They typically increase water demand slightly.
Retarders slow down setting time, allowing for easier application in hot weather or when using large batches. They usually require a bit more water.
Always check the manufacturer’s guidelines before adding admixtures to ensure you’re using them correctly and adjusting water accordingly.
Visual and Tactile Checkpoints for Consistent Mortar
Use simple tests to assess consistency on site. A uniform color and a cohesive feel in the palm are good signs. Look for a smooth, workable surface without separation or excessive stickiness.
Compare your touch test to a known good batch from earlier work. If you notice drift in feel or appearance, re-check your water, mix time, and material quality by consulting the product instructions or data sheet.
Visual cues: color, sheen, and lump-free mix
Before applying your mortar, use this visual checklist to ensure consistency. It’s quick and helps you catch any issues early.
- Uniform color: Mortar should be a consistent gray. Dry streaks or dark spots indicate uneven mixing.
- No excess sheen: Too much water makes mortar shiny and weak. Adjust if you see this.
- Lump-free: Small lumps are okay, but large ones mean your mix needs more blending.
- Consistent texture: Mortar should look even throughout the batch.
- No segregation: Sand and cement shouldn’t separate. If they do, remix your batch.
Quick rule: If it looks right, it probably is. But always double-check with a tactile test.
Tactile checks: stickiness, cohesion, and tool response
Before laying your first brick, use these simple tactile tests to ensure your mortar is workable.
- Stickiness: Squeeze a handful. It should hold together but not be too sticky. Too much water makes it sloppy.
- Cohesion: Drop a small amount on the ground. It should stay in one piece, not crumble or spread out.
- Tool response: Use your trowel to scoop and spread. Mortar should move easily but not slide off.
- Squeezing test: Squeeze a ball of mortar. It should hold its shape briefly, then slowly collapse.
Quick rule: If it feels right, it probably is. But always double-check with a visual inspection.
Simple tools for quick verification
These easy-to-use tools help you fine-tune your mortar’s consistency quickly.
- Small slump cone: Fill it with mortar, then remove. The slump should be about 60-75mm for bricklaying. Adjust water as needed.
- Spoon test: Scoop up some mortar. It should hold its shape but not be too stiff or sticky.
- Flow table test (if available): Spread mortar, then lift the plate. The spread should be even and not exceed 175mm for bricklaying.
Quick rule: Use these tools to confirm your visual and tactile checks. They help you make final adjustments before laying.
Troubleshooting Common Small-Batch Problems and Adjustments
Identify issues such as material separation, cohesion loss, or slump. Decide whether to re-temper by adding small amounts of water gradually or to discard and start anew if the batch is out of spec. Document what you change for future reference.
Apply fixes using a disciplined approach instead of guessing. When in doubt, refer to the manufacturer guidance or local standards to determine appropriate rework or disposal criteria.
Fixes for a batch that’s too wet or too dry
If your mortar is too wet, it’ll be soupy and runny. Too dry, it’ll be crumbly and won’t stick to the brick. Here’s how to fix it:
Too Wet: Add measured amounts of dry mix (sand and cement) incrementally while mixing. Stop when you reach the right consistency.
Too Dry: Slowly add water, a little at a time, and blend well after each addition. Don’t overwork it or you’ll end up with too wet mortar again.
Dealing with variable sand moisture or changing materials
Material choices can make or break your mortar. Here’s how to handle changes:
- Sand Moisture: Test incoming sand for moisture content. If it’s damp, you’ll need less water. Too dry? Add more.
- Cement Type: Use the right cement type for your job. General-purpose cement is fine for most jobs. Look for ‘CEM I’ on the bag.
- Sand Type: Sharp sand is best for mortar. Avoid builder’s sand as it’s too fine and can weaken the mix.
- Lime Content: Some cements have added lime, which can affect water demand. Check the bag’s spec.
- Avoid: Don’t use sea-dredged sand or sand with a high clay content. It’ll cause cracking and staining.
When to re-temper, save, or discard a batch
Mortar doesn’t last forever. Here’s when to keep, reuse, or toss it:
Re-temper: If your mortar has set but is still workable, you can add water and remix it. But be careful not to overwork it.
Save: Freshly mixed mortar can be covered and used within 30 minutes. After that, it starts to lose its plasticity.
Discard: If your mortar has started to set hard or has been sitting for too long (over an hour), it’s best to mix a fresh batch. Using old mortar can lead to weak joints and cracking.
Storage, Transport, Safety, and Cleanup for Small Batches
Plan short-term storage and transport so mixed mortar remains usable. Keep materials protected from contamination and temperature extremes during the job. Clean as you go to maintain a safe work area.
Minimize waste by using only what you can place within a practical working window. Check safety guidelines on labels and manufacturer data sheets to ensure proper handling, cleanup, and disposal procedures are followed.
Short-term storage and preserving workability
Once you’ve mixed your mortar, time’s ticking. You want to keep it consistent until you’re ready for the next batch. Here’s how:
Cover it up: Keep your mortar bucket covered with a damp cloth or plastic sheet. This stops it from drying out and keeps dust off.
Shade it: If it’s a hot day, find some shade for your mortar. Heat speeds up drying, so keep it cool to maintain workability.
Timing is key: Only mix what you can use within 30 minutes. After that, the mortar starts to lose its oomph. If you’ve got a big job, mix small batches regularly.
Transporting and applying batches on site
Moving your mortar around without messing it up is an art. Here are some tips:
Use a hawk or mortar board: These tools help you carry the mortar without disturbing it too much. A steady hand helps, too.
When applying, use smooth, even strokes with your trowel. This spreads the mortar evenly and keeps air pockets at bay.
Avoid overworking: Once you’ve applied the mortar, don’t keep messing with it. Overworking can make it lose its stickiness and mess up your work.
Safety, cleanup, and waste reduction
Keeping safe and tidy on site is a must. Here’s how to do it:
PPE: Wear gloves, safety glasses, and cover your mouth and nose when mixing or handling mortar. It can be messy and harmful if ingested.
Cleanup: Clean your tools and workspace as you go. A quick rinse with water will do the trick for most tools.
Waste reduction: Measure out your materials accurately to minimize waste. Leftover mortar can be re-tempered if it’s still workable, or used in other small jobs around the site.
Conclusion
Consistent water in small batches is the difference between durable joints and cracked, unattractive work. Keep it steady to protect safety, appearance, and long-term performance, and you won’t waste time or material on fixups.
Execute the practical check in plain language: verify your water amount matches the batch size, use the same measuring method every time, group your tools and materials in the same order, mix in steps until the texture holds, and test with a quick visual and touch check before applying. Keep a simple record or mark your pitcher or bucket so you’re always in the same range, and choose the right mortar mix for the project and scale.
Common mistakes to avoid are using weathered or contaminated water, guessing the water amount by sight, and rushing the mix without letting it soften and accrete. A simple safety rule is never back-drive a stiff mix by adding more water at the job site; adjust in the bowl in small, measurable increments and reassess. Always wear proper PPE, keep the work area clean, and set aside a small test patch first to verify adhesion and ledge behavior before full use.
If the project demands larger batches, unusual materials, or you see persistent cracking after a test patch, call in a professional rather than forcing a DIY fix. Stay disciplined, work methodically, and you’ll finish with solid mortar, neat joints, and real confidence in your results.
FAQ
How can I test mortar consistency without mixing a full batch?
Use a small test amount to gauge the mix. Check the stiffness by lifting a dab with a trowel and letting it fall back; it should hold its shape without slumping. Compare to your target texture from your procedure and adjust with small additions only.
What should I do if the water source isn’t clean or I suspect contamination?
Use clean, fresh water from a reliable source. If you doubt it, don’t add it to your mix. Label it and switch to another source until you confirm it’s suitable for masonry work.
How do I safely dispose of leftover mortar from a small batch?
Let unused mortar stiffen in a container if possible and solidify, then dispose per local guidelines. Do not pour wet mortar into soil, gravel, or drainage unless your local rules allow it. When in doubt, ask your local solid waste or building department for directions.
What can I do if the mortar begins to set before I can finish laying a course?
Work in smaller increments and re-temper only if the manufacturer instructions allow it. If you must rescue it, remove the set portion and mix fresh with proper water, then blend into the active batch carefully.