
Introduction
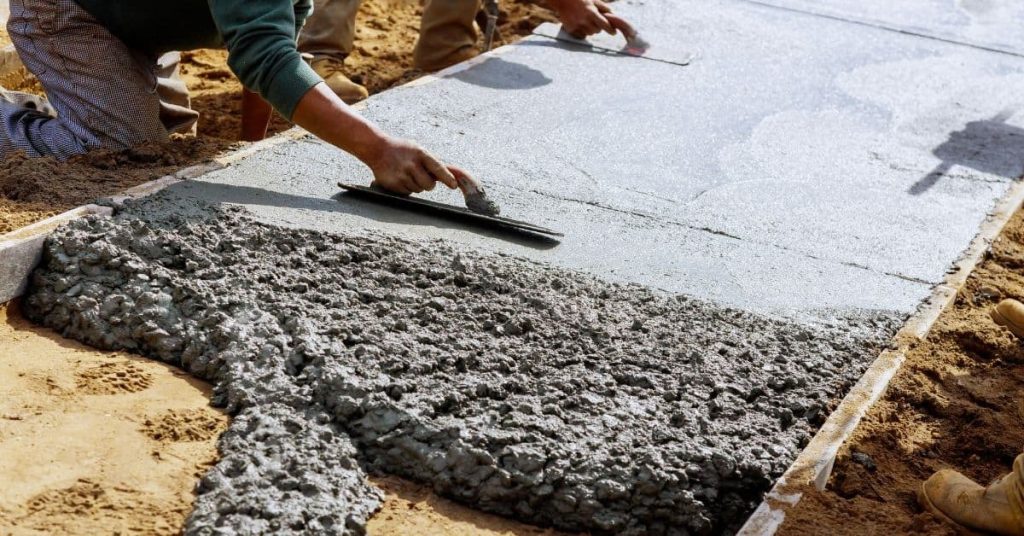
Edge prep for a new concrete trowel means ensuring the blade edge is clean and true so your finish tracks are minimal. Keep metal free of nicks and burrs, and verify the edge sits straight against the handle. If the edge isn’t true, check the manufacturer’s guidance on bevels and sharpening before proceeding.
Begin by wiping the blade with a clean cloth and inspecting for burrs or misalignment. Lightly deburr or file any rough spots following safe tool handling, and then wipe again. Test the edge on a scrap patch or a small test pour to see if it leaves clean lines, and adjust pressure or technique if you notice tracks.
Key takeaways
- Inspect new trowel for correct edge geometry and uniform blade edge before use
- Clean and deburr edges to prevent drag marks and concrete tearing
- Match edge prep workflow with your pour sequence and panel sizes
- Use protective gloves and eye protection during edge shaping
- Test on a sample panel; check for uniform tracks and smooth finish
- Inspect and maintain trowel after use; store dry to avoid corrosion
Table of Contents
- Introduction
- Key takeaways
- Why New Trowels Leave Tracks and What to Look for
- Tools and Materials Checklist
- Inspecting the Trowel: Quick Checks Before You Begin
- Step-by-Step Edge Prep Workflow
- Edge Shaping Options: Bevels, Chamfers, and Radii
- Test Panel Technique and Visual Checkpoints
- Troubleshooting Common Problems on the Job
- Maintenance and Long-Term Care to Prevent Reoccurrence
- Conclusion
- FAQ
Why New Trowels Leave Tracks and What to Look for
New trowels can leave tracks due to sharp burrs, rough machining, or edge geometry that isn’t compatible with the concrete surface. These factors can grab the surface and create visible lines as you finish. Edge prep aims to minimize or eliminate those marks before you begin smoothing the slab.
Look for common culprits on the edge, such as burrs, nicks, or uneven thickness along the perimeter. Also check for any leftover coatings or manufacturing residue that could transfer to the concrete. Your prep plan should address these issues to prevent tracking during the finish pass.
How edge geometry affects finish
The geometry of a concrete trowel’s edges significantly impacts the final finish. The heel, bevel, and flatness of the trowel can create drag or leave visible marks on fresh concrete.
Heel: A sharp or uneven heel can cause tracks as it passes through the concrete. Inspect your trowel’s heel for any imperfections that could lead to track marks.
Bevel: The bevel, or edge of the trowel, should be smooth and even. Any small defects here can become visible on the surface of the concrete. Check your trowel’s bevel for any inconsistencies.
The flatness of the trowel also plays a role in creating a smooth finish. If the trowel is not flat, it may leave tracks or create an uneven surface. Inspect your trowel’s flatness to ensure it’s even and smooth.
Common manufacturing defects and packaging damage
New concrete trowels may arrive with manufacturing defects or packaging damage that can leave tracks on fresh concrete. Identifying these issues early allows you to address them before use.
Burrs: Sharp edges or burrs left from the manufacturing process can create visible marks in your concrete. Inspect your trowel’s edges for any sharp points or burrs that need to be removed.
Rolled Edges: During packaging or handling, trowels may develop rolled or flattened edges. These can cause tracks as they pass through the concrete. Check your trowel’s edges for any signs of rolling or flattening.
Machining grit or other debris left from manufacturing can also create track marks. Inspect your trowel for any remaining grit and clean it off if necessary.
Tools and Materials Checklist
Gather basic hand tools for safe edge prep, including a file, a sharpening stone, and a soft-bristle brush. Include a clean rag and a non-corrosive solvent or degreaser for surface cleaning. Have a dull scraper or deburring tool on hand to remove sharp burrs carefully.
If a preferred tool isn’t available, look for acceptable alternatives that achieve similar deburring and smoothing results. Check the manufacturer instructions or product label to ensure compatibility with your trowel edge and the concrete mix you’re using. Use common sense to substitute while keeping safety in mind.
Hand tools and abrasives
These manual tools are essential for initial edge prep and removing manufacturing defects from your new concrete trowel.
- Files: Used to remove burrs and sharp edges. Choose flat or half-round files based on the trowel’s edge geometry.
- Rasps: Ideal for shaping and deburring. Select coarse rasps for initial prep, then fine rasps for final smoothing.
- Abrasive pads: Used with power tools or by hand to smooth edges. Check abrasive type (e.g., silicon carbide) and grit size (e.g., 60-120) with the manufacturer.
- Wire brushes: Suitable for initial prep if files, rasps, or abrasive pads are unavailable. Choose a wire brush with stiff bristles to remove burrs effectively.
- Stakes: Critical for initial edge prep and removing manufacturing defects. Inspect tools regularly during use to prevent damage from excessive pressure.
Power tools and safety gear
These power tools and protective equipment are essential for efficient edge prep and protecting against hazards.
- Rotary tool: Versatile for various tasks, including edge prep. Use with abrasive bits or grinding stones to smooth trowel edges.
- Angle grinder with flap discs: Ideal for heavy-duty prep work. Choose a disc with the appropriate grit size (e.g., 36-120) for your needs.
- Bench buffer: Suitable for final prep if a rotary tool or angle grinder is unavailable. Use with abrasive pads to smooth edges.
- Gloves: Protect hands from cuts and debris. Choose gloves that fit well and provide adequate grip.
- Eye protection: Essential for protecting eyes from debris and sparks. Wear safety glasses or goggles with side shields.
- Hearing protection: Important when using power tools to prevent hearing damage. Choose earplugs or earmuffs that provide adequate noise reduction.
- Dust control: Crucial for maintaining a clean workspace and protecting against respiratory hazards. Use dust collection systems or wet methods, as appropriate.
Inspecting the Trowel: Quick Checks Before You Begin
Start with a visual sweep of the edge for nicks, nontapered corners, or visible deformations. Run a straight edge along the perimeter to gauge flatness and detect high spots. Note any irregularities that could contribute to tracking.
A tactile check helps too: run a gloved finger along the edge to feel for burrs or roughness. Test a small surface area by lightly dragging a clean cloth over the edge to sense any resistance. Decide which prep steps you will take based on these findings.
Visual and touch tests
Before you start using your new concrete trowel, perform some simple visual and touch tests to identify any high spots or burrs. This will help you determine if any prep work is needed before breaking in the trowel.
Lighting: Inspect the trowel in a well-lit area to spot any visible defects on the surface or edges.
Fingernail drag: Gently drag your fingernail across the edge of the trowel. If you feel any sharp points, those are burrs that need to be removed.
Edge feel: Press lightly on the surface of the trowel with your fingertips. Any high spots will feel raised compared to the rest of the surface.
Measuring flatness and straightness (DIY methods)
Check your new concrete trowel for flatness and straightness using simple, low-cost methods before you begin work. This will help ensure the tool is suitable for use without needing expensive equipment.
Feel test: Run your fingertips along the edge of the trowel to detect any warping or unevenness. If you feel any significant variations, the trowel may not be straight.
Straightedge check: Use a known-straight edge, such as a level or a long, flat piece of wood, to check for flatness. Place the straightedge along the length of the trowel and look for any gaps or uneven spaces between them.
If you find that your trowel is uneven or warped, consider sending it back to the supplier or returning it for a replacement if the defect is significant. For minor issues, attempt DIY flattening using abrasives and careful technique.
Step-by-Step Edge Prep Workflow
Begin with cleaning to remove dust, oil, and release agents that can affect edge contact. Deburr and smooth the edge with a safe deburring tool or file, working evenly along the perimeter. Wipe clean to verify the edge looks and feels smooth.
Proceed to light polishing with a suitable abrasive if needed, and then perform a final cleaning. Inspect the edge again for uniformity and absence of new burrs. Only then proceed to test on a small panel before full use.
Step-by-Step Process
The following sequence ensures a consistent, high-quality edge prep workflow for your new concrete trowel. Before starting, review the entire process and understand the purpose of each step.
- Prepare your workspace: Ensure it’s clean, well-lit, and free from debris that could damage the trowel.
- Inspect tools and materials: Check all items on your tools and materials checklist. If anything is incomplete or damaged, pause and gather necessary items.
- Main edge prep work: Follow the steps below to clean, de-burr, and polish your trowel’s edges.
- Cleanup and final checks: After completing edge prep, wipe down the trowel with a clean cloth. Perform visual and touch tests to ensure a smooth finish.
- Store properly: Once satisfied with your work, store the trowel in a dry place to prevent rust or damage.
Cleaning and de-greasing
Contaminants like grease, oil, or dirt can create tracks during edge prep. Removing these is crucial to achieve a smooth finish.
Use a suitable cleaner or solvent that’s safe for your trowel material. Common options include mild dish soap and water, denatured alcohol, or specialized metal cleaners. Always test the cleaner on a small, hidden area first.
Never use harsh chemicals like bleach or strong acids, as they can damage the trowel.
If contaminants persist after cleaning, re-evaluate your cleaning method or use an additional solvent.
Deburring and removing machining marks
Burrs and machine lines can mar the finish of your concrete. Remove these imperfections using files or abrasive pads, working progressively from coarse to fine.
Familiarize yourself with different file types and abrasive pad grits. Start with a coarse file or pad (e.g., 80-grit) to remove major burrs and machine marks. Inspect your progress frequently to avoid over-angling the edge.
For remaining imperfections, use progressively finer files or pads (e.g., 120-, 220-, and 400-grit). Do not force files or pads, as this can cause damage.
Finishing and burnishing for smooth edges
Achieving a polished edge requires fine abrasives or stropping. This step ensures minimal effort in maintaining a smooth finish.
Use progressively finer abrasives, starting with 600-grit sandpaper or a fine abrasive pad. Stropping can be done using a leather strop and honing compound for an extra-smooth finish. Test your progress on a small, hidden area first.
A slightly rounded edge is preferable to a razor-sharp one, as it’s less prone to chipping and easier to maintain. If the edge isn’t smooth after initial refinement, progressively use finer abrasives or stropping.
Never over-polish the edge, as this can weaken its structure.
Edge Shaping Options: Bevels, Chamfers, and Radii
Edge profiles include small bevels, chamfers, and rounded radii, and each shape affects how the trowel edge leaves marks. The goal is to reduce visible tracks on the final surface without prescribing exact angles. Choose the profile based on the finish type and how forgiving the surface will be during shaping.
For smooth, polished finishes, a rounded radius or small bevel tends to minimize tracking by easing contact with the surface. Stakes are high: skipping proper edge preparation can leave visible tracks on the finished surface. If tracks appear, lightly sand and wipe clean, then reapply sealer if needed and have a pro check for burrs or sharp corners before reuse.
When to Round Versus Bevel an Edge
Choosing the right edge profile for your concrete trowel is crucial to achieving the desired finish. Both rounded and beveled edges have their advantages, but they also come with trade-offs.
Rounded Edges are excellent at reducing digging into the concrete surface. They minimize swirl marks, making them ideal for smooth, glossy finishes. However, they may not shed concrete as efficiently as beveled edges, which could lead to slight tracking if not used correctly.
Beveled Edges, on the other hand, shed concrete differently, creating varied surface effects. They are perfect for brushed or textured finishes but can leave marks on smooth surfaces if not used carefully.
To choose the right profile, first visualize how each would interact with your concrete. Then, consider your desired finish and the type of concrete you’re working with. It’s also a good idea to test both profiles on small samples before committing to one for your entire project.
Specialty Profiles for Different Concrete Finishes
The edge profile of your trowel plays a significant role in achieving the desired finish. Matching the right profile to your outcome is crucial for both aesthetic and functional purposes.
For a smooth troweled finish, consider using rounded or small bevel profiles. These help minimize tracking and create a uniform surface. If you’re after a brushed finish, larger bevels or chamfers can create distinct surface lines that give your concrete texture.
Exposed aggregate finishes require a different approach. You might need to experiment with various profiles to find the one that best reveals the aggregates while maintaining a smooth overall surface.
Remember, testing is key. Always review finish type requirements and test with small samples before committing to an edge profile for your entire project. If you notice unwanted results during testing, don’t hesitate to re-evaluate and adjust your edge profile.
Test Panel Technique and Visual Checkpoints
Prepare a small test slab or patch that mirrors your project conditions. Apply a light pass with the edge as you would on the actual pour. Observe how the edge interacts with the surface and whether tracks or gouges appear.
Look for consistent contact across the edge, uniform sheen, and absence of visible scratches. If issues are evident, adjust the edge profile or deburring steps and re-test until the results look right under your lighting. Use the test results to guide the full-scale work.
Making and finishing a test panel
Before starting your main project, create a test panel to validate your edge prep technique. This helps ensure accurate results on the job.
- Prepare formwork: Use the same materials and dimensions as your job.
- Mix concrete: Match the mix design for your project to replicate conditions.
- Pour and consolidate: Pour at the same rate and use the same methods as on the job. Vibrate or strike off as needed.
- Float: Use the same float method and time as planned for your project.
- Trowel: Start with a straight edge trowel, then use your finishing trowel. Follow your job’s troweling sequence.
- Check trowel condition: Ensure your trowel is clean and smooth before each pass to avoid leaving marks.
- Inspect for flatness and straightness: Use a straightedge or level to check your work. Make adjustments as needed.
- Let it cure: Allow the test panel to cure under the same conditions as your job site.
Quick rule: If your test panel doesn’t match your job’s results, adjust your process and retry.
What to look for under different light and moisture conditions
Inspect your test panel under various lighting and moisture conditions to identify any edge-caused tracking before it’s too late.
- Natural light: Check in direct sunlight and shaded areas. Tracking may appear differently under natural light.
- Artificial light: Inspect under job site lighting conditions to ensure consistency.
- Low angle light: Look for tracking that might be missed under normal viewing angles.
- High angle light: Check for reflections or sheen-related tracking issues.
- As concrete gains sheen: Inspect regularly as the surface dries to catch any emerging tracking.
- After rain or water exposure: Check for moisture-related tracking, especially in areas that may not dry evenly.
Quick rule: If you spot tracking under certain conditions, adjust your edge prep or troweling technique and recheck.
Troubleshooting Common Problems on the Job
Streaks after the final passes can indicate remaining edge burrs or contamination. Revisit the edge with a gentle deburring and polishing pass, then re-test on a small section if time allows. Ensure the edge stays clean during the pour to prevent transfer.
Gouging may result from excessive pressure or a dull edge. Reduce contact force and refine the edge with appropriate abrasives or tools. Edge buildup can occur with certain mixes; clean the edge regularly and rework as needed. Keep a routine to minimize repeats during a pour.
Fixes for streaking after troweling
Streaks can ruin the final finish of your concrete surface, leading to unnecessary rework. If you notice streaks after a final pass, follow these steps:
Stop troweling immediately and inspect your trowel for any debris or buildup. Check the edge condition and trowel angle as well.
If the problem persists, clean your trowel thoroughly, re-prep the edge, and rework a small area. If streaking continues, consider switching tools or changing your technique.
Dealing with concrete buildup and rust transfer
Concrete buildup on your trowel can cause streaks, while rust from corroded tools can discolor the concrete. If you notice these issues during a pour, take the following steps:
Check for any visible signs of buildup or rust on your tools. Inspect your trowel for buildup and tool condition for rust.
If buildup is significant, clean your tools thoroughly using methods like wire brushing, scraping, or suitable solvents. If rust is present and severe, replace the tool to prevent discoloration of the concrete.
Maintenance and Long-Term Care to Prevent Reoccurrence
Adopt a simple post-use routine: clean the edge thoroughly and dry it to prevent rust or corrosion. Lightly rework any high spots periodically to maintain a consistent edge geometry over time. Store the trowel in a dry location to minimize damage between uses.
Regular inspection before each job helps catch wear early. Schedule brief touch-ups to remove burrs and refresh the edge as part of your maintenance plan. Refer to the manufacturer instructions or product data sheet for any care recommendations specific to your tool.
Routine post-job cleaning and inspection
After each use, follow this quick checklist to maintain your concrete trowel’s edge integrity and finish quality.
- Remove residue: Clean the trowel thoroughly with a wire brush or scraper to eliminate any remaining concrete. Skipping this can lead to buildup and rust transfer.
- Check for burrs: Inspect the edges under bright light for any sharp projections. Use a file or deburring tool to remove them if found.
- Inspect for nicks: Look for small chips or cracks in the edge that could affect finish quality.
- Check wear: Inspect the entire trowel for signs of excessive use, such as dullness or thinning edges. Prompt attention can prevent major issues.
- Wipe dry: Ensure the trowel is completely dry before storing to prevent rust.
- Store properly: Keep the trowel in a clean, dry place, preferably with the edge off the ground to avoid damage.
- Check handles: Tighten any loose screws or bolts and inspect for cracks or wear.
- Re-oil if needed: Apply a light coat of machine oil to prevent rust during storage.
Quick rule: Always perform these checks after each use to maintain your trowel’s edge quality and longevity.
Reconditioning frequency and when to replace
Regularly inspecting and maintaining your concrete trowel ensures consistent finish quality and minimizes waste. Here’s how to determine when to recondition edges versus replace a trowel.
Edge condition: Inspect the trowel’s edges regularly for wear, nicks, or dullness. If signs of wear are present but still functional, rework or deburr as needed to restore edge quality.
Performance evaluation: Evaluate the trowel’s performance on test panels under varying conditions. If it fails to produce the desired finish or shows excessive wear, replace the trowel to maintain quality and prevent further issues.
Conservative replacement: Err on the side of caution when deciding whether to recondition or replace. Regular checks and conservative replacement based on performance ensure consistent results and minimize downtime.
Conclusion
Getting the edge prep right on a new concrete trowel matters for safety, durability, and a clean finish. When the edge sits correctly, you avoid leaving tracks and you protect the surface from dents or gouges that can ruin the look of the work.
To proceed, follow this practical sequence: inspect the trowel and your tools as described, select the appropriate edge shaping option for your trowel, dry-run on a small test panel, iterate until a smooth, track-free edge is achieved, then clean and protect the edge before returning to the full job. Do each step with deliberate, measured motions, and keep safety gear on throughout the process.
Avoid these common missteps: rushing the edge shaping or skipping a test panel, which can hide damage or misfit edges; using an improper bevel, chamfer, or radius for the situation; and neglecting basic safety like eye and hand protection or proper lifting and handling of the trowel. Keep these safety rules in mind: work in a well-lit area, test first on a small area, and stop if you notice any edge damage or unexpected resistance.
If the edge still leaves tracks after careful prep, or if the trowel shows cracks, loose handles, or persistent misalignment, consider consulting a professional. When in doubt, pausing to verify measurements, manufacturer guidance, and local rules helps prevent costly mistakes. With careful steps and patience, you’ll finish with a smooth edge and a clean, durable surface that lasts.
FAQ
How can I tell if the trowel edge is causing tracks and what to look for?
Look for nicks, burrs, or a visibly rounded edge. Check for metal dust or impressions on the concrete near the edge. If the edge shows wear, it can carry over into the concrete and create tracks.
Refer to the tool’s label or manufacturer instructions for recommended edge condition. If unsure, inspect and compare with a new or known-good edge before proceeding.
What steps should I take to prep the edge before use?
Clean the edge to remove any dirt, concrete, or drying aid. Remove burrs or nicks with a safe method recommended by the tool maker, then verify the edge is uniform along the entire width.
Follow local rules and manufacturer instructions for any sharpening or reshaping. Do not modify the edge beyond what is specified by the tool’s guidance.
How do I test the edge on a small panel before working a larger area?
Cast or prepare a small test panel with similar mix and height. Run a light pass and observe the pattern left by the edge. If tracks are visible, adjust angle or edge condition and re-test.
Document the results on the panel and use the same settings for the main area if the test passes.
What practices help maintain a clean edge during ongoing work?
Keep the edge free of concrete buildup and clean it as you work. Use a consistent angle and steady hand to avoid gouging or dragging the edge through fresh material.
Periodically re-check the edge condition and consult the tool manufacturer’s care instructions for maintenance steps and recommended intervals.