Introduction
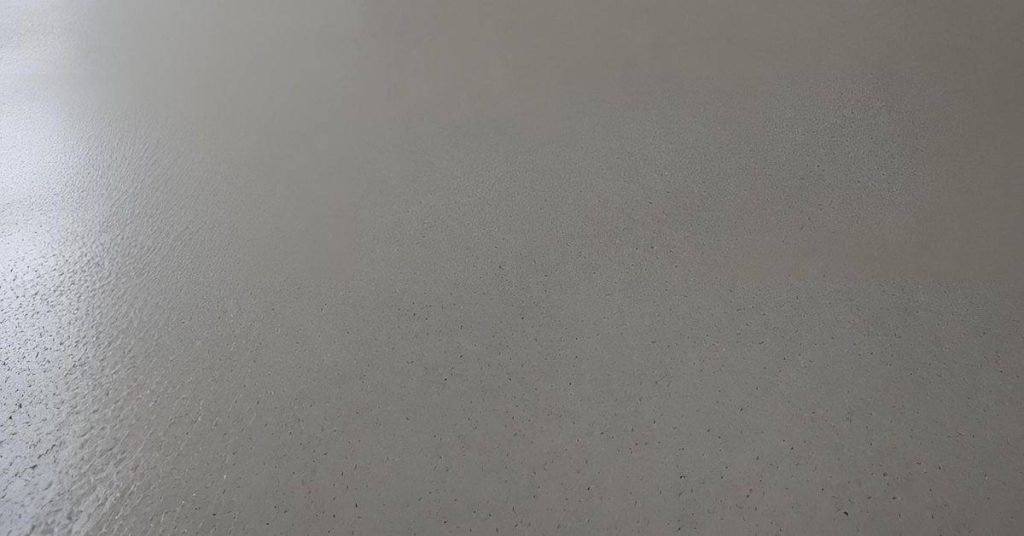
A backyard concrete sports court is a flat, durable surface designed for recreational games. Getting the slope, joints, and surface texture right matters for playability and longevity. This intro covers practical choices and what to check during construction, from drainage to curing.
Plan for a vapor barrier where moisture could affect the slab over time, and ensure perimeter drainage and slope direct water away from the playing area. Choose a surface texture such as a medium-broom finish and confirm the coating or coating schedule after a full cure. Allow a full cure before applying any surface coating, and verify local guidelines and product labels for proper steps.
Key takeaways
- Install a vapor barrier beneath the slab, overlapping seams and edges.
- Ensure adequate perimeter drainage and proper slope toward the designed outlet.
- Choose a medium-broom finish or similar texture for traction and ease.
- Allow full cure before applying coatings to prevent premature failures.
- Plan isolation joints and crack control to minimize reflected cracking.
- Use proper joints, surface prep, and primers before acrylic coatings.
- Follow safety guidelines and local codes during installation and finishing work.
Table of Contents
- Introduction
- Key takeaways
- Planning and Site Selection
- Concrete Slab Design and Slope Requirements
- Vapor Barrier and Subsurface Drainage
- Control Joints, Isolation Joints, and Crack Planning
- Surface Texture and Preparatory Work for Coatings
- Acrylic Coatings, Primers, and Alternative Surface Options
- Tools, Materials, and a DIY Install Checklist
- Cost Drivers, Common Pitfalls, and Safety Considerations
- Conclusion
- FAQ
Planning and Site Selection
Choose a suitable location that fits how the court will be used and how it fits on the lot. Consider sun exposure, typical wind direction, and nearby noise to minimize disruption and maximize usable time.
Outline preliminary checks before excavation: assess slope stability, soil type, drainage, groundwater proximity, and any root or utility conflicts. Verify setbacks, easements, and zoning rules that may affect placement and size.
Court size, orientation, and sport-specific layout
The optimal court size and orientation depend on the chosen sports and local conditions. Consider the following:
Stake: Determine optimal dimensions for chosen sports and court type.
Quick check/cue: Verify long axis alignment with north-south direction if possible to minimize sun exposure and wind impact.
Pro check: Assess sun exposure to minimize glare and heat gain; consider wind patterns for player comfort. For basketball, choose standard dimensions like 94′ x 50′, including a foul line, free throw lane, and three-point arc. For tennis, select appropriate sizes such as 60′ x 120′ for singles, with service boxes, center mark, and baseline markings.
Common mistake + fix: Re-evaluate layout if dimensions cause space constraints or interfere with access paths to avoid compromising safety and functionality.
Permits, codes, and utility checks
Before starting construction, ensure compliance with local regulations and check for underground utilities. Here’s what to do:
Stake: Ensure compliance with local regulations before starting construction.
Quick check/cue: Verify underground utilities are marked using ‘Call Before You Dig’ services to prevent damages and ensure safety during excavation.
Pro check: Contact your municipality or HOA to understand specific permit requirements for backyard sports courts. If including structural elements like walls or lighting, obtain necessary electrical and building permits. If changing property grade, check for grading or drainage permits.
Common mistake + fix: Address any violations promptly to avoid fines or delays in construction.
Visual checkpoints and site survey
Before pouring concrete, perform a thorough site survey to confirm the area is buildable. Use this checklist:
- Tree roots: Check for any tree roots that may interfere with excavation or affect stability.
- Soil stability: Assess soil stability by performing a simple perc test, digging a small hole and filling it with water to observe absorption rate.
- Grade: Inspect the grade to ensure proper slope (1-2% away from court) for effective drainage.
- Drainage paths: Check for adequate drainage paths to prevent water pooling, which can lead to structural issues and safety hazards.
- Groundwater proximity: Verify that the groundwater table is not too high to avoid instability and potential flooding.
- Root/utility conflicts: Ensure there are no conflicts with existing roots or utilities that could cause damage during excavation.
- Setbacks: Confirm that the chosen court location adheres to local setback requirements.
- Easements: Check for any easements on the property that may restrict construction activities.
Quick rule: Address any issues found during the site survey before proceeding with excavation and concrete pouring to ensure a stable, long-lasting court.
Concrete Slab Design and Slope Requirements
Plan a slab thickness and reinforcement that suits the expected loads and court layout. Typical practice considers edge supports and how changes in grade might influence the surface.
Address subgrade preparation and drainage awareness early. Consider a moisture plan and optional vapor barrier when coatings will be applied, and design a slope that directs water toward cleanouts or perimeter drains.
Slope Specifications and Importance
Proper slope is vital for efficient water runoff and optimal playability in sports courts. A common standard is around 1% or approximately 1 inch per 10 feet, but this can vary based on specific sport and local climate.
- Runoff: An appropriate slope facilitates quick water drainage, preventing puddles that could damage the surface and pose safety risks.
- Playability: The right slope ensures balls roll predictably, enhancing gameplay. It also helps prevent water from accumulating around players’ feet.
If your court is prone to heavy rain or snowmelt, consider incorporating a cross-slope to direct water away from building foundations and prevent damage. Use a level or laser level during construction to confirm slope. Always check that your chosen slope aligns with recommended targets for your specific sport and local climate.
Slab Thickness, Reinforcement, and Subbase
The slab’s thickness, reinforcement, and subbase are crucial for longevity and safety. Residential slabs typically range from 4 to 6 inches in thickness.
Subbase: Ensure the subbase is properly compacted to provide a stable foundation for your slab. Use a suitable aggregate and consider optional moisture mitigation where coatings will be applied.
Reinforcement: Reinforce your slab using rebar, welded wire mesh, or fibers. The choice depends on your specific needs and local building codes. Verify that the rebar spacing or wire mesh meets recommended guidelines. For heavy loads, consider thicker slab sections and additional reinforcement.
Check local building codes or consult a structural engineer for specific needs regarding slab design and reinforcement.
Load and edge conditions
Edge treatments, elevated slabs vs. flush slabs, and hoop anchors or fence footings significantly impact your sports court’s longevity and safety.
Edge treatments: Strengthen edges to prevent slab failure under load. This can be achieved through proper reinforcement and edge treatments like cantilevered edges or pile caps.
Elevated vs. flush slabs: Elevated slabs require additional reinforcement and edge treatments to distribute loads evenly and prevent failure. Flush slabs, on the other hand, need proper support from adjacent structures to avoid settling or cracking.
Hoop anchors/fence footings: Ensure hoop anchors and fence footings are securely attached to the slab. They should meet local codes and withstand expected loads without compromising the slab’s integrity. Verify that these elements are properly installed during construction.
Vapor Barrier and Subsurface Drainage
Explain the vapor barrier’s role in moisture control to prevent lift, blistering, and coating failures. Note when a barrier is required based on slab type, soil moisture, or climate.
Describe practical installation details for barrier materials, seam handling, and protection during subsequent work. Design perimeter drainage with proper screening and backfill to manage hydrostatic pressure.
Vapor Barrier Types and Installation
A vapor barrier is essential to prevent moisture issues in your concrete sports court. Here are common materials and best practices:
Materials: Polyethylene sheets, usually 6 or 10 mil thick, are popular due to their durability and effectiveness.
Installation: Place the vapor barrier on top of your base layer before pouring the concrete slab. Overlaps should be at least 4 inches wide and sealed with tape suitable for polyethylene sheets. Avoid puncturing the barrier during installation or subsequent work.
Perimeter Drainage, Grading, and Drains
Proper grading and perimeter drainage are essential to manage hydrostatic pressure and prevent water from ponding under or against your slab.
Grading: Ensure the ground around your court slopes away from it at a minimum of 1-2% to facilitate water runoff. This slope should extend at least 5 feet beyond the perimeter of your court.
Drains: Install perimeter drains or French drains along the outer edge of your slab. These should consist of perforated piping wrapped in filter fabric, surrounded by gravel or rock backfill. Ensure these drains lead to a suitable discharge point away from your court.
Control Joints, Isolation Joints, and Crack Planning
Control joints and isolation joints serve different purposes in concrete courts. Control joints are designed to channel cracks to predefined lines and are common for multi-use surfaces, while isolation joints separate the slab from surrounding structures or features to reduce transfer of movement. Spacing should reflect slab thickness, climate, and anticipated loads to balance crack control with playability around key lines and edges.
Plan joint placement around midcourt, baselines, edges, and any goals to preserve smooth play and predictable ball behavior. Good joint design supports drainage and slope consistency near joints, helps prevent water infiltration, and reduces surface longevity issues, which matters for DIY installations. Regular inspection and timely resealing, along with a pro check of joint types and spacing, keep joints clean and functioning.
Joint types and placement strategy
Concrete sports courts require strategic planning for joints to manage cracking while preserving playability. Two primary joint types serve different purposes:
Control/Contraction Joints are saw cuts made in the slab to direct where cracking will occur, preventing random cracking. They are suitable for basketball-specific or small multi-use courts with anticipated loads.
Isolation/Expansion Joints allow for movement due to temperature changes and slab size. They are ideal for large multi-use courts or areas subject to significant temperature fluctuations.
Joint materials and maintenance
The choice of joint material affects the longevity and performance of your sports court. Here are key considerations:
- Flexible Backer Rod & Sealant: Used in expansion joints, it accommodates movement and prevents water infiltration. Look for ASTM C1251-rated materials.
- Epoxy Injection: For filling hairline cracks or small voids, use epoxy with a high modulus of elasticity. Ensure it’s compatible with your slab material.
- Polyurethane Sealant: Ideal for control joints, it remains flexible and resists UV degradation. Check for ASTM C920 compliance.
- Integral Textures: For a simple finish, integral textures are added during concrete mixing. They provide slip resistance but offer less protection against water infiltration.
- Medium Broom or Trowel Finish: These finishes create a rough surface for better traction. They require periodic maintenance to maintain their effectiveness.
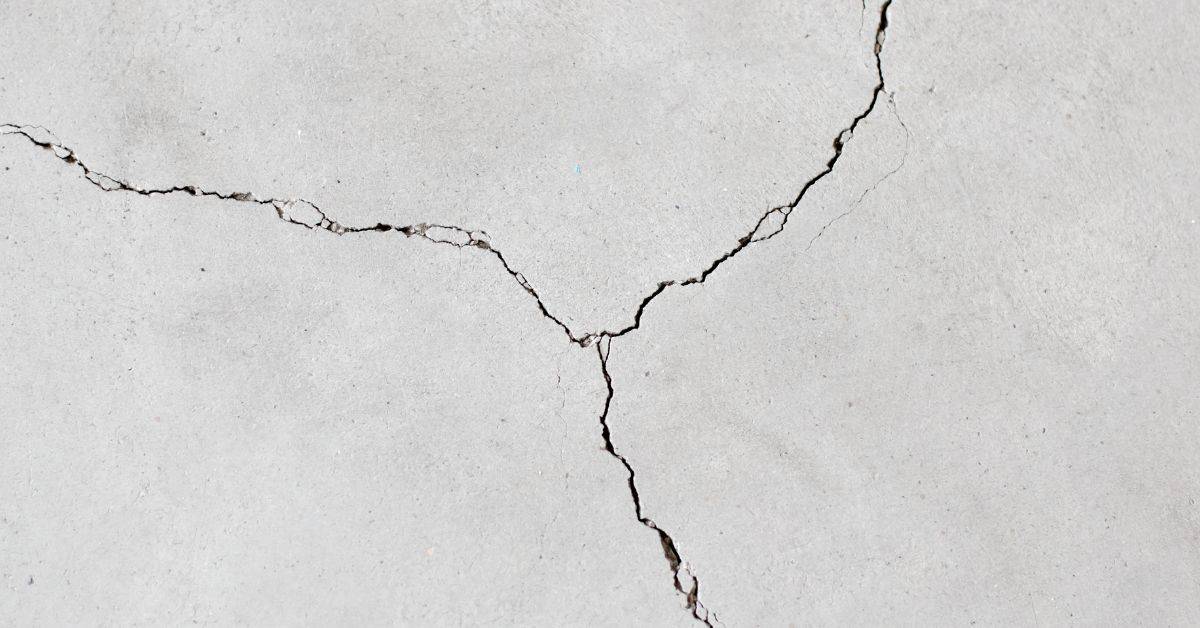
Repairing cracks and movement issues
Cracks in your sports court can be a sign of normal settling or indicate more serious structural problems. Prompt attention is crucial to prevent further damage:
Minor, stable cracks can be temporarily repaired using materials like epoxy or polyurethane. However, excessive cracking or signs of structural movement warrant professional consultation.
If you notice widening, lengthening, or new cracks, consult a structural engineer immediately. They can assess the severity and recommend appropriate permanent repair options.
Surface Texture and Preparatory Work for Coatings
Surface texture choices for coatings include medium-broom, steel-trowel, and shot-blasted finishes, each with different effects on adhesion, slip resistance, and ball bounce. Target a controlled microtexture for coatings such as SCC or epoxy overlays, and plan steps to achieve and verify it, including cleaning, moisture testing, and acid etching.
Proper prep prevents coating delamination and supports long-term performance, and a quick on-site wet rag check helps verify cleanliness. Follow moisture testing guidance and acid-etch cautions, avoid over-etching, and if unsure, check the label or datasheet for specifics.
Choosing the Right Concrete Finish
The surface texture of your concrete plays a crucial role in how well coatings adhere. Here are three common finishes and their effects:
Medium-broom finish provides excellent traction and promotes coating adhesion due to its textured profile.
Steel-trowel finish results in a smooth surface, suitable for painting but may hinder coating adhesion if not properly prepared.
Shot-blasted texture creates a rough, porous surface that enhances coating adhesion and slip resistance. Choose the finish that best suits your project’s needs and coating requirements.
Mechanical Preparation and Shot Blasting
Removing laitance or old coatings is essential for proper adhesion of new materials. Here are two methods to achieve the desired texture:
Shot blasting uses high-velocity steel shot to remove contaminants, create a textured surface, and improve coating adhesion.
Diamond grinding employs diamond-impregnated discs to remove laitance, level surfaces, and prepare for coatings. Use these methods when required by the chosen coating or if other preparation methods are insufficient.
Moisture Testing and Surface Neutralization
Excess moisture can compromise coating adhesion and performance. Before applying coatings, perform common moisture tests:
Relative Humidity (RH) test: Measure RH levels at the surface and within the slab to ensure they’re below acceptable thresholds for chosen coatings.
Moisture meter: Use a pin-type or impedance meter to measure moisture content in the concrete. If moisture content exceeds acceptable limits, address high moisture levels through:
Acid etching or neutralization: Apply these treatments to remove laitance, improve coating adhesion, and neutralize any alkaline residues before applying coatings.
Acrylic Coatings, Primers, and Alternative Surface Options
Detail the sequence for an acrylic system, starting with a compatible primer, followed by base coats and color/top coats. Align the order with coating compatibility and substrate condition.
Discuss alternative surfaces like modular tiles or polyurethane overlays and how they integrate with a concrete base. Consider outdoor exposure, installation ease, and long-term maintenance in the evaluation.
Acrylic System Application and Cure Timing
To ensure longevity and adhesion of your sports court’s acrylic coating system, apply it in a specific sequence:
- Select an acrylic latex primer compatible with concrete.
- Ensure the concrete is fully cured (minimum 28 days) and dry before application.
- Apply the primer following manufacturer’s instructions. Allow it to cure for at least 12 hours before applying base coats.
For base coats, follow the recommended layer order and coverage targets provided by the manufacturer. Typically, two coats are required with a minimum of 4-6 hours drying time between each coat. After the final base coat has cured (usually 24 hours), apply color/top coats following the same procedure.
Weather conditions impact application windows:
- Avoid applying coatings when temperatures are below 50°F (10°C) or above 90°F (32°C).
- Ideal humidity range is between 40-70%.
- Delay application if rain is forecasted to avoid bond issues.
Alternative Surfacing: Tiles, PU, Epoxy, and Hybrids
Besides acrylic coatings, several alternative surfacing options are available for your sports court. Modular court tiles offer quick, low-maintenance installation but may have limited UV stability and durability compared to other options.
Poured polyurethane (PU) systems provide excellent durability and slip resistance, making them ideal for high-traffic multi-sport courts. However, they require professional installation and have a higher upfront cost. Epoxy systems offer similar benefits but may not be as flexible or shock-absorbent as PU.
Hybrid systems combine the advantages of different materials to create a customized surface tailored to your needs. These can include combinations of tiles, PU, epoxy, or other materials. When choosing an alternative surfacing option, consider factors such as installation ease, UV stability, cost, and suitability for your specific sport(s).
For DIY installations, modular tiles may be the most feasible option due to their simplicity. However, professional installation is recommended for poured PU and epoxy systems to ensure optimal performance.
Line Marking and Color Choices
Once your acrylic coating or alternative surfacing has been applied and cured, you can proceed with line marking. For coated concrete surfaces, use a high-quality acrylic latex paint designed for outdoor use. Apply lines using a straight edge and tape to ensure clean, well-defined boundaries.
When selecting colors, consider both visibility and contrast against the court surface. High-visibility colors like red or blue are ideal for basketball courts, while multiple colors can be used on multi-sport courts to differentiate areas for different games. Ensure chosen colors have good UV durability to maintain their vibrancy over time.
For modular tiles, lines can be pre-marked during installation or painted using the same method as coated concrete surfaces. Some tile systems may also offer interlocking edge pieces with built-in lines for added convenience.
Always comply with relevant sports regulations when marking lines to ensure safety and game accuracy. If lines fade or wear quickly, consider recoating with more durable paint or applying a protective sealant to extend their lifespan.
Tools, Materials, and a DIY Install Checklist
Provide a clear phase overview that defines what is DIY versus contractor work and notes any permit requirements. Emphasize alignment with local codes and project scope.
List essential tools, equipment, and materials, including formwork, compaction, curing products, and joint components. Include quality checkpoints and a plan for communicating milestones with contractors.
Tools and Material Specs to Source
Ensure you have the right tools and materials for a successful DIY concrete sports court installation. Here’s what you need:
- Concrete Finishing Tools: Trowels, floats, edgers, and screeds to achieve a smooth finish. Check supplier labels for size options.
- Vapor Barrier: Prevents moisture from the ground entering your slab. Choose one rated for concrete slabs (e.g., 6-mil polyethylene).
- Joint Materials: Expansion and control joints help prevent cracking. Use joint filler compatible with your chosen joint material.
- Primers/Coatings: Acrylic primers and coatings protect the surface and provide traction. Check compatibility with your chosen finish.
- Moisture Tester: Essential for checking moisture levels before applying coatings. Rent or borrow if needed.
- Whacker Plate: Rental item to compact the concrete and remove air pockets. Ensure it’s in good working condition.
- Power Mixer: Rental item for mixing concrete. Check rental terms and availability.
- Broom Sander: Optional, but useful for smoothing the surface before coatings. Consider renting or borrowing.
Step-by-Step Timeline and Inspection Points
Follow this phased timeline to ensure a quality DIY concrete sports court installation with critical inspections at each stage.
- Site Preparation (Day 1-2): Grade, install perimeter drainage, form the slab, and compact the base. Inspect for proper compaction before proceeding.
- Concrete Pour (Day 3): Pour concrete into forms. Check for consistent depth and smooth surface using a straight edge.
- Jointing (Day 4): Cut control and expansion joints. Inspect for proper spacing and depth to prevent cracking.
- Curing (Day 5-14): Keep the slab moist during curing. Inspect daily for any signs of issues, such as excessive cracking or warping.
- Surface Preparation (Day 15): Clean and prepare the surface for coatings. Perform a moisture test before applying primers.
- Coating Application (Day 16-17): Apply acrylic primer and coating(s). Inspect for consistent coverage, bubbles, or missed spots.
- Line Marking (Day 18): Paint lines after the final coat has cured. Inspect for straightness and accuracy.
Cost Drivers, Common Pitfalls, and Safety Considerations
Break down major cost components such as site prep, formwork, drainage, moisture control, and coatings. Emphasize the importance of budgeting for contingencies and timing needs.
Highlight common project risks and practical safety practices for a backyard court. Include a checklist for weather, drainage adequacy, subgrade stability, and utility awareness to reduce surprises.
Major Cost Drivers and How to Estimate
The primary costs in constructing a backyard sports court in concrete are excavation, base preparation, concrete materials, reinforcement, coatings, labor, and equipment rental. To manage your project budget effectively:
Gather multiple local quotes for each component to compare prices and ensure you’re getting competitive rates.
Budget a contingency of 10-20% for unexpected expenses that may arise during the project. Regularly review and update your budget as the project progresses to avoid overspending.
Frequent Mistakes and How to Avoid Them
To prevent costly rework and delays, be aware of common errors made during DIY or contractor-led projects:
- Improper slope: Incorrect grading can lead to ponding water and premature concrete failure. Verify proper drainage plan implementation and ensure adequate slope for water runoff.
- Missing vapor barrier: Without a vapor barrier, moisture from the ground can cause delamination of the concrete surface. Check that a vapor barrier has been installed before applying any coatings.
- Wrong finish: An improperly prepared or finished surface may not accept coatings well or could create slip hazards. Inspect the surface finish before applying any coatings to ensure it meets your project’s requirements.
Regularly inspect work in progress, addressing any deviations from the plan promptly to avoid costly mistakes.
On-Site Safety and Environmental Concerns
Prioritizing safety ensures a successful project with minimal risks to workers, equipment, and the environment. Implement the following measures:
Erosion control: Use erosion control measures such as straw wattles or silt fences to prevent sediment runoff during construction.
Personal Protective Equipment (PPE): Ensure all personnel wear appropriate PPE, including hard hats, safety glasses, and steel-toed boots, when working on-site.
Safe concrete handling: Follow safe concrete handling procedures to prevent injuries from falls or equipment-related accidents. Provide adequate ventilation during coatings application to protect workers from harmful fumes.
Conclusion
A durable backyard court rests on proper planning, a correct slope, well‑placed joints, and a surface that holds up under use. Prioritizing safety and careful execution now protects your investment and keeps the play area looking right for years to come.
Confirm the grade and drainage plan, verify the slope with a level and reference points, install the vapor barrier and subsurface drainage as required, place control and isolation joints at the planned spacing, map out crack control and surface preparation, and then select a coating or surface option and test a small area before full application. Follow manufacturer instructions and local rules for curing times, weather limits, and compatibility, and document each step as you go so you can spot problems early and avoid costly fixes.
Common mistakes include skipping slope verification or drainage checks, neglecting joint planning or incorrect spacing, and rushing surface preparation or coatings without testing compatibility. Stay safe by wearing eye and skin protection, using the right respirator when coatings are involved, working within the recommended temperature and humidity ranges, and drying or curing materials as required before use. If grading is uncertain, drainage issues persist, or the project exceeds your comfort level, consider bringing in a licensed contractor to verify design and installation—this protects your concrete, prevents costly rework, and preserves safety and performance for the long term. With careful steps and attention to detail, your court will be ready for play and easy to maintain.
FAQ
What should I check when installing a vapor barrier under a backyard sports court slab?
Choose a vapor barrier that matches the subgrade and concrete mix. Follow the manufacturer’s instructions for overlap, sealing, and protection from punctures. Local guidance may affect requirements for moisture control near the surface.
How do I ensure adequate perimeter drainage and slope around the court area?
Plan a slope that directs water away from the playing surface to dedicated drainage paths. Verify that edges and perimeters have proper drainage outlets or channels, and confirm with product instructions or local rules to avoid trapping water near the slab.
What surface texture options are suitable, and how is a medium-broom finish achieved?
A medium-broom or similar texture provides traction without excessive roughness. Use the recommended pressure and timing for broom passes, and consult the concrete supplier or finishing contractor for surface preparation guidance.
When can I coat the surface with acrylic or other finishes, and what should I verify first?
Do not apply coatings until the slab has fully cured per the coating label. Check the coating’s cure time and compatibility with the concrete surface, and confirm any requirements for surface texture, moisture, or priming before application.

