
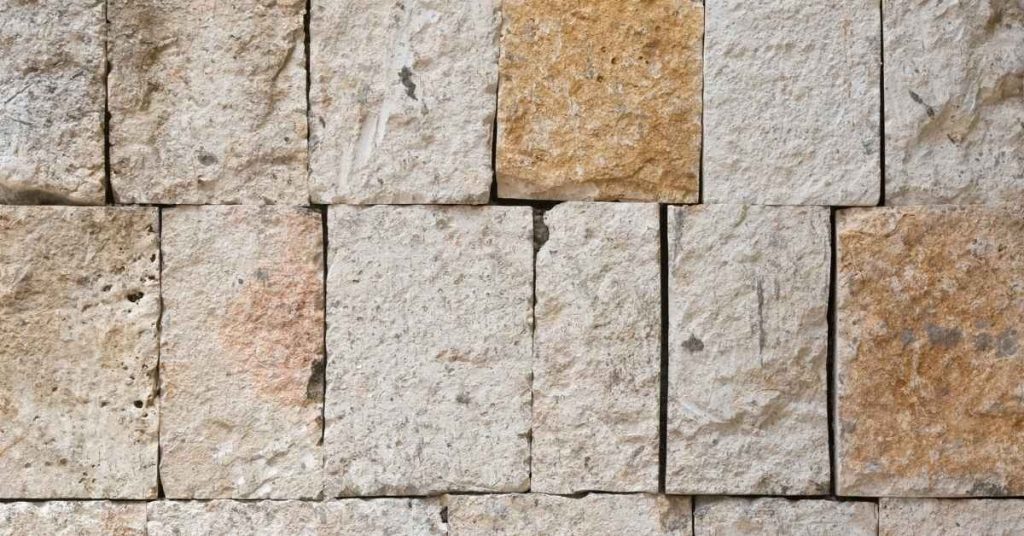
Introduction
Backfilling timing for block retaining walls means starting to fill behind the wall only after the wall is stable and set. Check that the wall is properly tallied with the foundation, that acceptable drainage components are in place, and follow manufacturer or local guidelines before proceeding. Use small lifts and follow recommended guidance to minimize movement as you work.
Monitor for signs of bowing or movement and stop backfilling if you see cracking, displacement, or misalignment. Ensure drainage practices are respected so water can escape and pressure is reduced. If problems arise, address them with appropriate repairs and verified materials, and refer to product instructions and local rules to guide your next steps.
Key takeaways
- Ensure wall is structurally ready before backfill per manufacturer and code guidance.
- Bowing often results from inadequate drainage, poor material compaction, or leaning wall.
- Use proper backfill materials with well-draining, non-corrosive aggregate; confirm specs.
- Backfill in shallow, staged lifts with compaction per guidelines; avoid sudden fills.
- Install drainage and inspect for signs of movement during and after backfill.
- If signs of bowing, cracking, or settling appear, halt work and call a pro.
Table of Contents
- Introduction
- Key takeaways
- When Is the Wall Structurally Ready for Backfill?
- Main Causes of Bowing and Failure to Address Before Backfill
- Proper Backfill Materials and Material-Spec Considerations
- Step-by-Step Backfilling Sequence and Best Practices
- Techniques to Avoid Bowing During Backfilling
- Tools, Materials Checklist and Material-Spec Confirmations
- Common DIY Mistakes, Cost Considerations, and When to Call a Pro
- Post-Backfill Inspection, Monitoring, Maintenance, and Repair Options
- Conclusion
- FAQ
When Is the Wall Structurally Ready for Backfill?
The wall should show signs of cure and readiness beyond simple time passages. Look for mortar and base concrete that have reached a stable surface texture and sufficient strength, with joints that are set but not chalky. Confirm that the wall is aligned and that drainage components are in place and functional before any backfill begins.
Assess cure and strength by observing surface moisture and any minor surface cracking as acceptable indicators within the manufacturer’s guidelines or product data sheet. Verify vertical plumb, horizontal alignment, and consistent gaps between blocks, noting any bowing or misalignment on the wall face. Ensure the drainage plan is installed properly, with accessible weep points or a perforated pipe system that will not clog under backfill conditions.
Curing and Requirements
Before adding backfill to your block retaining wall, confirm that the concrete, mortar, and blocks have adequately cured to achieve their full strength. Typically, this process takes 28 days for concrete and 7-14 days for mortar, though specific times may vary based on manufacturer recommendations.
Always adhere to manufacturers’ guidelines for recommended cure times and any engineer-specified hold points. If uncertain about requirements, consult the manufacturer or your engineer for written guidance.
Loading the wall prematurely with backfill can compromise its structural integrity. Allow sufficient curing time to ensure the strength development of concrete, mortar, and blocks.
Visual and measurement checks before adding backfill
Before starting the backfilling process, perform a thorough inspection of your block retaining wall to ensure its structural integrity, alignment, base stability, and drainage functionality. A quick visual inspection can help identify any potential issues.
Inspect the following:
- Vertical plumb: Use a level or laser tool to check if the wall is vertically plumb (perfectly straight up and down).
- Horizontal alignment: Check for uniform gaps between blocks to ensure horizontal alignment.
- Joint integrity: Verify that the mortar has set properly, allowing for slight surface cracking.
- Base stability: Ensure that the footing or base has no signs of settlement or frost heave risk by checking its levelness and cleanliness.
- Functioning drainage: Access weep or cleanout points to confirm they are functional and free from obstructions.
If any check fails, address and resolve the issues before proceeding with backfilling. Revisiting each failed checkpoint and rechecking ensures that your wall is structurally sound and ready for backfill.
Main Causes of Bowing and Failure to Address Before Backfill
Bowing is distinct from other failures, and you should recognize specific inward movement signs such as cracks that widen over time or noticeable curvature along the wall. Differentiate the issue from general settlement or cosmetic cracking to target the correct remedy. Identify concrete or block weaknesses that could permit inward movement if not addressed first.
Root causes include poor drainage, hydrostatic pressure, inadequate footing or base compaction, compromised reinforcement or anchors, incorrect backfill material, and soil pressures behind the wall. Before backfilling, perform checks for plumb and level, inspect the cap and footings, and verify drainage provisions are in place and accessible. Observe crack behavior and soil conditions around the base to determine whether stabilization is needed prior to backfill.
Hydrostatic pressure and drainage failure
Poor drainage allows water to accumulate behind the wall, increasing lateral loads. This can lead to bowing over time.
To mitigate this, ensure that perimeter drains, weep holes, and other flow paths are unobstructed and functioning correctly. Regularly inspect and clean these provisions to prevent clogging.
Signs of drainage failure include water pooling behind the wall, saturated soil, and visible cracks or stains on the wall face.
Inadequate base or uneven foundation support
A weak or non-compacted base can transfer stress to the wall face, causing it to bow. Ensure that the base is stable and well-compacted before backfilling.
Signs of base settlement include cracks in the footing, diagonal cracks in corners, or a leaning wall. Check for these signs before adding backfill.
If you notice any settlement, address it immediately to prevent further damage. Consult with a structural engineer if necessary.
Improper backfill materials and compaction practices
The choice of backfill material and compaction methods significantly impact the wall’s stability. Using fine-grained or poorly compacted materials can increase pressure and cause bowing over time.
- Clay or silt: Avoid using clay or silt as backfill. These materials retain water, creating hydrostatic pressure and promoting settlement. Check material labels for particle size distribution.
- Loose fill: Loosely compacted backfill can shift over time, increasing lateral loads on the wall. Ensure that backfill is properly compacted in layers to prevent this.
- Organic materials: Avoid using organic materials like wood chips or leaves as backfill. These materials decompose over time, creating voids and reducing support for the wall.
- Recycled concrete: Recycled concrete can be used as backfill but must be properly graded and compacted. Check that the material meets local standards for recycled aggregate.
- Compaction methods: Use appropriate compaction equipment and techniques to ensure even density throughout the backfill. This helps prevent settlement and reduces bowing risk.
Proper Backfill Materials and Material-Spec Considerations
Choose backfill types with attention to how they influence pressure, drainage, and overall wall stability, noting when granular fill or engineered materials are appropriate and when cohesive soils are not. Consider how particle size distribution and permeability relate to your site conditions and block design, and avoid assuming a single solution fits every situation. Defining material specs early helps prevent future movement and instability.
Include drainage components such as filter fabric, perforated drain pipes, clean gravel, and any geosynthetics required by the wall system, ensuring they integrate with the chosen backfill. When unusual heights, loads, or poor soils exist, consult manufacturer specifications or a structural/geotechnical engineer for documented approvals. Plan sequencing to minimize moisture retention and bowing as you place and compact each lift.
Recommended backfill types and what to avoid
Choosing the right backfill material is crucial for your retaining wall’s stability and longevity. Here are some key considerations:
- Free-draining, coarse granular materials: These include crushed stone or gravel. They allow water to drain efficiently, reducing hydrostatic pressure on the wall.
- Avoid silty/clay soils or materials with high fines: These can retain water and exert excessive lateral pressure on the wall, leading to bowing or failure over time.
- Check material compliance: Inspect delivered materials against approved plans to ensure they meet project requirements.
- Verify material gradation: Confirm that the particle size distribution meets project specifications for optimal compaction and drainage.
- Avoid using unsuitable materials behind the wall: If materials contain high fines, silts, or clays, consider alternative placement or treatment to prevent issues.
Using suitable backfill materials and avoiding common mistakes will help maintain your retaining wall’s integrity over time.
Geotextile, geogrid, and drainage components
Proper integration of accessories is vital for your retaining wall’s stability and longevity. Here’s how to ensure the right materials are used:
Filter fabric or geotextile helps prevent soil from clogging drains while allowing water to pass through. Ensure it’s installed according to manufacturer’s instructions, with proper overlap and anchorage.
Geogrid reinforcement provides additional strength to the backfill, helping to resist lateral pressures. Position geogrids at designed lifts during backfilling, following manufacturer’s guidelines for optimal performance.
Always confirm delivered items match approved plans and review manufacturer/engineer specifications for recommended materials and placement. Correcting improperly installed or missing accessories will help maintain your wall’s integrity.
Step-by-Step Backfilling Sequence and Best Practices
Begin with preparatory checks to verify structural soundness, plumb condition, and absence of cracks, while ensuring permits or braces are in place. Set up a staging area and clearly mark utilities to prevent accidental damage during work. Plan drainage first by installing a behind-wall solution with proper slope and a filter fabric layer.
Choose backfill material and fabric, then outline a lift-by-lift sequence with small, consistent increments that are compacted gently to minimize lateral stress. Maintain a gradual backfill slope toward the drainage system, and keep the top of the wall exposed for inspection while grading progresses away from the wall. Conduct final checks after each lift to confirm plumb and monitor for any signs of bowing.
Backfilling Retaining Wall: Step-by-Step
Proceed through these steps to backfill your retaining wall safely and effectively, minimizing lateral stress.
- Initial Checks: Inspect the wall for structural integrity. Verify permits are in place. Establish a staging area and mark utilities. Ensure the wall is plumb and free of cracks before proceeding.
- Drainage Setup: Install or connect a behind-wall drainage system with proper slope away from the wall. Lay filter fabric to prevent fines from clogging the drain.
- Backfill Material Preparation: Select suitable granular fill and roll out geotextile fabric behind the wall to separate backfill from native soil.
- Backfilling Sequence: Add material in small, consistent lifts (typically 6–8 inches compacted), lightly compacting with hand tampers or low-impact equipment. Avoid overcompaction and stoppage gaps.
- Final Checks: Verify the wall remains plumb after each lift. Monitor for signs of bowing. Complete grading away from the wall with proper surface drainage. Document any deviations for future maintenance.
Prep work: Drainage, Weep Holes, and Temporary Protection
Efficiently managing water behind the wall is crucial to prevent hydrostatic pressure buildup. Begin by installing a functional drainage system with proper slope away from the wall.
Lay filter fabric over the drain to keep fines from clogging it. Ensure weep/relief points are clear and protected to allow water to escape. This step also includes temporarily protecting the wall face before placing fill.
Pro Tip: Always verify the drainage system is functional before adding backfill to prevent future issues.
Layered Placement and Compaction Approach
Placing backfill in controlled lifts compatible with your compaction equipment is essential for minimizing lateral stress on the wall. Ensure even, uniform compaction across the length of the wall to maintain its structural integrity.
Pro Tip: Choose appropriate granular fill that meets specifications and roll out geotextile fabric behind the wall to separate backfill from native soil.
Lightly compact each lift with hand tampers or low-impact equipment, avoiding overcompaction and stoppage gaps. This controlled approach helps maintain the wall’s plumbness and prevents bowing.
Final Grading and Surface Runoff Control
Finishing the grade to direct surface water away from the wall is crucial for protecting it from erosion and hydrostatic pressure. Ensure each lift maintains a slight backfill slope toward the drainage system.
Keep the top of the wall exposed for inspection and gradually taper toward the landscape grade. Protect top-of-wall drainage with cap or filter material to prevent clogging and maintain proper water flow.
Pro Tip: Verify final grading meets design specifications before completing work, as improper grading can lead to future issues.

Techniques to Avoid Bowing During Backfilling
Backfill pressure bowing a block wall results from a combination of soil type, moisture content, drainage conditions, compaction practice, and any added surcharge, so the wall must be paced with carefully controlled lifts to prevent inward movement. On site, implement stepwise compaction, use smaller lift heights, apply gang-tamping methods where feasible, and install temporary bracing if the wall shows any signs of misalignment during fill placement. These factors guide your material selection and sequencing, helping you plan for voids in the first lift, the use of drainage fabric or geotextile where appropriate, and ensuring the new fill aligns with the existing block pattern.
For cohesive soils such as clay-like material, limit pressure with smaller lifts, gang-tamping, and temporary bracing, while for granular soils focus on consistent stepwise compaction and selecting compatible equipment and lift heights. Maintain monitoring throughout, measure plumb and assess for bow or tilt after each lift, keep clear access and PPE, and document lift-by-lift progress to support future repairs or maintenance.
Balanced and Incremental Filling (Zone-by-Zone)
To prevent uneven lateral loads on long runs of block walls, it’s crucial to backfill symmetrically or in short zones. This technique distributes the weight evenly along the wall, reducing the risk of bowing.
Divide your wall into manageable sections. For walls longer than 10 meters, consider dividing them into 3-meter zones for balanced filling.
Inspect each zone after backfilling to ensure no signs of bowing or tilting. If any movement is detected, redistribute the backfill and compact evenly before proceeding.
Temporary Bracing, Anchors, and Staged Loading
Maintaining wall stability during construction is paramount. For walls taller than 3 meters, consider installing temporary bracing or consult an engineer for permanent anchor specifications.
Temporary braces and tiebacks help distribute the load of the backfill evenly, preventing the wall from bowing inwards. Ensure these are inspected before each lift to maintain their effectiveness.
Consult with a structural engineer if you’re unsure about the need for temporary bracing or permanent anchors. They can provide tailored advice based on your specific project.
Real-Time Monitoring During Placement
Early detection of movement is key to preventing failure. Use simple tools like plumb lines, straightedges, and frequent measurements to monitor your wall’s alignment during backfilling.
Inspect the wall after each lift for any signs of movement. If movement is observed, stop work immediately to assess and address the issue before proceeding.
Ensure that all measuring tools are calibrated correctly to provide accurate readings. Regular monitoring helps maintain the integrity of your retaining wall.
Tools, Materials Checklist and Material-Spec Confirmations
The checklist covers core tools, equipment, backfill options, geotextile, and drainage needs to confirm before backfilling. Include PPE, safe access gear, and the basic material constraints like acceptable soils, maximum particle size, moisture targets, and required drainage. Verify fabric grade and permeability, drainage wrap, and the compaction specs to discuss with suppliers or engineers.
Verifying material specs and keeping documentation helps prevent wall bowing and misloads. Quick checks and pro verification with data sheets reduce field errors and track deliveries. If material is clay or organics, reject and request acceptable backfill; if wrong material is delivered, halt work and reorder.
Tools and Equipment for Safe, Effective Backfilling
Proper tools ensure a smooth, efficient, and safe backfilling process.
- Excavation Safety Gear: Essential for worker protection during excavation and backfilling. Includes hard hats, safety glasses, steel-toed boots, and high-visibility vests.
- Shovel: For moving loose soil. Choose a sturdy, lightweight model with an appropriate blade size for your project.
- Tamper Plate or Plate Compactor: To compact backfill in layers. Ensure it’s compatible with the lift thickness specified for your project.
- Hand Roller: For final compaction and leveling. Select a model suitable for your project, typically ranging from 100 to 200 lbs.
- Level: To ensure backfill remains even and stable. Use a 4-foot or longer level for accurate readings.
- String Line: Helps maintain straight, level lines during backfilling. Check it regularly to ensure accuracy.
- Pry Bar: For lifting and moving heavy objects safely. Use with care to avoid injuries.
- Masonry Chisel: For making weep holes or adjusting blocks if needed. Ensure it’s in good condition before use.
- Wheelbarrow: For transporting materials around the site. Choose a sturdy, large-capacity model for efficiency.
- Vibration/Compaction Aids (Optional): Rentable tools like vibrating plates or rollers can help achieve higher compaction levels. Consider renting if your project requires it.
Materials checklist and supplier confirmations
Selecting appropriate materials ensures wall stability and longevity during backfilling.
- Clean granular backfill: Well-graded gravel or engineered fill. Verify maximum particle size (typically 1-2 inches) and ensure it’s free of clay, organics, and other contaminants.
- Drainpipe: Perforated pipe for water drainage. Confirm its diameter and length align with your project needs.
- Geotextile fabric: Prevents soil migration while allowing water passage. Check its permeability rating (typically 1-500 gpm/sf) and ensure compatibility with your wall system.
- Geogrid (optional): Reinforcement layer for added stability. Verify its strength rating (typically in kN/m) to meet project requirements.
- Outlet materials: Gravel or stone for a stable outlet at the wall base. Confirm particle size and volume needed for your project.
- Moisture control additives (optional): To manage backfill moisture content. Consult suppliers about available options suitable for your project.
Common DIY Mistakes, Cost Considerations, and When to Call a Pro
Common DIY mistakes in backfilling a block retaining wall include insufficient drainage, improper compaction, using backfill material that isn’t suited to the site, neglecting buttressing or reinforcement, and rushing the timing. These errors can compromise the wall’s stability, shorten its lifespan, and increase future repair costs. Clear criteria for wall readiness—checking structure, drainage, weep holes, and temporary supports—helps you determine when backfilling can responsibly start and reduces the risk of later failures.
Costs reflect materials, equipment, site prep, drainage needs, and labor hours, and they influence both initial price and long-term performance. Know the typical triggers to call a pro: signs of bowing, cracking, bulging, inadequate drainage, water pressure issues, or uncertain soil conditions. If the wall shows signs of instability or inadequate drainage, consider calling a professional to assess and address the issues before proceeding; avoiding rush timing and ensuring proper compaction can prevent bowing and costly repairs. A practical quick-check and maintenance approach—secure all components, maintain drainage, sequence backfill correctly, and inspect after backfilling—lowers ongoing maintenance needs and supports wall longevity.
Typical DIY errors that lead to bowing
While tackling a block retaining wall project can be rewarding, it’s crucial to avoid common mistakes that may cause the wall to bow. Here are some pitfalls to steer clear of:
- Using fine soils: Fine-grained soils lack proper drainage and can lead to hydrostatic pressure buildup behind the wall, causing it to bow.
- Overcompacting at the face: Excessive compaction near the wall’s face can push the blocks outwards, leading to bowing. Ensure even compaction throughout the backfill.
- Skipping drains: Neglecting to install proper drainage systems allows water to accumulate behind the wall, exerting pressure that may cause it to bow.
- Uneven staging: Backfilling in stages helps maintain stability. Uneven or rushed staging can lead to imbalances and subsequent bowing.
Addressing these issues promptly is key to maintaining the wall’s integrity and preventing costly repairs down the line.
Cost and lifespan factors to consider
The cost of backfilling a block retaining wall and its lifespan are influenced by several variables. Understanding these factors helps make informed decisions about your project’s budget and long-term maintenance.
Materials: The type and quality of materials used, such as blocks, backfill, and drainage systems, significantly impact both cost and longevity.
Drainage needs, site access, potential repairs, and labor hours also play a role in determining the project’s overall price. Regular maintenance, such as periodic inspections and timely repairs, can extend your wall’s lifespan and reduce long-term costs.
When to hire an engineer or foundation specialist
While DIY projects can be satisfying, there are instances when it’s crucial to consult a professional. Prompt assessment by a licensed engineer or foundation specialist can prevent costly repairs and ensure safety.
Visible bowing: If you notice any signs of bowing in your retaining wall, it’s time to call a pro. This could indicate underlying stability issues that require immediate attention.
Significant wall height, uncertain subsurface soils, or structural connections at risk should also trigger a professional assessment. Engineers and specialists can provide thorough evaluations and designs tailored to the specific site conditions, helping you make informed decisions about your project’s safety and longevity.
Post-Backfill Inspection, Monitoring, Maintenance, and Repair Options
Offer a post-backfill inspection checklist to verify soil compaction, drainage, and absence of voids while confirming alignment with the original design. Establish a monitoring plan with regular measurements or simple indicators to detect movement early. Include routine maintenance steps focused on drainage management and surface grading.
Describe early-warning signs of trouble, such as horizontal or vertical cracking, visible bowing, or loosening near the footing. List repair options and decision factors, including temporary stabilization versus permanent reconstruction and when to involve a structural professional. Document progress with photos and measurements to support proactive maintenance or reinforcement planning.
Visual checkpoints and simple monitoring schedule
Regularly inspect your backfilled retaining wall to catch any issues early. Use this checklist to guide your inspection.
- Cracks: Check for new or widening cracks, especially horizontal ones which may indicate serious problems.
- Deflection: Look for bowing, leaning, or bulging. Use a level or plumb line to confirm.
- Settlement: Measure the distance between the top of the wall and the ground behind it. Any significant change may indicate settlement.
- Drainage performance: Ensure water is draining properly from behind the wall. Check weep holes, pipes, and surface grading.
- Wall-footings bond: Inspect where the wall meets its footing for any signs of separation or movement.
- Toe debonding: Check if the toe (bottom) of the wall has moved away from the ground. This can cause instability.
- Shoulder debonding: Look for any movement at the top of the wall where it meets the backfill.
- Wall alignment: Ensure the wall remains aligned with its original design. Any significant deviation may indicate a problem.
Quick rule: Inspect your wall weekly after backfilling, then monthly or seasonally thereafter. Keep records of your inspections to track changes over time.
Maintenance actions to prolong wall life
Regular maintenance helps prevent costly repairs and extends the lifespan of your retaining wall. Follow this checklist for proactive care.
- Drainage clearing: Keep weep holes, pipes, and surface grading clear of debris to ensure proper drainage.
- Vegetation management: Control surface vegetation growth that could put pressure on the wall or clog drainage systems.
- Groundwater monitoring: Keep an eye on groundwater levels, especially after heavy rainfall. Excessive water can increase pressure on the wall.
- Backfill settlement: Check for any settling of backfill material behind the wall. Recompact if necessary.
- Wall cap inspection: Ensure the wall cap remains secure and in good condition to prevent water intrusion or debris accumulation.
- Tiebacks/anchors check: Inspect any tiebacks or anchors for signs of corrosion, damage, or loosening.
- Joints and mortar: Check joints and mortar for cracks or deterioration. Repair as needed.
Quick rule: Schedule and perform maintenance tasks regularly to prevent small issues from becoming large, costly problems.
Repair options if bowing or movement develops
If you notice bowing or movement in your retaining wall, take prompt action to prevent further damage. Consider these repair options.
- Tiebacks/anchors: Install or reinforce tiebacks or anchors to provide additional support and stabilize the wall.
- Reinforcement systems: Add reinforcement systems like geogrids, geotextiles, or soil nails to strengthen the backfill and reduce pressure on the wall.
- Partial rebuilding: If a section of the wall has moved significantly, it may need to be partially rebuilt to restore stability.
- Underpinning: In some cases, underpinning (strengthening or replacing the foundation) may be necessary to support the wall.
- Engineered fixes: Consult a structural engineer for tailored solutions based on your specific wall and soil conditions. They may recommend specialized repair techniques.
Quick rule: Address small issues promptly to prevent larger failures. If you notice significant movement or bowing, consult a structural engineer or foundation specialist immediately.
Conclusion
Backfilling a block retaining wall is a pivotal step for safety, durability, and appearance; take your time to confirm readiness and follow the correct sequence to avoid bowing and costly repairs. Stay focused on solid footing, correct materials, and careful compaction, and you’ll protect the wall and surrounding area.
First, verify readiness by checking the wall is structurally ready per manufacturer instructions or local rules, confirm the wall is plumb and footing conditions are appropriate, confirm the backfill material meets the spec, and confirm moisture and drainage are addressed. Then proceed with the backfill in stages, compacting at each stage, monitoring for any movement or misalignment, and stopping if signs of bowing appear or if the wall shows any tilt, cracking, or water pooling behind it. Ensure you have the right tools and safety gear, test a small area first, and document any deviations in plan before continuing.
Common mistakes to avoid include backfilling on saturated or unstable soil, skipping or skipping over proper compaction, and neglecting drainage or temporary bracing. Follow simple safety rules: wear eye protection and sturdy gloves, keep your footing secure, avoid heavy loads near the wall, and never push or lean on a wall that shows movement. If signs of bowing persist or if the wall shows unusual movement, or if local codes call for professional assessment, it is time to call a pro. With careful steps and prudent judgment, you can complete a durable backfill and maintain a strong, safe wall.
FAQ
What are common failure causes for block retaining walls to watch for?
Soil pressure, poor drainage, and poor backfill compaction are frequent contributors. Improper wall alignment or insufficient initial support during construction can also lead to failure over time.
What danger signs indicate that repair is needed?
Noticeable leaning, cracking, or bowing in the wall, or gaps that widen over time, should be checked. Also watch for tilting sections or new soil movement against the wall and increased moisture behind the barrier.
How does drainage affect backfill and wall health?
Water behind the wall increases hydrostatic pressure, which can push the wall forward. Proper drainage paths and relief for water help reduce pressure and limit movement.
How should you begin repairs for leaning or shifted sections?
Assess for blocked drainage and verify backfill support. Follow manufacturer instructions or seek guidance on stabilizing the affected area, then plan to correct alignment and regrade to improve drainage before completing backfill.