
Introduction
Antiquing integral color is about using stains or washes that are worked into concrete to create an aged, variegated look.
This hands-on approach hinges on proper surface prep and a controlled application process so the color settles evenly. Before you start, clean, etch or profile the surface as needed and test on a small area to see how the color develops.
Sealants change the final look by altering sheen and depth, so choose a sealer that suits your color goal.
Different sealers can make colors appear warmer, cooler, or more muted, and they’ll require different application methods. Check the product label for coverage rates and how many coats are recommended, and follow local rules or manufacturer instructions for your project.
Key takeaways
- Understand whether to use integral color or surface stain before sealing decisions.
- Wear eye protection and gloves during staining and sealing tasks.
- Prepare concrete by cleaning, etching only if needed, and patching cracks safely.
- Antiquing techniques vary: brushing, wiping, and layering create depth and age.
- Sealers alter color and sheen; test on sample panels before large areas.
- Coverage and product quantity depend on surface texture and porosity; plan extra.
- Maintain with proper cleaning and re-seal when wear shows; avoid harsh chemicals.
Table of Contents
- Introduction
- Key takeaways
- Integral Vs. Surface Stains — How They Work and Which to Choose
- Surface Preparation and Preliminary Testing
- Application Process: Stains, Washes, and Antiquing Techniques
- Sealing — How Different Sealers Alter Color, Sheen, and Durability
- Color Selection, Sample Kits, and Cost Planning
- Maintenance, Longevity, and When to Refresh
- Common Mistakes, Troubleshooting, and Visual Checkpoints
- Safety, Environmental Impact, and Disposal
- Conclusion
- FAQ
Integral Vs. Surface Stains — How They Work and Which to Choose
Integral color is mixed into the concrete mix, creating a uniform base color that travels with the substrate. Surface-applied products include acid stains, water-based stains, and antiquing washes that sit on or just below the surface. Understanding the fundamental difference sets the stage for your color strategy.
With integral color, the pigment is locked into the cement matrix as it cures, offering steady color that can age with the slab. Surface treatments develop color through exposure and aging, often producing variations and patina. Durability, maintenance, and final appearance hinge on whether you want uniformity or depth and texture that evolves over time.
What is integral color?
Integral color is a method of coloring concrete by adding pigments directly to the mix during batching. It can also be applied to fresh concrete using dry-shake or liquid color hardeners.
Why it’s uniform: Pigments are evenly distributed throughout the concrete, resulting in consistent color from top to bottom and side to side.
Why it lasts: Since the color is part of the concrete itself, it won’t fade or wear off like surface-applied products. It’s durable and long-lasting.
Surface-applied stains and antiquing washes
These are products that sit on or react with the surface of cured concrete to create color and patina. They include:
- Acid Stains: React with concrete’s minerals to produce natural, variegated colors.
- Water-based Stains: Sit on the surface, providing a consistent, semi-transparent color.
- Antiquing Washes: Create a patina effect by reacting with the concrete and leaving a soft, aged appearance.
Why they vary: These products rely on the concrete’s absorption and reaction to create unique, varied results. They can’t be controlled as precisely as integral color.
Choosing by project and performance
Selecting between integral and surface-applied methods depends on your project’s needs:
- Existing Concrete: Surface-applied products can be used to change the color of existing concrete. Integral color requires new pours.
- Desired Aesthetic: For consistent, solid colors, choose integral. For varied, aged looks, consider surface-applied options.
- Longevity Needs: If long-term durability is crucial, go with integral. If you’re okay with periodic touch-ups, surface-applied might be fine.
- Substrate Condition: Surface-applied products can hide minor imperfections. Integral color requires a well-prepared substrate for best results.
Surface Preparation and Preliminary Testing
Surface prep determines how evenly color lands and how well sealers bond. The goal is a clean, stable canvas that resists color absorption inconsistencies. Start by assessing the surface condition and plan your cleaning strategy accordingly.
Moisture, pH, and porosity influence how products behave, so identify any contaminants or laitance before testing. Use small patches to preview color change and adhesion with your chosen system. Document results to guide the main application and flag any remediation needs.
Cleaning, repair, and surface profiling
The first step to a successful antiqued concrete finish is a clean, well-prepared surface. Start by removing all loose debris with a broom or shop vacuum.
For stubborn residues like efflorescence, soap scum, or oils, use a degreaser. Apply it, let it sit for 15-30 minutes, then scrub and rinse thoroughly.
Repair cracks and holes using a concrete patching compound. Ensure the surface is smooth and free of gouges by feathering the edges of repairs and filling any voids. The goal is to create a consistent profile that will accept stain and sealer evenly.
Pro tip: For integral color, expose the appropriate texture (mechanical or chemical) before staining to ensure good bond and absorption.
Moisture, pH, and compatibility tests
Before testing stains and sealers, check your concrete’s moisture content and pH level. High moisture or alkaline conditions can affect stain absorption and sealer bonding.
For moisture, use a non-contact moisture meter or the calcium chloride test method if applicable. Aim for a relative humidity (RH) of 75% or less at the surface.
To check pH, use litmus paper or a pH meter. Ideal pH for stain and sealer adhesion is between 6-8. Consult product data sheets for manufacturer tolerances.
Pro tip: High moisture or alkaline conditions may require additional surface preparation like sealing or acid washing before staining.
Preliminary testing and mock-ups
Before committing to the whole project, test stains and sealers on small, inconspicuous areas or sample boards. This helps preview color change, absorption rates, and final finish.
Select test patches that represent various conditions present in your main application area, including moisture-prone spots if applicable. Apply both staining and sealing combinations to these patches.
Document surface conditions, measurements, and pass/fail criteria for each test patch. This will guide your main application and help flag any remediation needs before proceeding.
Pro tip: Allow ample drying time between stain and sealer applications, and between testing phases to ensure accurate results.
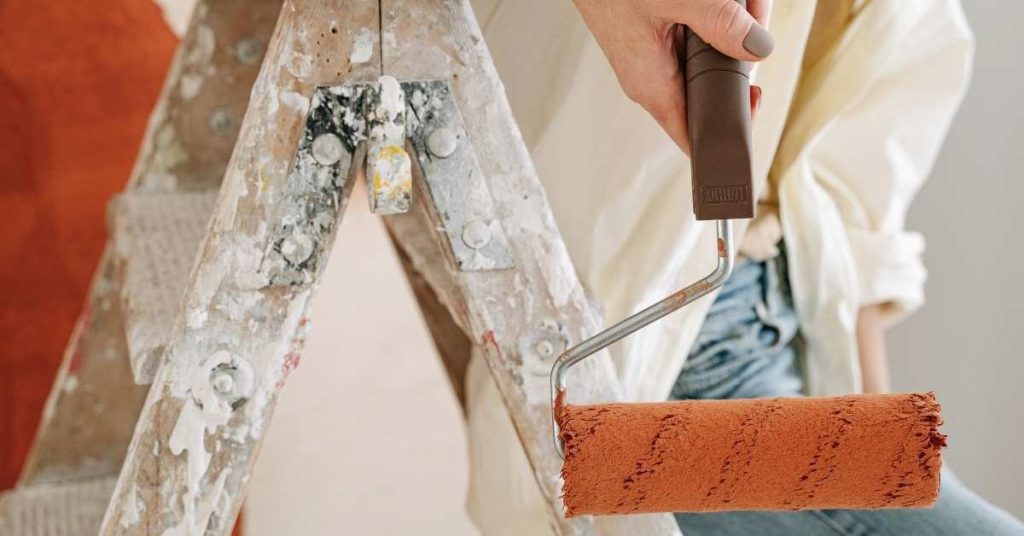
Application Process: Stains, Washes, and Antiquing Techniques
Plan the sequence from base color to antiquing accents, testing on a sacrificial area first. Prepare tools and mix additives as recommended, while maintaining consistent application conditions. The workflow should flow from prep to final sealing with deliberate checks along the way.
Layering methods include light base stains, antiquing washes, and optional highlights to create depth. Dwell times, reactivation steps, and blending techniques determine the final look without blotching. Keep the surface clean during the process and follow safety guidelines for ventilation and handling.
Tools and materials checklist
Before you start, gather these essential tools and materials to ensure a smooth antiquing process.
- Sprayers: For even application. Check for proper nozzle size and pressure.
- Rollers: Medium nap for stains, fine nap for sealers. Ensure they’re in good condition.
- Brushes: Angled sash brush for edges, 3-4″ roller cover for large areas. Check bristles for stiffness and length.
- Scrubbers: For surface prep. Choose stiff-bristle, non-metallic scrub pads.
- PPE: Gloves, safety glasses, ear protection (if using power tools).
- Stains: Water-based or solvent-based. Check for desired color and opacity.
- Washes: Additive washes for antiquing effect. Check compatibility with chosen stain.
- Trowels: For squeegee effects. Choose a flexible, non-corrosive blade.
- Sealers: Water-based or solvent-based. Match sealer to desired look and surface type.
Quick rule: Always check product labels for safety warnings and storage instructions.
Step-by-step application for antiquing stain and washes
Follow this sequence to achieve a professional-looking, antique finish on your concrete surface.
- Pre-clean the surface. Remove all dirt, debris, and contaminants.
- Test stain/wash compatibility. Apply a small amount of each product in an inconspicuous area.
- Apply base stain. Use sprayer or roller for even coverage. Let it dwell as per manufacturer’s instructions (usually 15-30 minutes).
- Apply antiquing wash. Use a brush, roller, or sprayer. Work in small sections to avoid lap marks.
- Blend or wipe excess. Use a damp cloth or sponge to blend edges and remove excess product. Check for desired effect.
- Neutralize if needed. Rinse with clean water to stop the staining process (if using acid-based washes).
- Allow curing. Let the surface dry completely before sealing (usually 24-72 hours).
- Apply sealer. Use a roller or sprayer for even coverage. Allow it to cure as per manufacturer’s instructions.
Layering, blending, and faux-aging techniques
Create depth and authentic-looking age with these layering and blending techniques.
Layering: Apply multiple colors of stain or wash, allowing each to dry before the next. Start with a light base color, then add darker shades for dimension.
Selective wiping: Wipe off excess product while it’s still wet to reveal underlying layers and create contrast. Use a damp cloth or sponge for controlled results.
Dry-brushing: Apply a small amount of stain/wash to a dry brush, then gently dab onto the surface to create a textured, weathered look. This technique works best with water-based products.
Resist or masking: Use tape, paper, or plastic to mask off areas before applying stains/washes. Remove the mask after the product has dried to reveal clean lines and contrast.
Sealing — How Different Sealers Alter Color, Sheen, and Durability
Sealer families include penetrating options and film-forming coatings, with variations in water or solvent bases. Each type changes color depth and perception, so understand how your chosen sealer interacts with the look you want. Expect some shift as the glaze sets and cures.
Sheen ranges from matte to gloss, influenced by application method and film thickness. Consider slip resistance, UV stability, and abrasion needs when selecting a sealer. Guidance on penetrating versus film-forming options should align with substrate condition and intended use without assuming a fixed result.
Sealer types and finish characteristics
Sealers fall into two broad categories: penetrating and film-forming. Penetrating sealers, like silane or siloxane, soak into the concrete to protect it from within, leaving a natural, matte finish with minimal color change.
Film-forming sealers, such as acrylics, polyurethanes, or epoxies, create a protective layer on top of the surface. They alter color saturation and depth, providing more intense hues and gloss levels ranging from matte to high-gloss.
Solvent-based sealers offer better durability but have strong odors and longer drying times. Water-based alternatives are eco-friendlier, faster-drying, but may not be as durable or resistant to UV rays.
Choosing a sealer for location and look
For indoor use, consider water-based sealers with low VOCs. They’re safer, faster-drying, and offer a range of sheens from matte to semi-gloss.
For outdoor applications, opt for UV-stable, solvent-based sealers or high-quality water-based options. They’ll resist fading and maintain color vibrancy under sunlight exposure.
High-traffic areas like driveways or walkways need abrasion-resistant sealers. Epoxies or polyurethanes are good choices, but check manufacturer suitability for your specific antiquing work.
Timing, application methods, and curing after staining
Wait at least 24-72 hours after staining before sealing. This allows stains to fully cure and prevents sealers from interfering with the stain’s chemical reaction.
Use recommended application methods: spray for even coverage, roller for smooth surfaces, or pad for textured ones. Follow manufacturer guidelines for film thickness to avoid over-application.
Sealers are ready when they’re dry to touch. For full cure and maximum protection, wait at least a week before exposing the surface to heavy traffic or moisture.
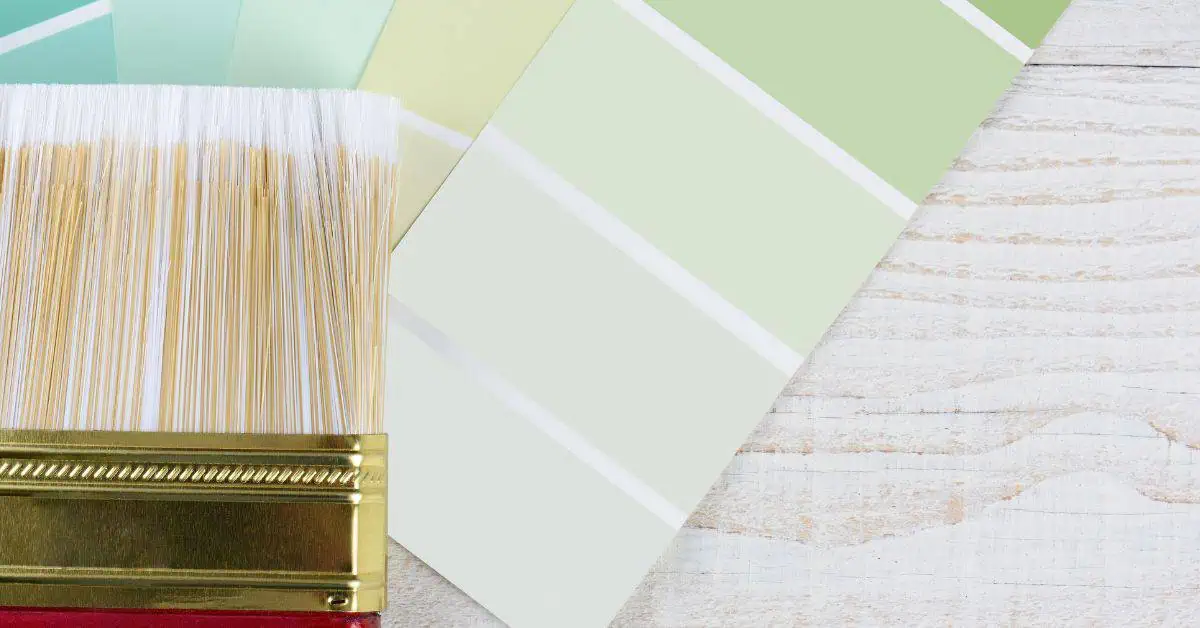
Color Selection, Sample Kits, and Cost Planning
Define color goals before selecting any product, considering how the concrete’s natural tone will interact with finishes. Plan for both the base color and any antiquing or highlighting treatments you intend to use. This clarity helps with kit choices and application expectations.
Use samples and small trials to compare options under typical lighting and conditions. Build a practical workflow for color planning, including board samples and field testing. Prepare a realistic budget by outlining likely material needs and potential waste, while noting when professional help might be more efficient for consistency.
Using sample kits and building a color palette
Order or create sample patches using your chosen stain, wash, or pigment. Apply them to the concrete surface in various locations to evaluate color under different lighting conditions throughout the day.
Layer washes to achieve the intended antiqued effect. Start with lighter colors and gradually add darker shades, mimicking the natural weathering process. Document results by taking photos from different angles and noting substrate, application method, and any other relevant factors.
Pro tip: Create a small color board for easy reference during the staining process to ensure consistency in your antique effect.
Cost comparison: DIY kits, materials, and professional bids
Material choices significantly impact the final result. Here’s a breakdown of major cost categories to help you compare kit options versus buying supplies separately or hiring a contractor.
- DIY Kits: Convenient, all-in-one solutions with clear instructions. However, they may limit customization and could be pricier per square foot.
- Buying Supplies Separately: Offers more flexibility in color selection and quantities. Requires research for compatible products and proper usage.
- Professional Services: Ensures consistent results, especially for large projects. However, labor costs can add up quickly.
- Tools: Consider the cost of necessary tools like sprayers, brushes, or rollers. Some kits may include these, while others require separate purchase.
- Sealers: An often-overlooked expense. Choose wisely based on desired sheen and durability for your specific project.
- Waste and Overhead: Factor in material waste due to spills or improper application, as well as time spent cleaning tools and equipment.
Project timeline and budgeting checklist
Use this checklist to estimate time and sequence tasks efficiently from prep work to final sealing.
- Surface Prep: Clean, repair, and profile the concrete surface. Ensure proper moisture levels and pH balance.
- Stain Selection: Choose your stain or wash based on desired color goals and integral color compatibility.
- Sample Testing: Conduct mini-project tests to ensure chosen colors meet expectations under site lighting conditions.
- Application: Apply stains/washes, layering and blending as needed for the antique effect. Follow manufacturer’s guidelines for application methods and timing.
- Curing Time: Allow adequate curing time between stain/wash applications and before sealing to ensure optimal results.
- Sealer Selection: Choose a sealer that complements your desired look and offers appropriate durability for your location.
- Sealing: Apply sealers according to manufacturer’s instructions, considering application methods and curing times.
- Cleanup: Properly clean tools and dispose of chemicals responsibly after completion.
Quick rule: Always allow extra time for touch-ups, reapplication, or unexpected delays during the staining and sealing process.
Maintenance, Longevity, and When to Refresh
Establish a routine that includes cleaning, moisture management, and surface prep between reseals. Regular checks help you catch wear before it becomes noticeable. A simple cycle keeps color and sheen closer to the original intent.
Look for signs like color fade, sheen loss, or increased absorption to know when a refresh is needed. Indoor versus outdoor environments, traffic, and chemical exposure all influence reseal timing. Develop a practical plan for reapplication and preservation without oversaturation or dulling effects.
Routine cleaning and stain care
Regular cleaning is key to preserving your concrete’s antiqued finish. Use a mild, pH-neutral cleaner to avoid stripping the sealer or pigment.
Avoid acidic cleaners like vinegar or lemon juice, as they can dull the sheen and fade the color over time.
For tougher stains, use a soft-bristled brush or a pressure washer with a wide-angle nozzle. Always test cleaners on a small, hidden area first to ensure compatibility.
Recoat, partial repairs, and full refresh strategies
Start by inspecting your concrete for any damage or wear. For small areas, a recoat might suffice. Use the same sealer as before to maintain consistency.
For larger areas or deep scratches, you may need to apply a thin wash of stain to refresh the color tone. Always spot test first to ensure compatibility with your existing finish.
If the concrete is severely damaged or worn, it’s best to do a full refresh. Remove any loose material, clean the surface, and start from scratch with a new application of stain and sealer.
Common Mistakes, Troubleshooting, and Visual Checkpoints
Watch for uneven coverage, lap marks, and color bleed from adjacent surfaces. Incorrect dilution or incompatible sealers are frequent culprits that alter finish. Early detection makes fixes simpler and cheaper.
Use a quick patch test to diagnose substrate prep and application issues, then adjust technique or products as needed. Visual checkpoints after each stage help you verify even tone, consistent sheen, and uniform color under different lighting. Keep notes and swatch panels for future reference.
Troubleshooting fading, blotching, and adhesion issues
Use this checklist when you notice uneven color, lack of penetration, or sealer incompatibility.
- Uneven color: Check for partial coverage, lap marks, or overlapping wet edges. These can cause fading and blotching.
- Blotchy appearance: Look for signs of bleeding from adjacent unsealed surfaces. This can cause discoloration.
- Poor adhesion: Inspect for areas where the stain or sealer isn’t bonding properly to the surface. This could lead to peeling or flaking.
- Incompatible sealer: Ensure your chosen sealer is compatible with the stain and substrate. Incompatibility can alter finish, adhesion, or cause discoloration.
- Improper dilution/activator ratios: Check if you’ve mixed products correctly. Incorrect ratios can affect color penetration and durability.
- Substrate issues: Re-evaluate substrate prep (pH, moisture, porosity). Poor preparation can lead to adhesion problems and uneven staining.
- Tool choice: Ensure you’re using the right tools for application. Incorrect tools can cause streaks, blotches, or poor penetration.
- Stroke consistency: Check if your strokes are consistent throughout. Inconsistent strokes can lead to uneven color and sheen.
- Dry/wet times: Reassess dry/wet times under current conditions. Incorrect timing can cause blotching, streaking, or poor adhesion.
Quick rule: If issues persist despite troubleshooting, consider stripping and starting over to ensure a consistent finish.
Visual checkpoints during each phase
Use this checklist to validate your process step-by-step during prep, staining, and sealing.
- After staining/washing: Check for uniform tone and absence of blotching. This confirms even color distribution.
- After drying: Inspect for even color saturation without patchy spots. This ensures proper penetration.
- Immediately after sealing: Look for consistent sheen and avoid glossy blotches or streaks. This confirms a uniform finish.
- Final look under different lighting: Check for subtle color shifts. This helps catch any inconsistencies that may not be visible in regular light.
- Substrate condition: Document substrate conditions before starting. This can help troubleshoot issues later on.
- Product batch numbers: Record product batch numbers. This can help track any inconsistencies between batches.
- Ambient temperature/humidity: Note ambient temperature and humidity. These factors can affect application and drying times.
- Cure times: Document cure times. This helps ensure the surface is fully cured before use or additional coats.
Quick rule: Regular visual checks help catch problems early, saving time and effort in the long run.
Safety, Environmental Impact, and Disposal
Wear appropriate PPE for the task, including eye protection, gloves, and suitable respirators or masks based on product class. Ensure adequate ventilation and avoid confined-space exposure. Follow task-specific safety guidelines at all times.
Dispose of leftovers, containers, and wash water following local regulations and manufacturer instructions. Consider recycling options where allowed and minimize waste by planning precise quantities and reuse where practical.
On-site safety and personal protective equipment
Safety on the jobsite is paramount. Here’s what you need to protect yourself while working with antiquing integral color products.
- Respirator or dust mask: Use a respirator or N95/P100 mask for fine particles. Some products may require supplied-air respirators, check SDS.
- Eye protection: Wear safety glasses with side shields or goggles to protect from splashes and debris.
- Gloves: Use chemical-resistant gloves suitable for the product. Some may require neoprene or nitrile gloves, check SDS.
- Long sleeves and appropriate footwear: Wear long sleeves to protect skin from contact and sturdy boots to prevent slips and trips.
- Optional: Tyvek suits: For heavy-duty protection, consider renting a Tyvek suit (around $20/day).
Environmental considerations and proper disposal
Minimize your environmental impact by following these guidelines for product selection, waste reduction, and disposal.
Product selection: Choose low-VOC products to reduce air pollution. Some may be labeled ‘low VOC’ or ‘zero VOC’.
Waste reduction is key. Use only what you need, seal containers properly, and store for future use if possible.
Disposal: Follow local hazardous-waste disposal rules. Check with your city or county for specific guidelines. Some may require special collection days or facilities. Always follow manufacturer recommendations on container labeling and disposal. Never pour leftover product down drains.
Conclusion
Get confidence from a solid plan: test small areas first, choose a stain approach that matches the substrate, and seal with the right product to protect color and durability. Prior planning and safety keep you from costly surprises and poor results.
Start by testing colors on scrap boards and a hidden area, confirm how the stain or antique finish looks after drying, then prep the surface, clean, repair any damage, and choose the compatible sealer. Gather the correct products, apply in the approved order, work in small patches, and follow label directions for drying times, ventilation, and disposal. Do a final check on sheen, color, and coating thickness, and plan maintenance and refresh when needed.
Common mistakes to avoid include skipping a real test area, applying heavy coats in one pass, and neglecting proper surface prep or ventilation. Always wear the right safety gear, work in good lighting, and dispose of rags and waste according to local rules. If the project involves complex substrates, wide color shifts, or structural concerns, consider a professional before proceeding and remember that careful planning today saves time and money tomorrow.
FAQ
How do I prepare the concrete for antiquing stain?
Start with a clean, dry surface. Remove dust, oil, and sealers if present. Etch or grind only if the manufacturer instructions require it, and always test a small area first.
What types of sealers are available and how do they affect color?
Different sealers change color and sheen in distinct ways. Water-based sealers tend to brighten or convert a stain slightly, while solvent-based ones often deepen the color. Check the label for color/clear results and test on a sample area before full application.
How can I estimate how much stain and sealer I need?
Look up the product’s coverage rate on the label or datasheet and plan for losses near edges and corners. Buy a little extra for touch-ups, and account for surface porosity. If in doubt, buy a starter kit or consult the manufacturer instructions for guidance.
How do I clean up after applying antiquing stains and sealers?
Wash brushes and tools per product directions with the recommended solvent or water. Wipe up puddles and spills promptly to avoid staining unintended areas. Dispose of waste according to local rules and the product label.