
Introduction
Anti-static floor coatings are coatings that reduce static electricity buildup on concrete floors. In a workshop or DIY space, they help prevent shocks and protect sensitive tools. Choose a coating that suits foot traffic and cleaning needs, and follow the label for surface prep.
Before applying, test the concrete for moisture and cleanliness, and confirm the coating’s compatibility. Apply in a well-ventilated area and follow safety guidelines; don’t rush the cure. If unsure, check manufacturer instructions and local rules for your space.
Key takeaways
- Choose proper anti-static or conductive coatings based on workshop usage and ESD risk.
- Prepare concrete surface clean and dry; moisture can undermine coating adhesion.
- Follow manufacturer instructions for priming, curing, and recoat intervals.
- Test with a simple static check after installation before heavy use.
- Document compliance: keep product data sheets, installation logs, and inspection notes.
- Safety: wear PPE and avoid applying coatings near sparks or flames.
Table of Contents
- Introduction
- Key takeaways
- What Anti-Static and Conductive Floor Coatings Are
- Types of Coatings and Materials Used
- When Anti-Static Floors Matter in Workshops
- Assessing DIY Limits and When to Hire a Professional
- Surface Preparation and Step-by-Step Installation Overview
- Tools and Materials Checklist
- Testing, Maintenance and Visual Checkpoints
- Regulations, Standards and Documenting Compliance
- Conclusion
- FAQ
What Anti-Static and Conductive Floor Coatings Are
Anti-static floor coatings are designed to limit static buildup and direct electrical charges away from surfaces. Conductive floors provide a continuous pathway to dissipate charge quickly. Explain the difference in plain terms so readers can spot labels and marketing language clearly.
Focus on the primary purpose: controlling electrostatic discharge in work areas. Clarify common terms and what to look for on product labels, data sheets, or manufacturer instructions to avoid confusion. Safety and performance hinge on choosing the right system for the job.
Anti-static vs conductive — basic definitions
Anti-static, also known as dissipative, floor coatings reduce charge buildup by increasing the surface’s electrical resistance. Conductive systems, on the other hand, provide a low-resistance path to ground.
Anti-static coatings work by slowing down the rate at which charges accumulate on the floor’s surface. They’re designed for environments where static generation is moderate but consistent grounding isn’t feasible.
Conductive systems, however, quickly dissipate charges to ground. They’re ideal for high-static areas like electronics manufacturing plants or labs handling explosive materials.
How these coatings work in practice
Both anti-static and conductive floor coatings rely on increasing the floor’s surface resistivity to control static buildup. This is achieved by incorporating conductive additives into the coating.
The key difference lies in how they’re grounded. Anti-static floors slowly dissipate charges through increased resistance, while conductive floors quickly transfer charges to ground via a low-resistance path. This grounding is typically achieved using a continuous conductive strip or mesh beneath the floor.
In essence, anti-static coatings manage static by increasing the time it takes for charges to build up, while conductive systems quickly remove them once they’ve formed.
Types of Coatings and Materials Used
Wood, concrete, and metal substrates each have typical coating choices. Epoxy and polyurethane systems are common for durability and chemical resistance. Polymer-modified cement and conductive membranes offer alternative paths for ESD control.
Understand the role of conductive fillers or mats within these systems. Note how tradeoffs show up in wear resistance, ease of application, and long-term maintenance. Always verify compatibility with your substrate and environment via manufacturer guidance.
Resin-based systems (epoxy, polyurethane)
Resin-based anti-static floor coatings like epoxy and polyurethane offer excellent durability and chemical resistance for workshop floors. They form a tough, seamless barrier that’s easy to clean and maintain.
Epoxy is the go-to choice when it comes to heavy-duty wear and tear. It’s highly resistant to abrasion, impact, and chemicals. However, it can be sensitive to extreme temperatures and may require longer curing times.
Polyurethane, on the other hand, provides superior flexibility and resistance to hot tire pick-up. It’s ideal for areas with heavy equipment traffic but might not perform as well under severe chemical exposure compared to epoxy.
Sheet or mat solutions and hybrid systems
Prefabricated conductive mats or hybrid layered systems are preferable when you need a quick, easy-to-install solution with minimal downtime. They’re ideal for retrofitting existing workshops or areas where liquid coatings might be challenging to apply.
Conductive mats provide a cost-effective way to create anti-static zones in specific work areas. They’re easy to install and can be cut to size, but they may not offer the same level of seamless protection as liquid coatings.
Hybrid systems combine the benefits of both liquid coatings and conductive mats. They typically involve applying a conductive mat over an epoxy or polyurethane base coat for added durability and protection. This approach offers flexibility in design and can accommodate complex workshop layouts.
When Anti-Static Floors Matter in Workshops
Electronics assembly and precision instrument repair are classic cases where ESD protection matters. Handling flammable or dusty materials also benefits from controlled conductivity. Frequent foot and cart traffic can affect discharges and wear a floor more quickly.
Identify risk factors like sensitive components and potential ignition sources in your space. Assess whether the nuisance of static is a real hazard in your workflow. Check product data and local guidance to confirm suitability for your setting.
Electronics and ESD-sensitive work
Even a tiny static discharge can fry sensitive electronics components. Floor control is one way to protect them.
In workshops handling ESD-sensitive devices, anti-static floors help prevent these damaging discharges. They’re not the only protection layer, but they’re crucial.
Key areas: Workbenches, assembly stations, and storage zones for sensitive components.
Fire, dust and flammable environments
Static can spark fires in workshops with flammable materials. Grounding and material choices matter here.
Anti-static floors help prevent static buildup that could ignite flammable dust or vapors. They’re a must in workshops handling explosive or highly flammable substances.
Key areas: Around storage for flammables, work zones with open flames or sparks, and high-traffic paths where static can build up quickly.
Assessing DIY Limits and When to Hire a Professional
DIY can cover small, simple floors with good access to surface prep tools. If the surface is cracked, delaminated, or damp, consider outside help. Safety, warranty, and code implications matter as the project grows in scope.
Use professional contractors for complex installs or large areas, especially when integration with existing systems is involved. Always check local codes and the manufacturer’s installation warranty conditions before proceeding. Get a clear written plan and scope of work from any pro you hire.
Tasks generally suitable for experienced DIYers
If you’re comfortable with basic DIY tasks and have a small area to cover, you might tackle these jobs yourself.
Simple surface repairs – Touch-ups or minor damage can be fixed using leftover materials from your original installation. Just make sure the surface is clean and dry before applying.
Applying topcoats under controlled conditions – If you’ve got a small, well-ventilated area and some spare time, you could apply a new topcoat to refresh your floor’s appearance. But remember, it’s crucial to follow the manufacturer’s instructions to the letter.
Red flags that mean call a pro
There are times when it’s best to leave things to the professionals. Here are some situations where you should consider hiring an expert.
Grounding integration – If your project involves integrating anti-static flooring with grounding systems, it’s wise to call in a pro. They’ll ensure everything is connected correctly and safely.
Large-area installations – Covering vast areas can be challenging. Pros have the right tools and experience to get the job done efficiently and evenly.
Installations in regulated facilities – If your project is in a facility with strict regulations (like hospitals, labs, or data centers), it’s crucial to hire a professional. They understand these rules and will ensure your installation complies with them.
Surface Preparation and Step-by-Step Installation Overview
Start with a clean, dry, and sound surface. Address cracks, delamination, and moisture issues before any coating goes down. A good prep reduces failures and long-term maintenance needs.
Get a high-level view of the installation sequence, so you know what comes first and last. Verify the product tech data for cure times, recoat windows, and surface tolerance. Watch for common pitfalls like moisture traps or insufficient texture for adhesion.
Step-by-Step Installation Process
This section guides you through the surface preparation and installation of your anti-static floor coating, ensuring a durable, long-lasting result.
- Preparation and Safety Checks: Clear the area, ensure no moisture (relative humidity below 50%), and check substrate temperature (above 4°C/39°F).
- Cleaning: Remove all contaminants using a degreaser or cleaner suitable for your floor type. Rinse thoroughly.
- Grinding and Repair: Grind any high spots, remove loose material, and repair cracks with an appropriate filler. Allow to dry.
- Primer Application: Apply primer following manufacturer’s guidelines, ensuring even coverage. Let it cure according to product data.
- Conductive Layer/Mat Installation: Install conductive layer or mat, following package instructions. Ensure proper adhesion and no air bubbles.
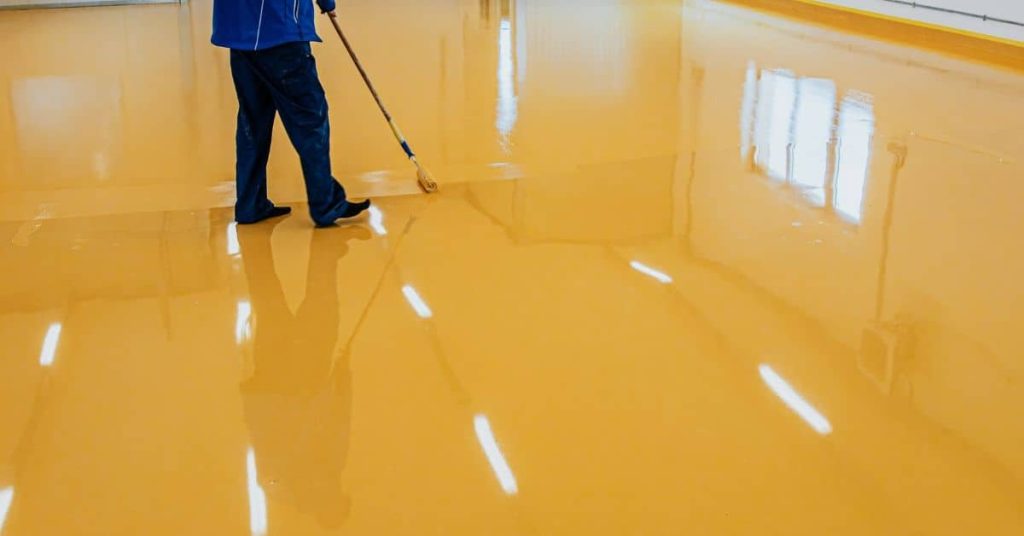
- Topcoat Application: Apply topcoat evenly using a roller or spray system. Maintain a wet film thickness within manufacturer’s recommendations.
- Curing and Final Inspection: Allow the coating to cure as per product data, then perform final visual inspection for any defects.
Surface assessment and prep checklist
Use this checklist before starting your anti-static floor coating project to ensure a successful outcome.
- Inspect Substrate: Check for adhesion issues, delamination, or weak spots. Mark for repair.
- Remove Contaminants: Ensure no grease, oil, or other contaminants remain on the surface. Use appropriate cleaners.
- Check Flatness: Identify any high or low spots that need grinding or filling.
- Moisture Check: Test for moisture using a moisture meter (below 4% relative humidity).
- Temperature Check: Ensure substrate temperature is above 4°C/39°F.
- Check Substrate Pore Structure: Verify it’s open and suitable for coating adhesion. If not, consider surface treatment.
- Inspect Edges: Check edges and corners for any damage or weakness. Repair if necessary.
- Verify Substrate Compatibility: Ensure your chosen coating is suitable for the substrate type (concrete, wood, etc.).
- Check Coating Storage Conditions: Ensure products were stored correctly and within their shelf life.
- Gather Tools and Materials: Have all necessary tools, safety gear, and materials ready.
Quick rule: If in doubt about any aspect, consult product tech data or contact a professional.
Typical application stages
The anti-static floor coating installation process typically involves several stages to ensure optimal performance and durability. Here’s what you can expect:
Primer Application: The first stage is applying a primer, which promotes better adhesion of the subsequent layers and seals the substrate.
Conductive Layer/Mat Installation: Next, install the conductive layer or mat. This stage ensures your floor dissipates static charges effectively.
Topcoat Application: The topcoat provides a durable, wear-resistant surface that protects the underlying layers and enhances the floor’s appearance.
Curing/Inspection Windows: Between each stage, allow for adequate curing time as per product data. Perform visual inspections to ensure no defects before proceeding with the next stage.
Tools and Materials Checklist
Prepare a practical kit for small to medium jobs: personal protection, floor grinders or scarifiers, and basic mixing tools. Include rollers, brushes, and seam tapes as appropriate for the system chosen. Have cleanup supplies ready for spills and spills minimization.
Note that professionals may bring specialty items or power aids not usually found in a home workshop. Always verify manufacturer recommendations and local rental options for larger tools. Keep a copy of the product label or data sheet on site for quick reference.
Essential tools and PPE for safe work
Before you start, ensure you have the right gear to keep yourself and your workspace safe.
- Respirator: Protects from harmful fumes. Use a half-face respirator with organic vapor cartridges.
- Safety glasses: Shields eyes from debris and chemical splashes.
- Gloves: Essential for handling chemicals and preventing skin irritation.
- Coveralls: Protects clothing from contamination. Use disposable ones for easy cleanup.
- Grinder: Needed for surface preparation, like removing old coatings or leveling high spots.
- Rollers: Required for applying the coating evenly and quickly.
- Grounding probe: Ensures static dissipation. Check it regularly to confirm proper grounding.
- Tape measure: Crucial for determining how much material you need and ensuring even application.
Quick rule: Always double-check your PPE before starting work to avoid potential hazards.
Materials and specs to verify before purchase
Before you buy, make sure the materials you choose are suitable for your project and workspace.
- Substrate compatibility: Check if the coating is compatible with your existing floor. Incompatibility can lead to delamination or poor adhesion.
- Recommended thickness: Follow manufacturer guidelines to ensure proper coverage and protection. Too thin may not provide adequate protection, while too thick could lead to cracking or peeling.
- Cure times: Understand how long it takes for the coating to cure fully before applying a second coat or exposing it to heavy traffic.
- Grounding method: Ensure the coating has an appropriate grounding method, like conductive particles or a separate grounding system.
- Color and finish: Choose the color and finish that best suits your workspace needs and aesthetic preferences.
Quick rule: Always verify product data sheets to avoid costly mistakes and ensure a successful installation.
Testing, Maintenance and Visual Checkpoints
Plan post-install checks for adhesion and surface continuity. Run basic visual inspections for coating uniformity and wear patterns. Establish a routine to catch contamination before it causes issues.
Develop a maintenance schedule that fits your traffic and environment, and follow product guidance for testing frequency. Document results and keep records of repairs or re-coats to support warranties and future work. Verify any test methods with product instructions.
Post-installation testing methods
Before putting your workshop back into use, follow this checklist to verify your anti-static floor coating’s integrity and performance.
- Check continuity: Use a multimeter set to ohms to ensure the coating is electrically connected from one end to the other. A high resistance or open circuit indicates a break in the conductive path.
- Test surface resistivity: Follow manufacturer’s instructions for surface resistivity testing. Values should match specified performance levels.
- Inspect grounding points: Ensure all grounding points are secure and properly connected to the coating.
- Check ESD protection: Test ESD protection by simulating a static discharge using an ESD simulator. The coating should dissipate charge quickly.
- Examine visual appearance: Look for any cracks, gaps, or discoloration that could indicate damage during installation or curing.
- Test under load: Place heavy equipment on the floor to ensure it doesn’t compromise the coating’s integrity.
- Perform humidity testing: Check performance in high humidity conditions as per manufacturer’s guidelines. Some coatings can lose effectiveness in high humidity.
- Inspect edges and corners: These areas are prone to damage during installation or use. Ensure they’re intact and performing as expected.
Quick rule: Always follow manufacturer’s guidelines for testing frequency and methods.
Routine maintenance and signs of failure
Regular maintenance keeps your anti-static floor coating performing at its best. Here’s what to check during routine inspections.
- Inspect for wear: Look for signs of excessive wear, such as scuffs or scratches that could compromise the coating’s performance.
- Check for delamination: Gently push on the floor with a flat object. If it feels spongy or moves, there may be delamination occurring.
- Examine for chemical attack: Check for any signs of damage from chemicals spilled on the floor. Some coatings can degrade when exposed to certain chemicals.
- Inspect seams and edges: These areas are prone to wear and tear, and should be checked regularly.
- Monitor grounding points: Ensure they remain secure and functional. Tighten or replace as needed.
- Check for moisture: Excessive moisture can degrade some coatings over time. If present, address the source of the moisture.
- Examine for cracks or gaps: These can form due to settling, temperature changes, or heavy equipment use.
- Test ESD protection periodically: As with post-installation testing, ensure ESD protection remains effective over time.
Quick rule: If you notice any signs of failure, address them promptly to prevent further degradation and maintain your workshop’s safety.
Regulations, Standards and Documenting Compliance
Some industries and workplaces require adhering to ESD and safety standards. Check applicable national or industry standards and facility policies before specifying a floor system. Compliance often hinges on proper documentation and installation records.
Keep installation and test records to support compliance and warranty claims. When in doubt, review the manufacturer instructions and your local regulations to confirm what must be documented. Seek guidance from the expert or authority having jurisdiction if needed.
What to check with authorities and employers
Before you start, make sure anti-static flooring is required for your workshop. Here’s a quick checklist:
- Local building codes: Check if they mandate ESD floors in workshops.
- Workplace safety officers: Consult them about industry-specific regulations.
- Quality managers: Ask about employer requirements for anti-static flooring.
- Industry standards: Verify if your industry has ESD standards (e.g., ANSI/ESD S20.20).
- Fire codes: Ensure the chosen floor system meets fire safety regulations.
- Insurance providers: Confirm they cover the specified flooring type.
- Environmental health & safety (EHS) policies: Check if your workplace has ESD-related policies.
- Occupational Safety and Health Administration (OSHA): Ensure compliance with their standards.
Quick rule: Skipping these checks might lead to non-compliance, safety hazards, or invalidated warranties.
Record-keeping and warranty considerations
Proper record-keeping supports warranty claims and helps during audits. Here’s what to document:
Product data sheets: Keep them for reference, as they contain crucial product information.
Document installer qualifications: Ensure your installer is certified or experienced in anti-static flooring installation.
Keep test reports: These prove the floor system meets ESD and other performance standards. They’re vital for warranty claims and audits.
Conclusion
Getting the coating right protects you, your tools, and your floor. A properly chosen anti-static or conductive coating keeps static shocks from damaging parts and preserves the look of the shop, without belting you with costly mistakes.
Check your plan in plain terms: pick the coating type suited to your activity, prep the surface clean and dry, follow the manufacturer’s mix and cure steps, apply in the recommended order, run the required tests, and keep clear records of what was done and when. Confirm that the area is ready, cabinet doors, benches, and traffic won’t disturb the cure, and that you test a small area first before committing to the whole floor. Safety first, test in a small area, and document compliance.
Common mistakes to avoid are skipping surface prep, ignoring humidity or temperature guidelines, and rushing the cure or test steps. Don’t mix coatings with incompatible materials, don’t skip the test process, and don’t assume “it looks fine” means it is protecting the workspace. Keep hands and feet clear of wet coatings, wear the right PPE, and never work alone when handling chemical surfaces.
If you’re unsure about the coating type, surface condition, or required tests, it makes sense to call a professional rather than push ahead. When in doubt, section off a small trial area and verify performance before scaling up. With careful steps and clear records, you’ll end up with a durable, safe floor you can trust every day.
FAQ
How can I tell if an anti-static coating will work with my concrete floor and tools?
Read the product label for substrate compatibility and surface prep. Look for the resistance class or performance claims and follow the manufacturer’s instructions. If in doubt, test a small area first and compare results to the label.
What should I watch for during the application in a home workshop?
Avoid creating dust and keep the work area clean. Follow the label for ventilation and drying/curing cues. Don’t rush foot traffic or heavy loads until the coating is dry to the touch and finished per instructions.
Can I apply an anti-static coating over an existing epoxy or painted floor?
Check compatibility with the existing surface and any coatings already on the floor. Some systems require surface profiling or a specific primer. If unsure, consult the product instructions or contact the manufacturer before proceeding.
How should I document this DIY job for future reference?
Save the manufacturer’s data sheets and any local notes. Take photos of the prep, application, and final result. Record dates, conditions, and who did the work for simple future reference.