

Introduction
Algae on stucco is algae growth that appears as green or dark spots on the surface. Identify it by color, texture, and where it’s growing, especially in shaded or damp areas. This guide keeps things simple for DIY homeowners and avoids bleaching or etching.
Use safe cleaners that are milder than bleach and follow manufacturer instructions for stucco surfaces. Gather a soft-bristle brush, a spray bottle, gloves, eye protection, and a hose; plan to test a small area first. Proceed with gentle agitation and rinsing, avoiding harsh scrubs that could damage finish, and watch for any color change or signs of damage.
Key takeaways
- Identify algae on stucco by color, slimy feel, and staining patterns before cleaning.
- Choose non-bleach cleaners and test a small area to prevent color fading.
- Use proper tools: soft-bristle brushes, pump sprayer, and low-pressure rinse equipment.
- Apply cleaning gently, avoid abrasive scrubs, and rinse until runoff remains clear.
- Address recurring growth by improving drainage, sun exposure, and scheduled cleanings.
- Safety: wear eye protection and gloves; follow manufacturer instructions and local rules.
Table of Contents
- Introduction
- Key takeaways
- What Causes Algae on Stucco and Why It Matters
- Inspecting and Preparing the Surface Before Cleaning
- Tools and Materials Checklist (Non-Bleach Focus)
- Non-Bleach Cleaning Methods That Preserve Color and Finish
- Dealing with Stubborn or Recurring Growth
- Rinsing, Drying, and Post-Cleaning Checks
- Preventing Future Algae and Preserving Stucco Finish
- Safety, Common Mistakes, and Planning Tips
- Conclusion
- FAQ
What Causes Algae on Stucco and Why It Matters
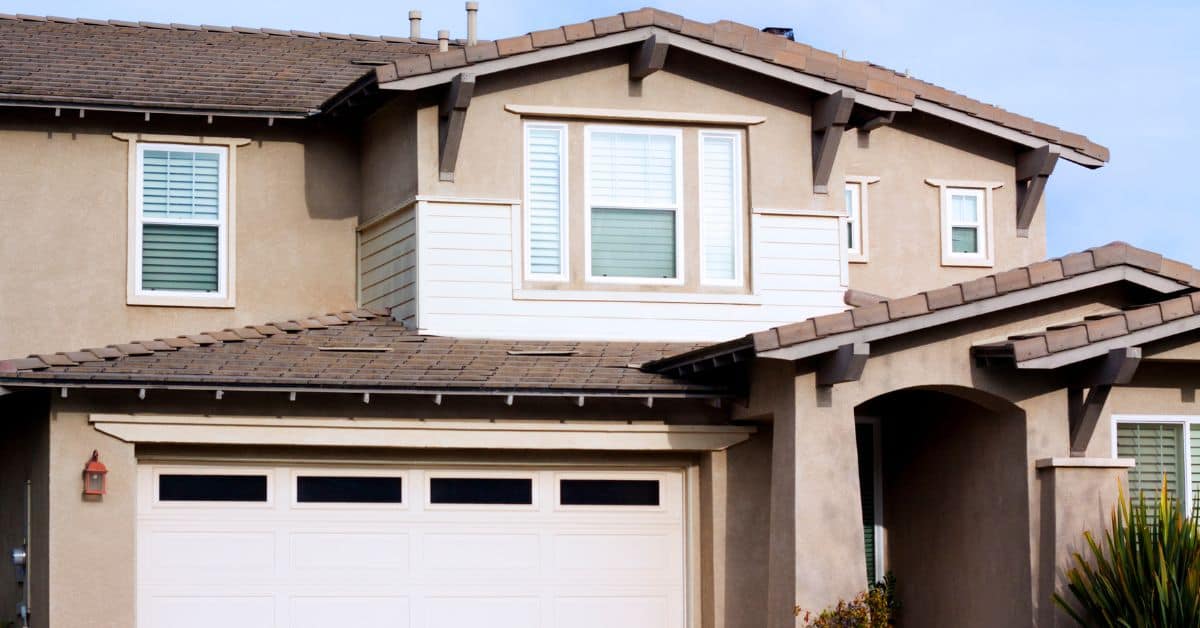
Algae, moss, and mildew thrive on damp, shaded stucco where organic deposits like dust and foliage accumulate. They discolor the surface and can form slimy films that trap moisture, potentially speeding surface chalking and micro-deterioration even if the substrate stays intact. Common spot checks include north sides, shaded valleys, and areas near gutters to spot the issue early.
That matters because the problem may stay on the surface or point to drainage or shading issues behind the finish. Before you clean, do quick checks: look for loose finish, nearby vegetation, and general substrate condition, and plan for proper PPE and safe ladder use to avoid slips or runoff.
Types of growth and visual checkpoints
Before you start cleaning, it’s crucial to identify the type of growth on your stucco. This checklist helps you spot algae, moss, or mildew.
- Green patches: Algae loves moisture and shade. Look for it on north-facing walls, shaded valleys, or near gutters.
- Black streaks: Mildew thrives in damp, shady spots. It often grows where water collects or drips.
- White powdery substance: Efflorescence is a sign of moisture behind the stucco. It’s not algae but indicates a problem that needs addressing.
- Small, soft clumps: Moss grows where there’s consistent moisture and organic matter, like near trees or gutters.
- Stained areas: Algae can leave behind stains even after it’s been removed. Check for these to assess the extent of growth.
- Wet spots: Moisture encourages growth. Look for dampness, especially around windows or near gutters.
- Cracking or crumbling: Persistent moisture can weaken stucco, leading to cracks or crumbles. Check for these signs of damage.
Quick rule: If you’re unsure about what you’re seeing, it’s better to err on the side of caution and treat it as algae or mildew until proven otherwise.
How algae can affect color and finish
Algae isn’t just an eyesore; it can also damage your stucco’s appearance and longevity. Here’s why:
Firstly, algae produces a slimy biofilm that traps moisture, leading to discoloration and staining. This can make your once-pristine stucco look dull and dirty.
Secondly, abrasive cleaning methods or harsh chemicals can strip away the pigment in your stucco, leaving it looking faded or patchy. Some cleaners can even etch the surface, making it rough and uneven.
Strong chemicals: Bleach, for instance, can lighten or discolor your stucco if not used carefully. It’s best to avoid these unless absolutely necessary.
Inspecting and Preparing the Surface Before Cleaning
Begin with a careful visual survey of texture, cracks, peeling paint, spalling, and any efflorescence. Mark areas with high moisture or mold to revisit later. This baseline helps you decide if resealing or repairs come first.
Test a small inconspicuous patch with the chosen cleaner to see how color responds and to assess any potential etching risk. Note substrate porosity and evidence of water damage that might require preconditioning or sealing. Gather tools and plan masking strategies before you start.
Visual and tactile pre-checks
Before you start cleaning, give your stucco a good once-over. You’re looking for any issues that could make the job harder or cause damage.
Check for:
- Loose or cracked stucco. These areas need extra care to avoid crumbling during cleaning.
- Flaking paint. Peeling paint can be taken off by cleaner, so remove it first.
- Damp spots. High moisture areas might need extra attention or even professional help if there’s a water issue behind the stucco.
Mark down any problem zones. You’ll want to treat these areas differently during cleaning.
Test patch protocol
Before you tackle the whole surface, do a test run in an inconspicuous spot. This way, you can check if your chosen cleaner is safe and effective.
Here’s how:
- Choose a small, hidden area. The back of a gutter or under a bush are good spots.
- Apply your cleaner to this test patch, following the instructions on the label.
- Let it sit for the recommended time, then rinse off.
- Check for any changes in color, texture, or softness. If everything looks good, you’re ready to clean the rest of the stucco.
If you see color loss, softening, or other changes, try a different cleaner or dilute your current one before proceeding.
Tools and Materials Checklist (Non-Bleach Focus)
Safety first: wear gloves, eye protection, and a respirator if the job needs it. Always test in a hidden area before committing to the full treatment. Your test patch helps prevent surprise color changes or finish damage.
Core tools include soft brushes, microfiber cloths, spray bottles, and low-pressure rinse gear. Have buckets, mixing sticks, and optional foam applicators on hand. For materials, choose biodegradable or oxygen-based cleaners and pH-neutral formulations, plus poultice options if stains are embedded.
Choosing safe cleaners
Before you start cleaning, make sure to choose the right cleaner for your stucco. Here’s a checklist to help you.
- Oxygen-based cleaners: These are eco-friendly and effective against algae. They’re suitable for painted or pigmented stucco.
- Enzymatic/biological products: These break down organic matter but may not be as strong against tough stains. Check if they’re compatible with your stucco type.
- Mild surfactant cleaners: These are gentle and can help remove dirt, but might not tackle heavy algae growth. Always test first.
- pH-neutral or mildly alkaline: Stucco is porous; avoid acidic cleaners to prevent damage.
- Non-bleach stain removers: These are safer than bleach and won’t discolor your stucco.
- Poultice materials (optional): For embedded stains, use diatomaceous earth or absorbent clays as a carrier.
- Non-toxic degreasers (if algae is oily): These help remove oil-based stains without harming the environment.
- Always follow label instructions: Dilution ratios and contact times vary. Stick to them for best results.
Quick rule: Always test cleaners on a small, inconspicuous area first to ensure they won’t damage your stucco.
Brushes, nozzles, and protective gear
Protect yourself and your property with the right tools and gear. Here’s what you need:
- Soft-bristled brushes (varying stiffness): These won’t damage your stucco. Use stiffer ones for tough stains, softer ones for delicate areas.
- Extension handles: Reach high spots safely and easily.
- Garden hose with adjustable nozzle or soft-wash pressure settings: Low-pressure rinse equipment is crucial to avoid etching or mortar damage.
- Gloves: Protect your hands from harsh chemicals and rough surfaces.
- Eye protection: Safety glasses or goggles keep debris out of your eyes.
- Respirator (if needed): For heavy-duty cleaning, protect your lungs from dust and fumes.
- Drop cloths: Protect landscaping by placing drop cloths around the work area.
Quick rule: Always wear appropriate PPE to safeguard yourself and others during the cleaning process.
Non-Bleach Cleaning Methods That Preserve Color and Finish
Non-bleach methods focus on cleaning without altering color or finish, using manual scrubbing with safe cleaners, oxygen-based solutions, or soft-wash techniques. Protect nearby plants and surfaces during prep, and wear appropriate PPE for the work area. Start with a small test area to confirm colorfastness.
Detail each method step by step: mix ratios per label, scrub patterns, dwell times, and a careful rinse sequence. Use gentle pressure and avoid harsh chemicals that could etch mortar or fade color. Finish with a visual check for streaks or residue and adjust as needed.
Manual scrub and rinse method
Start by mixing your biodegradable cleaner according to the product label. Apply it from the bottom up, working your way upwards to prevent streaking.
Using a soft-bristle brush, gently agitate the surface in small circular motions. Be careful not to scrub too hard and damage the finish.
After about 10-15 minutes, use a low-pressure garden hose or pump sprayer to rinse thoroughly from top to bottom. This will help lift the algae safely off the stucco.
Soft-wash and oxygen-based soak methods
For this method, you’ll want to use an oxygen-releasing cleaner or a peroxide-based formula. Follow the manufacturer’s instructions for mixing.
Apply the solution evenly across the surface using a pump sprayer set at low pressure. Let it soak for the recommended time (usually 15-30 minutes) to allow the oxygen to break down the biological material.
After the dwell time, gently rinse the surface from top to bottom with a low-pressure garden hose or pump sprayer. This will remove any loosened algae and cleaner residue.
Dealing with Stubborn or Recurring Growth
Escalate carefully with a safe ladder of steps: gentle repeated treatments, targeted plastic-scraper removal, and then species-specific non-acid algaecides. Avoid acids or chlorine to protect the stucco finish and color. Document what works and what doesn’t for future reference.
Assess growth patterns and hotspots to tailor frequency and methods. When mechanical removal is used, keep the scraper angle shallow and work slowly to prevent gouging. After treatment, rinse thoroughly and re-evaluate before deciding if professional help is needed.
Mechanical and spot-removal techniques
For stubborn algae growth, you might need to resort to mechanical removal. Plastic scrapers are your best bet here. They’re gentle enough not to damage the stucco finish but tough enough to remove embedded algae.
Hold the scraper at a 45-degree angle to the surface. Apply firm but careful pressure. Too much force can gouge the stucco. Work in small sections, scraping away from the direction of the growth.
Test your technique on a small, hidden area first. After scraping, rinse the area thoroughly to remove any debris and check for damage.
For thicker growth or hard-to-reach spots, use soft-bristled brushes or even an old toothbrush. Avoid metal tools and high-pressure washers that can damage your stucco.
When to call professionals
While DIY methods are effective for most algae issues, there are times when it’s best to leave the job to the pros. If you notice any of the following, don’t hesitate to pick up the phone:
– Extensive substrate damage: If your stucco has been significantly damaged by the algae growth or previous cleaning attempts, it might be time for a professional assessment.
– Persistent regrowth: Despite your best efforts, if the algae keeps coming back after multiple safe treatments, it could indicate an underlying moisture issue that requires professional diagnosis and repair.
– Hard-to-reach high areas: If the affected area is too high or unsafe for you to reach comfortably, leave it to the professionals. They have the necessary equipment and training to work at heights safely.
Rinsing, Drying, and Post-Cleaning Checks
Rinse methods should remove loosened algae without stripping color or finish. Use a low- to moderate-pressure nozzle and technique that avoids etching or mortar damage. Keep rinsing focused on stained areas and then perform a light final rinse from top to bottom.
Protect landscaping by covering plants and wetting soil to minimize runoff. Allow the surface to dry fully in dry, shaded conditions before any sealers or coatings are applied. Check for remaining moisture pockets and document the drying progress as part of your post-cleaning check.
Rinse best practices
Start by wetting down your stucco surface. This helps to loosen the algae and prevents cleaning residue from sticking. Use a wide-angle nozzle on your pressure washer, set at low pressure – around 500-600 PSI. Keep your distance, about 12-18 inches away, to avoid gouging or etching the finish.
Direct runoff away from plants and foundations. Algae cleaner residue can harm vegetation and seep into foundation cracks. Use plastic sheeting or tarps to protect landscaping if needed.
Remember: Be gentle. Stucco is porous, so too much pressure can damage it. And always test a small area first to ensure your method won’t discolor or harm the finish.
Post-cleaning inspection and touch-ups
After cleaning, let your stucco dry completely before inspecting. This could take a few days depending on weather conditions.
- Check for remaining algae: Look closely at the surface to ensure all algae has been removed.
- Inspect for discoloration: Make sure your cleaning method hasn’t caused any color changes or stains.
- Feel for moisture pockets: Press gently on the stucco. If it feels spongy, there’s still moisture trapped inside.
- Verify finish integrity: Check that the finish remains intact and hasn’t been damaged during cleaning.
- Check runoff areas: Ensure no algae or cleaner residue has pooled near plants or foundations.
- Recheck test patch: Confirm your initial test patch is still holding up as expected.
- Inspect sealant lines: Make sure sealants around windows, doors, and corners are intact and haven’t been damaged.
- Check for trapped moisture: Before resealing, ensure no invisible moisture is behind coatings. A simple touch test can help here too.
Quick rule: If you find any issues, address them immediately to prevent further damage or discoloration.
Preventing Future Algae and Preserving Stucco Finish
Prevention starts with lightening shading and controlling vegetation that traps moisture, such as trimming branches and keeping plants away from the wall. Improve airflow around the stucco to reduce damp spots. Regular checks help catch problems early.
Use breathable, water-repellent coatings that resist moisture without changing color or texture. Establish a routine for inspections and low-pressure cleaning, and plan resealing intervals with non-bleach products to maintain color and finish fidelity over time.
Maintenance schedule and seasonal timing
Timing your stucco maintenance right is key to keeping algae at bay. Aim for dry, mild weather – typically spring or fall.
In shady areas or humid climates, inspect and clean your stucco every 6 months. In drier, sunnier regions, once a year should suffice.
Here’s a simple seasonal checklist:
Spring: Inspect for signs of moisture intrusion, trim vegetation, and perform light cleaning.
Fall: Reseal any cracks, apply water-repellent coating if needed, and prepare stucco for winter.
Choosing protective treatments
Breathable, compatible coatings are your best bet. They let moisture escape but keep water out.
Silane or siloxane-based sealers work well. But always check compatibility with your stucco’s finish first:
– Read manufacturer guidelines. If unsure, contact the manufacturer directly.
– Test on a small area. Apply sealer to an inconspicuous spot and monitor for any adverse reactions.
Safety, Common Mistakes, and Planning Tips
Always list PPE and plant protection, and plan for runoff containment to safeguard pets and landscaping. Identify weather windows and wind conditions before starting to minimize overspray and drift. Build in time for patch tests and clean-up to avoid rushed mistakes.
Common errors include using household bleach, high-pressure washing, or skipping test patches. Verify compatibility of cleaners with stucco finishes and check for any re-sealing needs after cleaning. Follow a logical sequence from prep to cleanup and have a buddy or spotter when working with ladders or elevated areas.
Estimating time and materials (cost planning)
The right materials can make or break your algae cleaning job. Here’s how to estimate what you’ll need:
- Calculate surface area: Measure the stucco area you’ll be cleaning. Divide by 100 to get square feet.
- Check product coverage: Look at the cleaner label for coverage rate (e.g., ‘covers up to 25 sq ft’).
- Tool purchase/rental: Consider buying or renting tools like soft-wash pumps, brushes, and ladders.
- Local prices: Shop around for best prices on cleaners. Don’t rely on fixed cost figures.
- Retailer coverage: Ensure you can get materials when needed. Check store hours and delivery options.
Project planning checklist
Before you start cleaning, use this checklist to ensure a smooth process:
- Check weather forecast: Plan for temperature, humidity, and wind. Avoid cleaning in extreme conditions.
- Gather personnel: Have your helper(s) ready if using a buddy system or needing extra hands.
- Materials on hand: Ensure you have all necessary tools, cleaners, safety gear, and protective coverings.
- Test patch results: Review initial color/etching response. Make sure pass/fail criteria are clear.
- Containment setup: Have tarps or containment ready for runoff management.
- Professional contingency: Know when to call professionals if cleaning fails or safety is at risk.
Quick rule: Always review your checklist before starting any task to avoid mistakes and delays.
Conclusion
Protecting the finish and your safety comes first, so plan your steps carefully and stick to non-bleach methods that won’t wash away color or damage the texture. Focus on steady cleaning, thorough rinsing, and a good dry time, then check for any remaining spots and repeat only where needed.
Start with a quick readiness check: inspect the area, identify colors that are still bright, test a small hidden spot with your chosen cleaner to confirm it won’t bleach or etch, gather the cleaning tools and a bucket of clean water, apply with a soft brush in gentle strokes, rinse deeply from top to bottom, dry with a clean cloth or air flow, and then recheck for recurrences or missed patches before moving on to prevention or sealing if needed. If you see flaking, cracking, or color loss, back off and reassess—don’t push through a bad spot and don’t mix cleaners; keep to the tested method and sequence.
Common mistakes to avoid are skipping the test patch, using a bleach or high-alkaline product, and rushing the rinse or drying. Never clean in full sun on a hot surface, and never scrub hard enough to damage the finish. A simple safety rule is to wear eye protection and gloves, keep the area well ventilated, and always rinse completely before drying.
When in doubt, or if algae keeps returning after a couple of attempts, call a pro for a targeted assessment and cleanup plan. You can handle most of this, but a stubborn spread or recurring growth may need professional-grade checks or treatments. Stay practical, stay safe, and you’ll preserve both the look and the life of the stucco.
FAQ
How can I tell if I’m dealing with algae on stucco and not dirt or grime?
Algae often looks like green, gray, or black spots that stay damp after rain. It may form film-like patches or streaks that won’t rinse away with simple water. If you’re unsure, test a small area with a cleaning method and observe what lifts; look for a color residue that’s hard to scrub off.
What cleaning agents are safe for stucco when avoiding bleach and etching?
Look for non-bleach cleaners labeled for stucco or masonry. Use products with mild and gentle active ingredients, and always follow the label exactly. If in doubt, check the manufacturer’s instructions and test a hidden spot first.
Which tools and equipment should I use for cleaning without causing damage?
Use soft bristle brushes, non-metal tools, and a garden sprayer or pump sprayer for applying cleaner. Avoid high-pressure nozzles that can damage the surface. Keep a bucket, rags, and a hose handy for rinsing and quick cleanup.
What maintenance steps help prevent algae regrowth on stucco?
Clean and rinse thoroughly, then allow the surface to dry completely. Consider treating with a non-bleach preventive cleaner or a moss/algae barrier product as directed by the label. Regular inspections after wet seasons help catch growth early.