
Introduction
Texturing slick concrete means creating a non-slip, patterned surface using either mechanical tools or chemical treatments.
Mechanical methods bite into the surface with grinder discs, scarifiers, or brushes, while chemical methods react the surface to leave a grip pattern.
Both approaches require clean, dry conditions and a plan for the look you want, plus safety checks.
If a spec matters, check the product label, manufacturer instructions, and local rules to know what holds up and what to avoid.
Key takeaways
- Assess concrete condition and plan texture method before starting to avoid reseals.
- Mechanical textures wear unevenly if underlying slab is cracked; repair first.
- Chemical texturing depends on cure time; follow manufacturer instructions exactly.
- Safety: wear eye protection and respiratory protection when grinding or applying chemicals.
- Consider disruption: DIY scheduling vs hiring a pro affects concrete downtime.
- Choose method based on traffic, maintenance cycles, and surface irregularities.
Table of Contents
- Introduction
- Key takeaways
- Why You Should Texture Slick Concrete
- Mechanical Texturing Methods (What They Are and When to Use Them)
- Chemical Texturing and Surface-Conditioning Methods
- Durability and Performance: Which Methods Hold up over Time
- Safety, Environmental, and Regulatory Considerations
- Cost, Time, and Disruption: DIY Vs Hiring a Pro
- Choosing the Right Method for Specific Scenarios
- Step-by-Step Application Guides and Best Practices
- Conclusion
- FAQ
Why You Should Texture Slick Concrete
Slick concrete can be a slip hazard, especially in high-traffic or wet areas. Texture adds traction to help prevent falls for people and pets. It also helps curb premature wear by providing a more forgiving surface underfoot.
Beyond safety, texture can improve durability and longevity by creating a micro-structure that resists surface polishing. The right texture also aligns with how the space will be used and where it’s located, guiding the method you choose. Verify local guidance and product labels to ensure compatibility with your slab and finish goals.
Slip risks, liability, and user comfort
Wet conditions turn slick concrete into a slip hazard. Oils from shoes or vehicles can make it worse. Over time, wear and tear expose smooth surfaces, increasing the risk.
Liability: If someone slips and falls on your property, you could be held responsible. Texturing reduces this risk.
User comfort: A textured surface provides better grip, making it easier for everyone to walk on, especially the elderly or those with mobility issues.
Typical locations and failure modes
High-priority sites include ramps, pool decks, entryways, and garage floors. Slick concrete here can cause accidents or make access difficult.
Failure modes: Polished surfaces lose grip over time. Contamination from oils or chemicals reduces traction. Worn coatings expose smooth concrete.
Texturing these areas improves safety and longevity. It’s a small investment for big benefits.
Visual checkpoints before choosing a method
Before texturing, inspect the surface to choose the right method. Here’s a quick checklist:
- Gloss level: Check how shiny the concrete is. High gloss means it’s slippery.
- Existing coatings: See if there are any worn or peeling sealers, paints, or epoxies.
- Cracks: Look for hairline cracks that could widen with texturing.
- Embedded aggregate exposure: Check if the aggregate is exposed. If so, grinding might be needed first.
Quick rule: The more severe the conditions, the more aggressive the texturing method you’ll need.
Mechanical Texturing Methods (What They Are and When to Use Them)
Mechanical texture uses physical contact with the surface to alter its profile. Common options include grinding, diamond brushing, shot blasting, scarifying, and profiling. Each method can create different roughness and depth to suit sealer bonding and wear resistance.
Choose mechanical methods when you need more durable texture or a defined profile for coatings. They often work best for areas with heavy traffic or where a deep texture is required to hold coatings. Always check manufacturer guidance and test a small area before full application.
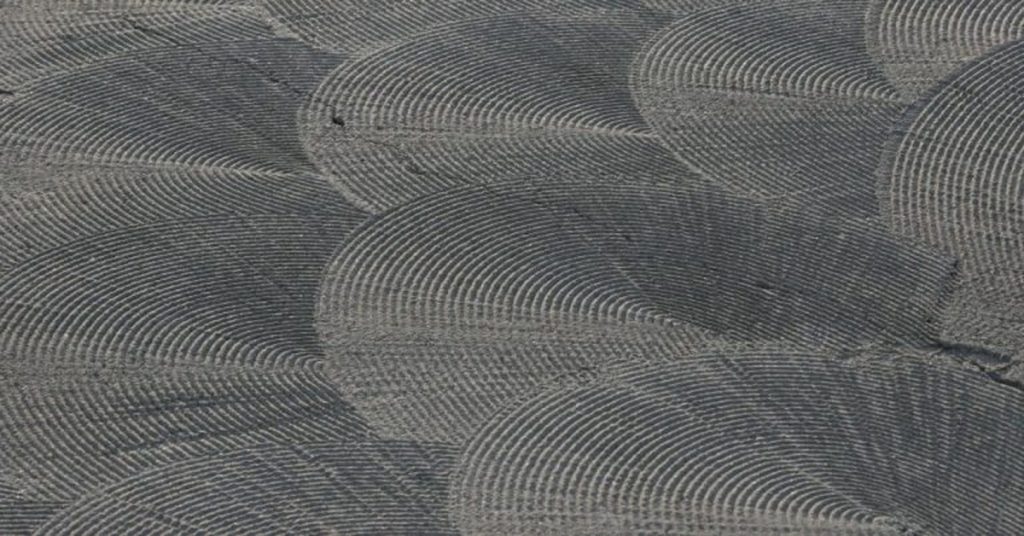
Diamond grinding and brushing
Diamond grinding is a mechanical texturing method that uses diamond-impregnated segments to remove concrete surface material. It’s often followed by diamond brushing to enhance the texture.
This technique creates a light profile, typically around 1/32″ to 1/16″. It’s ideal for restoring traction on smooth surfaces without removing too much material.
Why use it? Diamond grinding is great for lightly profiling and improving slip resistance. It’s also useful for preparing surfaces for new toppings or sealers.
Shot blasting and rotary impact
Shot blasting involves propelling abrasive materials at high speeds to remove coatings, contaminants, and create a medium profile. Rotary impact uses rotating heads with pins or chains to achieve similar results.
These methods can create profiles up to 1/8″ deep, making them suitable for surfaces that will see heavy traffic or have overlays applied.
When to use? Shot blasting and rotary impact are ideal when you need to remove existing coatings or contaminants and create a profile that can handle high foot or vehicle traffic.
Scarifying and milling for deep profiling
Scarifying uses rotating cutters to remove thick toppings, heavy contaminants, or deeply profile an overly smooth slab. Milling is a similar process but typically involves larger equipment.
These aggressive methods can remove material up to 1″ deep, making them suitable for surfaces with severe issues or those requiring significant texturing.
Why choose these? Scarifying and milling are the go-to methods when you need to remove a lot of material quickly. They’re also useful for preparing surfaces that will have new toppings or overlays applied.
Chemical Texturing and Surface-Conditioning Methods
Chemical texture relies on chemical reactions to alter the slab surface, such as acid etching and buffered etchants. These approaches can create a textured feel without intensive grinding. They also influence how well subsequent coatings bond to the concrete.
Be aware of limits: chemical methods may not achieve the same depth as mechanical ones, and bonding with sealers or coatings can be affected. Always follow product labels, SDS, and local code requirements when planning chemical treatments.
Acid Etching and Safer Alternatives
Acid etching is a popular method to increase concrete’s texture. It works by eating away at the surface, revealing the aggregate and creating a rougher finish.
Safety first: Always wear protective gear when handling acids. Neutralize used acid with baking soda before disposal.
For those concerned about safety or environmental impact, buffered etchants are an alternative. They use mild acids to achieve similar results without the same level of hazard.
Reactive Densifiers and Salt-Based Treatments
Reactive densifiers are liquid chemicals that penetrate concrete, reacting with it to form a harder surface. They’re great for reducing dusting but don’t expect deep texture.
Salt-based treatments like sodium silicate can also harden concrete. But again, they won’t create significant texture on their own.
Beware: Densifiers and salt-based treatments need proper curing to work effectively. Don’t rush this step.
Coatings with Built-In Grit and Broadcast Aggregates
Adding aggregate to a coating can create traction, reducing slip. This is done by mixing in sand or larger aggregates before application.
Broadcasting involves throwing down more aggregate onto the wet coating, then sealing it in place. Get your rates right – too much, and you’ll have loose material; too little, and you won’t get enough texture.
Pro tip: Always check sealer compatibility before using broadcast aggregates. Some sealers won’t stick to certain types of aggregate.
Durability and Performance: Which Methods Hold up over Time
Durability depends on how you apply it. Mechanical methods tend to resist wear when traffic is steady, while chemical methods can fade faster with heavy use. Check traction, abrasion, and maintenance to judge long-term performance.
For a DIYer, pick based on traffic type and upkeep. You may get longer life from the approach that matches how you clean, seal, and reapply over time. Always check the product label and manufacturer instructions for guidance on longevity and care.
Short-term vs long-term traction outcomes
Mechanical texturing methods like diamond grinding, shot blasting, and scarifying provide immediate grip. They create deep profiles that offer excellent initial traction.
However, these methods can lose their effectiveness over time as the profile wears down under traffic and weathering.
Chemical methods like acid etching or reactive densifiers don’t initially improve traction but enhance surface roughness over time. They maintain grip longer, even if the texture isn’t as pronounced at first.
For long-term traction, consider a combination: start with mechanical texturing for immediate grip, then follow up with chemical treatment to maintain it.
Wear, abrasion, and maintenance needs
Mechanical profiles wear down over time due to traffic. Deep profiles from scarifying or milling may last longer but still require periodic touch-ups.
Chemical treatments, on the other hand, don’t wear off like mechanical profiles. They maintain their effect until they’re washed away by heavy rain or snow melt.
Maintenance frequency depends on traffic type and volume. High-traffic areas may need re-texturing every 1-3 years, while low-traffic areas can last up to 5 years.
Regular inspection is key. Re-texture before the surface becomes smooth again to maintain safety and prevent liability issues.
Sealer and coating compatibility over time
Textured profiles can clog or reduce bond with sealers and coatings if not matched correctly. Deep mechanical profiles may trap liquids, leading to premature failure of the sealer or coating.
Chemical treatments that create micro-porosity can also cause issues. They might absorb too much sealer, reducing its effectiveness on the surface.
To avoid these problems, match your texturing method with the right sealer or coating. For example, use a penetrating sealer with deep mechanical profiles to prevent clogging.
Always follow manufacturer guidelines for application and compatibility. If in doubt, consult a professional before proceeding.
Safety, Environmental, and Regulatory Considerations
Personal protective equipment, ventilation, and containment are essential for any texture work. Prepare for dust control and careful handling of chemicals or grinding debris. Plan for proper cleanup to reduce exposure and mess.
Environmental and regulatory factors include runoff containment, VOCs, and disposal rules. Always review product SDS, local codes, and disposal guidelines before starting any texture project.
Worker and Bystander Safety Procedures
Safety’s our top priority. Here’s what you need:
Mechanical Texturing: Wear a respirator, safety glasses, and ear protection. Keep bystanders 50 feet away from dust.
Chemical Handling: Use chemical-resistant gloves, goggles, and a lab coat. Ventilate the area. No eating, drinking, or smoking nearby.
Environmental Runoff, Neutralization, and Disposal
Protect the environment:
Chemical Residues: Use absorbent pads or booms to soak up spills. Neutralize with sodium bicarbonate. Dispose of in a chemical waste facility.
Mechanical Slurry: Collect and contain dust/slurry using vacuums or wet/dry vacuums. Dispose of in accordance with local regulations. Never wash down surfaces into storm drains.
Permits, Codes, and What Contractors Will Ask About
Check these before you start:
Contact your local building department for permits. They’ll need to know the method, product, and anticipated slip-resistance. Have product data sheets and SDS ready.
If it’s a rental property, your property manager might ask for the same info. Keep records of compliance for future reference.
Cost, Time, and Disruption: DIY Vs Hiring a Pro
Labor, equipment, and material costs drive the bulk of project expenses. The scale of the job and the chosen method influence time and disruption in the space. Plan for surface preparation and post-treatment curing when estimating duration.
Decide between DIY and a pro by weighing equipment needs, risk, and finish quality. Verify what the estimator includes, such as prep, texture, sealer, and any follow-up maintenance per product data sheets.
Tools and materials checklist (DIY and pro)
Before you start, check off this list to ensure you’ve got the right gear for your texturing job.
- Surface cleaner: To remove dirt, grease, and contaminants. Skip it? Your texture won’t stick.
- Power washer (rental): For deep cleaning. Pro tip: use low pressure to avoid damaging the surface.
- Acid etching solution (DIY) or professional etcher: To roughen the surface for better adhesion. Be safe, follow instructions!
- Texturing equipment: This varies by method – DIYers might use brushes, sponges, or brooms; pros may have specialized machines.
- Texturing material (DIY) or pre-mixed overlay (pro): Check labels for compatibility with your surface type.
- Sealer and coating: To protect your texture and extend its lifespan. Skip it? Your texture will fade faster.
- Personal protective equipment (PPE): Safety glasses, gloves, respirator – don’t skip this! Your health is worth it.
- Tarps and drop cloths: To protect surrounding areas from overspray or drips. Neighbors will thank you!
Quick rule: Always check your surface first. Some methods won’t work on certain types of concrete.
Time, cure, and return-to-service considerations
Choose your method wisely – some will keep you off your concrete longer than others. Here’s what to expect:
Mechanical texturing usually dries faster (1-2 days) but may need extra time for heavy traffic areas like driveways or walkways.
Chemical methods can take longer to cure, especially if you’re using acid etching or reactive densifiers. Expect 3-7 days before re-opening the area to foot traffic and up to 28 days for full strength.
Coatings with built-in grit may require additional drying time (1-4 hours) depending on temperature and humidity. Always follow manufacturer guidelines!
Cost drivers and how to budget
When budgeting for your texturing project, consider these cost drivers:
Surface prep: The more damaged or contaminated your surface, the higher the prep costs. Expect to pay more if you need extensive cleaning, grinding, or patchwork.
Accessibility: Is your surface easy to reach? If not, expect higher labor costs due to additional time and safety measures needed.
When requesting bids, ask contractors about these factors. A detailed breakdown will help you compare apples to apples. Here’s what to ask:
– What’s included in the base price?
– How do they handle surface prep issues?
– Are there any additional charges for accessibility challenges?
Choosing the Right Method for Specific Scenarios
Start by assessing surface condition, indoor vs outdoor, and traffic patterns. A high-traffic area may justify a deeper, mechanically induced texture. A cosmetic retexture might suit lighter use with chemical or topical options.
Balance aesthetic goals with budget and maintenance. Refer to guidelines from coating manufacturers and local codes to align your choice with the project context.
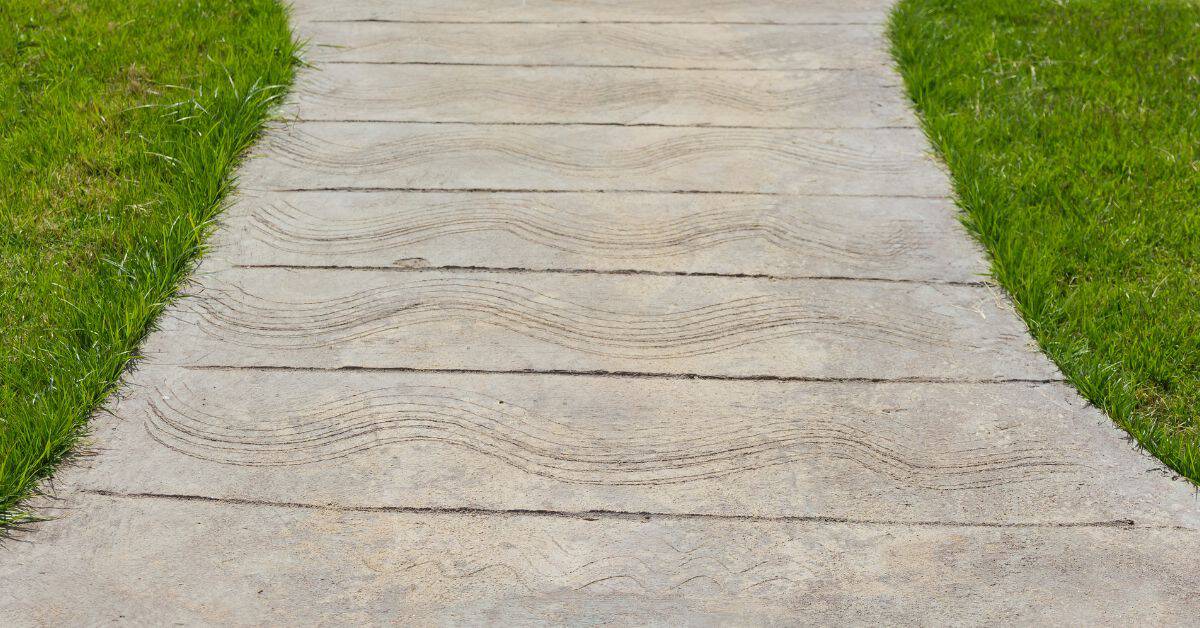
Residential patios, pool decks, and driveways
For moisture-prone areas like patios and pool decks, consider mechanical texturing. It’s great for slip resistance even when wet. Choose from options like broom finishing or salt finishes.
Decorative settings call for subtler methods. Try chemical etching with mild acids to create a light texture without sacrificing aesthetics. Remember, both methods need proper sealing afterwards.
Maintenance is key here. Expect to reapply sealers every 2-3 years and touch up texturing as needed. Keep an eye on high-traffic areas like driveways.
Commercial entrances, ramps, and ADA considerations
Durability is crucial for heavy foot traffic. Go with mechanical texturing like diamond grinding or shot blasting. They provide consistent traction in wet weather.
ADA compliance matters too. Ensure your chosen method meets the required 0.6 coefficient of friction, especially on ramps and entrances. Consult local codes for specifics.
Long-term performance is key here. Opt for methods that won’t wear out quickly under constant use. Regular maintenance will help keep traction levels up.
Historic or decorative concrete surfaces
Gentle methods are best for preserving historic or decorative surfaces. Try light chemical etching with mild acids to avoid damaging the surface. Always test in an inconspicuous area first.
Aim for a balance between texture and appearance. You want enough traction without compromising the look of your concrete.
Maintenance is minimal but important. Clean regularly to prevent buildup, and reapply sealers as needed to protect the surface and maintain traction.
Step-by-Step Application Guides and Best Practices
Begin with clear prep: remove loose material, clean thoroughly, and repair any damage. Follow the chosen method’s prep steps exactly as specified by product instructions. Plan for appropriate curing and ventilation during the process.
During application, follow a logical sequence from roughening to sealing. Use visual checkpoints to confirm the texture development and surface readiness for coatings or finishes. Always verify that your methods align with label directions and local requirements.
Step-by-Step Process
Follow these clear, practical steps to add texture to your concrete safely and effectively.
- Preparation: Clear the area, wear safety gear, and check weather forecast. Why: Safety first, and wet conditions can affect application.
- Inspect surface using provided checklist. Why: Ensures good adhesion and prevents surprises during work.
- Choose your method: Mechanical (grinding, etc.) or Chemical (etching). Quick check: Understand the process before starting.
- Execute chosen method following respective walkthroughs. Sign it’s right: Follow manufacturer’s guidelines and visual checks.
- Cleanup: Remove dust, rinse, neutralize chemicals if used, and dispose of waste properly. Why: Maintain a clean workspace and protect the environment.
Surface Prep and Inspection Checklist
Use this checklist before starting any work to ensure a successful outcome.
- Clean surface: Remove dirt, debris, and grease. How to confirm: Wipe with a damp cloth; it should be clean.
- Repair cracks: Fill with appropriate concrete repair material. Why skip?: Cracks can affect adhesion and texture uniformity.
- Test adhesion: Apply painter’s tape, pull off after 30 minutes. How to confirm: No paint comes off; surface is ready for texturing.
- Check moisture: Use a moisture meter (15-20% max). Why skip?: High moisture can cause delamination.
- Identify coatings: Determine if existing sealers or paints need removal. How to confirm: Consult product labels or test with a small area.
- Remove incompatible coatings: Use appropriate strippers and follow safety guidelines. Why skip?: Incompatible coatings can prevent adhesion.
Quick rule: Always follow manufacturer’s guidelines for specific products used.
Mechanical Method Walkthrough
Grinding, shot-blasting, or scarifying create texture by removing surface material. Follow these steps:
1. Set up dust control: Wet down the area and use HEPA vacuums. Why: Reduces dust and improves safety.
2. Choose your mechanical method based on desired texture depth. Quick check: Understand the machine’s capabilities.
3. Operate machinery according to manufacturer’s guidelines, maintaining a consistent speed and overlap. Inspection milestone: Check progress visually; ensure even texture.
4. Clean up dust, rinse surface, and allow it to dry before applying sealers or coatings. Why: Removes residue and prevents contamination of subsequent applications.
Chemical Method Walkthrough and Neutralization
Etching chemicals react with concrete to create texture. Follow these steps:
1. Mix etching solution according to manufacturer’s instructions. Safety: Wear appropriate PPE.
2. Apply solution evenly using a low-pressure sprayer or roller. Dwell time: Follow product label; typically 10-30 minutes.
3. Rinse off residue thoroughly with clean water. Why: Removes unreacted chemicals and prevents staining.
4. Neutralize any remaining acid using a suitable neutralizer (e.g., baking soda solution). Post-application check: Test pH; it should be near neutral (7).
Conclusion
Texture adds grip, cues of depth, and long-term durability when you pick the right method and apply it carefully. Prioritize safety and finish quality, because a sloppy job shows up as chipping, staining, or wear much sooner than you expect.
Assess the slab, decide on mechanical or chemical texture based on the look you want and the area’s use, clean and prep the surface, follow a clear sequence for your chosen method, test a small area first, and then cure and seal per plan. If you’re unsure, start with a conservative approach and keep to the steps you’ve seen in the guides you followed.
Common mistakes to avoid are skipping surface prep, letting moisture or contaminants linger, and rushing the cure or the clean-up. Safety rules are simple: wear eye and skin protection, use appropriate ventilation when chemicals are involved, follow manufacturer guidelines, and keep any tests isolated to prevent affecting larger areas.
If the project is large, highly visible, or involves uncertain chemicals or code rules, call a professional rather than pushing ahead solo. With careful planning, measured steps, and strict safety, you’ll end up with a textured finish that lasts and looks right—and you’ll know you did it right. Stay steady, stay safe, and finish strong.
FAQ
1. How do I know if a mechanical texture will hold up on my outdoor concrete slab?
Inspect the surface for proper adhesion prep. Follow the product instructions and use the recommended concrete primers or bonding agents. If in doubt, test a small area first and watch for flaking or dullness before moving to the whole slab.
2. What should I do if the texture ends up uneven or inconsistent?
Discourage guesswork by rechecking the surface profile and tool settings. Fix small patches with a quick retexture or blend, and keep a consistent pass pattern. If large areas look wrong, consult the product label or manufacturer instructions for refinishing steps.
3. Can I texture over old paint or sealers?
Avoid texture over coatings that aren’t compatible with the texture method. If possible, remove or thoroughly abrade the old coating first. Always verify compatibility on the product datasheet or with the coating manufacturer.
4. What are telltale signs that my texture method isn’t durable enough for high-traffic areas?
Look for surface wear, flaking, or loss of grip under foot traffic. In high-traffic spots, you’ll want a texture method recommended for durability by the product instructions. If in doubt, test a small area and compare against the manufacturer’s guidance.